In our quest to replace all the light fixtures in our house we’ve run into some interesting… situations. In the bathroom we discovered an existing hole in the wall once we removed the medicine cabinet and old light fixture. In our bedroom we, once again, had no electrical box, couldn’t mount one where the existing hole in the ceiling was, so had to put a new hole in our ceiling for the electrical. When we moved in there was also some existing awfulness by the window on our stair landing, so this weekend we had 3 different repair/patch situations to deal with.
The Basic
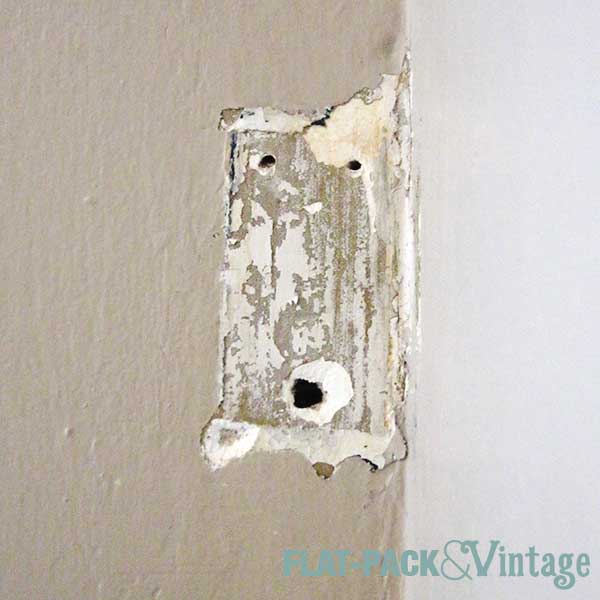
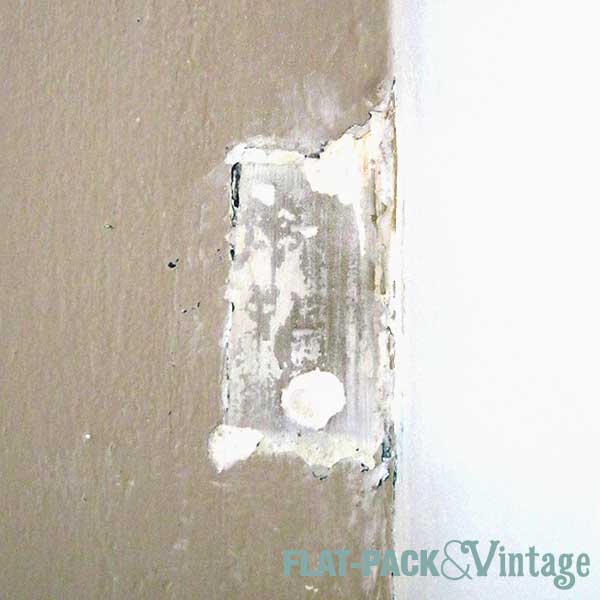
Removing the old make-up mirror in the bathroom left more than a couple screw holes. It looks like they painted around it multiple times so there was actually a depth change in the wall too.
What you need
- Spackle
- Flexible putty knife
- Sandpaper
Start by cleaning up the existing surface. In the case of flaking paint, try and take off all the loose stuff you can. For holes just make sure there’s no unevenness (especially with plaster walls since they can sometimes bubble when you try and screw into them).
Next, cover the hole, dent, divet, whatever with a thin layer of spackle. Use the putty knife to smoosh in the spackle then drag the blade of the knife even against the wall to scrape off excess. Like spray paint, the trick is working in thin layers.
Once the first layer has dried, use your putty knife to lightly scrape off any ridges and sand down any noticeably high points. Then add another thin layer and repeat. You’ll probably use around 3 layers, so don’t try and gob a ton of spackle on all once.

Once you think you’re done, run your hand over the area to make sure. You may feel lumps and bumps you didn’t see and they’ll stand out more once you paint. Sand/spackle as needed until everything feels nice and smooth. Then you just need to prime and paint and voila!
The Intermediate
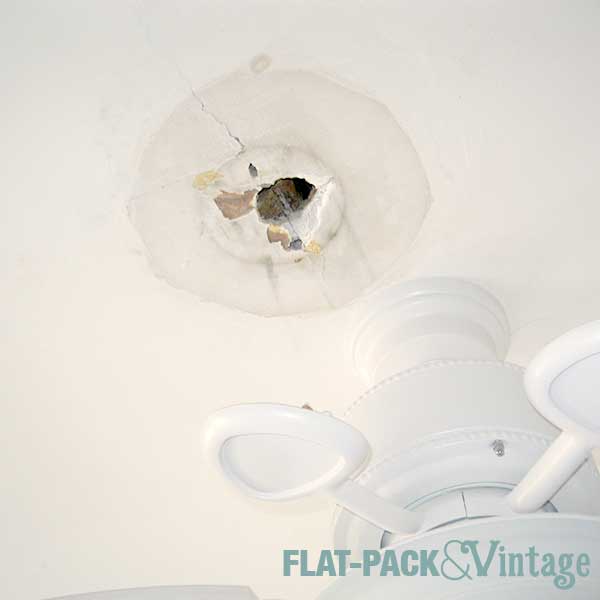
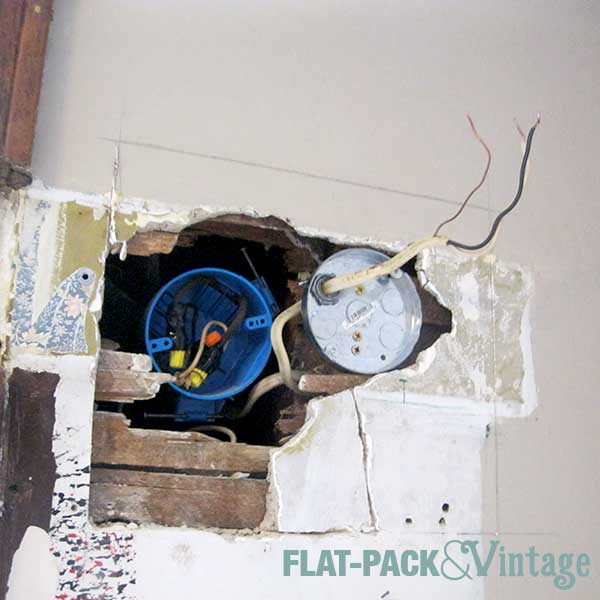
If you have a larger hole, spackle alone isn’t going to cut it. Maybe a doorknob tried to show your wall who was boss. Maybe your teenagers had an unauthorized rowdy party. Maybe the idiots who wired your house didn’t believe in electrical boxes and you need to patch the old hole where the wiring came in.
What you need
- Wall patch
- Spackle or joint compound
- Flexible putty knife
- Sandpaper
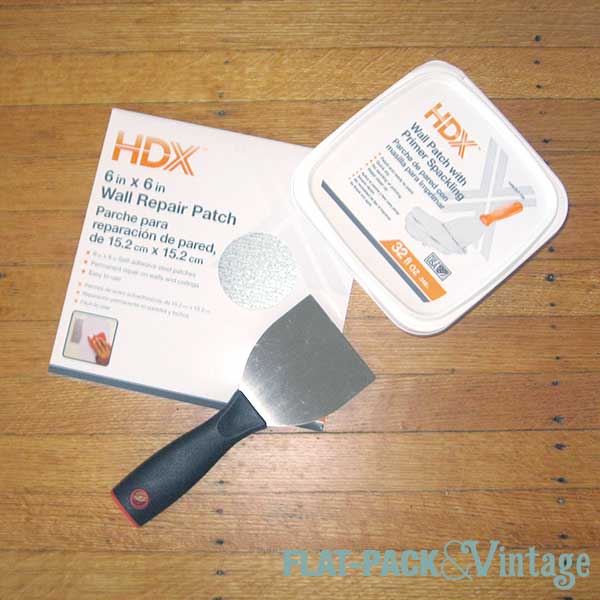
The steps are pretty similar to patching small holes, but you need to cover up the hole first because there is no way you’re going to fill it solid with spackle. You can find wall patches at your hardware store in a variety of sizes. They’re pretty much an adhesive mesh over an aluminum panel so they’ll stick over the hole and then you spackle over them.
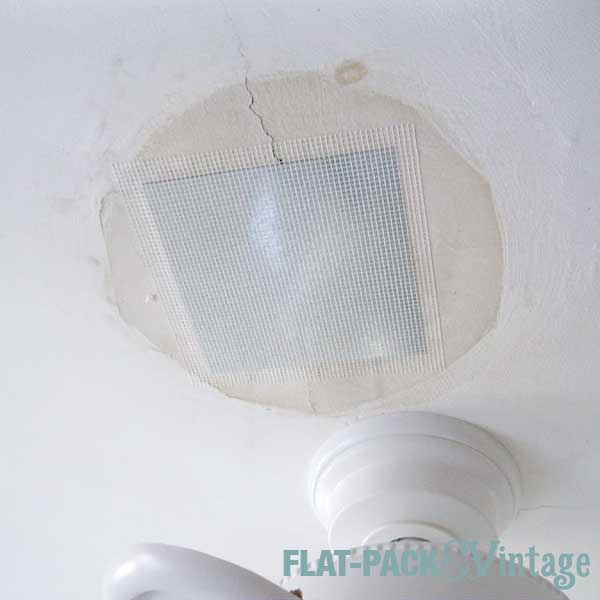
The trick here is to gradually feather out from the patch since it’s going to be slightly higher than the surrounding wall. Again, build up thin layers until everything’s hidden and smooth.
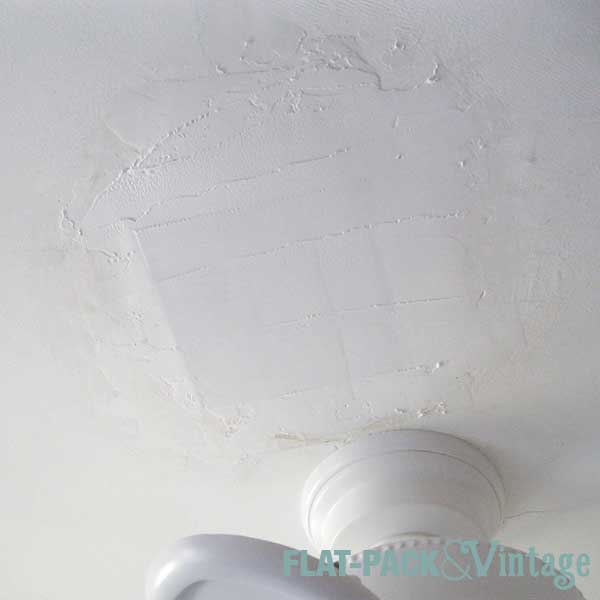
Once the ceiling gets repainted it will disappear completely, but even now you can’t notice it unless someone points it out to you.
The Maybe-I-Should-Just-Call-a-Pro
Dude, you got this. It looks scary, but it’s not that bad. Even if you have plaster walls.
What you need
- Drywall (Home Depot sells 2’x2′ squares, Menards sells random sizes for patching… other places probably do too)
- Drywall Screws
- Utility knife
- Stiff putty knife/5-in-1 tool or drywall saw (depending on your wall type)
- Paint stir stick/thin scrap wood (optional)
- Wood glue (optional)
- Joint compound*
- Flexible putty knife
- Sandpaper
When you have a hole this big they don’t make adhesive patches big enough so you’ll need to fill it with drywall.
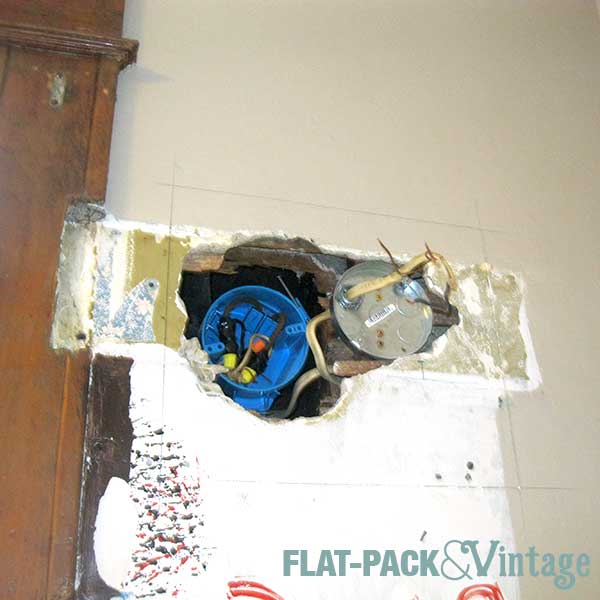
Safety note: make sure you know if there are any electrical wires behind the area you’re patching since you do not want to accidentally cut or drill through them.
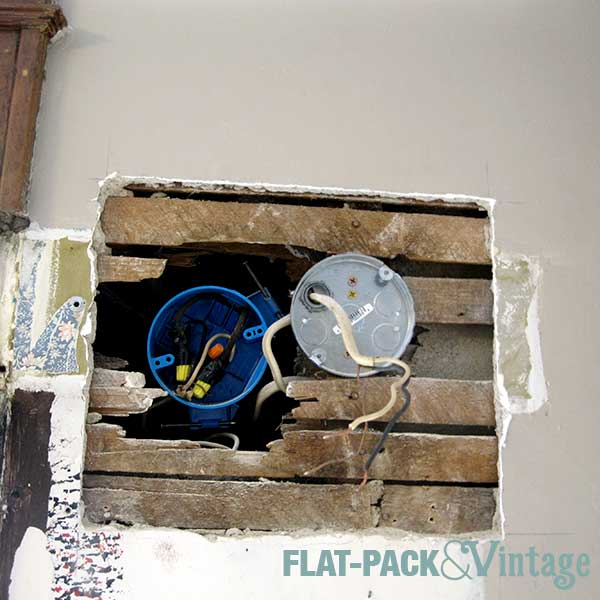
Start by evening out the edges of the hole so it’s rectangular. If you have drywall you can cut out the rough edges with a drywall saw easily. If you have plaster walls… it takes some more effort. This video can probably explain it better than I can. It’s a little putzy and time consuming (and dusty!) but not incredibly difficult.
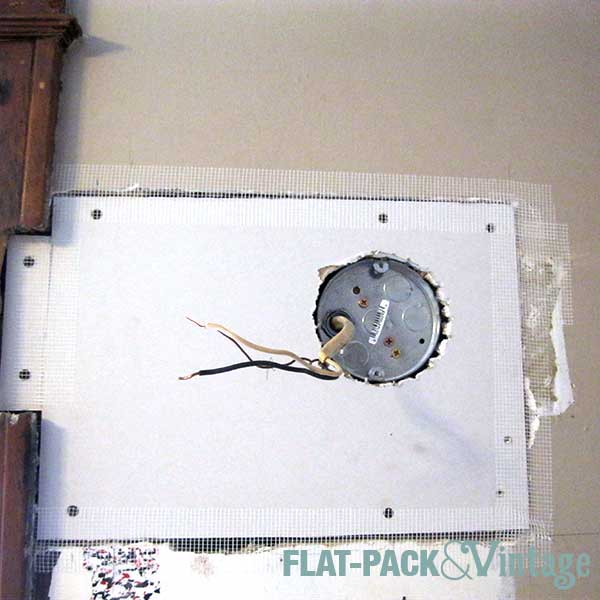
Cut (really score with a utility knife and snap) your drywall patch to fit your new, squared hole and screw it into place. If you’re missing lath or not near a stud you may have to create a surface to screw into with some scrap wood. Again, there’s already a video that should help explain that better than me. He’s patching a pretty small hole, but the concept’s the same.
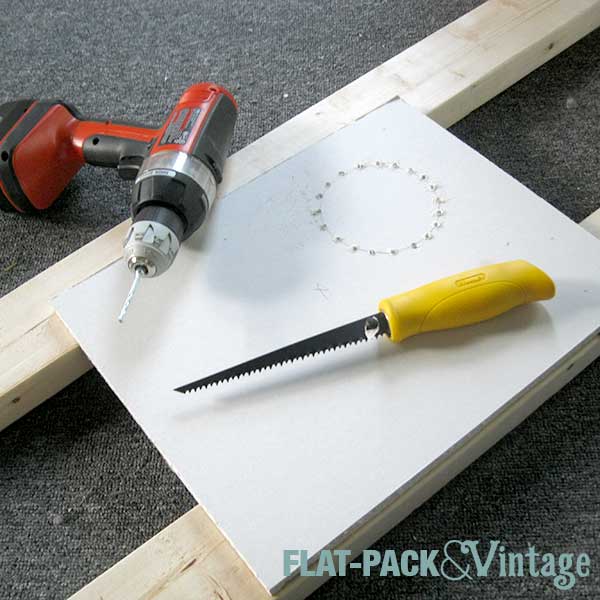
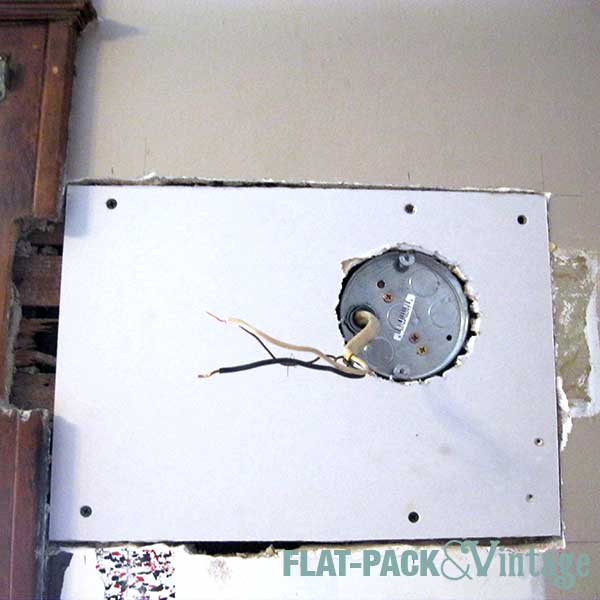
We had to cut a hole for the wiring too. I traced the electrical box in the right spot, drilled holes along the perimeter, then used a drywall saw to cut it all the way out. The drilled holes just make it easier to cut a rounded shaped, if you’re cutting out a square you probably just need the saw.
Tape the edges with an adhesive mesh tape and feather out those edges just like you did for a smaller patch. We ended up taking off more plaster so we could expose some more stable laths to mount the drywall on.
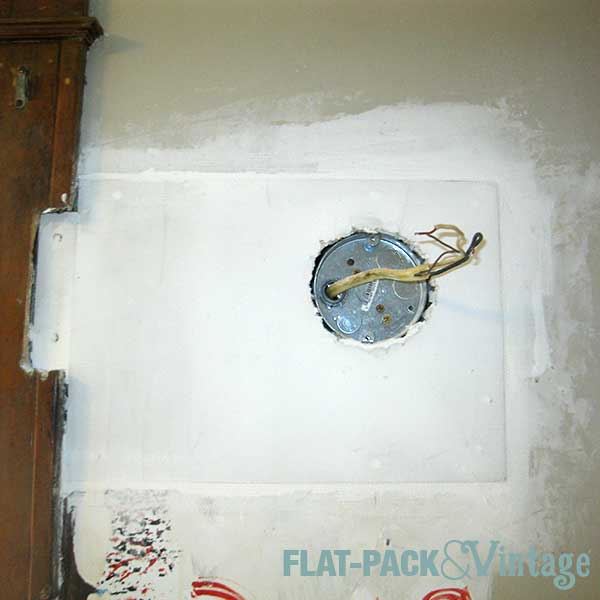
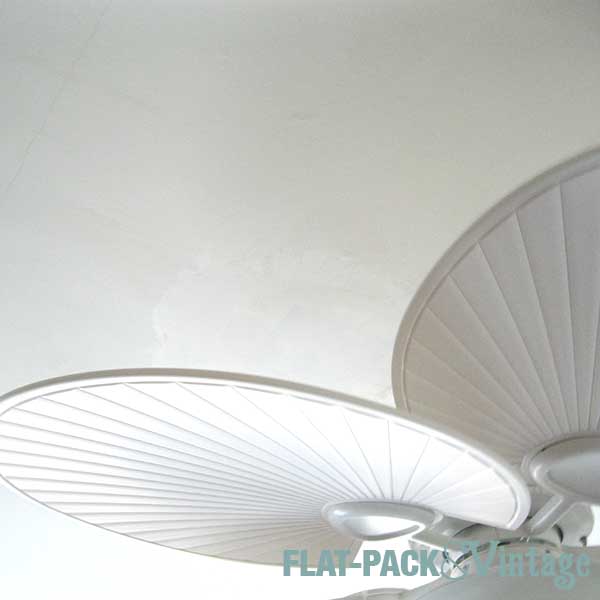
Still working on this one since it will take some effort to completely hide a hole that big, but by the time we paint you’ll never even know it was there.
*Ok, so I used the same wall patch spackle I used on the bedroom ceiling… time will tell if I royally flubbed it.