I started painting the dining room today. I got about 1/2 done but now have to shove the furniture into the other corner so I can paint the other 2 walls. I’ve done quite a bit of painting over the years–walls, trim, furniture.* I know not everyone has painting experience though so I’m going go over the supplies I use, and then run through my process.

At the time of writing this I have no sponsors, no advertisers, no one slipping me convenient wads of cash behind the scenes. This is what I use and my honest, unbiased opinions.
Priming:
Almost all paints I see these days are a paint + primer, but a separate primer is still definitely worth on some things. If you’re painting over bare wood or drywall, you should probably prime. If you’re painting over a finish that may be a little grimy (kitchens, homes previously owned by heavy smokers…. that sort of thing) you’ll probably want to prime. I’ve been using the water-based Bullseye 1-2-3 primer and have been pretty happy with it. An oil-based primer will give you even better adhesion, but will also need more ventilation and special cleanup. Also, you can use latex paint over oil-based but shouldn’t oil-based over latex.
Walls:
I always use an Eggshell finish on walls in all rooms. Sure there are lists that specify certain finishes for certain rooms based on durability, but my go-to is always eggshell. It’s cleanable, but not shiny (quick n’ dirty breakdown: the shinier the finish the more scrub-able it will be, but shinier will also highlight any imperfections or texture changes on the walls). If you have kids who are prone to drawing on walls, you might want to bump up the sheen in problem areas.
My paint brands of choice for walls are Behr (Home Depot) and Clark + Kensington (Ace). They’re pretty inexpensive as far as paints go, but have pretty respectable coverage.
Trim, Cabinets, and Furniture:
I used to always use a high gloss on furniture, and then I discovered satin. To me the satin is more in the range of a “factory finish” level of shine for most things and the high gloss can leave things looking obviously painted. Painting my kitchen cabinets turned me into a Benjamin Moore Advance convert (fangirl!). I’d read good things about it so decided to give it a shot. It’s a little pricey, but the coverage is excellent and the finish is beautiful. I was raving to my sister about it and when she saw our cabinets her comment was “I can see why you liked this some much.”
We also used Advance (satin finish) on our trim… after the kitchen. I went to buy Advance but the Ace near us didn’t carry Benjamin Moore since they’re too close to another BM dealer and the guy there highly recommended Clark + Kensington. I’d used it on walls and been really impressed for the price point and at half the price of Advance I thought sure, why the hell not. 3 coats plus primer (and could probably use another) is why the hell not. And painting trim is a beast so I think it’s better to splurge on better coverage here (but I’ve personally never found the pricier paints worth it for walls). After the kitchen we switched over to my original plan of Advance. It still needed 2 coats + primer, but was definitely looking good at that point (and if you’re only using about 1/2 the amount of paint, it’s not really even a splurge anymore)!
Tools:
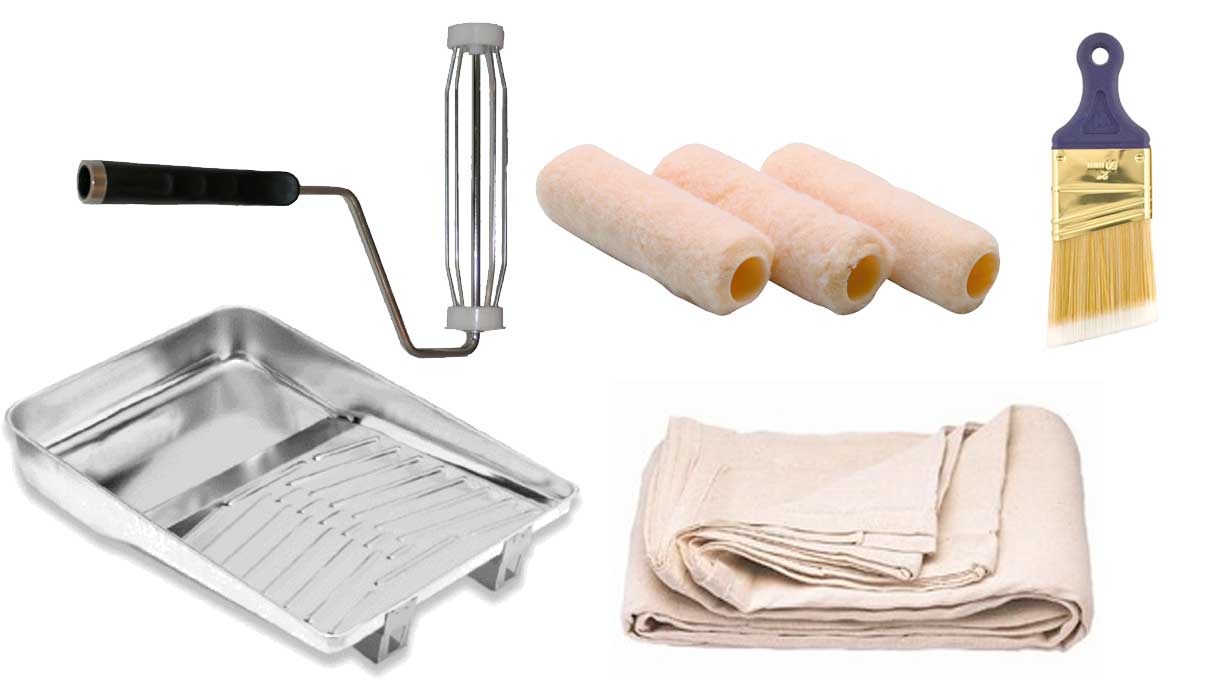 The basics: paint tray, roller, roller covers (don’t be afraid to splurge on roller covers, or at the very least, don’t reuse your covers to death –>guilty) drop clothes, 2″ angled brush. I really like the Wooster Shortcut, but there is a little bit of personal preference involved. This is another area where you don’t want to choose the absolute cheapest option and take good care of your brushes.
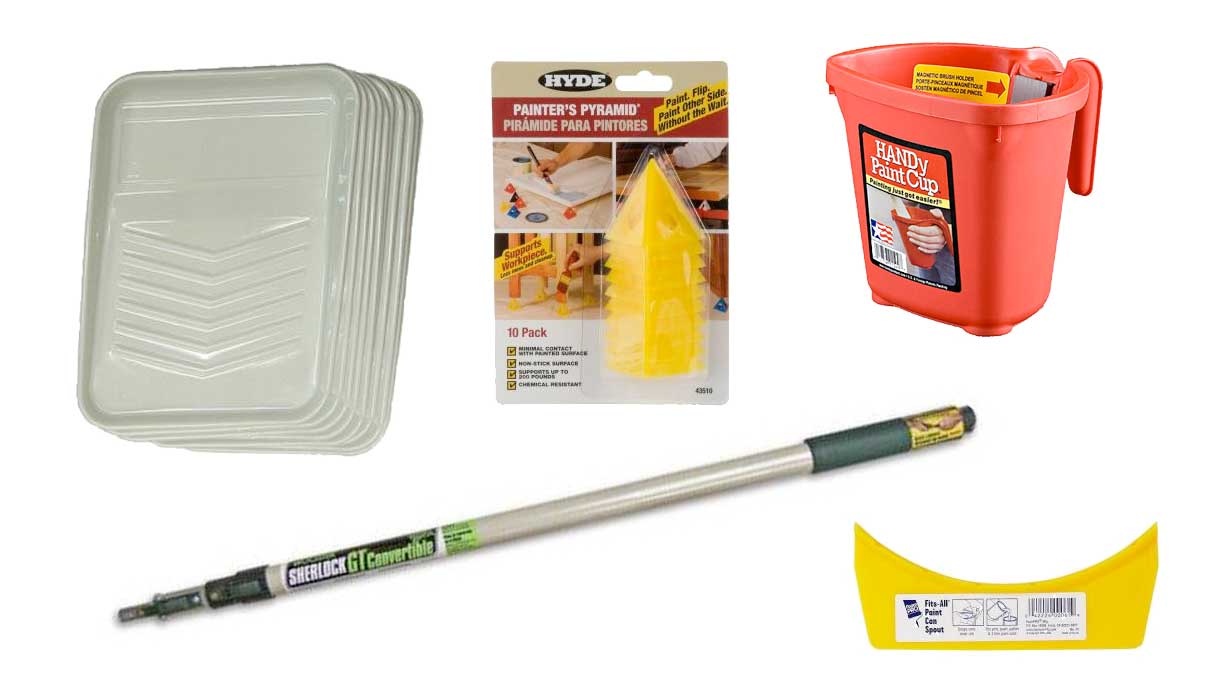 Very useful extras: pole/extender for your roller (I really wish I had an adjustable one!), painters pyramids (if you need to prop up something flat to paint the edges), paint pail (sure, you could use any old plastic container, but the handle and magnetic brush holder are pretty sweet), paint tray liners (they make clean up waaay easier, I dump as much extra paint back into the can, let the rest dry, and then peel it off and reuse the liner**), and a flexible pour spout (they conform to both gallon and quart cans, make the paint easier to pour, and prevent paint from clogging up the rim of the can).
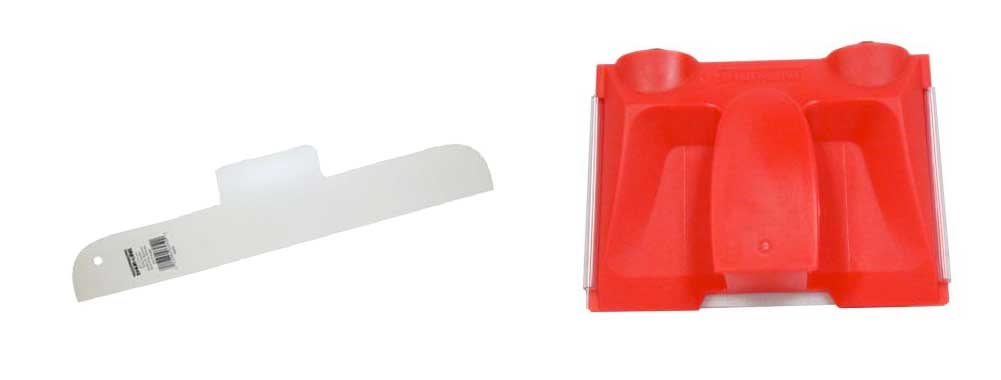 Marginally useful extras: Edger (I have had various levels of luck with these, they work well in some situations but not others, and some of them constantly fall apart or get paint where they shouldn’t), paint guide (like the edger it works well in some areas and less so in others, if you use one keep a damp rag around and wipe it down constantly).
To Tape or Not to Tape?
I used to be a taper because I was told that was just a normal part of prep work… then I read an article over at Apartment Therapy and it changed my life. They claimed that taping was actually more time consuming and even a little more risky than just cutting in by hand. So I tried cutting in the old fashioned way…and it was wonderful! You need a good quality angled brush and a steady hand, but if you go slow it’s not that hard.
The “risky” part of taping is that it can lead to overconfidence because if your tape is not perfectly sealed or you’re a little too globby with your paint it can ooze underneath. Also, there’s a risk of peeling off some of your new paint if you don’t time your tape removal right.
Ultimately it comes down to personal preference. If you’re new to the painting game you may still want to tape everything, but maybe still try your hand at cutting in carefully and see how much paint you really get on the tape.
*Ceilings are hands down the worst. If I ever want to repaint our ceilings I may just hire it out. Really.
**Cheap, green, whatever you want to call it