A couple weekends ago we hung the wallpaper in the micro-bath! It looked so good I even had to share a teaser on Facebook before it was trimmed.
When I’ve told people I was planning on wallpapering the bathroom I’ve mostly been met with polite skepticism. I get it. Most people probably associate wallpaper with their grandma’s house and think of dated florals that are impossible to remove.* Wallpaper has come a very long way though! There are a huge selection of prints to choose from and it’s a great way to add a fun accent. Plus, it’s much easier to remove than it used to be.
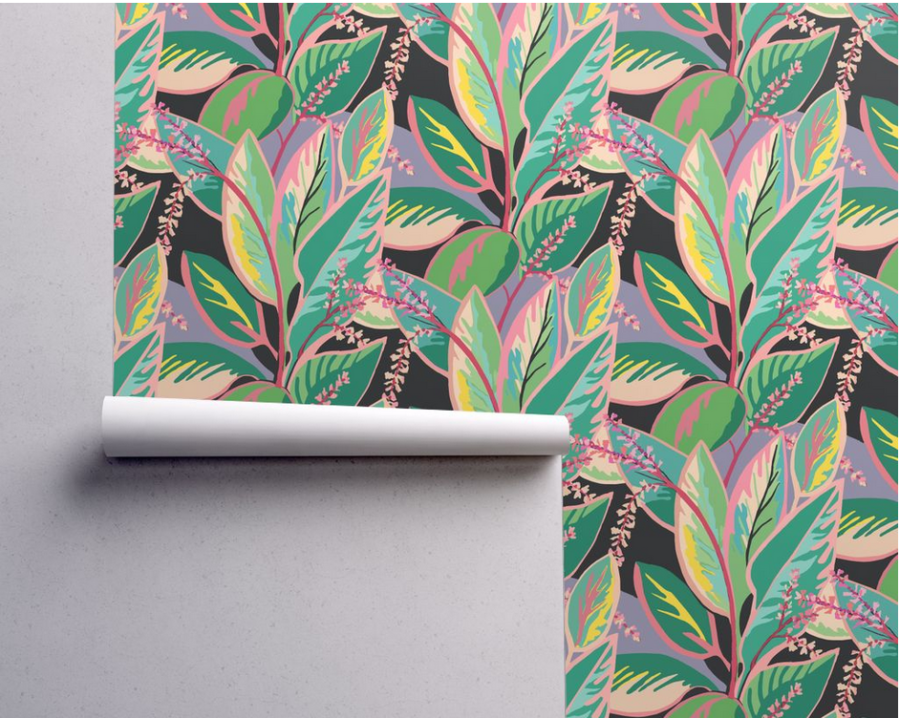
I ordered this water-activated wallpaper from Spoonflower. The instructions it came with were pretty straight-forward, and you can find video instructions too. Unfortunately, we had to deviate slightly from the directions because they assume your walls are reasonable square and ours very much are not.
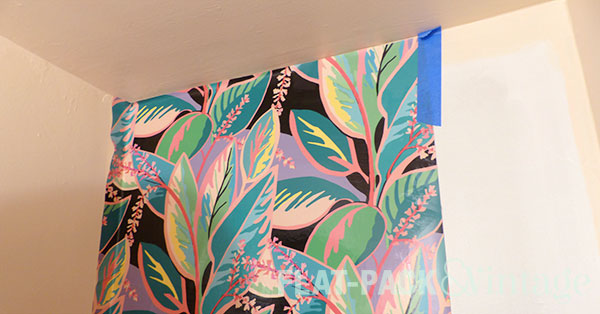
Instead of lining up the wallpaper in the upper left corner, I drew a level line down the wall (about an inch narrow than the paper) and lined up the right edge of the paper with that, leaving some overhang along the left corner. This was slightly more finicky, but really not too bad. The pattern had a noticeable vertical to it so I wanted to make sure it hung a square as possible.
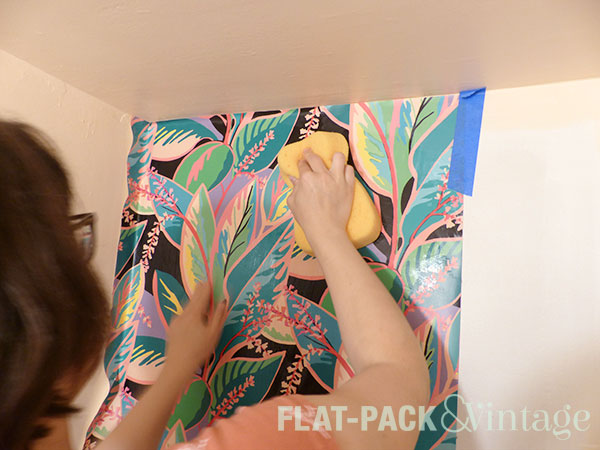
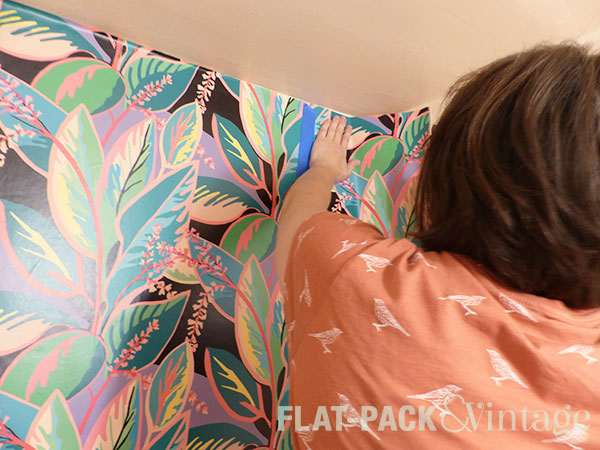
I used painter’s tape for a little bit of extra support while lining everything up. It won’t support a lot of weight, but it’s helpful for keeping a section in place while you’re wrangling the rest of the roll.
Since out bathroom is only about 30″ across, I only need about a width and a half of wallpaper. Instead of dealing with over a foot of overhang, I cut the second roll in half (while it was still rolled–it’s not a super-clean cut, but the extra wasn’t getting used for anything). I still had a couple inches of overhang, but it was much easier to wrangle in a tiny space.**
To smooth it down behind the toilet (without having to remove the toilet), I used this handy-dandy super-skinny roller. Now, I’m positive this area has some lumpy bits, but they’re also impossible to see so I’m fine with that.
Once everything had dried, I trimmed all the overhang with a utility knife and a straight edge. Even though the excess had adhesive on it, it peeled off without a problem and didn’t leave any gunk behind. You can totally tell how not-square our corners are, but I anticipated that and carried the wall paint past the corners a bit… I could have painted the back wall completely, but it wasn’t necessary. After trimming, I noticed some loose bits along the edges/corners which was a little worrying. Thankfully I just re-wet the adhesive on the paper and stuck down just fine.
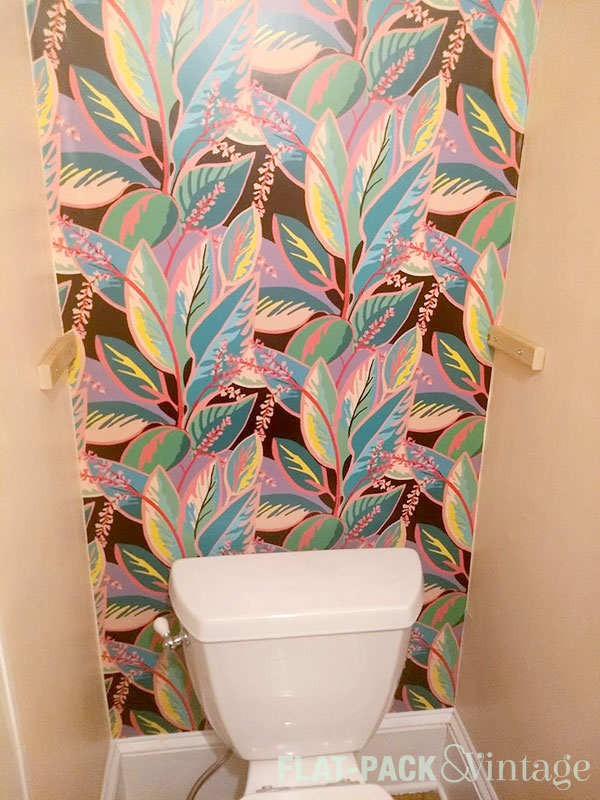
(ignore the bits of wood on the walls…they’re part of the last project for the room that’s not done yet)
SO GOOD!
At this point Matt probably thinks I’m a lunatic since I keep wandering into the bathroom to stare at it.
*One house I lived in growing up had wallpaper EVERYWHERE and it left the most disgusting residue when you tried to take it off.
**Matt’s brilliant suggestion was to just hand a single width of wallpaper down the center of the wall. Um, yeah, no.