I attacked the horrible brick red radiator this week and man is spray paint a bitch in confined spaces! If you’ve never tackled painting a radiator before, here’s my quick rundown.
Step 1: Prepwork
Give the radiator a good cleaning. A flexible dryer vent brush is seriously your best friend here. If you have never cleaned out the inside of a radiator before, be prepared to be amazed at how much nastiness you’ll knock out. If there’s any flaking or bubbling paint, take it off with a wire brush or sandpaper (if you think the paint could be lead based, be careful and look into appropriate precautions). You’ll also want to wash it all down to get ride of any remaining dust or particles.
Step 2: Tape off everything like you’re trying to make your own hazmat decon unit.
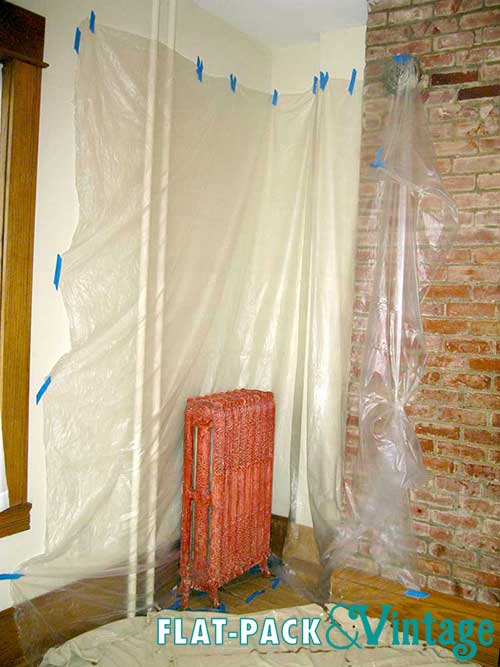
The biggest problem with spray paint is over-spray. Not a big deal if you’re outside, but if you have ANYTHING you don’t want paint on in the same room, cover it. I didn’t cover absolutely everything and there’s a fine dust all over the floor (the particulates dry pretty quickly as they drift, so this actually isn’t a bad clean up). I taped around all the feet and pipes, layered craft paper (or cut up grocery bags) over that, drop clothed to cover a wider spread, and taped lightweight plastic sheeting to the walls and over the brick (FYI painters tape does not like brick. At. All.).
Step 3: Light Layers

I really didn’t use anything special for paint, just Rustoleum Universal white in a satin finish. The sprayer on these bottles is pretty sweet and doesn’t cause annoying finger cramps like the standard spray nozzles can. Rustoleum sells a High Heat spray as well, but since their normal spray paint is good up to 200 degrees there’s really no need for the high heat stuff. They also make a Radiator Enamel… but I couldn’t find it in stores near me so Universal it was. Don’t worry about getting a good coat on the first pass. In fact, don’t even try. You want light layers so they dry faster and don’t get all drippy. Also, get as much ventilation as you can cuz this stuff is pretty potent. If you know several friendly weightlifters you they can also disconnect the radiator and haul it outside making a lot of this considerably easier.
Step 4-Infinity: Lather, Rinse, and Repeat
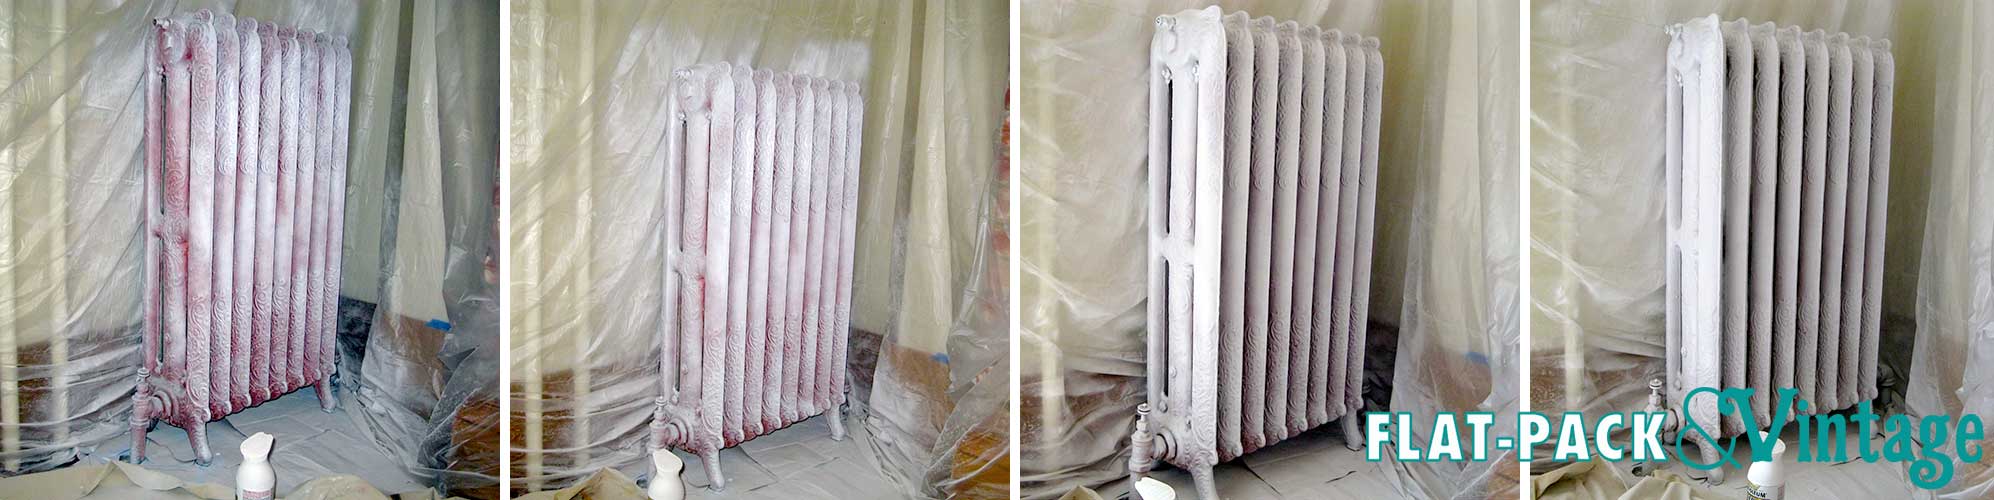
Lots and lots of light layers. Patience is important here… and it’s totally not one of my strong points. I got up to coat 5 before I ran out of paint. Trying to cover up red is probably especially difficult… so is trying to paint something complicated that’s stuck in a corner.
Step 5: Fuck it, just use a brush
After coat 5 I was out of spray paint and didn’t really want to keep going. Plus I had also covered myself in a layer of spray paint and didn’t really feel like another day of trying to scrub it all off. I picked up a tiny can of Rustoleum white paint in a satin finish and used a foam brush to touch up the areas I failed at spraying. If I had to do this all over again, I’d probably just brush paint from the start. I also forgot my camera at home at this point and then collapsed into a puddle of moving exhaustion, but you’ll get to see it soon once I’ve got the cabinets finished. Spoiler: It looks a lot like the last picture from step 4, just a lot better close up. Crazy.
Much improved by your efforts Lisa:)
Overspray is why my cordless drill is bespeckled with silver. 🙂
5 coats of paint? You have to be kidding – it’s not a sports car, you know… 🙂