
Still have the old finish on your project? Make sure you check out Step 1: Stripping.
Supplies
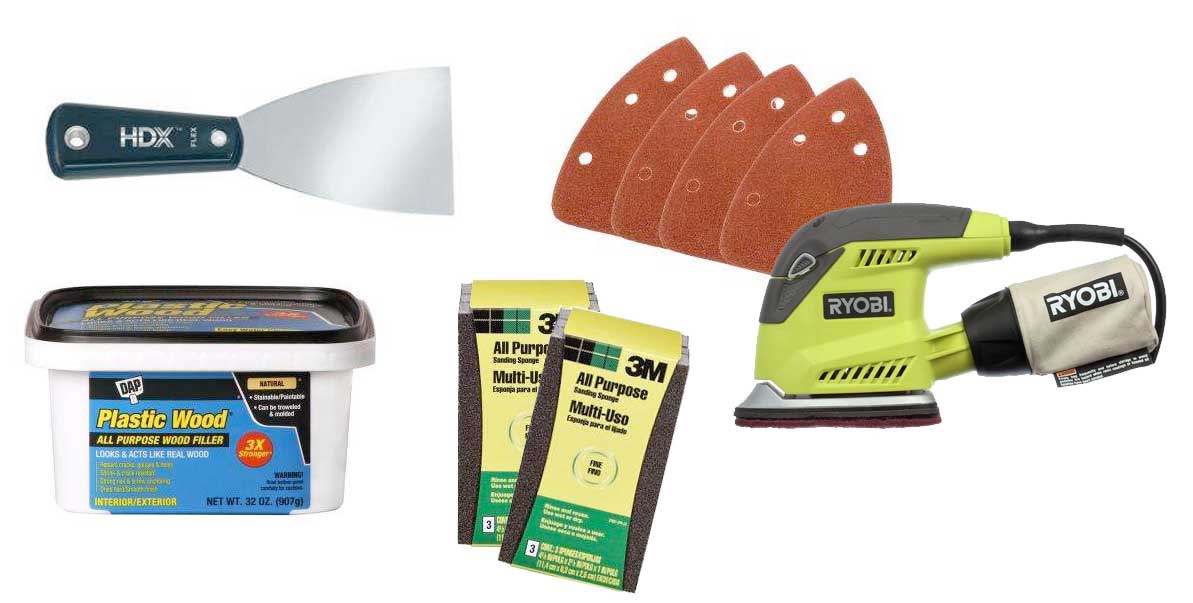
- Palm sander and/or sanding block
- Coarse, Medium, and Fine sandpapers (roughly 80, 150, and 200 grit)
- Wood filler
- Putty knife
How To
Alrighty, by now you should have bare wood, but it’s still probably seen better days. If you have weird white residue in spots, don’t fret.
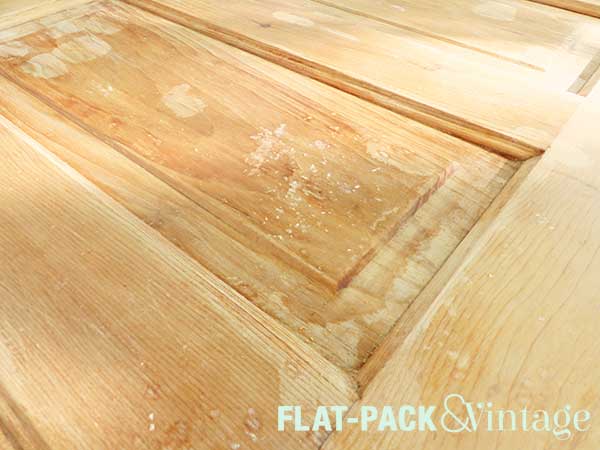
See? It happened to me too and it’s nothing to worry about–just dried up bits of stripper that didn’t get completely wiped off. It will come right off with some sanding. It can be washed off too, but you need to sand anyway, so why make extra work for yourself?
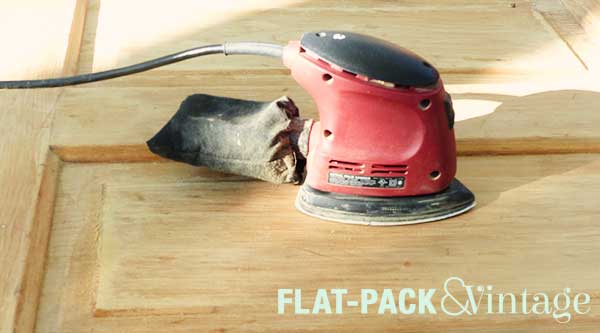
I started sanding with an 80 grit paper and my palm sander (I still used a sanding block and loose sand paper to get into the smaller and more detailed areas). The coarser paper will even out any small scratches in the surface and also take off any tiny bits of varnish you may have missed with the stripper. When sanding, always sand with the grain of the wood as much as humanly possible.
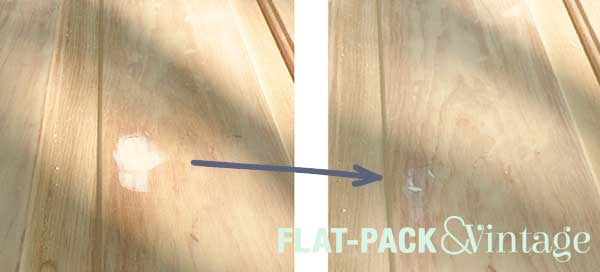
After going over everything with 80 grit, dust everything down with a tack cloth (an ever-so-slightly damp rag works too). This is when I inspect for any significant gouges. Since these doors are old I wasn’t aiming for a perfectly smooth surface. That just feels disingenuous. I did however want to patch the worst of the worst. Some of the doors had dog scratches down the front. One had NO carved into it, probably by some angsty asshole teenager. Several had assorted old screw holes. These were all things that I didn’t really feel added to the character and would need to be filled in.

Using wood filler is easy, blob it over the hole/crack/gouge then use your putty knife to scrape off the excess. Set the edge of your putty knife flat against the surface and with a firm, even pressure pull it over the putty you laid down. It sands off very easily, so don’t panic if it looks a little lumpy. Also don’t panic if you didn’t completely fill in the hole–let the first layer dry and add another.

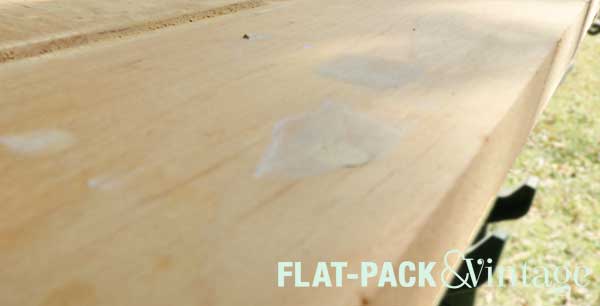
If you’re going to be staining, make sure to use stainable wood filler. I’ve tried a few different kinds and my favorite so far is Plastic Wood. Don’t bother buying a giant tub though. It dries out fairly quickly and is difficult to work with if it gets too dry (I’ve had the same issue with other fillers I’ve tried too). Personally I also think a metal putty knife works better for wood filler, but you could definitely use a plastic one if that’s what you have.
Now that all your holes/dents/gouges/graffiti are all filled in, it’s time to sand with a medium grit paper. I used 150-120 grit,* again with my palm sander. This will smooth out your 80 grit sanded layer and smooth out any blips left from the wood filler. If you find areas that need a filler touch up, dust them off, fill again, let dry, and sand.
When sanding over the filled spots you want to remove an filler that’s sitting on the surface and leave only the filler left in the divet. Pretty much just keep sanding until you see the original shape of the hole you filled.
Finally, I went over everything with a fine grit sandpaper (I used 200 grit). I chose to used just a sanding block instead of a palm sander since all the real work should have been done on the coarse and medium sands.
At this point you’ll want to clean everything off really well. Vacuum, tack cloth, canned air–whatever it takes. If you find dust congregating in any crevices you can dig it out with a tooth pick. Basically you want your surface to be completely dust free before finishing it.
Up Next: Staining (or Painting)
* I had a mix on hand… have I mentioned I am SO not a professional?