Keepin’ It Cool

We recently hit the height of Minnesota Summer.  The last couple weeks have been toasty.  Like temps in the high 90’s and heat index of 110+ kind of toasty.  Yeah, yeah, anyone in Florida or Arizona or some such place may be laughing at me, but I’m sure ya’ll have central air.

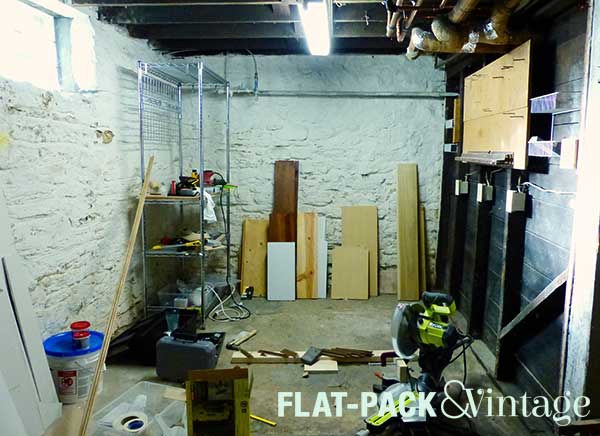
Point is, we haven’t the ideal conditions for painting an upstairs hallway so I’ve had to turn my attention elsewhere.  I decided to tackle my basement work space because it’s virtually nonexistent at the moment.
workspace1

It’s really just a corner of the basement where we stash our tools, but it’s totally disorganized and generally ucky.  I needed a place to organize tools and store supplies, and also a place to work without me constantly crouching on the ground since my back has decided to rebel ever since I turned 30.

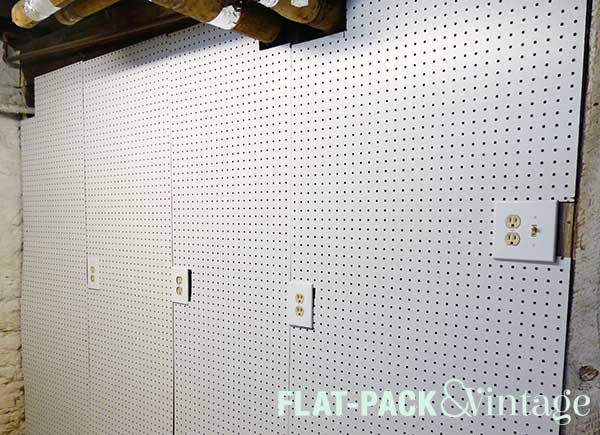
I started by peg-boarding the ucky wall.  The space was 3 inches too long to get away with 2 sheets of peg board so I had to buy 3 sheets.  ARGH!  Luckily it’s cheap.  I had the hardware store cut the sheets down to the sizes I needed because I have a small car and no table saw.

The boards were all cut so the edges would center on the existing studs.  This was so I could both anchor the edges well and fit everything into our car.  And, of course, because it’s our house, none of the studs were evenly spaced so had boards that were 30.5, 22.5, 23.5, and 24.5 inches wide.  Brilliant.

Now I just had to cut out holes for the outlets and pipes.  First I tried using a handsaw but it was way more of a PITA than I anticipated.  Then I tried my dremel with a cutting wheel but it started smoking and then the wheel shattered.  Oops.  Finally I broke down and demanded that we buy a jigsaw.  They’re actually cheaper than I expected (at least they can be, they can also be pretty splurgey, but I didn’t need anything fancy).
workspace2

It’s been YEARS since I used a jigsaw and I didn’t actually have the correct blade to cut hardboard so the cuts are pretty rough.  I also started with the most complicated panel and ended with the easiest.  Brilliant right?  And then in the middle I totally effed one of my measurements around the the outlet.  So basically it looks kind of crappy, but it’s a basement right?  It doesn’t have to be perfect, just functional, RIGHT???.  Please humor me here otherwise I may go out and buy more pegboard to fix it because, yes, I am that insane.

Speaking of insane, I also switched out all the outlets for white ones so they’d match the pegboard.  While switching out the outlets, I added spacers to bring the outlets even with the front of the pegboard as well.

Once the pegboard was all set up, I picked up a work bench kit.  I wanted to use the 2×4 Basics connectors to make a custom sized one, but an 8′ long top would be really hard to fit in my car so I opted for a 6′ kit instead.

When you see “kit” would you assume pre-drilled holes?  ‘Cause I sure did and was incredibly disappointed.  What I imagined taking a couple hours ended up taking several evenings worth of work because I would get frustrated and walk away.  It went way smoother when Matt was free to help me–he held stuff in place and drilled pilot holes while I followed with another drill to screw everything together.
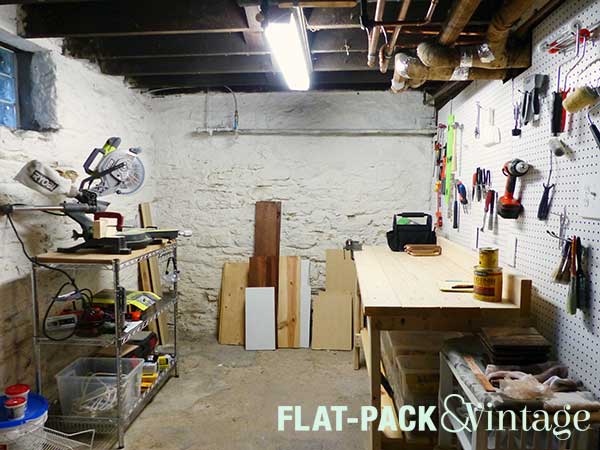
workspace3

Fast forward through a few hours of swearing, a trip to IKEA, and a few more hours for organization and voila!  I have a somewhat organized work space!  I still need to pick up a miter saw table since the work bench isn’t big enough to set that on, and I’ll be need a stool as well.  All and all though it’s a pretty awesome improvement, and I got do it all while hanging out in our (comparatively) cool basement.
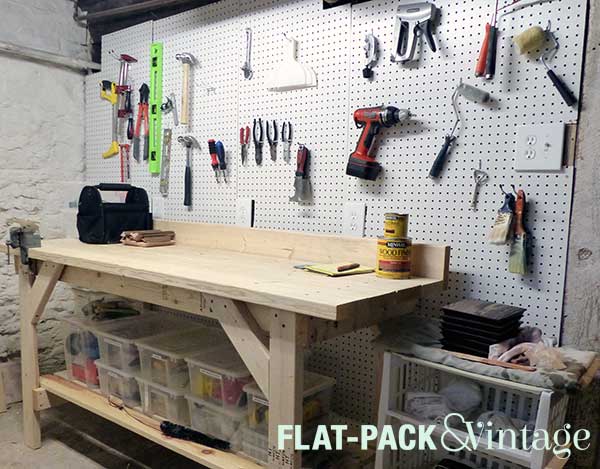
workspace4

Save

Ladies and Gentleman, We Have a Wall!

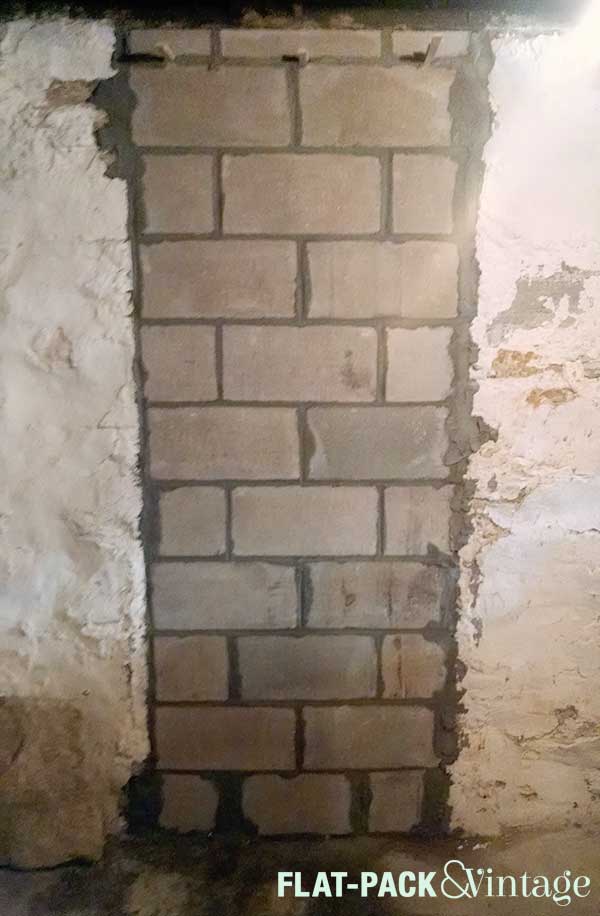
When we last left our basement we had a giant, gaping hole that was in desperate need of some masonry work.  Thankfully our mason decided that this past week (with temps in the uppers 90’s to 100’s) was a good time to work on a basement project instead of out in the blistering sun.

basementDoor2

Lovely, no?  Ok, not really… but it’s way better than the the rotting door and collapsed stairwell.

basementDoor1

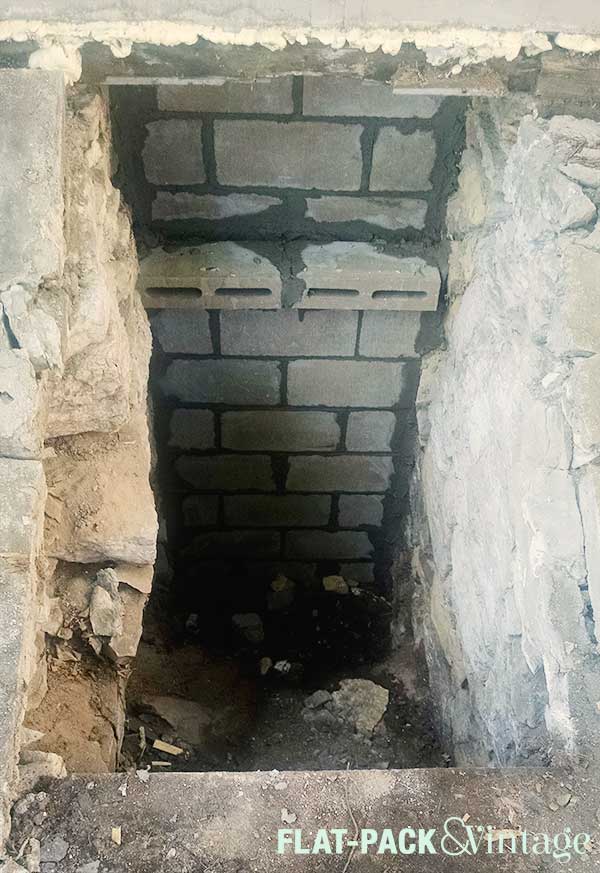
The outside has now been upgraded to Giant Treacherous Pit.  Thank god we have no small children, but we still need to get this filled in the near future so we don’t have to worry about small animals or wandering Pokemon Go players falling into it.

We had a little bit of water leakage this weekend because it was pouring on Saturday, but we’re hoping that water-proofing and proper fill will prevent that in the future. We’re also planning on adding a concrete patio over that section of our yard so if all else fails THAT should stop any water.  I think pavers would look better than poured concrete (and be DIYable!) but concrete is more water-tight and our house doesn’t have gutters.*  I’m keeping my fingers crossed that stamped/stained concrete will be in the budget, otherwise rock what ya got!  …but that’s all a project for another day.


*We plan to get gutters in the future, but it’s pricey and we haven’t had water issues so far so it’s not at the very top of the list.

Rain Rain Go Away. No Really, We have a Giant Hole in Our Basement.

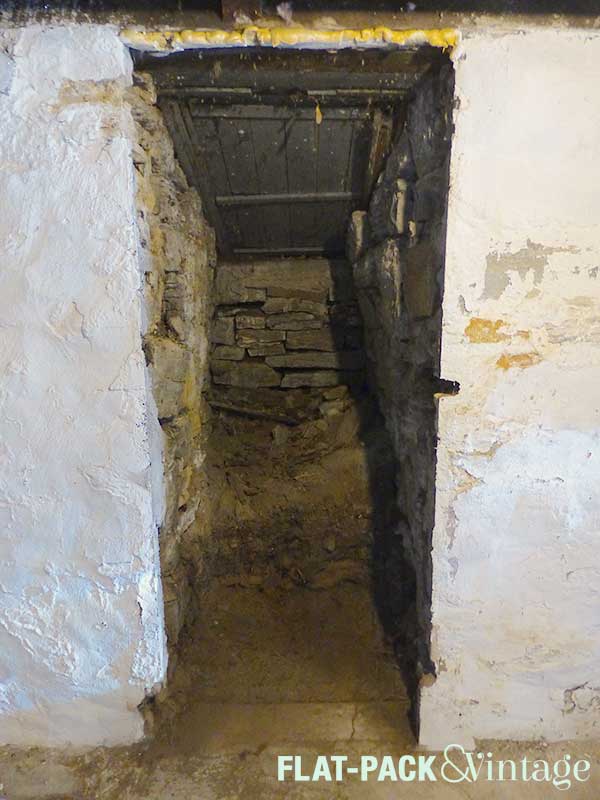
When it was built our house as designed with a cellar entrance.  By the time we moved in the outside was boarded up, the stairs had collapsed, and any wood pieces had rotted away.  The door inside the basement was still there but super nasty and didn’t close all the way.  This was the cats’ favorite place to explore and I’m pretty sure it’s where Schmutz found her dead mouse (it’s also probably where the live one gained entrance).

What I’m saying is, we had this unsightly, ancient door in our basement, an unsightly cover in our yard, and a prime weak spot for vermin to sneak in.  Not. Good.

We’ve been trying since last fall to recruit a mason to brick the whole thing up.  You’d think this wouldn’t be too hard, but it was a giant PITA.  They were busy, they wouldn’t work over winter, then they wouldn’t give us an actual date, only vague answers, and that was IF they answered the phone.  Matt finally tracked down a different mason (who was also way cheaper!) who checked out our hole and told us what we needed to do to prep.

Pro-tip:  If you want to save some money, try and handle the “easy” manual labor yourself.  We didn’t really want to pay mason rates to dig and fill a hole. Is it a lot of work, yes.  Is it totally doable, YES.

We (and by “we” I totally mean Matt*) started by clearing out the excess debris and digging down about 10″ so the mason could pour a concrete base for the blocks.  It was a combination of dirt, sand, giant rocks, and tree roots.  Good times.

Basement Interior Believe it or not, this is the After and looks WAY better than what we started with.
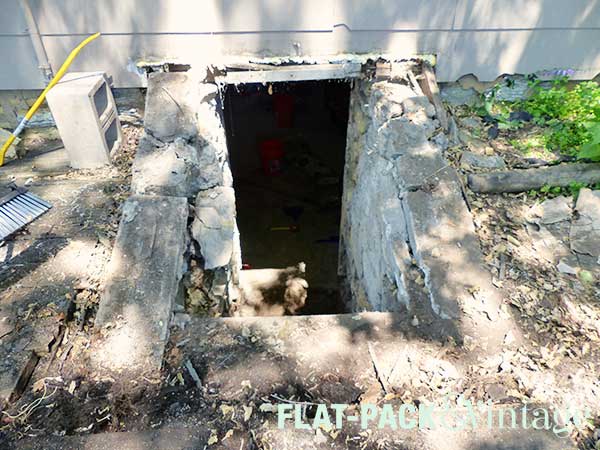
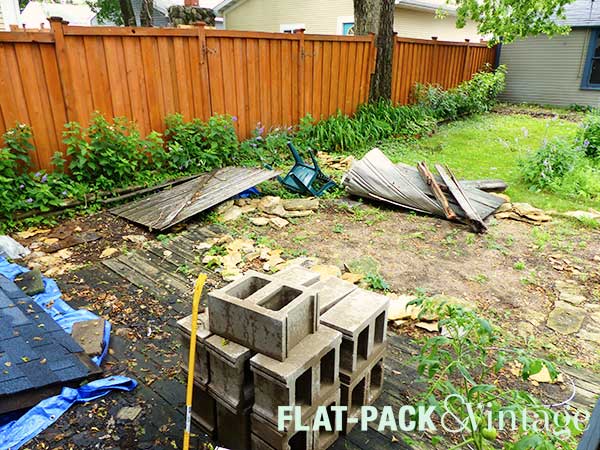
After we had excavated, we (again, meaning Matt) turned to demoing the outside cover.  The visible cover lifted off (it was heavy as hell, but not actually attached to anything).  Under that was another layer of shingles, under those was sort of thin sheet metal/flashing, and under THAT was the wood that you can see in the picture above.

basement2

Whoohoo!  We have a hole!  Unfortunately the mason wasn’t going to be in until later in the week, so we had to cover the giant hole back up.

basement6

We also have a backyard that is starting to resemble a junk yard.

basement4

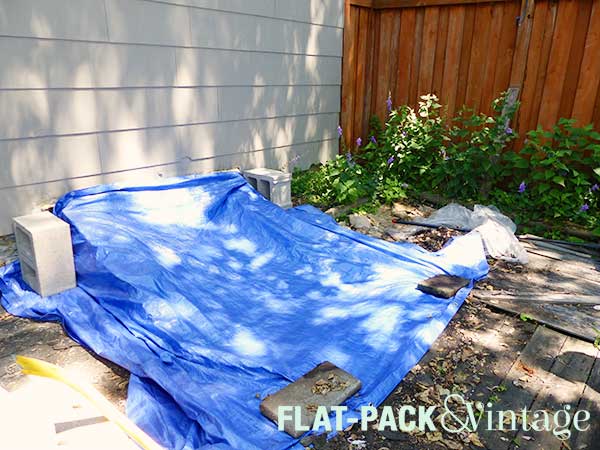
We added a tarp and then put the pre-existing cover back and thought we were being pretty smart.  And we were… at least mostly.

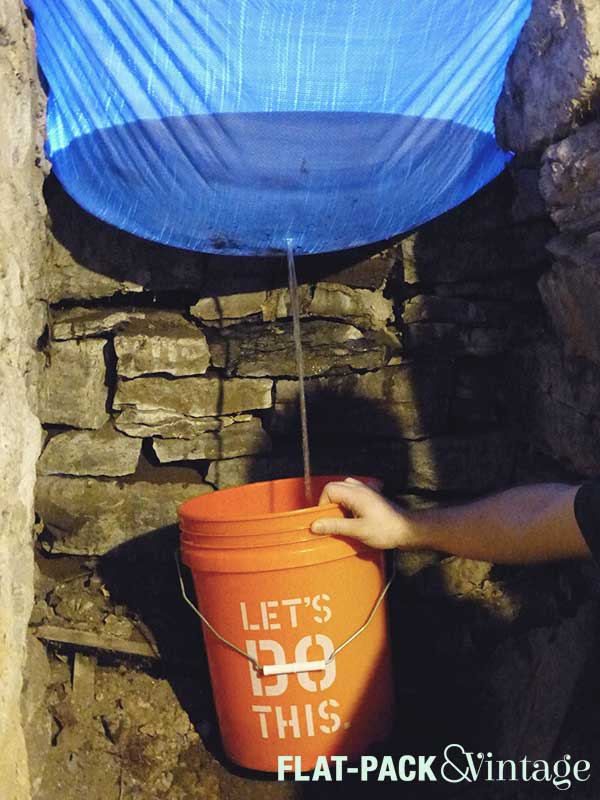
It rained that night though.  Like a lot.  I went down to check how things had help and promptly informed Matt that we had “a good-news, bad-news sort of situation.”  The good news was that not much water ended up in our gaping hole.  The bad news was that a TON of water had pooled in the tarp and wasn’t about to go anywhere on its own.

basement5

Luckily we had a bunch of buckets.  Matt cut a small hole in the tarp and let it drain into a bucket.  I was on standby with another bucket so he could swap them out and I could dump the full one down out utility sink.  This took quite a while we estimated that we emptied out over 20 gallons from the tarp.  Peachy.

basement7

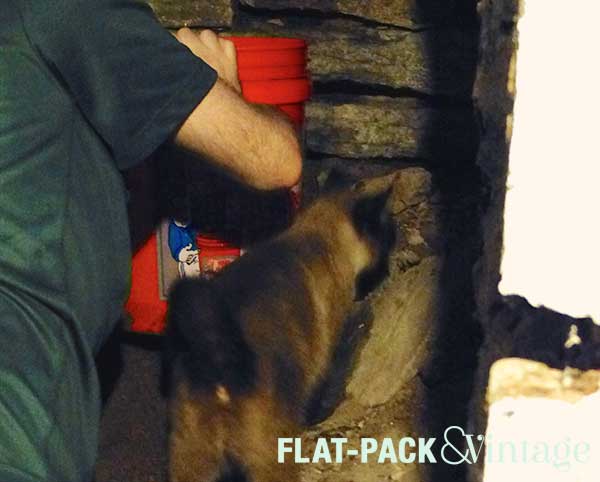
Schmutz has been very upset about what’s been happening to her cave and decided to come and investigate further.

On Monday the mason came to pour the concrete–yay progress!  Matt I also attempted to re-jigger the tarp (since it now has a hole in it….).  We’re supposed to be getting more rain throughout the week, so keep your fingers crossed that we don’t end up with an indoor water feature!


*I helped a little, but I have some serious Arachnophobia and refused to actually enter this particular spider-pit.

Save

Save

Save

Save

Save