When we moved in to our house there were no existing window treatments At All. Not even the really shitty blinds like the ones that we had in our apartment. I stocked up on inexpensive rods and curtains at IKEA and we strategically placed a few tension rods and curtains to have up until I actually start installing the curtain rods. The problem is in the bedroom. We have an air conditioner in one of the windows so I had to swag the curtain off to the side which leaves a big open gap of window and also leaves me to have to get dressed wedged into a corner.
NO MORE!
The last time I was at IKEA I picked up one of their panel curtains in the hopes of making a quick ‘n dirty privacy screen for our bedroom windows. The panel curtains do let a fair amount of light filter through, but also provide a nice privacy layer for bedrooms, bathrooms, or any place where you don’t want people just staring in. The downside is that they are only 24″ wide… our windows are about 30″ wide so it’s not a perfect solution (although there’s a fair amount of window casing in that 30″ so the panel does cover all the glass + a little overlap).
Now, you can buy the hanger IKEA sells for their panel curtains… but they’re $10 a piece so that’s $20 for our bedroom windows. I cobbled together a way to hang both of them for around $5 and then figure I can buy a bottle of wine. Win. (Also I didn’t really like the visual heaviness of IKEA’s system… and I do like wine).
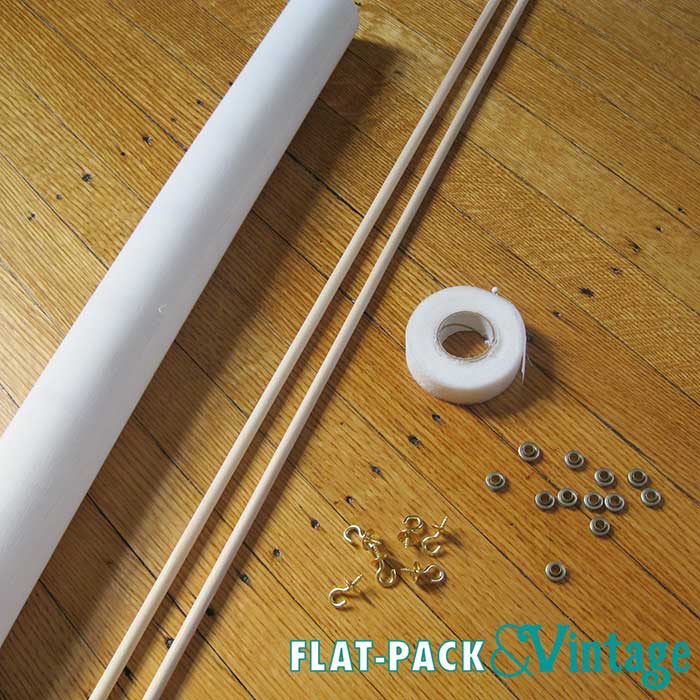
Supplies
- IKEA Panel Curtain (I used one GRYNET for both our windows)
- Fusible webbing
- 1/4″ dowel or small piece of wood, 24″ long (optional)
- Cup hooks
- Grommets (I like the tiny ones because they aren’t very noticeable)
Directions
Step 1: Measure your windows. Like I mentioned, the panel curtains come in very limited sizing options. As long as your window glass is narrow than 24″ you should be able to pull this off and if you happen to have window that’s narrower than 24″ you can cut the panel down width-wise. You also need the height of the window. Measure from the height from the inside of the wood frame, subtract about a 1/4″ to compensate for the cup hooks and add 2″ if you’re going to hem both ends. (Full disclosure: I didn’t follow these measurement guidelines at all, I just eyeballed it cuz I’m a badass DIYer like that)

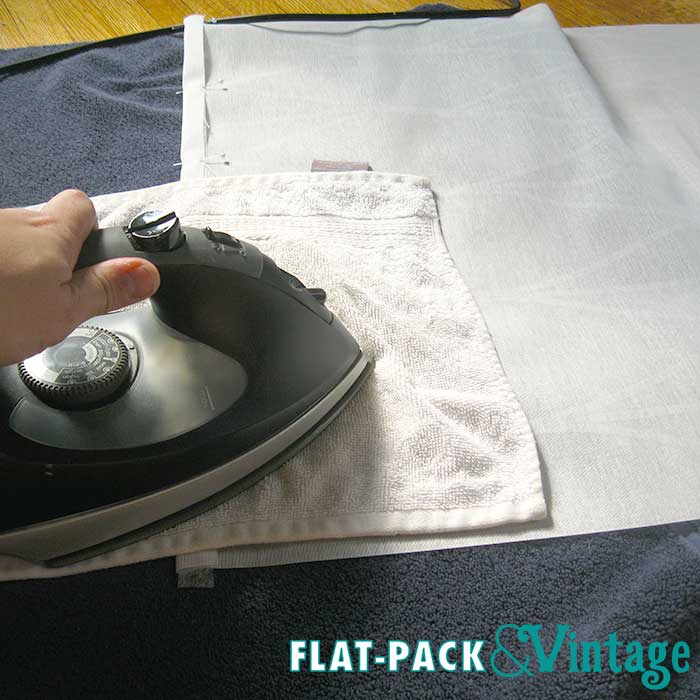
Step 2: Hem (the easy way). I hemmed the top using a fusible web to create more stability for the grommets. Fold the top over an inch and follow the directions with your fusible web. The panel curtain is not meant to be ironed but go slow and you should be fine. If you didn’t fail at step 1 like I did (math is hard) you can do the same thing to the bottom or glue the fabric around a dowel or other small piece of wood (but paint the wood white first).
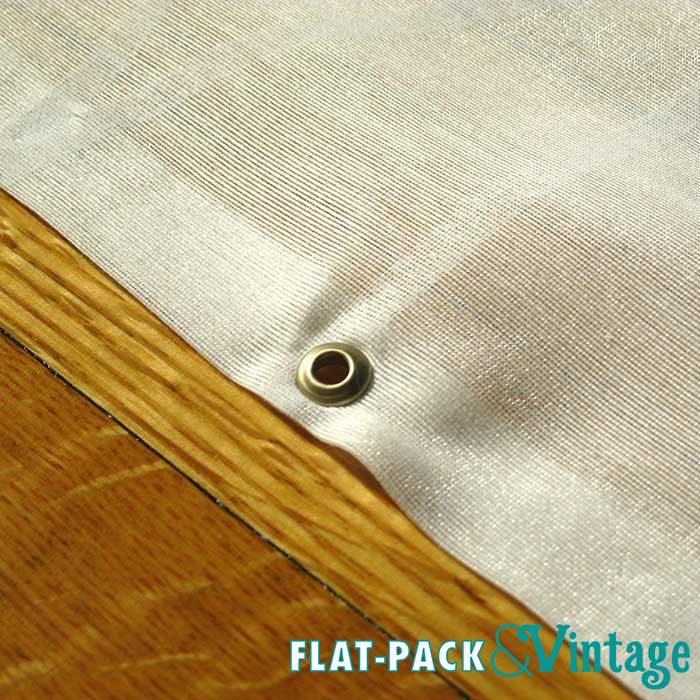
Step 3: Grommet. I did 3 grommets across the top of the panel–1 in the center and other 2 about 1″ from each edge. Grommets can be a little tricky if you’ve never used them before. The key is getting the hole in the fabric just slightly smaller than the grommet that you will push through. The best way I’ve found is to take a little pair of embroidery scissors and just push them through the fabric (twice, forming a small X) instead of trying to cut out a hole. When hammering the grommets it’s also a good idea to put a magazine or piece of cardboard underneath and this will keep the shape of the “display” side of the grommet looking a little nicer.
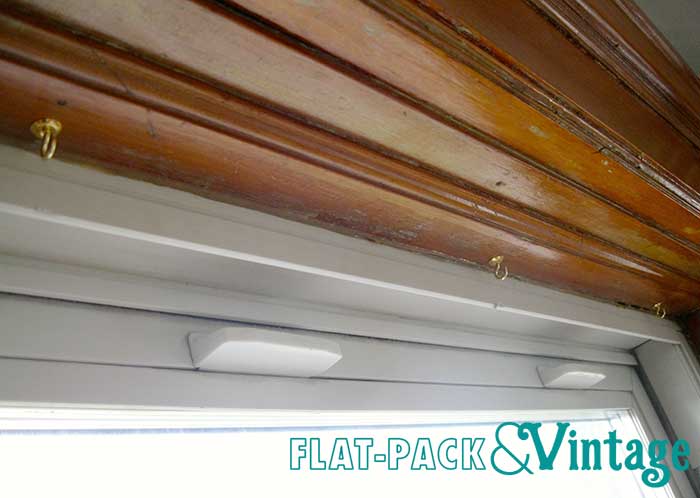
Step 4: Drill baby drill. Mark a spot on the underside of the top of the window molding in the center and about a 1/2″ from the back to compensate for the cup hooks and drill a small pilot hole. I wanted the panel to hang pretty close to the window so you could hang it further out if you wanted to. The small cup hooks are a little annoying to screw in just because they’re small and can be hard to grab, especially that close to the window. Once I got the center hook in, I hung the panel and then marked where the other 2 grommets fell. Drill, screw, hang, and you’re done! Simple, elegant, and you won’t have to worry about flashing your neighbors.
Now go and enjoy that bottle of wine.
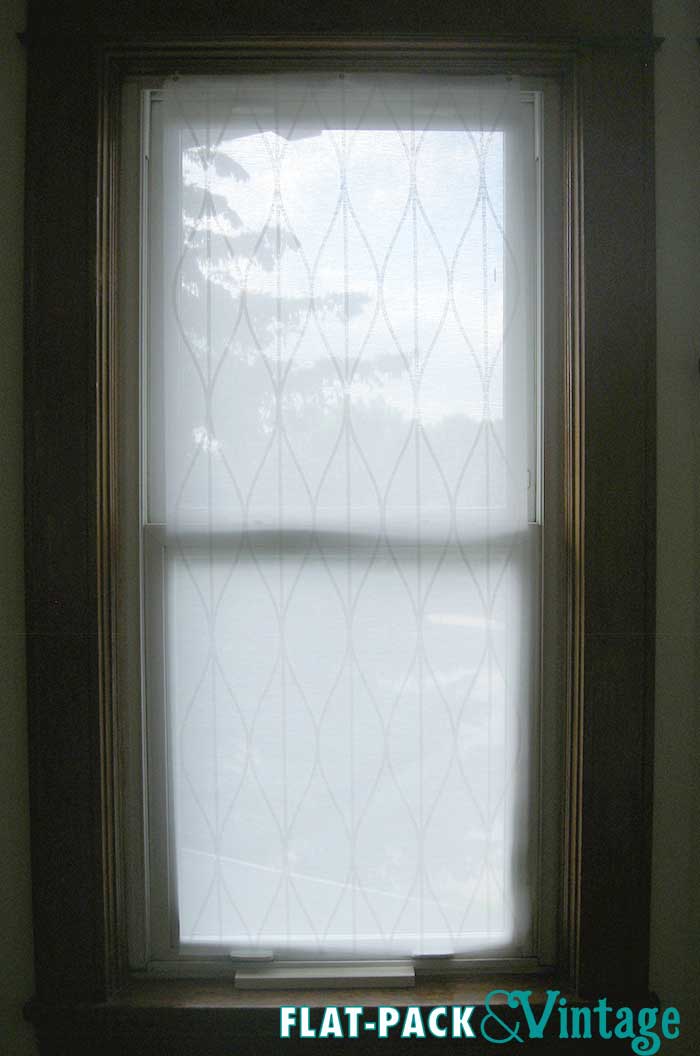
I’m really sorry this last photo is so crappy. I was trying to get a respectable end result photo, but was pretty much shooting right into the light. You can at least get the general idea though.