…plus assorted miscellaneous things like stain and hardware and things that we didn’t fully track (like small accessories, if you’re wondering where we got something, just ask). In realty it’s the final damage was probably closer to $1200, which I think is pretty damn good considering we replaced all the baseboards and ceiling, and also got a giant rug.
*Pssst you can also find it at Overstock and Wayfair… I just found the best deal through Rugs USA
I wasn’t prolonging the suspense on purpose, I swear! I was all on track to have this finished up last Sunday, but I work up feeling crappy (sore throat, muscle aches, no energy At All) so I managed to get 2 things (out of 7) hung in the dining room and then just sort of passed out. Ugh. By Tuesday I hauled myself off to the doctor and got a positive Strep Throat test (wheee) and wasn’t back to 100% until the end of the week…it was rough.
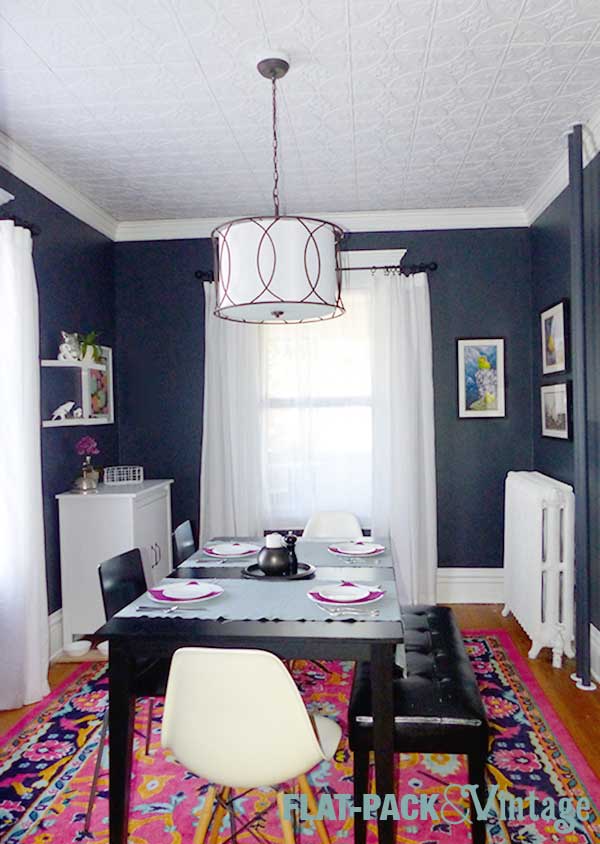
But FINALLY I have the full reveal for you!
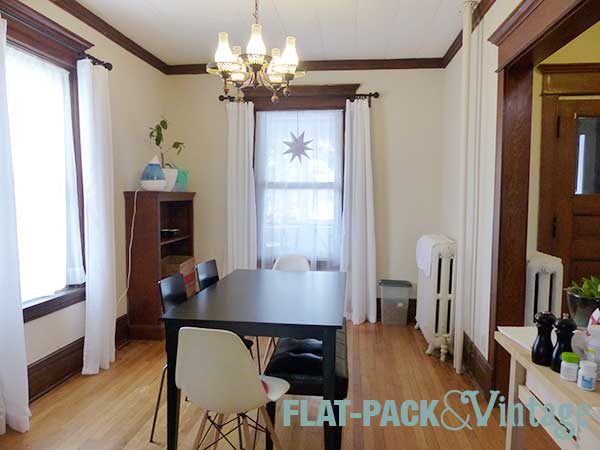
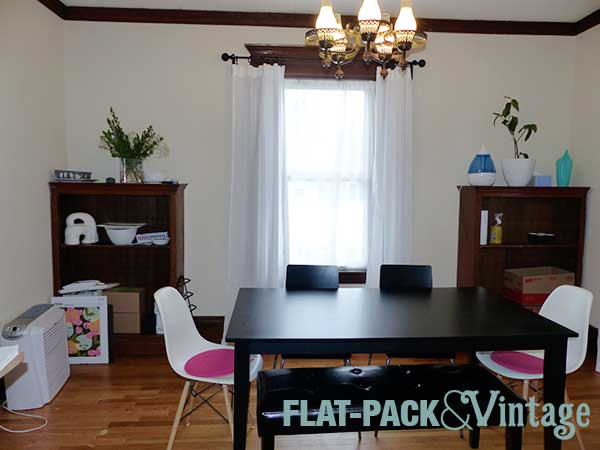
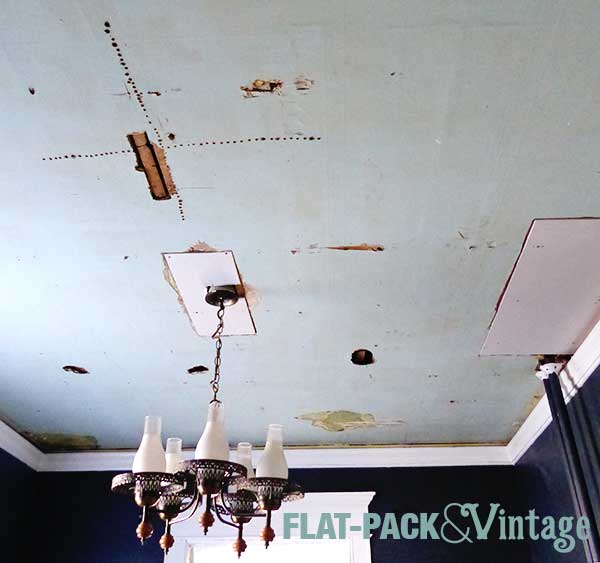
First let’s step back and look at what the dining room looked like when we bought the house.
There are worse rooms out there for sure, but this one was seriously lacking in style. The light fixture was kind of dated, the ceiling was pretty awful (and saggy in spots–thankfully this was only from the tiles pulling free of their staples, and not actually structural), and the bookcases served no useful purpose whatsoever in here.
In fact, the bookcases just sort of turned into catch-alls once we moved in.
So we ripped out the bookcases, repaired the wall behind one and the floors under both, replaced the baseboards, painted everything, ripped out the old ceiling, added a tin ceiling, extended the crown molding, and added a new light fixtures.
Oof, that made me tired just typing all of it… but the end result is so completely worth it!
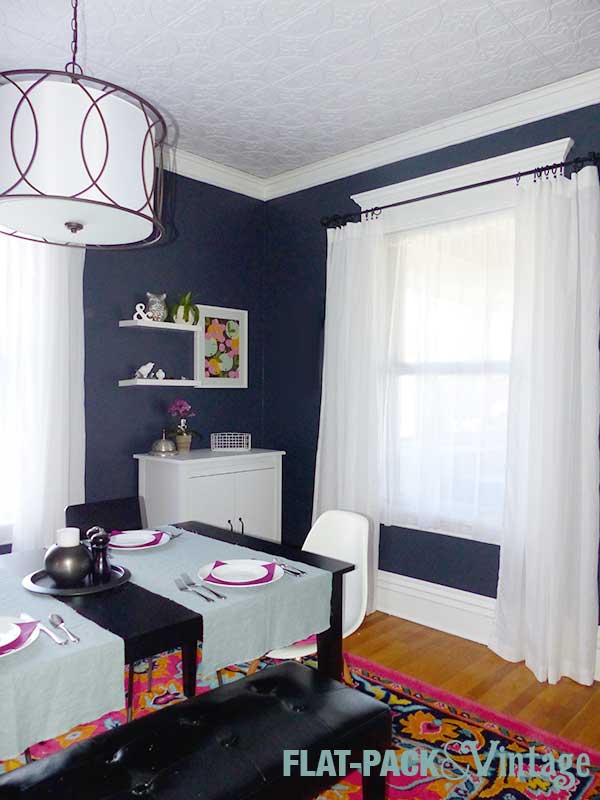
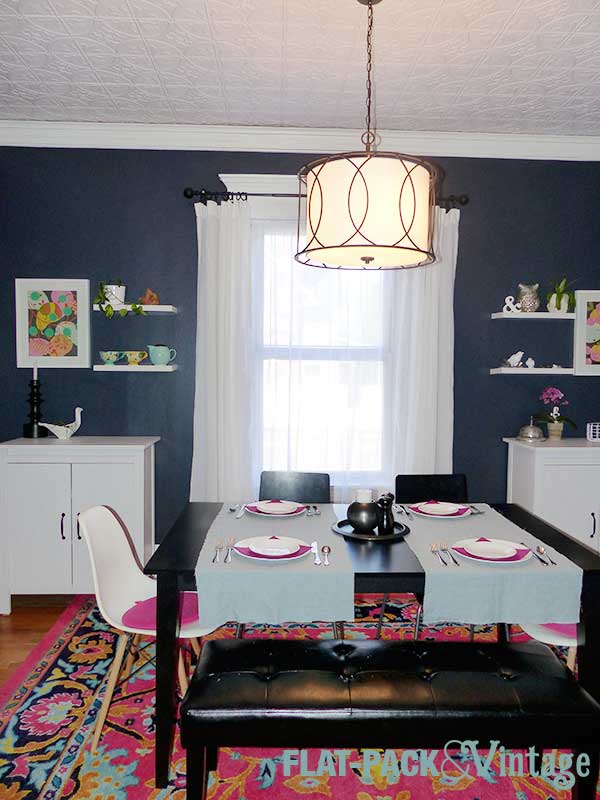
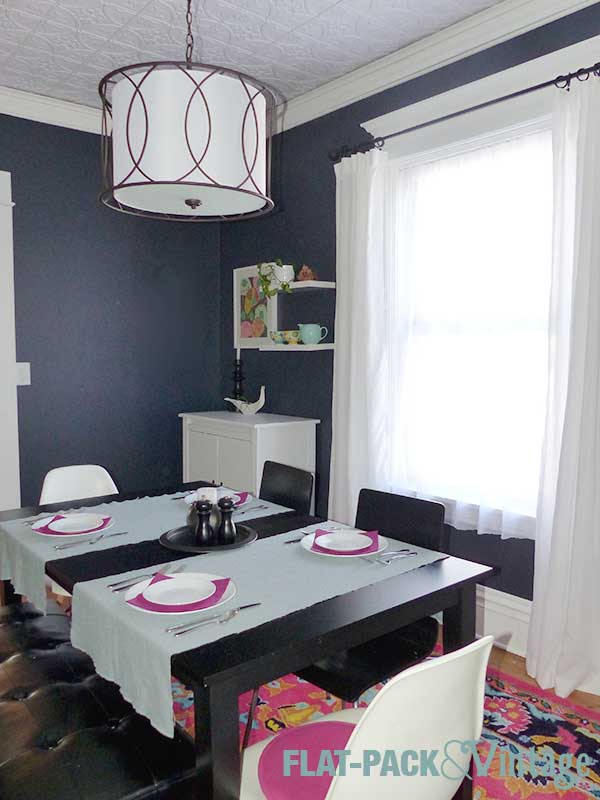
I LOVE how dramatic this turned out! We don’t have separate formal and casual dining spaces so this is it. I didn’t want to take it too formal since we’re not terribly formal people, but I still wanted the room to make a statement and I think I succeeded.
Pssst… don’t tell anyone, but those table runners totally aren’t hemmed yet. I only recently scored some blue-gray linen at Hancock Fabrics for like 70% off so they’re only cut down to size at the moment.
The ceiling and rug make me kind of stupid-happy. Matt was deeply suspicious of my desire for a hot pink rug, but after he saw it in person he admitted it really pulled the room together.
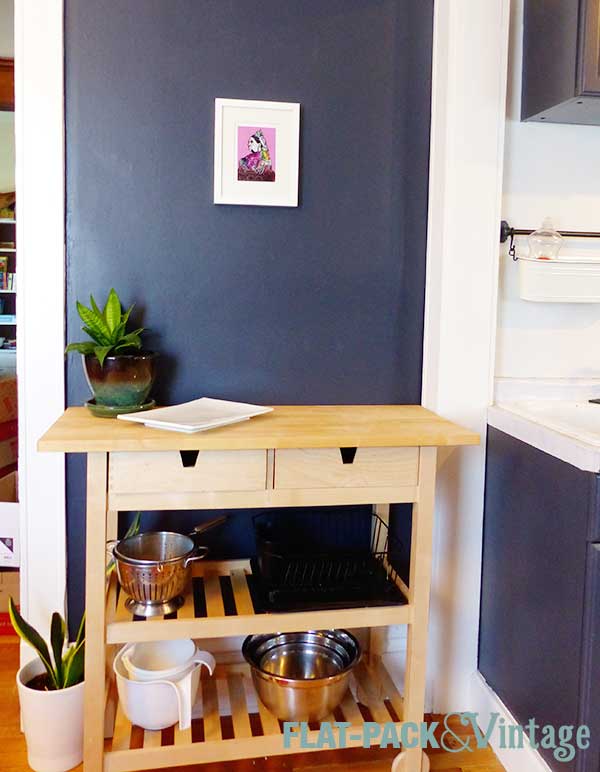
We also found a spot for my Weird Fruit prints by Ursula Vernon.
And my Queen Victoria made of garbage postcard that a friend sent me.
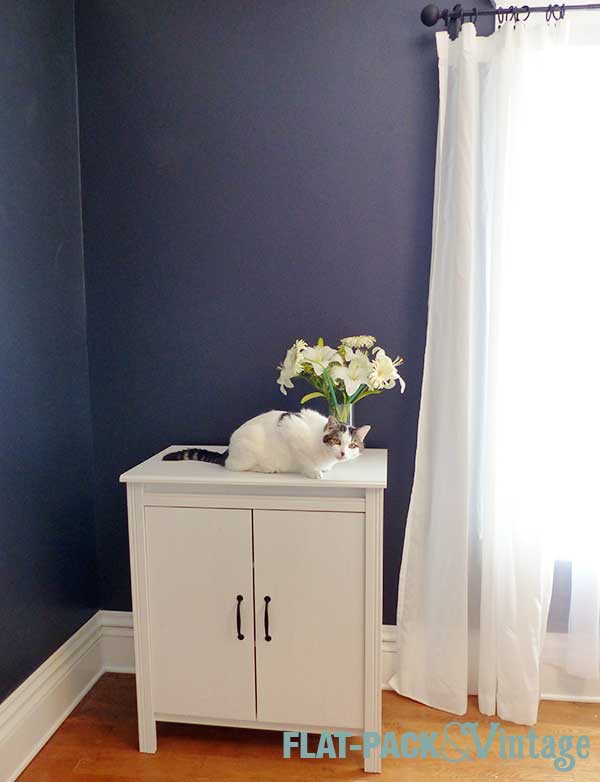
This sideboard is pretty much our dishwashing station since we have very limited counter space in the kitchen. It’s ok, but I hope to upgrade it at some point. I hope to upgrade the IKEA buffets on the other side of the room too, but sometimes you just have to accept some temporary solutions while you’re on the hunt for perfection. Plus, nothing ever is really done when you’re a creative–there will always be something you decide to tweak at some point. It’s done enough though (actually looking a like a finished room!) and we can finally have people over again!
We’re getting down to the wire now… not that we’re on any actual schedule, but I’m eager to get another room knocked off my list.
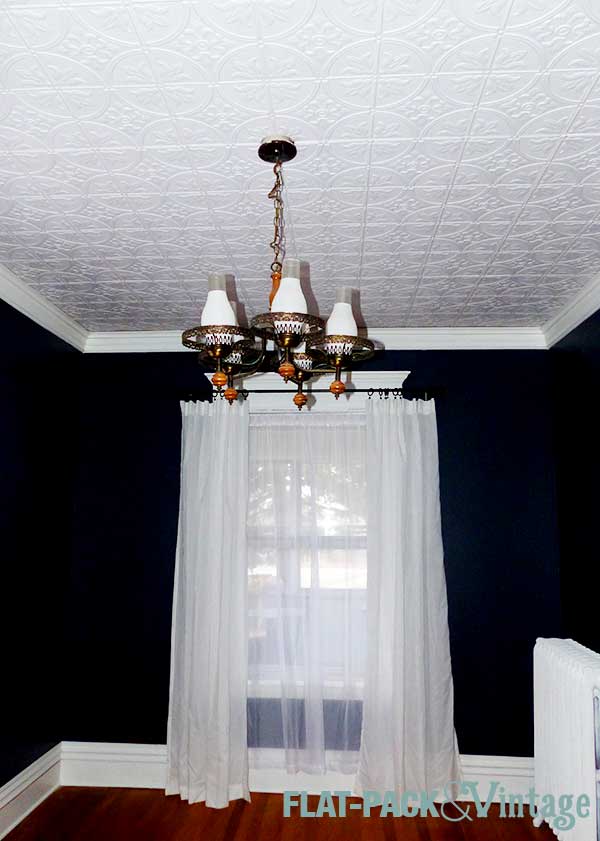
Our new light fixture arrived on Thursday and was breeze to put up since there was actually a properly installed electrical box AND modern wiring already in place. Madness! The only issue was the electrical box protruding out of the ceiling about 2-3 inches. We just ran with it and added a collar to make it look a little more intentional.*
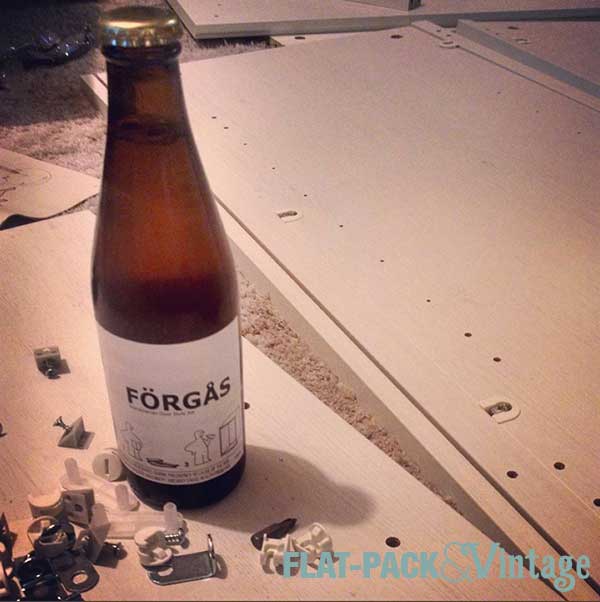
I also tackled some IKEA assembly. I picked up 2 BRUSALI cabinets to use as buffets flanking the window. They were inexpensive, a good size, and provided useful storage for some of our extra kitchen gear. Only problem? They’re not actually white. WTF Ikea? You call them white, couldn’t you call them “distressed white” or some such thing so people don’t get a nasty shock? Ugh. I wish IKEA would keep it’s finishes more consistent, this is just as bad the Stockholm series that’s a funky dirty beige color. Oh well, that’s what paint is for, right?
It’s also what IKEA beer is for….**
These are one of the more obnoxious IKEA I’ve ever put together, and to put that in perspective, I think the MALM dressers are pretty easy. We managed to slightly damage both in the process, nothing (too) visible, but it wasn’t hard to do. That and the fact that they’re fairly wibbly-wobbly does not make them one of my favorite IKEA pieces ever. Scale-wise they fit the room pretty well though and they were pretty darn cheap so ultimately I’m feeling pretty good.
After I got them in place the distressed-ness of the finish wasn’t terribly obvious so I’m holding off on painting them for now. I am on the hunt for some fancier hardware for them though… although I can’t find anything with the same hole spacing (and I’m sort of in love with these) so I may have to paint them just so I can the patch the holes…
What’s left now you may ask? The final prettifying*** is yet to come. I need to pick up some final accessories, our rug should arrive sometime this week and then it’s just styling and staging. And the room’s not really done until it’s properly accessorized. If all goes smoothly we should be done within the next week!
*Not gonna lie, the fact that the seam on the shade is on the most visible side ever drives me a little bonkers.
**Ok, so 1) It’s not really IKEA beer, they just styled the labeling as an IKEA spoof and 2) I’m not a beer drinker so wine was my comfort of choice. It was too fun not to pass up!
***Whoa, spellcheck says this actually a word! I thought I was making it up!
We have a ceiling!!!! I have been positively pumped for this moment ever since I decided to add faux tin panels to our dining room ceiling!
Why faux tin? Tin ceilings are fairly period-appropriate for the house but legit tin is super pricey and would need to be nailed up. Plus, the fake stuff is super easy to cut and manipulate–scissors and glue is all you need. I also wanted the ceiling to remain white, like someone had painted the tin (which is totally even a thing) and that seemed like a waste of good tin. If you’re feeling super hard core though, check your local salvage places for tin panels. If you’re local, The Mall of St Paul on has some and I would assume Architectural Antiques in Northeast Minneapolis has some too (I got distracted by doorknobs last time I was there…. omg that place is pure heaven).
If you’re going to jazz up a ceiling with faux tin, here’s what you need.
Tiles in your pattern of choice (there are loads of options!)
Locktite Power Grab (you need an adhesive that holds instantly because gravity)*
Caulk gun
Scissors and utility knife
Chalk line
Measuring tape
Straight edge
Another person
Yup, that’s about it.
We had ordered 160sqft of tile and had 150sqft of ceiling, so we didn’t have a ton of wiggle-room in how the pattern fell. Thankfully the electrical box for the ceiling light was already nearly perfectly centered.
Then we chalk-lined the center lines on the ceiling….and then adjusted them ever-so-slightly to make sure the pattern was centered on the light.
We followed the directions that came with the tiles and ran a bead of adhesive around the perimeter, and then in 3 cross-shaped sections in the middle. (White-on-white isn’t so visible in photos, so I traced the glue lines in blue)
We started in the center, cutting out a semi-circle out of 2 panels to sandwich around the light fixture. Ideally you should cut the power and take out the fixture, but we’ll be replacing this one soon, we just don’t have the new one yet. #poorplanning
If you’re working with 2×4′ panels it’s really a two person job. Because the panels are very thin, they’re also very bendy so having an extra set of hands to both support the other end and help line up that end is incredibly useful.
Depending on the shape of your room and the placement of any fixtures, you could start in a corner. I just wanted to get our ceiling fixture centered on the pattern. You may want to sketch up a quick layout too so you can figure out where the panels will fall. Because our room was a simple shape and our light fixture was nearly perfectly centered, I was able to just visualize the layout and go.
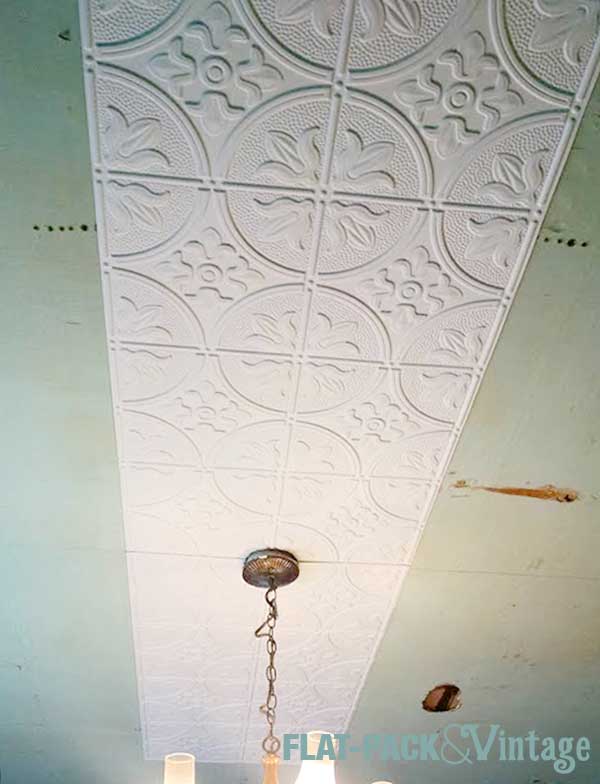
From there we added all the panels that wouldn’t need to be trimmed down. Because the panels are designed to interlock, as long as you get the first one well-placed, the rest should follow suit.
And then filled everything else in.
(sorry for the ucky pictures… we were working on this mainly after work so natural light wasn’t on our side)
These panels are super easy to cut–scissors will work just fine. If you’re not putting up crown molding (although I would suggest it) you may want to use a utility knife and straight-edge for your cuts. It did take us several nights of work to get them all up, mainly because the caulk gun started to give me blisters, so we’d max out at around 5 panels per night.
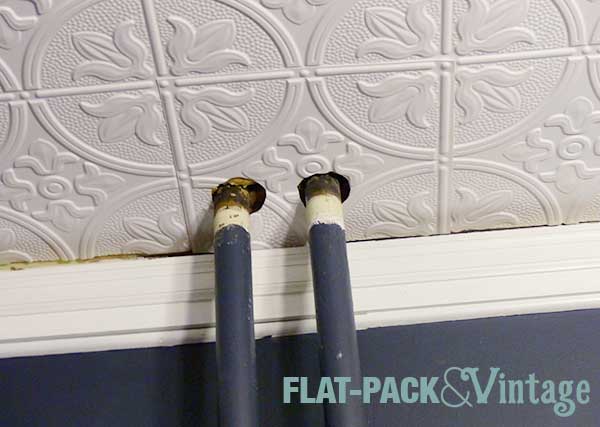
We saved the panel that would go over the radiator pipes for (second to) last because we figured it would be really annoying to get the cutouts just right. We cut out one of the squares from the pattern so we had a big gap around the pipes. Then I tested the cuts on some poster board and used that as a template. Using some of our scrap pieces, I used a straight edge to cut out a single square (I cut just to the outside of the pattern sections that overlap so it would fit into place) and traced my template onto there. Now it was much easier to manipulate a single square around the pipes. We wedged it into place and pulled down the edges to add the adhesive (it would have gotten everywhere if we had put the adhesive on first). Sorry I don’t have more pictures of this… I got sucked into the process and neglected my camera.
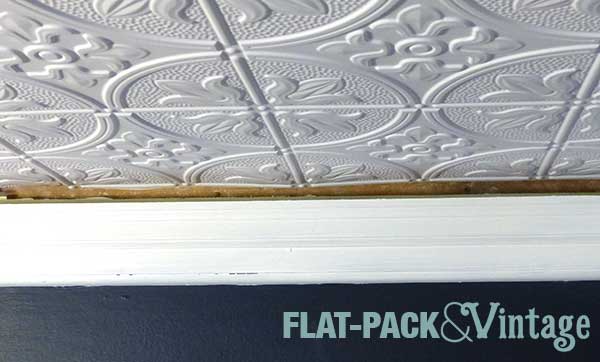
Because the previous tiles were stapled onto 1×2’s we were left with a small gap between the crown molding and the ceiling. No bueno.
We could have just moved the existing crown up, but I decided to add on to what was already there. I found some approximately 1.5″ cove molding at Menards (I can’t find it on their site, otherwise I would link) which was exactly what I was looking for! Now the crown molding sort of curves into the ceiling.
Crown molding is an absolute beast to put up by the way. It’s an exercise in geometry and I’m pretty sure luck plays into it as well. Uneven, not square walls make it especially beastly. Basically I’m saying I’m not even remotely qualified to give you a tutorial on installing crown molding because we’re not even entirely sure how we managed it at this point. There are tons of tutorials out there on youtube though. Good luck.
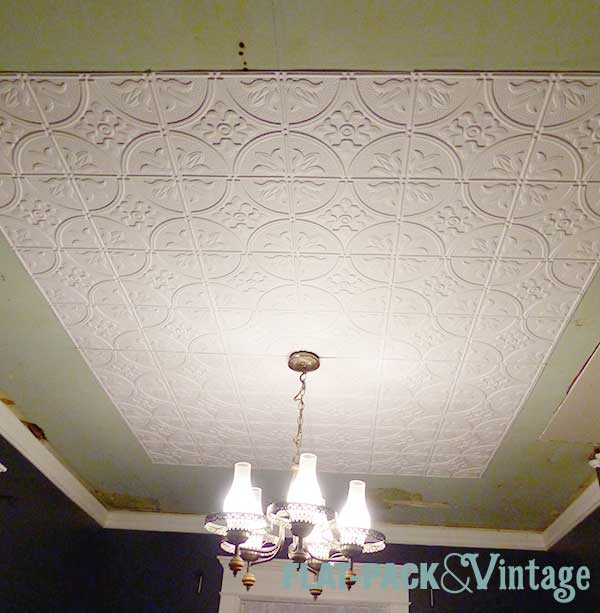
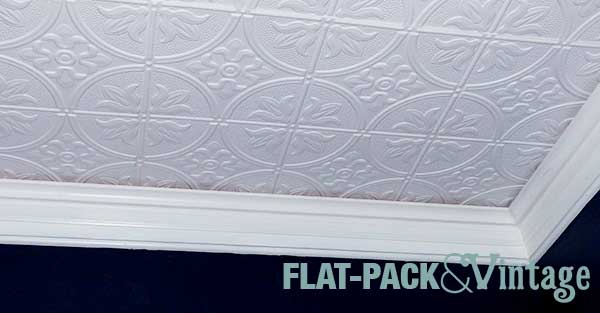
And now we have an actually nice looking ceiling! Pretty amazing right? I think it’s amazing a least, so please just humor me here….
The electrical box for the light sticks out a little bit because of the drop in the previous ceiling, but we should be able to find either a canopy or medallion that will hide that. Our new light fixture has been ordered and is on its way so the end of this makeover is in sight!
*You’ll need LOTS. I originally picked up 3 tubes, then went back for another 12… we ended up using 11 total for our 150sqft ceiling
Our dining room ceiling was pretty sad when we moved in: fugly acoustical tiles and unfortunate saggy bits. Something needed to be done.
I pretty much assumed that there was some reason that there were acoustical tiles there instead of plaster, so I wasn’t terribly hopeful for the condition of the ceiling underneath. I figured the safest course of action would be to plan on covering the ceiling. Added bonus, a faux tin ceiling would be a pretty snazzy, and fairly period-accurate detail for the house and it would bump up the formality of our dining room a bit.
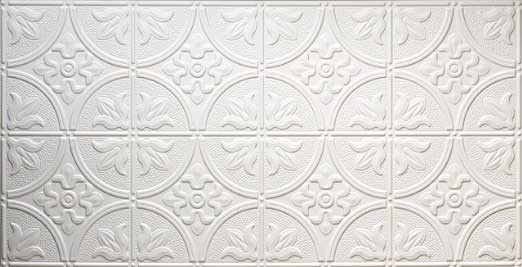
After doing some research and crowd-sourcing ideas from Facebook, I decided on this pattern:
It was one of the more affordable options (yay!) and after looking at a few companies who still used the same patterns they did back when they made actual tin ceilings, this one popped up a lot. You can find it in several different scales, but I opted for the 2-by-4 so each square on the panel would be roughly 1sqft. This was the same size as the existing titles so I already had a good reference for how it would look.
Immediately after moving into the house we had several things tested for asbestos, including the ceiling tiles. I knew we were planning on ripping them out and I wanted to be sure it was going to be safe to DIY. Thankfully the test results came back negative so we were good to go!
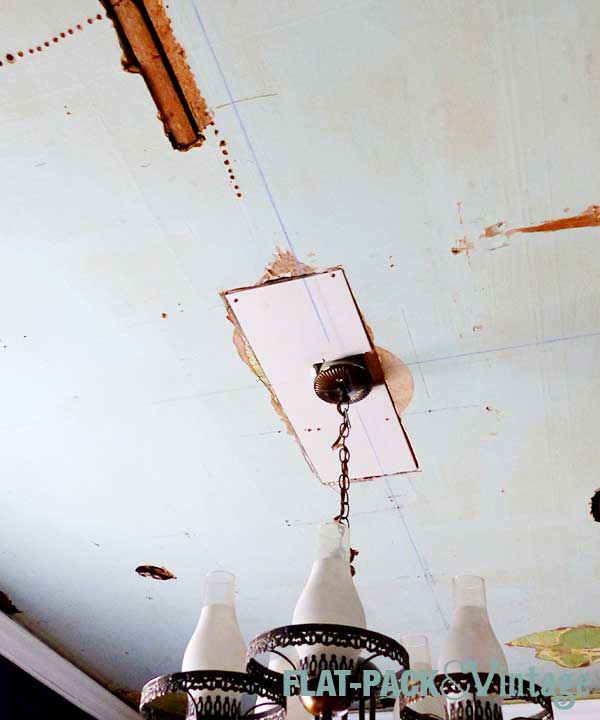
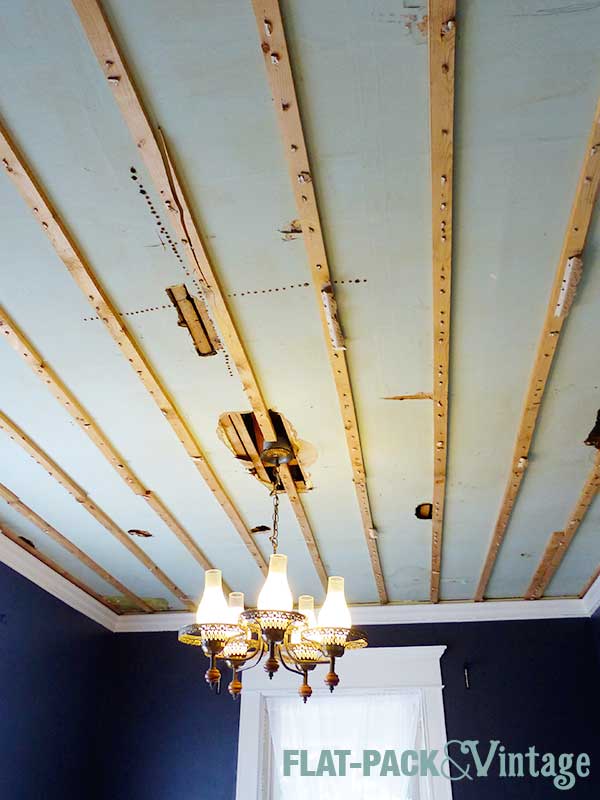
My back has been killing me for the past couple weeks so Matt removed the ceiling while I curled up with a heating pad and researched massage therapists. And yup, it was more-or-less what I expected to find underneath (except there was modern wiring!!!!)
We originally thought we were going to keep the 1x2s so we wouldn’t have to mess with the height of the crown molding. This did mean we had to pull out all the staples, which Matt did over the course of a couple evenings.
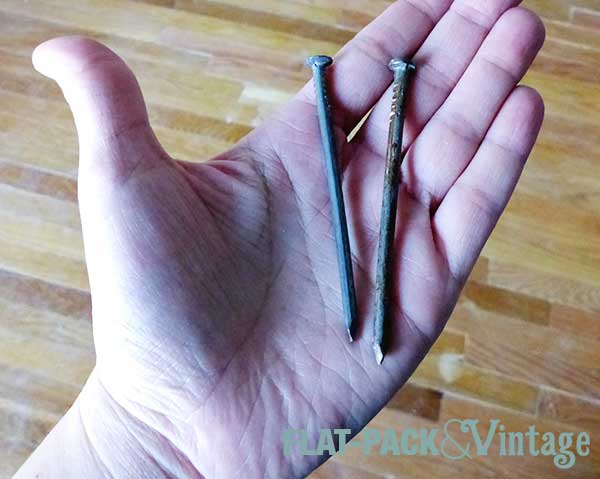
Then the tiles arrived and we re-assessed matters. After going back and forth a bit we decided that prying out the boards and semi-patching the holes would make putting up the tiles way easier in the long run…. so Matt went to work prying off the 1×2’s. It probably wouldn’t have been so bad except a former owner of this house was clearly a strong believer in overkill so a number of nails holding up the boards were HUGE.
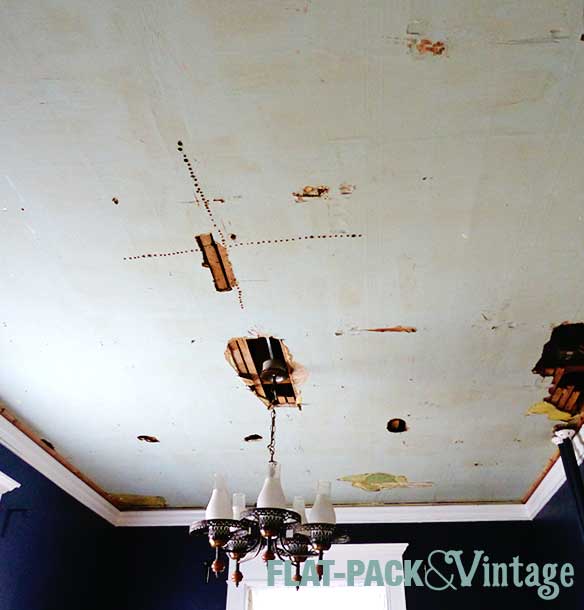
Matt pulled out most of the boards without incident, but there were two runs that were clearly put up before the crown molding was so there wasn’t enough space to pry the nails entirely out. We tried a metal hand saw, but it while it might have worked on a sheet of aluminum, it wasn’t going to get through a chunky steel nail. So we went shopping.
There are some good options out there, like reciprocating saws and the Dremel Multi Max, but we didn’t want to spend a lot. We eventually settled on a pair of 14″ bolt cutters which were just small enough to fit in the little gap we made after prying the boards as far away from the ceiling as we could.
After prying off all the boards, we had to deal with the two biggest holes (we decided the smaller ones shouldn’t be a serious issue). Matt removed some extra plaster to make the holes squarer and then we cut and screwed up 3/8″ drywall. We didn’t bother taping and mudding because it’s not going to be visible, we just needed a solid surface to glue the tiles too.
As with any project, prep-work is half (or possibly even three quarters) of the battle, but all the extra work should make the tile install go much smoother.
After fighting with them for a week, the dining room baseboards are now installed and they look FABULOUS! Trying to mimic Victorian baseboards with trim you can find at an accessible hardware store can be a bit of a pain in the ass, but guess what? It’s doable! It’s not exactly cheap (it cost us around $200 for a 150sqft room), but it is still reasonably affordable.
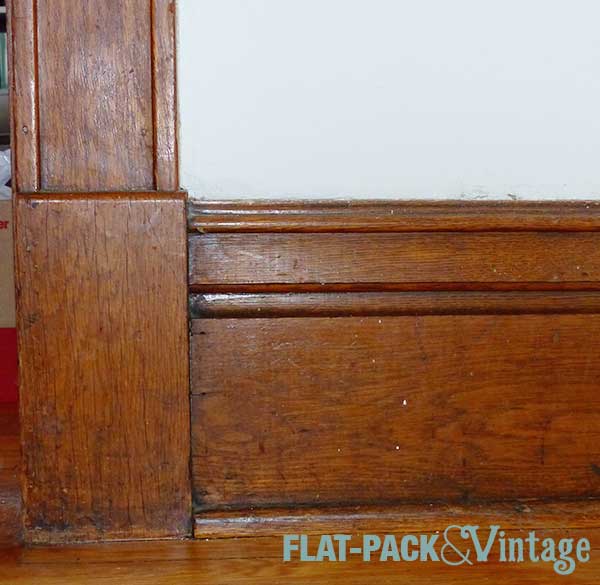
To recap: This is what the rest of the house has that I was trying to at least somewhat match.
And I ended up being my neurotic self and choosing a 4 part baseboard option.
(This image isn’t exactly too scale since, so the base cap really isn’t that chunky)
If I hadn’t had a specific plinth height to work around at all the doorways, I probably would have gone with a 5 1/4″ baseboard, the chair rail, and quarter round since the look would be very similar, but about an inch or so shorter than what I needed.
I’m pretty sure I saw all the same pieces at Home Depot, Menards, and Lowes (I’m positive of everything except the base cap), but I ended up buying the Chair Rail and Base Cap from Lowes and the 1×6 (select pine) and quarter round from Home Depot, just because I happened to be at Lowes when I had my trim meltdown.
When buying your trim pieces, not only do you need to measure your total length of trim, but you should also calculate how many pieces you’ll need to avoid as may same-wall joints as possible. Example: our longest wall was 15′, we could only fit 8′ boards into our car so after cutting pieces to fit that wall we’d have 1′ of board that would effectively be dead to us since we don’t have either a 1′ long run or a 9′ long run anywhere and piecing in a 1′ long piece unnecessarily would look a little awkward (you want to try and limit as many seams as possible). Basically just be aware that you may have to overestimate more than you might think.
I decided to paint everything before installing it (although you will still need to fill and touch up your nail holes later on). I used 2 coats of primer (the bare wood absorbed quite a bit of the first coat so I decided to play and it safe) and then one coat of Benjamin Moore Advance.
After everything was dry, I moved on to the install. Matt and I decided to buy a brad nailer for this very purpose since, let’s be honest, while you can definitely hammer everything in by hand it will be a beast. We also have other trim we’ll be replacing in the house later on so buying seemed like the best option. Most hardware stores have tool rental options you could look into as well.
We started off with the easiest section of wall–single length of board, no miters. You want to measure as precisely as possible because if you cut your pieces too short they’ll be gappy, too long and they won’t fit.
I dry-fit after each cut: cut my 1×6, dry fit; cut my base cap, dry fit; cut my chair rail, dry fit. This way I could figure out after one cut if I screwed up my measurement somewhere before possibly ruining any of the other pieces.
I felt like a champ after doing this bit! It fit together like a dream and looked perfect! I was on top of the world! I was going to conquer this dining room in less time than I thought!
And then I moved on to a corner.
Oh sweetzombiejesus kill me now.
A pretty well known fact about old houses is that nothing is square. As a teenager I once watched my dad, my aunt, and my uncle work to install a hardwood floor into a 150 year old farm house… you think I would have learned something from that. Apparently not, but here’s my best advice for tackling a baseboard install.
1- Dry-fit ALL your pieces before nailing anything in.
I started by working wall-by-wall (luckily only with the 1×6) and at my very first corner I hit a snag (see above re: walls not square). So I had to rip off the first board and yank all the nails out of it. Ugh. THEN I did the same damn thing while trying to join the boards on the long wall. *headdesk*
Also, pick a start point and work consecutively from there. If you have sections of walls that don’t have corners you can do those independently. Otherwise though you want to go in order rather than trying to make something meet in the middle. We had a couple spots where we had to shim up the 1×6 to make it level with the previous board and other places where we had to grind off a bit of the floor to make a piece sit level (what we took off from the floor was entirely under the previous baseboard and was a combination of some sort of adhesive and a height change from years of refinishing the exposed floor).
2- Keep your saw close by
We keep our miter saw in the basement so I had maneuver 8′ boards up the stairs and around a couple corners and sometimes the cuts require a bit of tweaking so I’d to haul them BACK downstairs and back up again. This virtually destroys my motivation. After 2 days of not much progress we shoved the dining room table into the living room and I moved the saw into the same room I was working in.
3- Saw blades have width
I actually knew this before starting, but if you’re new to power tools this is worth noting. Basically, when you’re going for very precise cuts where you line your saw blade up with your cut mark matters. It’s also why if you’re cutting multiple lengths out of one board you don’t mark off all the measurements an then cut–you’ll get progressively more off the more cuts you make.
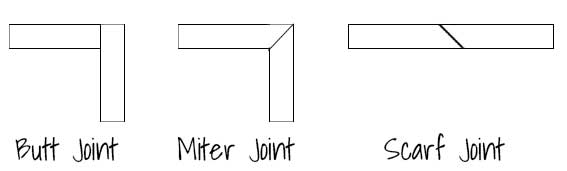
4- Know your joints
There are 3 main types of joints you’ll deal with for trim: butt, miter, and scarf.
You can use a butt joint for corners when you have straight pieces (I used it for the 1×6’s). You can also do a version of a butt joint with fancier trim pieces; this would be a coped corner.
The other option for corners is a mitered joint, but this can get finicky when your walls are not square. If you’re painting the trim and it’s just a little off, it’s not a big deal because you can caulk the gap unless it’s ginormous.
The scarf joint is for joining two straight pieces of trim because most trim you find will be 8-10′ long and many walls are longer than that.
5- Cut your longest pieces first
This way if you screw up you can just keep cutting them down and use them in a shorter space. I managed to do this without even thinking about it–go me!
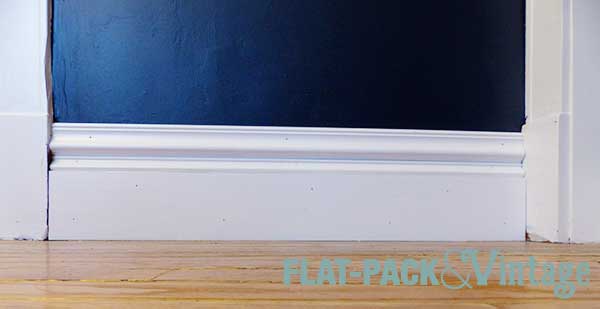
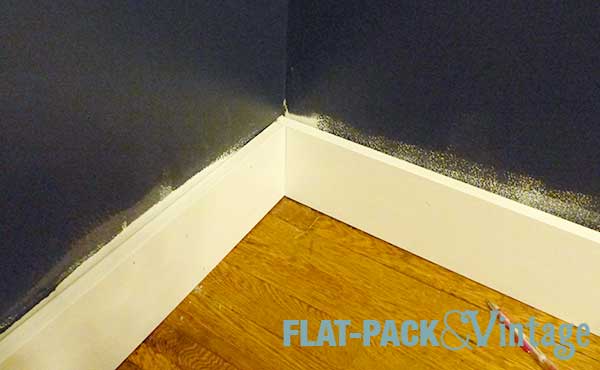
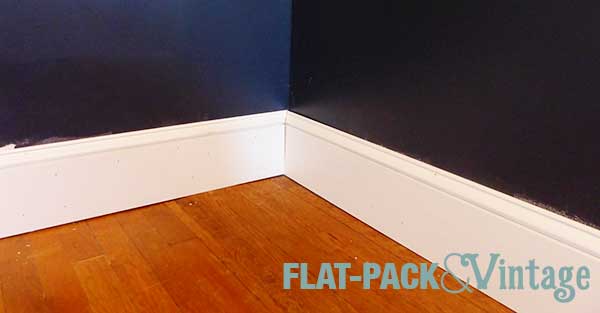
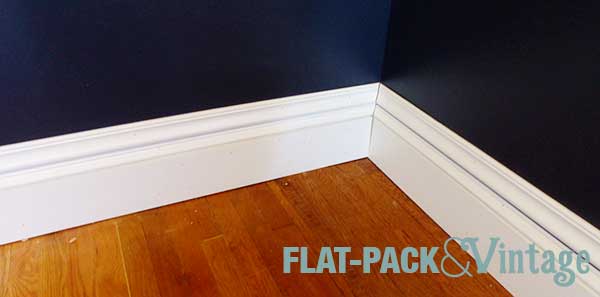
So after a couple of false starts and a few headaches we got all the baseboard molding up!
The 1×6 was the worst to deal with–it’s not flexible and has the most area to line up well for corners. I opted for butt joints with this because the mitered corners were not lining up well at all. It also didn’t help matters that the miter saw would slide a little on our hardwood floor, making some of my cuts off because the board I was cutting would no longer be square against the blade. ARGH!!!! This took a couple evenings of work, but getting the first layer installed well would make everything else a lot easier.
Next up I added the base cap. SO much easier. I was able to knock out this layer in about an hour and my scarf joint were much, much cleaner.
And finally, the chair rail.
I still have to add the quarter round, fill the holes, caulk any gaps, and touch up with paint. The worst is over though and it’s looking good!
*I don’t think any reasonable person could truthfully admit that they wouldn’t have even considered that title.
I’ve been on the hunt for baseboard molding for a couple weeks now. We have to replace all of it in the dining room because chunks were cut out behind the bookcases and we’d never get a perfect match unless we had someone custom make it. So I’ve been trying to find something with a similar weight and style to the rest of the house.
Finding something comparable to Victorian trim in today’s shops is hard. The existing trim was about 10″ tall and you can’t detour too far from that height because there are 10″ tall plinths at the base of all the door moldings and it’s designed to be a similar height as the baseboards.
I figured I’ve have to get two different trim pieces (technically 3 once you figure in quarter-round) and that’s even how the existing trim was made. The trouble was that I couldn’t find two pieces of trim that, when combined, gave me the look I wanted at the height I needed.
At this point normal people may have settled. It’s clearly what happened in our kitchen and it’s not bad… but the base trim is barely visible in the kitchen and will be quite prominent in the dining room given the contrast with the walls.
Also, I am far from normal.
After being disappointed with Home Depot and Menards I trekked out to West St Paul to hit up Lowes. At this point I was ready to buy trim come hell or high water. I spent a good 45 minutes there laying out different combinations of trim on the floor and muttering to myself and eventually I settled on a 4 part baseboard plan. (FYI: All the stores seem to have nearly identical trim options).
It goes as such:
Because that’s not going to be a pain in the ass to install at all.
Since we’re painting, I went with pine for all the pieces since it’s inexpensive (and the MDF was more warped and I think the plasticy stuff is just gross). I chose Select Pine for the flat base piece because it’s straighter and less knot-y than standard pine boards and paint won’t hide knots.
This weekend we also picked up a new toy to help us with the install.
Wheeeeeee! I did NOT want to hammering in 4 different types of trim pieces by hand. Plus, we’re also going to end up adding on to the crown molding AND we’re going to redo all the moldings in Matt’s study at some point* AND fixing some broken quarter-round throughout the house so this seemed like a reasonable investment vs renting. Plus it’s cordless and doesn’t require a compressor, how cool issat???
Pro-tip: If you go with cordless tools, try and stick to the same line so the batteries are interchangeable. We’ve opted for Ryobi since it seems pretty well reviewed for the price point (not necessarily for the professional user, but good for the homeowner with some projects, i.e. us). Added (and completely useless) bonus: I love the green color.
We were originally hoping to install the baseboards this weekend, but since I didn’t pick out trim until Thursday night and it all needs to be primed and painted, this is the current state of things:
(Isn’t our basement lovely?)
and this:
But it’s going to look spectacular!
*Somebody really hated that room. It has the same janky ceiling tile as the dining room, trim that belongs in a 1950’s ranch and walls that appear to have been paneled and then heavily painted? Poorly skim-coated? Something… Needless to same that room does not quite match the rest of the house.
Last week I went over my favorite tools and products for painting. Today I’m going to cover my process for painting walls. Painting walls really isn’t difficult so if you have the time and aren’t afraid of getting a little messy it’s probably not worth hiring out,* especially if you’re working on a budget.
There are multiple different techniques for painting, but this is what works well for me. If you’ve got your own awesome tips, tricks, and techniques feel free to chime in in the comments!
If you have carpeting, you’re going to want to drop cloth the bejeezus out of it (unless you’re planning on replacing it, then make sure you paint first and voila! Built-in drop cloth). I’ve had hardwood floors for years and, um, don’t actually do much of anything to protect them. If you drip a little paint you can wipe it right off while it’s still wet and even if you don’t catch it before it dries you can scrape it off or use some Goof Off. I really just use a big scrap of cardboard to pile my roller tray and paint can on and just shove it around the room with me as I go. Carpet is not as forgiving, so you’re going to want to be careful about protecting it.
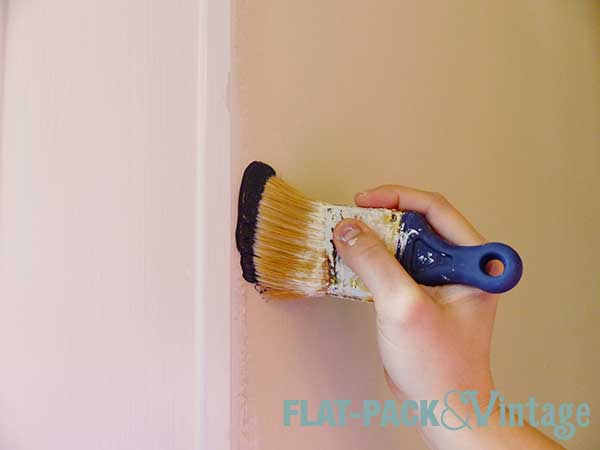
Cutting In
I start by cutting in. In a perfect world you’d keep a wet edge everywhere you go, but if you’re working solo that’s not always practical. I cut in using a 2″ angled brush (I hardly ever tape anymore) and make sure I cover at least 4″ or so away from the edge so I don’t have to worry about my roller bumping the ceiling or trim. When cutting in you also want to feather out your wet edge so you don’t end up with a line as it dries. Basically, once you have most of the paint off your brush (or edger) come back over inner edge of your paint and smooth it out any excess paint.
To get a nice clean line (without tape!) I start by dipping just the tip of my brush into the paint.
***It’s important to have a good brush if you’re going to do this. I used a crappy one once and it was a gigantic mess! I’ve been super happy with the Wooster Shortcut for cutting in and I think the short handle makes it very easy to control.***
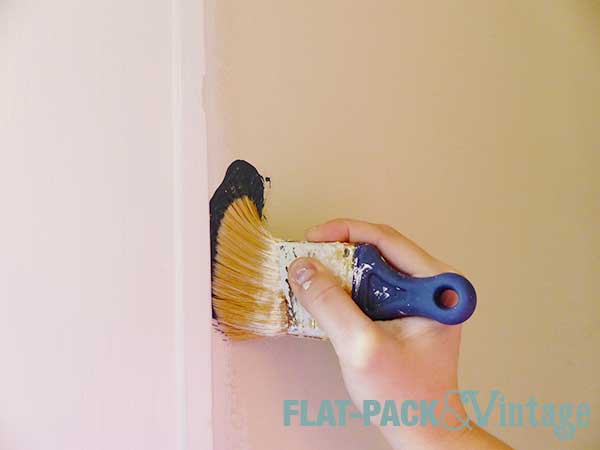
Set the brush down on the wall a little bit away from the edge,
Then smoosh the bristles down a bit so they fan out slightly.
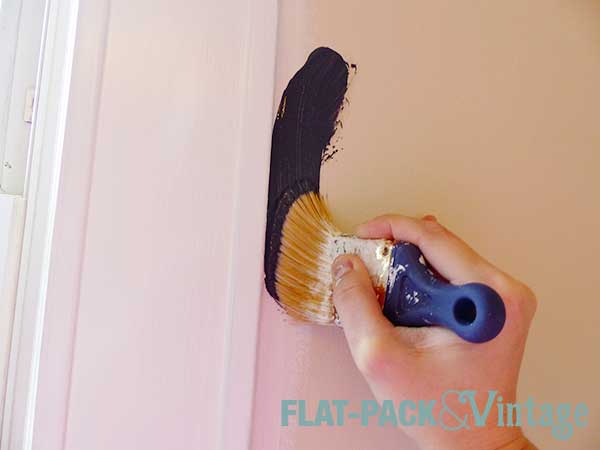
Then slowly sweep the brush towards the edge.
And finally, drag the brush downward (or across for horizontal edges) keeping only the very tip the bristles against the edge. You can see I also still keep the brush at a slight angle so only a small section of it is coming into direct contact with the trim.
Work slowly and don’t load too much paint onto your brush. If you’re worried about your cutting-in skills, you can still tape your edges and practice to see how much paint really ends up on the tape.
Walls
The open areas of walls are the easy parts. Load your roller up with paint and then use the textured part of your paint try to roll off excess.
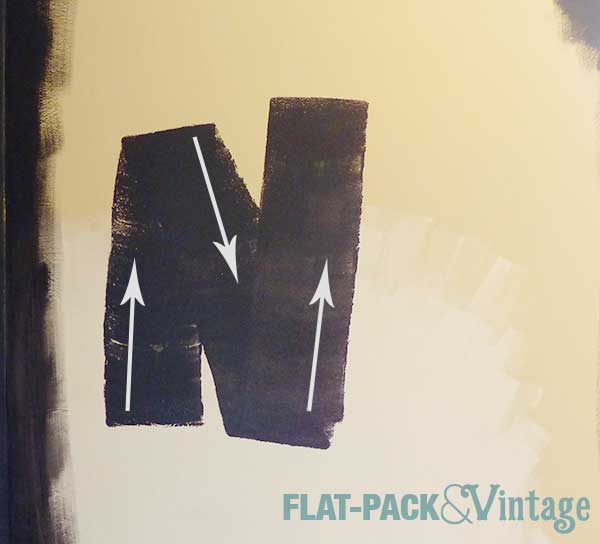
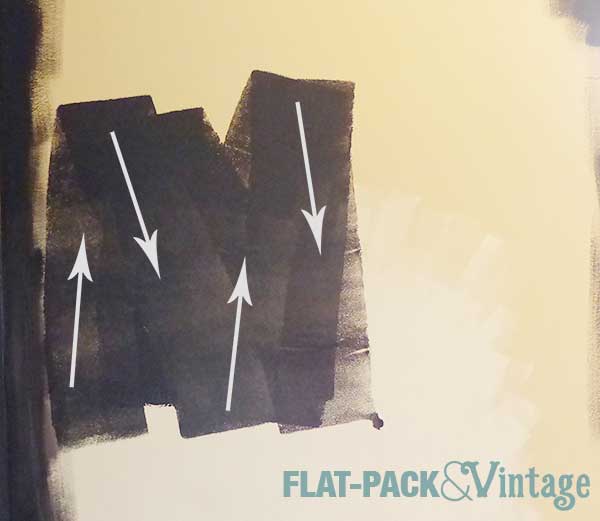
I work in a N pattern on the walls (most people say W, but I tend to actually make an N or M)–roll your paint on in a 2-3 foot N….
….and then roll right back to fill it in. This distributes the bulk of the paint from your roller and then spreads and evens it out as you come back over it. I set my roller down to get the picture so I starting rolling again on the same side I started with. If I’m not pausing in between I’d naturally roll my N then double back the way I came, just slightly off-set… whatever works.
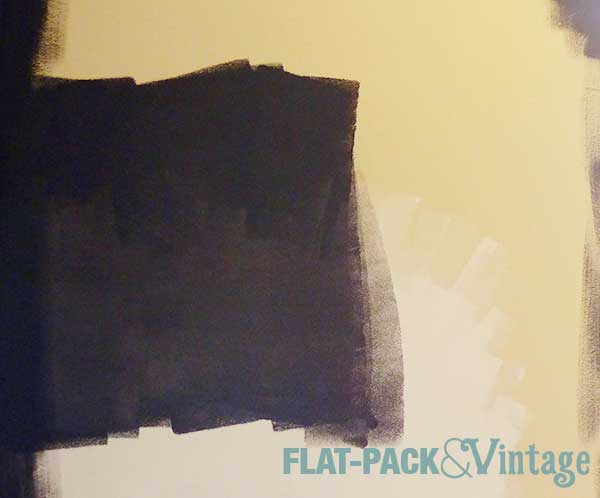
Your may have to go back and forth a couple times to fill it in nicely, but don’t add more paint to your roller, just work with what’s already up on the wall.
Once you’ve filled in your N then you can go back for more paint. Start a new N (or M or W) shape, slightly overlapping your previous section and repeat.
When working with a roller make sure you don’t have too much paint on it (it should be saturated but not dripping) and roll slowly. This will minimize both paint drips and spray from the roller. You also want to slightly overlap your previous section each time. This keeps a wet edge and helps each section of paint better blend into the other. You also don’t need to put a lot of the pressure on the roller–remember, you’re rolling, not scrubbing. If you find yourself scrubbing with the roller it’s probably a sign you need a new cover.
If you need to stop partway through (waiting a couples hours until the next coat, ran out of time for day, etc) you don’t have to wash out your brush and roller. Wrap them in plastic wrap, and if you’re not picking back up until the next day, stick them in a cool place like the fridge (we were out of room in our fridge, but our basement’s pretty cold so I stuck mine there).
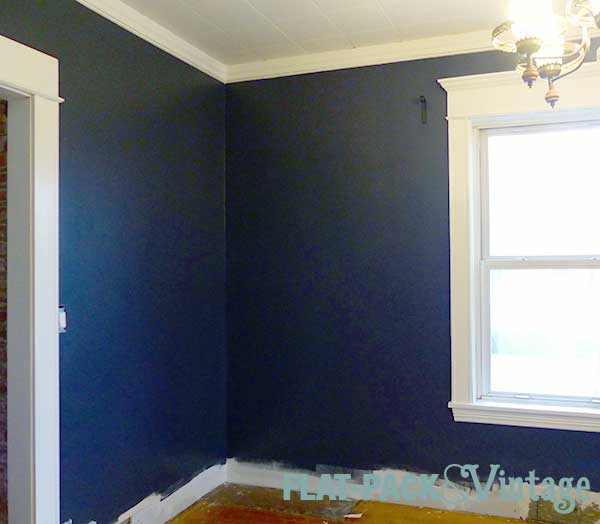
No too scary, right?
Also, how absolutely amazeballs does this color look????
*Super tall walls and stairwells are TOTALLY worth hiring out in my opinion, but I’m not so good with ladders. Also ceilings. Painting ceilings is a bitch.
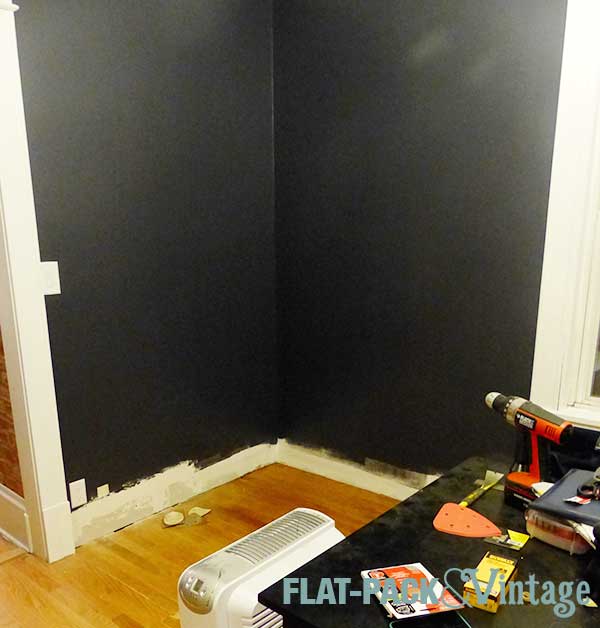
I’ve been obsessing over this patch job for WEEKS now! The better the mudding comes out, the better your paint will look… especially if you pick a paint with any sort of sheen to it–that sheen will just make every imperfection pop. I happen to like eggshell for walls, it’s not shiny, but it’s not flat either (and if you have kids or a tendency to beat the crap out of spiders you find on your wall, you really don’t want a flat finish because it’s not cleanable At All).
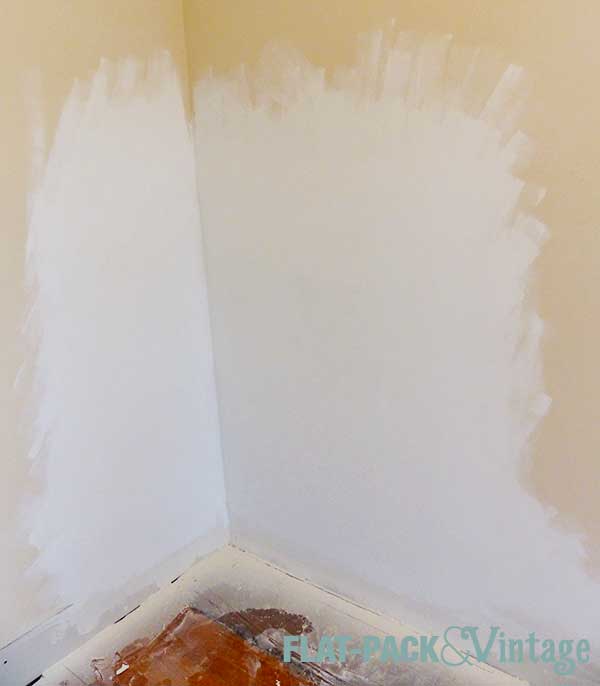
Eyeballing your finish isn’t quite enough; if you really want it to turn out well run your hand over it. You’ll end up feeling bumps you might not have caught otherwise.* After things were feeling pretty good with the hand test (not perfect mind you, but pretty good) I went over everything with a coat of primer. Once everything’s an even color it’s also easier to pick out areas that looks a little off, just make sure to check it out as the lighting changes throughout the day.
I was crazy happy with how good the spot looked after priming. 1) It looked way more even than expected and 2) the texture left the primer and roller seemed to be just enough to match the subtle wall texture that was already there. I was a little worried about that and had started to look into some of aerosol texture sprays, but think we may be ok!
I also (mostly) finished painting the trim. I started last week on our day of rest after Vegas and got one coat of paint on about 1/2 the room. This weekend I got almost everything else done (I couldn’t reach everything since our table is shoved against one wall, so I’ll be working in sections). Trim is the most tedious thing to paint I think. Walls are a piece of cake, but trim… it’s more of a souffle–time consuming and finicky.
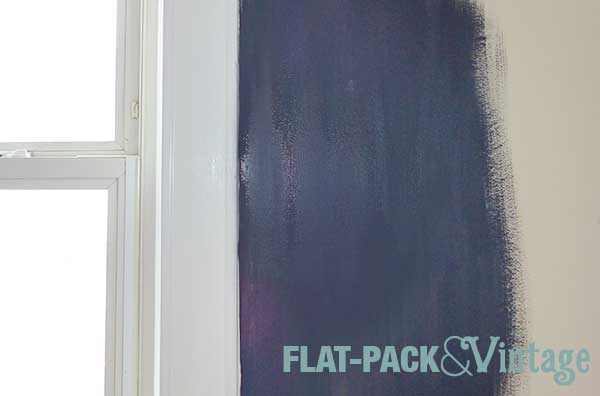
Because I’m impatient, I also put a little patch of paint up to see how it looked against the trim.
SO excited to get this room painted!
I switched my day off for this coming week from Monday to Wednesday to help out a co-worker and it ended up working well for me too. I get a break from manual labor and can hopefully dive into painting on Wednesday. Karma.
I spent the last week working on smoothing out the patch job. It’s a fairly timing consuming project since you have to wait for the previous layer of joint compound to fully dry before you can add another… which pretty much means waiting a full day in between coats.
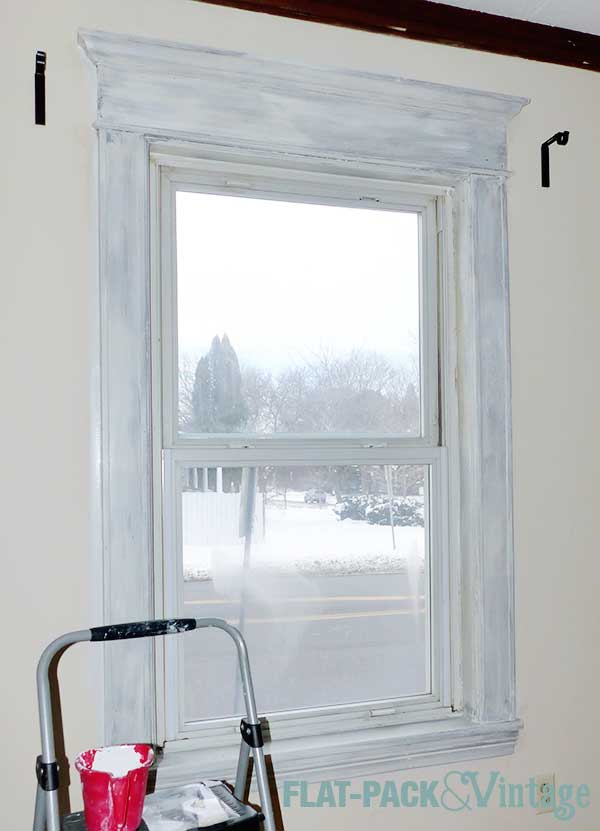
With the walls well underway I decided to start tackling the trim. The baseboards are going to come later, but I wanted to get the door and window trim and the crown molding painted before painting the walls. I think it’s easier to paint trim first (personal preference) and I could knock out the trim while still finishing up the patch job on the wall.
Priming isn’t that exciting, but solid prep-work is important. All the trim got wiped down with a liquid deglosser and then got hit with a coat of primer. What I’ve read about using deglossers is that they tend to lose their effectiveness if they sit too long, so I worked in small sections. Deglossed the kitchen doorframe, let it dry to the touch (about 10 minutes), primed. Then I moved on to one of the windows, degloss, dry, prime… next window, etc.
I’ve been using Bulls Eye 1 2 3 primer and have been pretty happy with it. If you can stomach it, an oil-based would be even better, but it’s cold here and the windows are staying closed. No matter which primer you choose just make sure to follow the directions on how long to wait between coats because if you don’t give it enough drying time it won’t end up bonding as well as it should.
If you’ve never primed anything before, don’t panic if it looks splotchy and awful, because it will. It will make your top coat(s) look SO much better though and it will reduce the number coats you’ll need.
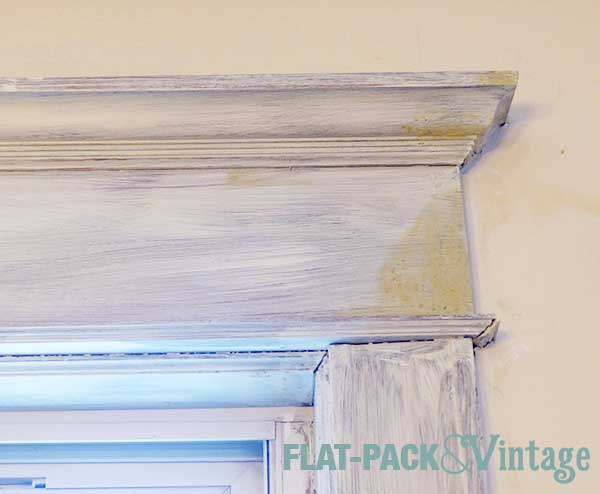
After priming, a bunch of old nail holes and assorted wear spots popped up. I should have touched them up before priming, but I wanted to illustrate the shape our trim was in.
All the top edges were like this from years of, I dunno, mounting curtain hardware directly to the trim? There were also holes and chips like this everywhere. Bits of the decorative moldings were chipped and the inside frame had gouges around the nail heads holding it in. I didn’t manage to get a good shot of the sill, but it was even worse.
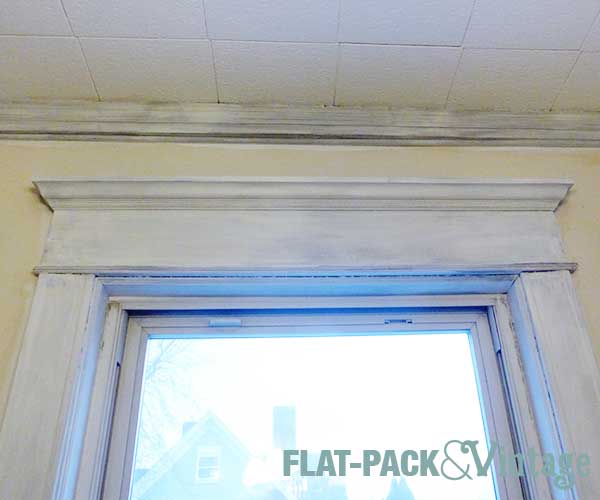
I touched them up with wood filler and then went back the next day to sand and spot prime.
I’d say it’s looking better, but it really still looks like a construction zone here.