A few nights ago Matt commented to me that our house has too much flat-pack and not enough vintage.
CHALLENGE ACCEPTED!
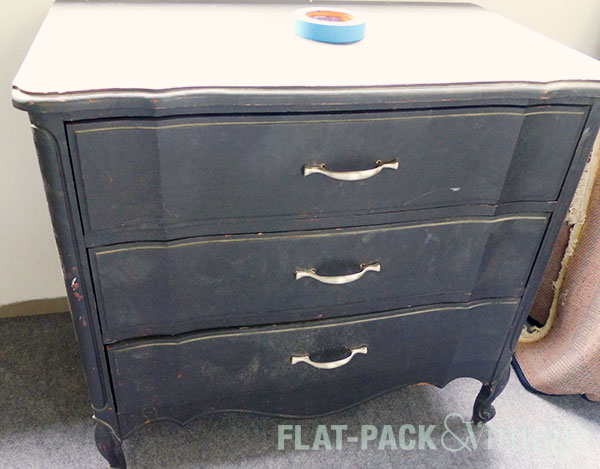
The very next day, I found this beauty on the side of the road.
I literally did a double take as I drove by, but continued on to pick up my son from daycare. We swung by on the way back home for some Mommy-Son bonding time (read: he cried while I muscled this thing into my minuscule car and drove a block with my trunk open #safetyFirst). The drawers need some repair and the whole thing needs refinishing, but it’s all completely doable and I even have a spot for it in our living room.
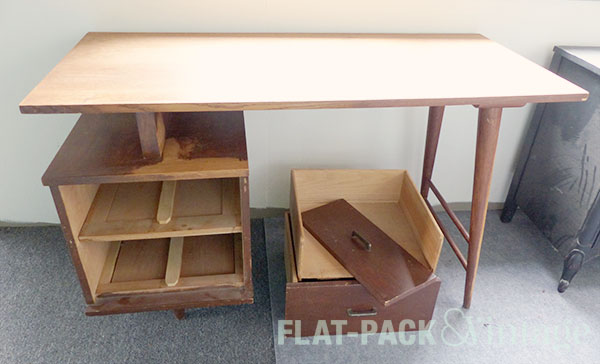
On Saturday I had a friend visiting from out of town, so naturally we went to the cluster of antique/vintage stores. Outside of one was a shabby looking MCM desk that was clearly in the process of being rehabbed. All the repair/refinshing work was stuff I could do, so I scored this puppy for $40!
One of the drawer fronts needs to be re-glued, the damaged edging needs to be pried off and replaced, and the whole thing needs to be stripped and re-stained. Someone must have refinished it at one point and did a TERRIBLE job with the stain. It’s splotchy and streaky and horrible, which means it just needs to come off. I’m currently planning a dark stain with white drawer fronts, I just need to figure out what hardware I want on the drawers…possibly cup pulls, we’ll see.
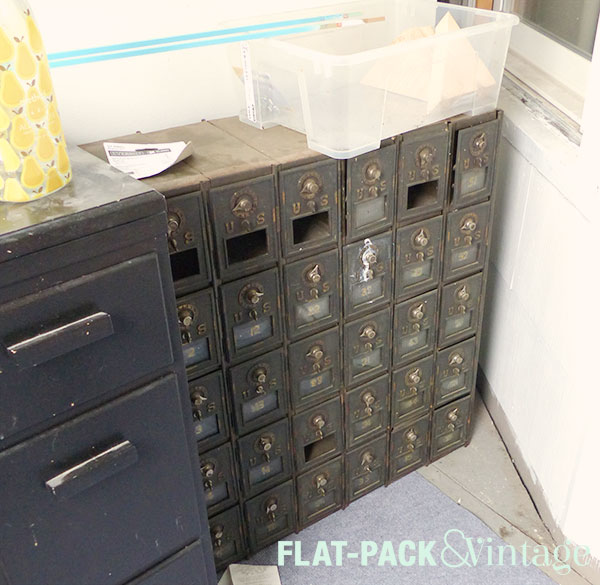
I also (still) have my bank of vintage post office boxes. I love these SO much, I’m just unsure how I really want to finish them.
They also got some paint on them while I was working on another project. I tried to wipe it off right away and failed, so now it just looks like a bird crapped on it. Classy.
On top of all of that, I have a vintage sewing machine table. The machine is fabulous, but it’s built into the table which was causing space issues in our study layout. I bought a new sewing machine and this one is going to my mom. If I get in a serious refinishing groove, I’d like to try and strip and re-stain this as well… especially since I’m responsible for the black paint. We all make poor life choices at some time or another….
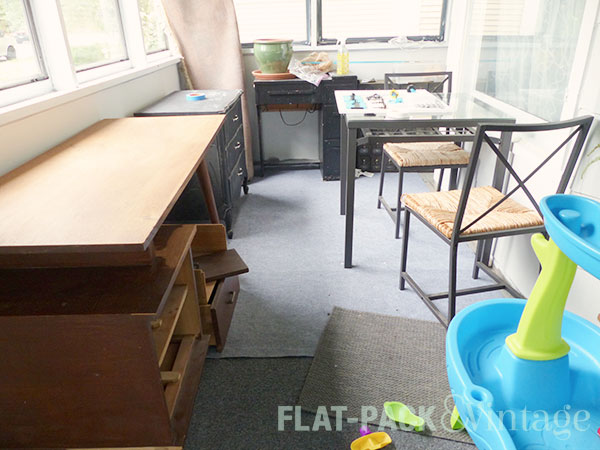
So with all of that, this is the current state of our front porch:
Please don’t report me to Hoarders…
In the past I’ve done refinishing work out here because the space is well ventilated and enclosed (plus, the carpet’s crap so I don’t have much guilt if I drip something and it misses the dropcloth). Unfortunately, I don’t want this to be a working space with Wesley crawling around because there’s too many dangerous things a baby can get into in a refinishing project. I’m probably going to end up setting up shop in our garage and trying to get everything done before it snows.
In semi-related news, I passed a furniture refinishing and repair place that’s hiring. Not gonna lie, I’m really tempted to apply just so I can put “stripper” on my resume. Unfortunately they’re only hiring part-time. Still might be worth it if I could get an employee discount on reupholstering my couch….
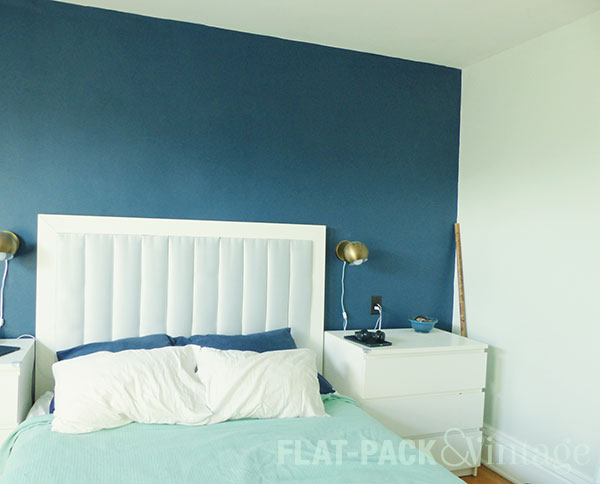
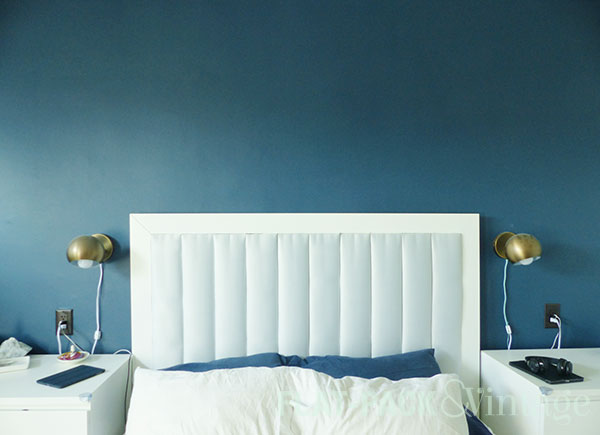
Hey hey hey! We have a new headboard! Did you think you had lost me to baby posts? Yeah… hopefully those will be slowing down and I’ll be focusing more on the house again. If you are interested in some down-to-earth baby talk, I finally did something with my Twitter account. Yup, I’m officially a Twit.
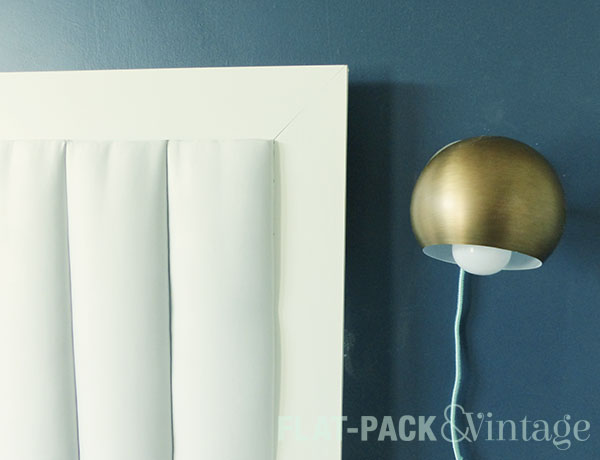
And our new sconces? How cute are they???
We seriously haven’t had a headboard since we moved into this house, so it’s been really nice to finally get this project out of the way. And yes, this was all custom-made and not terribly difficult. If you can use a miter saw and staple gun without losing a hand, this is for you!
Staple gun (+ 1/4″ staples)–an electric staple gun is totally worth it!
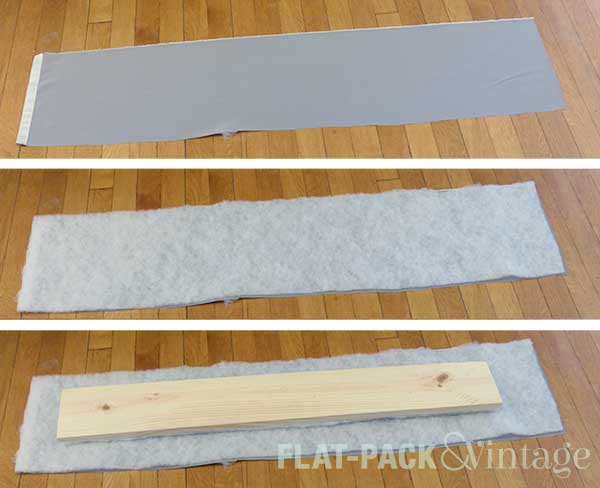
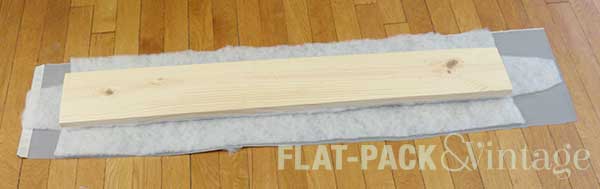
Because we didn’t take our headboard all the way to the floor, we measured from the top of our bed frame (without the mattress) to our desired height. We cut 8 1x6s to this measurement.
I used spray adhesive to adhere 2 layers of batting to each board. The adhesive will help prevent your base layers from shifting, but isn’t necessary. I rough-cut the batting first, then trimmed it to size after gluing it down.
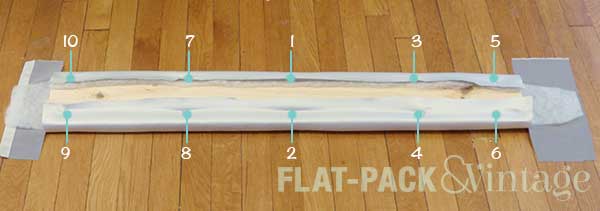
Cut your third layer of batting a few inches longer on each side–you’ll need enough to wrap around the board and staple down. Cut your fabric about the same size.
Lay your fabric on the ground right-side down. Layer your batting, and then your board (fabric side down).
Oh hey, look! I finally remembered to take some pictures! I blame mom-brain (it’s a convenient excuse for everything).
I also cut out the corners of the batting to de-bulk when I got to wrapping the ends.
Starting from the center, staple the batting and fabric to the back of the board. You’ll want to pull the fabric snug, but not super-tight. Work your way around the board, alternating sides.
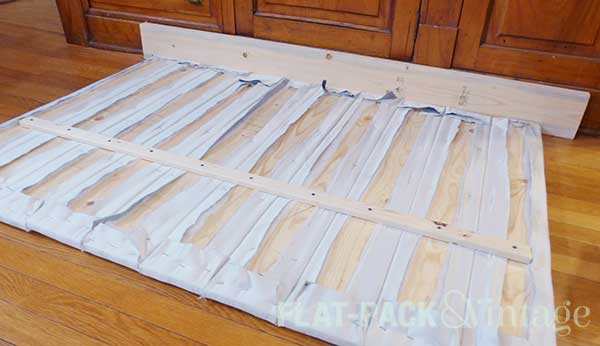
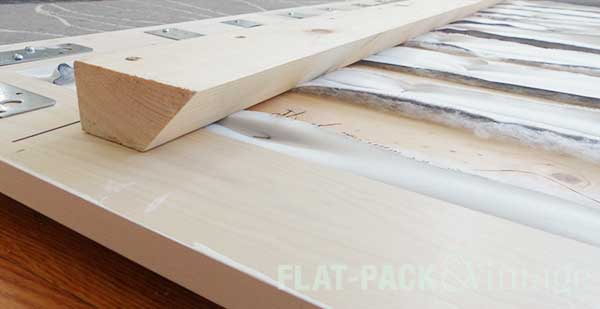
Once all your board are wrapped you’ll need to attach them all together. Cut a 1×2 a few inches shorter than the entire width of the boards. Use a convenient stretch of baseboard to keep the top of your boards lined up evenly (because of our shoe molding, I put an extra board in front of our baseboards). Recruit a helper to pull the boards tightly together as you screw the 1×2 into them. Depending on how you choose to mount the headboard, you may opt to do more rows of 1x2s, but we were attaching some additional boards.
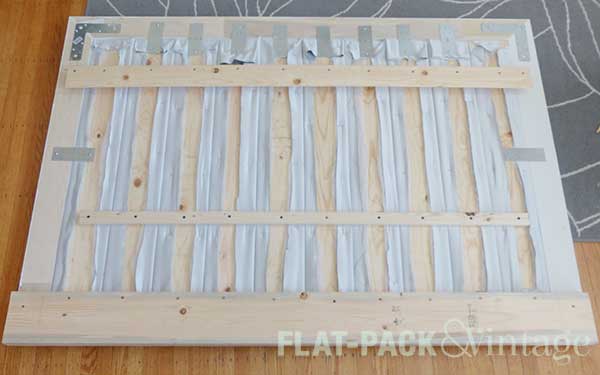
After the panels were secured together, we measured, cut, and attached the frame. First I dry-fit everything to check that everything was cut right. Then I attached the corners together with L-shaped plates. The frame then slipped around the panels and got attached to each board with straight plates.
We added a 2×6 along the bottom to give us an area to screw our bed frame directly into the head board. Our bed was constantly inching forward on our hardwood floors so we wanted to put a stop to that. Only about half of the 2×6 overlaps the headboard, the remaining overhang fills the gap between our bed frame and the wall. If you have less-chunky baseboards, you may not not need a 2″ board here. Just measure the gap between your bed frame and the wall when your frame is pushed up as close as it will go.
At this point, some of you may be wondering why one of the boards of the frame appears to be painted on the back side. This is because my husband–the math major–forgot how angles work.
Matt: I probably shouldn’t have bothered getting the pre-primed boards. I still had to prime one of them again anyway.
Me: Why?
Matt: Because after cutting the first the side piece you need to flip it over to cut the angle for the opposite side.
Me: Or you could just reverse the saw.
Matt: No no, because see, this side needs to be angled this way so to get the opposite angle on the other side you need to flip the board over and…. oh… well I feel stupid now.
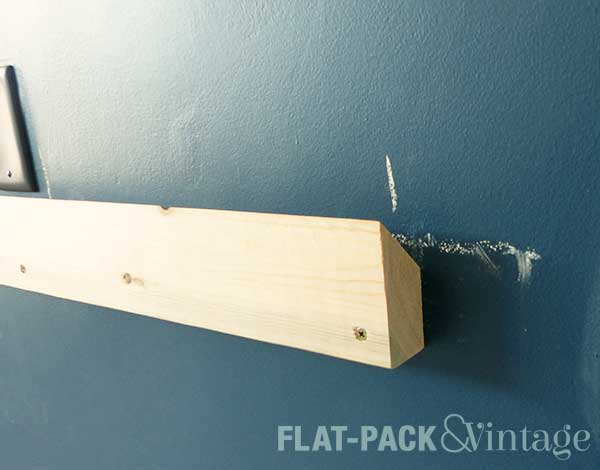
The picture above also show the cleat on the back of the baseboard. Cleats are a great way to mount heavy objects on a wall–the length helps distribute weight while allowing you to hit multiple studs. If you have a table saw, they’re also super easy to make.
We chose to mount half of the cleat on the back of the headboard first and then measure for the correct height for the corresponding wall
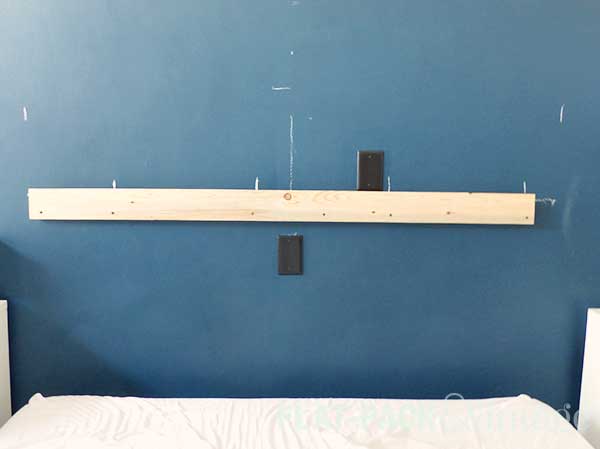
I don’t have a lot of specific guidance for lining up each half of the cleat other than measure. Measure lots. And make chalk mark for guides. It probably easier if your headboard rests on the ground, but ours rests on the top of our bed frame (because we just like to be difficult here).
FYI: That’s not a phone resting on the cleat, it’s just one of the 50 million awkwardly placed outlets in the room. Matt removed the outlets, capped the wires, and put a solid plate over the electrical boxes.
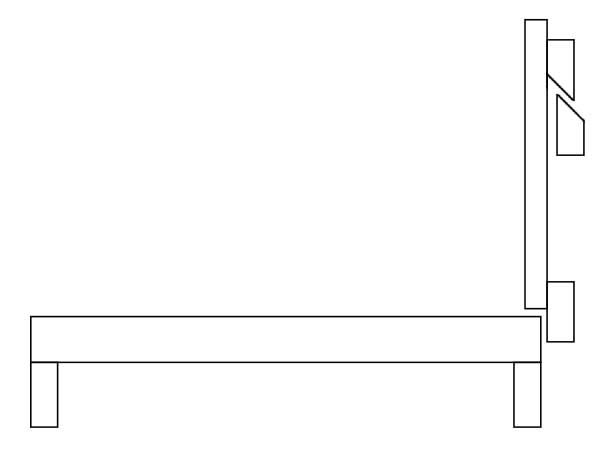
So to recap: The headboard is attached to both the wall and the bed frame. It’s secured to the wall with a French Cleat, and bolted to the frame using a spacer.
.
Awesome diagram, no? One of these days I’d like to install Windows XP on my old (Windows 7) laptop so I can install my copy of AutoCAD again…but that’s a lot of work. #lazygirl
So yay! We have a headboard! And new sconces! Our bedroom is actually starting to come together! I have one wall left to paint (that I won’t be able to fully finish until we take out the window AC unit). I have an area rug ready to go (I just don’t want to put it down until I’m done painting). The biggest element I’m missing at the moment is a pair of nightstands. The dressers aren’t really working there, especially with a lower bed frame…but hey, we’re getting close to done!
The room we use as our TV room is slightly awkward for furniture placement since it would have originally been used as the dining room. We happen to like it as the TV room since the built-in buffet acts as a killer bar and we really like the openness between this room and living room for entertaining purposes.
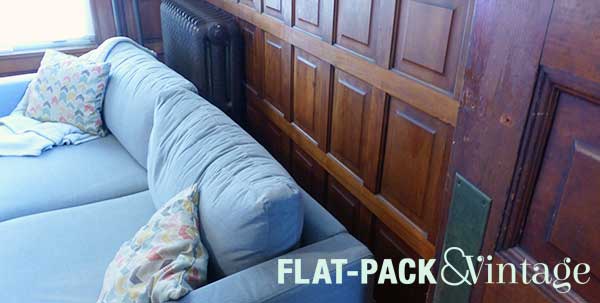
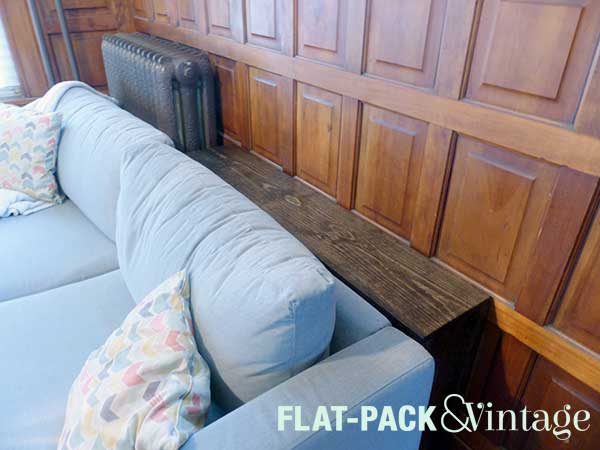
The layout in the TV room has the couch in front of the radiator, which means…
…the couch has a tendency to angle back since there’s nothing to stop the other side from shifting.
Luckily, there was super easy fix. Full disclosure: As easy as it was, I totally half-assed this project. I had no plan and had to redo it once. But it the end it all worked out. I also failed at taking progress shots since I was just trying to get this done in the evenings while Matt was on baby duty.
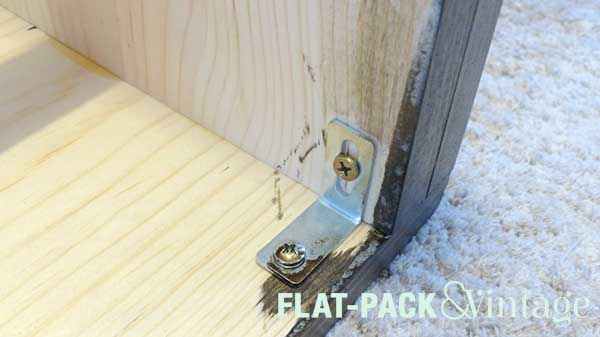
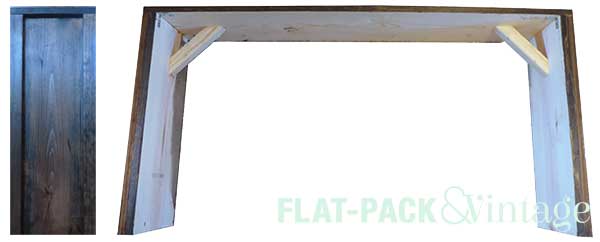
First I picked up a couple 1×10 pine boards, along with a couple 1×2’s. I cut the 1×10’s into 1 board the length of my finished table, and 2 boards the height of my finished table (if your goal is a really exact finished size, technically it’s the height minus 3/4″).
You could move on to construction at this point, but I wanted a little extra detail, so I cut the 1×2’s down to 4 pieces the height of the table, then glued and clamped them down onto edges of the table legs. (You can also glue, then cut everything down to size at the same time)
Once the legs were dry, I glued the tops of them onto the bottom of the table top, making sure to line up the edges as smoothly as possible. After that dried, I reinforced the joint with a couple of small L brackets and assorted tiny screws we had left over from random projects.
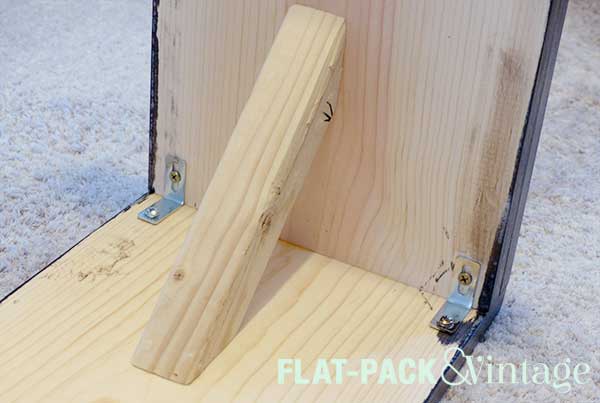
The table was still a little wibbly-wobbly, so I cut down a scrap 2×2 with 45 degree angles at each end to use as a brace on each side. This also got simply wood-glued into place.
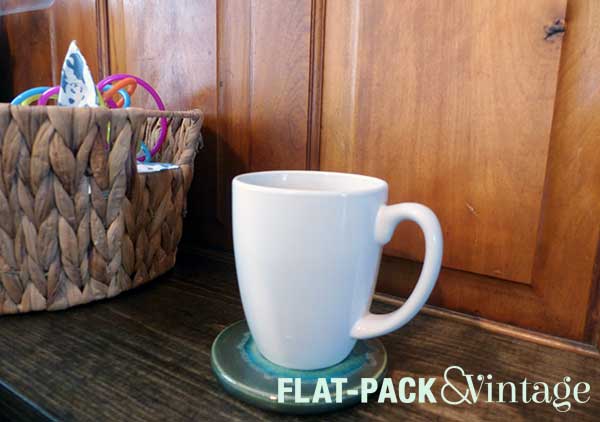
Once everything was nice and solid, the whole piece got a light sanding, a couple coats of stain (Minwax: dark walnut), and 2 coats of polyacrylic. I didn’t bother staining the inside faces of the table since it will be completely hidden behind the couch. #lazygirl
Et Voila! No more shifting couch + a great place to stash drinks and a basket of baby items since this couch is my go-to nursing spot (and a great spot to stash a cuppa).
After Matt broke one of my picture frames from our gallery wall I’ve been meaning to get out to IKEA for a replacement. In the meantime I also managed to convince him that we should replace the beige couch* and discovered a sale on their PAX wardrobe line (which we were already planning on getting). So we just decided to make one giant (read:expensive) trip.
We’re a compact car family so we opted for the delivery service. We even lucked out and were in Zone A so it was a flat $59 for anything we wanted delivered. Plus the delivery service would leave the items in the room of your choosing. No man-handling PAX parts up our stairs for me! Sold!
I usually try to avoid IKEA on the weekends, but the Sunday we went wasn’t too bad. We had a specific plan and weren’t really browsing for anything else (although we did end up with a full-length mirror because such is the nature of IKEA). I used their in-store PAX planner because for some reason it’s super slow to load at home. This was the most time consuming part of the trip and I started steadily feeling crappy. After you have a PAX plan an employee will type up an order slip, but as soon as we were done with our plan the nearby employees had vanished (it was busy, I get it). I sent Matt off to find someone and collapsed on a nearby ottoman.
I must have looked pretty awful at this point because a random man came up and asked me if I was ok. “Just pregnant and miserable, but otherwise fine.” was my reply. “Ah.” He said knowingly. “Migraines? My wife had horrible migraines.” I’m pretty sure I just got more sympathy from a total stranger than I have from my husband…. although he’s now afraid to offer any help to me because he’s afraid I may misinterpret it as coddling and get pissed. Poor guy can’t win.
After getting our PAX order together we were informed we had to go back to the kitchen section to get the door hardware, but everything else would be pulled for us. It had been a rough weekend for me so I seriously considered passing out on one of the beds and letting Matt wander back through half the store to get back to the kitchen section. I womaned it up though and went with him.
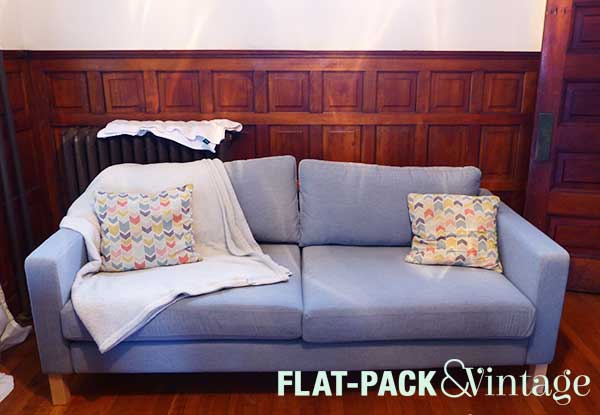
We also decided to replace the Beige Couch of Boring. It was a super comfy couch, but I’m pretty much programed to hate beige. Plus the size and style just weren’t working for me. We decided to go with the Karlstad sofa because we figure with kids on the way we don’t have to worry about it getting destroyed. Plus, every square inch of the cover can be removed an washed. Win.
We were able to get same-day delivery (woot!) but I wasn’t going to deal with same-day assembly. Unfortunately, this meant dealing with assembly after work during the week. Because Matt’s a sweetie, we assembled the couch first. Because Matt is considerably less pregnant than me, he then decided to assemble the PAX that same night while I tested out the nap-ability of the new couch (verdict: little hard, needs breaking in).
The couch looks solidly IKEA at the moment, but not to worry, I’ve got plans to hack this puppy! The smaller, more open profile is definitely a win for the space.
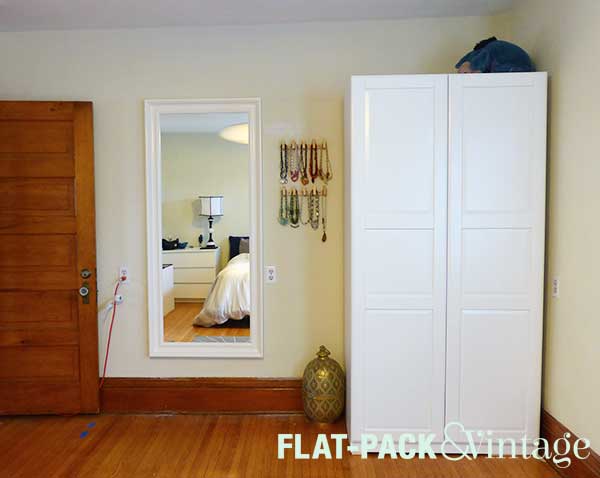
Hey look, Matt has a closet! In the bedroom! It actually even gives him more space than the closet he was using previously. More wins! Since I was napping and not supervising, he managed to break one of the rods and lose a hinge. 2017 has not been a good year for Matt’s DIY record…. We seriously tore the bedroom apart looking for the missing hinge and can’t find it. It’s big enough that we would have heard the cats playing with it if they had batted it off.
The most exciting part of assembling this was getting it level. The PAX frame has little feet behind the bottom edge in the corners that you can adjust… but they assume your floor is only a little unlevel. Anyone who’s even lived in a old house know words like “level,” “square,” and “standard size” are words that will no longer appear in your vocabulary. Instead this thing got leveled by jamming a 1×2 under one corner. Good times.
While we were at IKEA I was debating between the BERGSBO and TYSSEDAL doors. The TYSSEDALs were about twice as pricey and I while I thought they were slightly nicer, I didn’t think they were twice-the-price-nicer so we went with BERGSBO. Then Matt assembled everything….
But because I’m a genius, I forgot to take a picture of assembly round 1. We got them up, I stared at them for a couple days, and then decided they weren’t right for the room. The paneled doors and detailed trim of the house just wasn’t working with the bare-bones shaker-style doors on the wardrobe. Luckily, the doors fit into our car (hatchbacks FTW!) so we hauled them back and exchanged them. Oh, and we picked up another pack of hinges because a week later we still hadn’t found the lost one.
The TYSSEDALs have some beveling similar to the house’s interior doors and work MUCH better. I also finally got a nice, chunky, full-sized mirror. It only took Matt about 20 holes in the wall to get it hung! This one’s not even his fault! A 100+ year old house means lathe-and-plaster construction for the walls. While there still are studs, the extra bulk over them makes stud-finders useless. the only thing to do is drill a bunch a tiny holes until you feel a stud and then patch them all later. Fun times, right?
Our dressers replaced our nightstands (which you can see a bit in the reflection) but I’m not showing pics of the whole room because it’s not super clean and is also incredibly bland at the moment. Like most rooms in the house, it’s on the to-do list. At least we’ve upped the functionality!
*Anyone in the Twin Cities area looking for a couch? The main reason we’re getting rid of it is because I HATE beige. It’s also a little too chunky for our space. It’s up on Craiglist right now so if you’re in the area let me know and I’ll share the link.
 .
.