And Then Our House Rebelled

Image via Giphy

Around 3:30am on Saturday our smoke detector decided to lose its shit.  It started beeping and loudly announcing “low battery!” Around 4am Matt decided to go an rip out the batteries.  That was when he discovered that the smoke detector in the hallway is hardwired. Yup,  our smoke alarm woke us up at 3:30am because the backup battery was bad.

Luckily we had extra batteries, so Matt grabbed a replacement…only to find that the previous battery was also rather corroded and the gunk left on the battery connectors was now impeding its ability to sense the new battery.

Now, I’m still in bed at this point so all I hear is Matt shuffling around the house like he’s playing some twisted game of Marco Polo with the smoke alarm. Then the alarm suddenly starts shrieking “Fire! Warning carbon monoxide! Fire! Warning carbon monoxide!” I start laughing like an idiot because now I’m convinced our smoke detector is just straight-up broken and of course that would happen at 4am.

Turns out Matt hit the test button to see if that would act like a reset and get the alarm to recognize the new battery. It didn’t work. Obviously.  So now it’s 4:10am and I start googling how to remove a corroded battery because it’s either that or flee to a hotel.

In case you’re wondering, vinegar will clean off battery corrosion. You should really use gloves/eye protection, and of course be very careful around the electrical workings of anything–especially when it’s still connected to power.
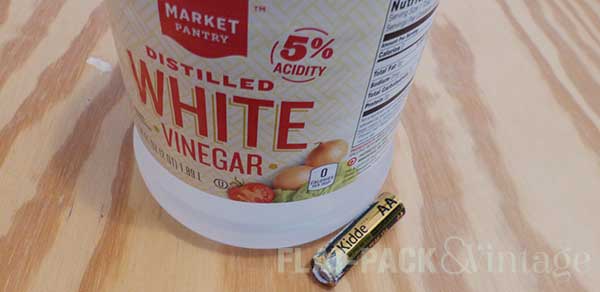
You’re welcome.

After Matt and I properly woke up for the day, we went on a walk to get breakfast since we’re having a January heat-wave at the moment.* When we got back, I went to haul in the baby gear and the baby, and Matt stayed out to salt the walkways. I left Wesley snoozing in his stroller next to the door while I dropped the diaper bag and pastries inside, then turned to go back out and grab the baby.

Only the backdoor wouldn’t open.

I checked the locks. It was unlocked. I fiddled with the locks (both the deadbolt and the simple lock for the latch we never use). Nothing. Was it stuck on something? Nope.

W.T.F.?

I finally went out the front door, walked around the back and tried to shove it open vs pull it open. No dice. So I tried and force it open with my shoulder TV cop style. Ouch. Finally I gave it a good swift kick (just to show it who’s boss), collected Wesley and schlepped around to the front door.

When Matt was done salting, he repeated everything I had just tried and nothing worked for him either.  It turns out that the bottom doorknob (which controls the latch) had inexplicably broken, so the knob could no longer retract the latch. This is a vital part of being able to open a door.

Step 1 was to run to the hardware store and buy a new latch set.  I also picked up a matching deadbolt because I really didn’t like the existing brass one we had so hey, excuse to update! We thought Step 2 would be as simple as taking off the door knob and wiggling the inner workings around. Nope. The inner workings were well and truly busted.
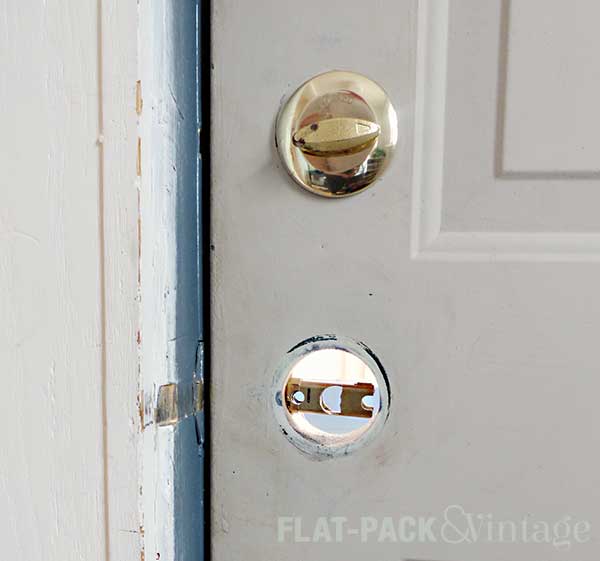
Matt went through our tool stash to try and find something he could shove between the frame and the door to push the latch back in,** but it still wouldn’t budge.  He asks me if I have any brilliant ideas, to which I reply “sure” and then immediately get to googling.***
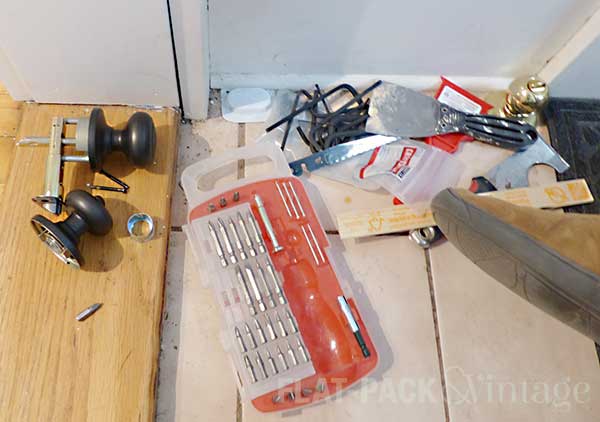
It turns out this sort of thing is not unheard of and found a fairly lengthy thread in a DIY forum dedicated to it. Long story short, if your latch is properly busted (like in our case) there isn’t an easy fix. The general consensus is 1) don’t bother taking the door off the hinges because that often doesn’t help and 2) either bust out your hack saw or call a locksmith.

We chose the hacksaw option and it took Matt around an hour to cut through.
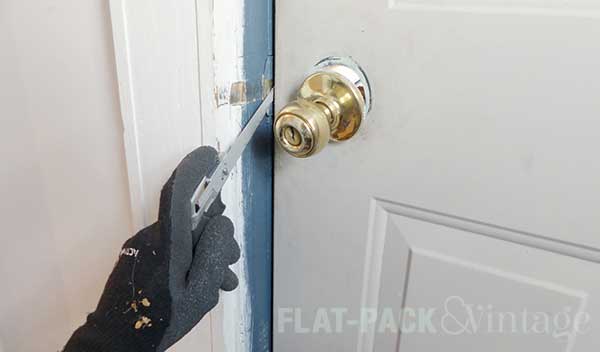
(We set the knob back in place to block some of the draft)
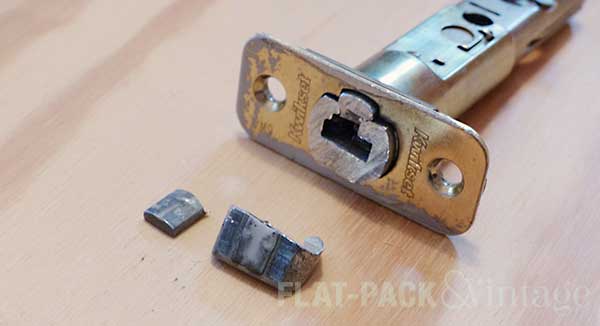
Thankfully installing our new latch and deadbolt was a piece of cake. Matt was very confused because I decided to try Kwikset Smartkey locks that let you re-key them yourself.  They were more expensive that the standard locks, but cheaper than bringing in a locksmith (and we really didn’t want 3 different keys for our house). They are SUPER simple to use to, so we were able to get our 2 back locks on the same key as our front lock in about a minute.
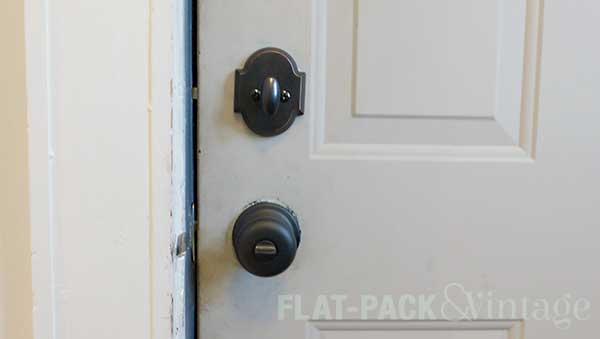
Once the weather legitimately warms up we’ll also paint the the rest of the door frame and repaint the door, since it looks a little sad at the moment.

Matt looked up the security of these locks and it sounds like they’re no better or worse than a lock that would require a professional to re-key. Plus, as one person put it: your house is only as secure as its weakest point and we all have windows.

So that was our Saturday.  We woke up to a demon smoke alarm and later I got locked inside the house. I have a feeling I’ve offended the DIY spirits in some way or else our house has spontaneously acquired a poltergeist. Maybe I should turn on our gas stove and shake some sage from our spice cabinet over it… If that doesn’t work, we are surrounded by churches so I could probably round up an old priest and a young priest.


*In Minnesota a winter heat-wave means anything over 30 degrees. Over the last 2 days I have seen 2 people outside in short sleeves, one guy in shorts, and several without jackets.

**During all of this we’re working from inside the house, so you have access to that tiny gap.  The outside of the door frame has trim pieces covering up this space.

***This is how I solve problems at work too. People think I’m smart, but really I just figure out good search terms.

D-Day

That’s Dishwasher Day.

A few weeks ago we decided to bite the bullet and replace our fridge and water heater.  Both were quite elderly* and we figured it was a much better idea to proactively replace them rather than deal with the consequences of them dying spontaneously. We figured all the other appliances could wait to be replaced until they actually died.

Well, about 2 weeks after replacing the fridge, our dishwasher started leaking. Awesome. I swear they’re going to start greeting us by name at Warner Stellian soon…

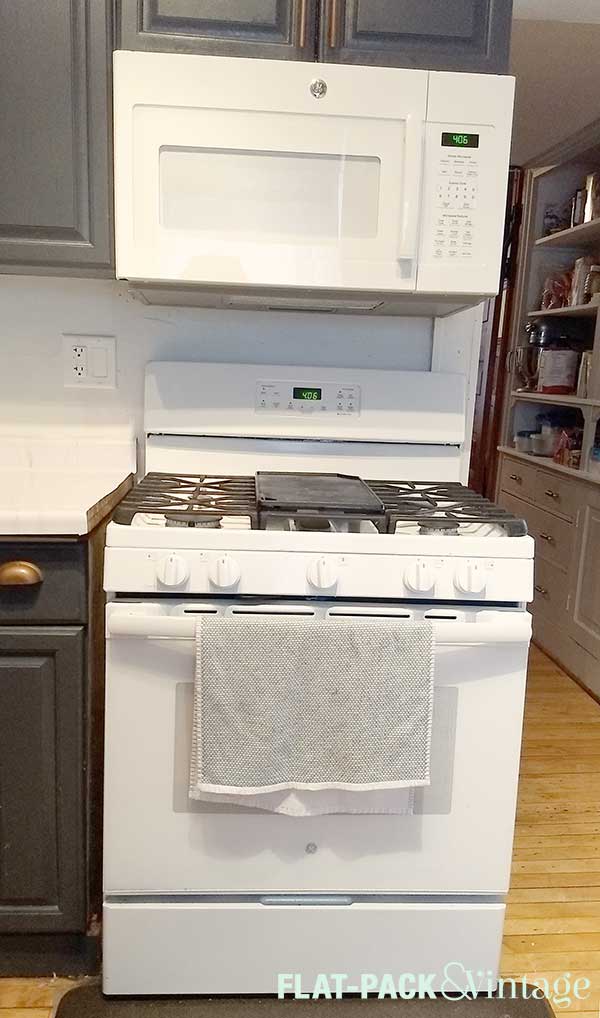
While we were dishwasher shopping we also decided fuckit, let’s just replace the microwave too.  Maybe if we replace the microwave and dishwasher with new (ie more efficient) models we’ll stop tripping the breaker when we run them at the same time.**

After much pondering, we picked out our latest batch of appliances and got delivery/install scheduled for last Tuesday. My mom is currently staying with us and watching Wesley during the day, so she got to be the one to field the delivery.

Being a weirdo, I get super excited about getting new appliances.  I’ve also gotten spoiled over the past 5+ years of living with a dishwasher so the week without one has been a bit of a bummer.  I seriously could not wait to get home and check out our new, shiny dishwasher.

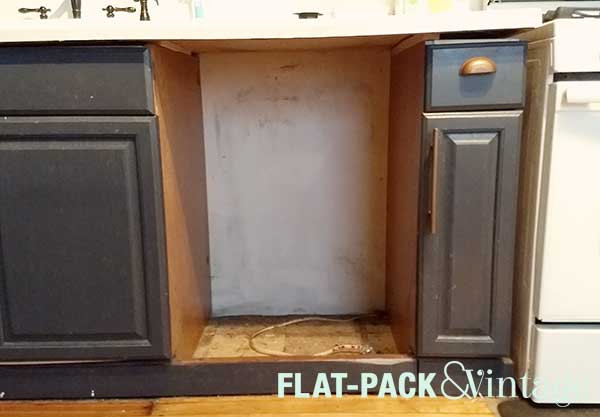
Well, if you follow me on Facebook, you’ll know that this is what I actually came home to:

Whomp whomp.

The delivery people came, hauled out the old dishwasher, but when they went to haul in the new dishwasher they discovered it has been significantly damaged.  “Smashed in” is what I believe they told my mom.

Sigh.

So now we have a gaping hole where our dishwasher once was, which led to the following exchange with a friend:

Me: Do you like our new dishwasher?!

J: … Does Matt actually fit in there?

It’s a pity Mort doesn’t have opposable thumbs, because he hung out in this new “cave” quit a bit.

On the bright side though, our new microwave arrived that day and was installed just fine.

This gives us a 50% chance success rate with kitchen appliance delivery.  Now, I’ve been out of school for a little while now, but I’m pretty sure 50% is a solidly failing grade.

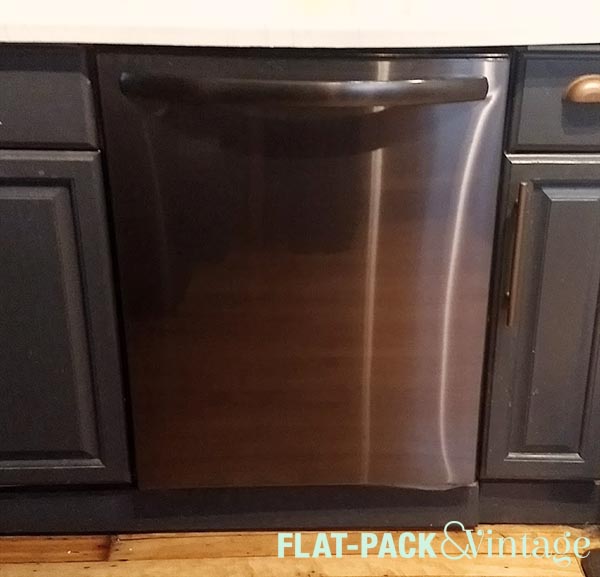
A week after our dishwasher disappointment, we attempted delivery round two.  Luckily, unlike with our stove fiasco, this was the end of it and we now have a brand-spankin’-new dishwasher.

We debated back and forth about the color a bit.  All our other appliances are white, but I really wanted the dishwasher to blend into the cabinets.  I also plan on keeping dark base cabinets whenever we do our big kitchen makeover.  The color we ended up going with was “black stainless.” It’s not as industrial looking as true stainless and has more depth to it than plain black.  I’m totally diggin’ it.


*Our existing water heater was installed in 1982–our plumber was pretty impressed it was still running.

**We also can’t run our toaster and electric kettle at the same time.  Old houses are like a game of electrical Russian Roulette.


New Fence!

We’ve slowly been attempting to make our backyard look less like a junk heap.  We’ve already demo-ed the weird lean-to/shed thing, destroyed a decaying garden bed, and seeded new grass. After a fairly windy storm we had to stabilize our elderly fence before it collapsed and took out a pedestrian. Even with the extra support in place we still planned on completely replacing it ASAP.

We figured the perfect time to get it done was while we were out on leave. We had no intention of DIYing this one*, so it wouldn’t be added work on our end but we could still be on hand for the contractors if anything came up.  Last Thursday a team of two guys showed up, knocked the old fence down, and hauled the poor decrepit bits off to rot in piece.  They also set the new posts then left for the day so the cement could set.

We sort of assumed they’d be back the next day since they didn’t actually tell us when they left and when they’d be back.  By mid-day on Friday they hadn’t shown up so Matt called the company to see what the actual plan was.

Monday.  They would come back Monday.  This was perfectly fine, I just wish we were kept in the loop. We’ve had this same issue with other contractors too.  I realize some of the work we’ve had done is weather-dependent, but I’d still appreciate a ballpark estimate. We actually gave up on a mason because we had gone back and forth for a couple months and he refused to give us any idea of when he would actually be free to do the work.  For the fence it would have been really nice to know X was expected to be completed on day 1, but then the cement needed time to set so they’d be back 2-3 days later to do Y. I feel a little bad when we have to call to ask about a time frame because we aren’t actually trying to rush them, we just want to know what the plan is.

Anywho….

On Monday the men were back to install the the privacy part of the fence.  The battens went up, the support posts were cut to height, and the gate at side of the fence was installed.

YAY! We have a fence that actually looks nice! If we didn’t live on a busy-ish street we probably would have demoed the old one ages ago.  The privacy (and mild sound-blocking) the fence provided against the traffic was really nice though.  Having a kid put us on a timeline for a full replacement since having a sturdily-fenced backyard by the time Wesley was mobile was non-negotiable.

We also decided to keep the chunk of chain link fence that runs right through our giant lilacs (at the back of the yard).  The lilacs probably would have gotten damaged (at the very least, severely pruned) if we removed it and a new fence would have either smashed up against them on on side or hidden them from our view.  The chain link is pretty well camouflaged by the bush though so it’s not a big deal.

A cedar privacy fence was considerably more than we expected, but we suspect that due to the amount of lumber involved.  Our fence was 60′ long and 7′ high and cost just under $4k.  Ouch, but like I said, necessary. If you’re feeling ambitious, Vintage Revivals just DIY’ed a similar sized fence for around $800!


*Given the whole pregnancy/birth-recovery/adjusting-to-an-infant thing which was pretty much our entire summer plan.

Save

Save

Save

Laborious Labor Day

Ok, not all that laborious, but Matt did go on a small project rampage on Monday.  I think he was trying to get some stuff out of the way because he was going to be stuck on double babysitting duty on Tuesday.  I has a sedation dentist appointment and basically wasn’t allowed to function* for the entire day so not only did he need to solo-parent Wesley, he also needed to babysit me. Luckily I survived** despite a nasty fear of the dentist*** and we’re back to tag-teaming projects.

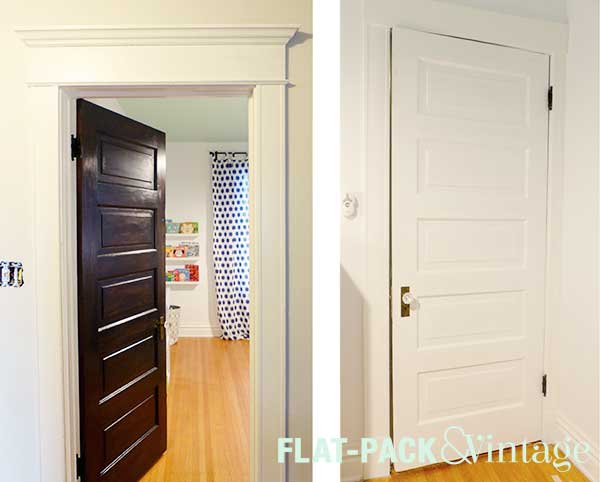
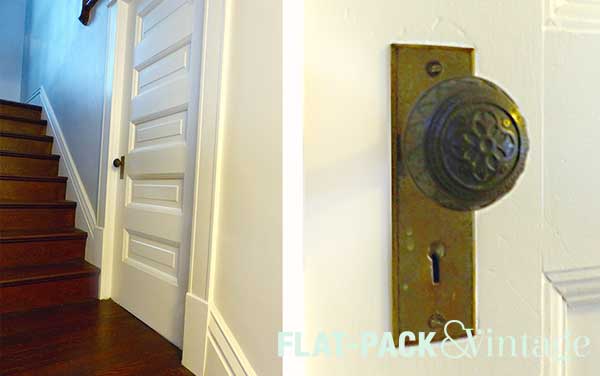
Now that I’m no longer pregnant (wheeee!) I’ve been able to get back to work refinishing the upstairs doors.  We tackled the nursery door first since it needed a little extra repair work. Matt stripped off the golden-oak stain and I re-stained and painted it.****  By Monday we were able to put it back up. Matt also replaced the mortise lock and switched out the black porcelain knobs with the glass knobs I ordered like, a year ago.

It’s also worth mentioning that the light switch cover in the hallway has seriously been off for at least a year. #safetyFirst

Our Winchester Door has also been sitting around with a gaping hole where the door knob should be.  Sure, the door can’t actually open, but I can’t remove it and drywall because I don’t have a good way to replace the baseboard.  Solution: embrace it’s complete and utter doorness. I wasn’t thinking about this door when ordered the knobs, so I didn’t have another glass one to use here.  We did, however, have this gorgeous embossed metal knob from the decaying cellar door in the basement.  Honestly, the embossed knobs are my favorite, but I thought the glass knobs would look better against the dark wood of the upstairs doors.

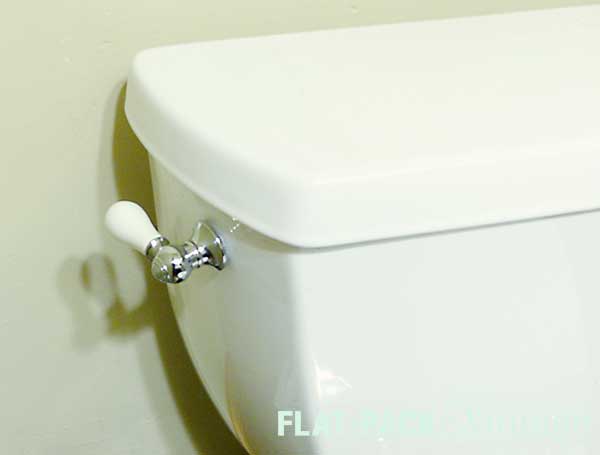
The final update seems really minor, but I smile every time I see it. The toilet handle in our downstairs bathroom has been acting wonky, so Matt decided to replace it.  Knowing me as well as he does, he chose the fancy porcelain handle option. It matches the faucet handles and as I said, it makes me kind of stupidly happy,

Even though I posted the Master Bedroom Plan, part of me wants to tackle our downstairs Micro-Bath before I head back to work.  It’s such a tiny room that it would actually be doable, but I know Matt wants to finish up the doors first. I may be a little ADD when it comes to projects so it’s probably a good thing he’s here to keep me in line.


*No driving, no attempting stairs, no being left unsupervised with small children, etc

**It actually went pretty well… although I remembered more than I expected too.  I also still panicked when confronted with needles which the dentist was apparently a little surprised by (although I did warn him that I can panic my way through nearly anything). Luckily I did not get belligerent with Matt, which is what I tend to do if someone is trying to coddle me.

***Step 1 in dealing with a dental phobia: find a dentist who’s not a condescending asshole.  This is surprisingly difficult.

****My original plan was to stain both sides, but Matt liked the doors better white on the inside and marriage is about compromise.

Save

Save

A Series of Small Projects

Some of these were more recent than other, but none really deserved their own post.  Every house has it’s small projects that make a difference though.

Pantry Light

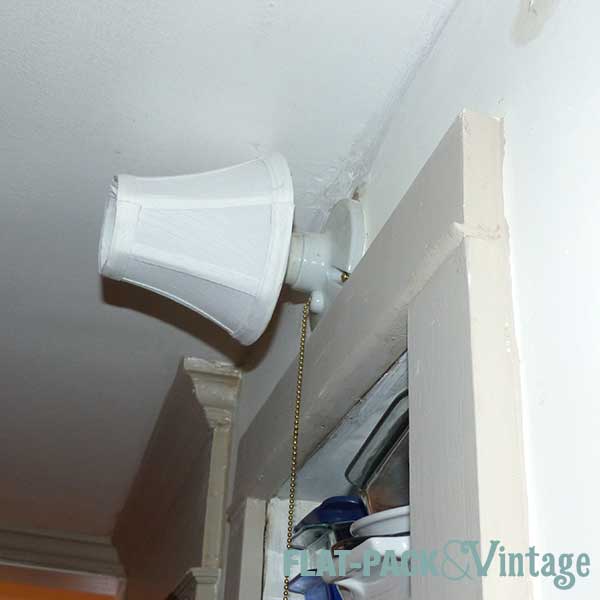
Our butler pantry had a pretty hideous light fixture–really just a basic socket and pull chain (like you’d find in an unfinished basement) with an ugly little clip-on shade.  So sad.  The problem here though was that we were super limited in our choices.  There was no switch so we had to have a pull chain, and the trim around the weird built-in shells left us only about 6″ of space to work with.

pantryLight1

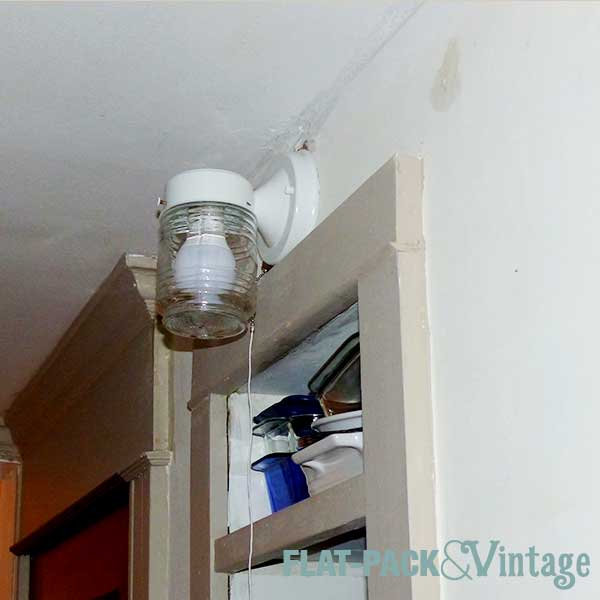
We ended up finding a super-cheap Jelly Jar light at Menards along with a pull-chain kit.  For about $10 total we figured it would be worth a try even if we royally effed it up.


pantryLight2

Still not amazing, but probably the best we can do with the limitations unless we haul in an electrician (which, honestly, I really would like to do).

The hardest part of converting a standard light to a pull-chain is drilling the hole for the pull-chain mechanism itself to go through.  I would suggest trying to make a pilot hole of sorts by pounding a nail through the area first, then you can probably drill through.  Matt tried using our Dremel and admitted it was not one of the smartest things he has ever done.

Micro-bath Mini Makeover

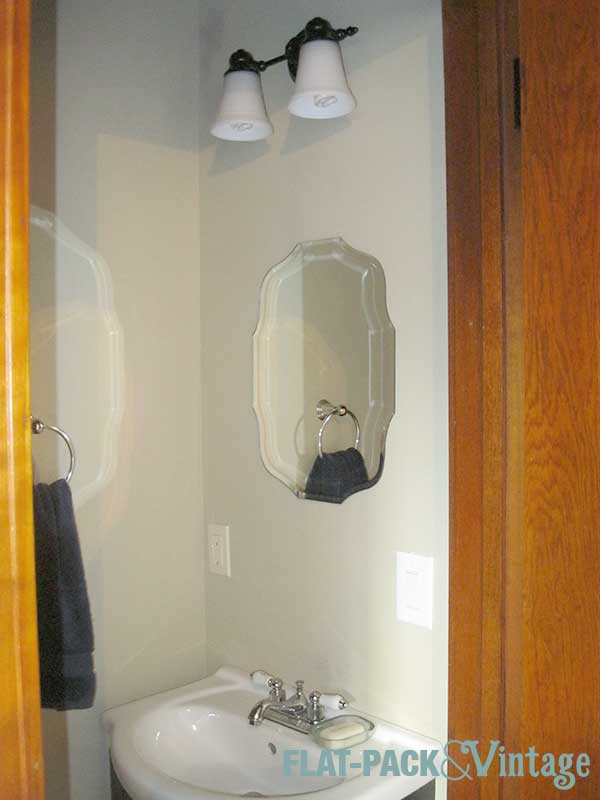
Our half-bath wasn’t in awful shape, but it still needed a little lovin’.  I don’t have a proper before picture, so here we’ve already swapped out the existing faucet for this adorable ceramic-handled one switched out the mirror for something with a little more style.

microBath1

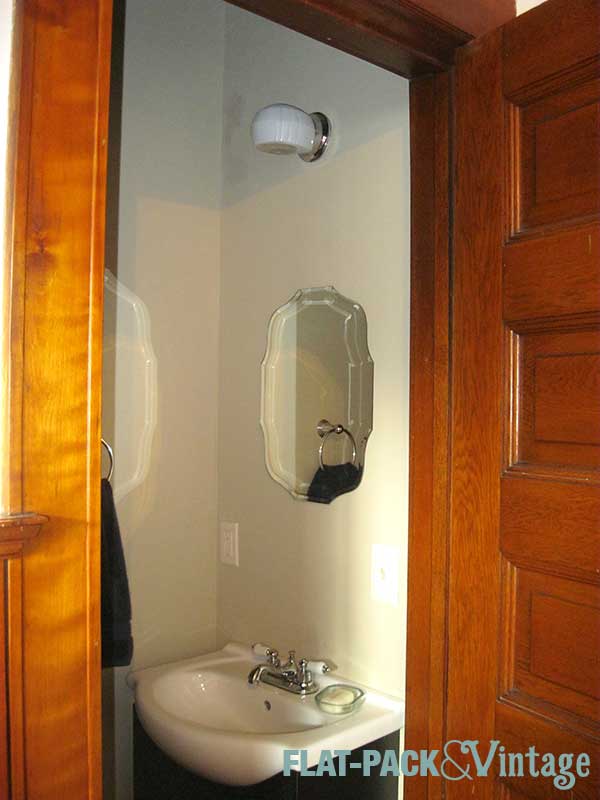
We also replaced yet another sad little light fixture.


microBath2

I’m actually still on the hunt for a better fixture here, but at $25 I don’t feel too bad about swapping this one out again down the line.  The micro-bath is going to get a more significant makeover in the near-ish future so I’ll probably be deciding on a more permanent replacement then.

Front  Railing

Our house is in desperate need of some curb appeal, no question there, but a lot of that will be slowly worked in over the years.  A more pressing matter however, is that our front steps lacked a railing.  This can be a sore spot for insurance companies, but it was also a practical issue for us. Our parents are getting older, winters are icey, and I have a nasty habit of random injuries* so having a railing on our front steps seemed like a really good idea.

outside

We picked up a fairly inexpensive railing at Menards since we’re planning on completely replacing the front steps in the next couple years.  It took a few hours to align and assemble and then another day to paint (Rustoleum Hammered Old Bronze).  It actually looks better than I expected!

railing1

Please ignore our ghetto drainage solution–we get huge amounts of water pooling there when it rains and until recently it’s been too cold to start properly  re-grading that area.

Outlets

We’ve been steadily switching out all the switches and outlets in the house for the “decorator” style ones.  We needed to switch out all the beige for white anyway (at least by my personal definition of “need”) so I opted for the fancy ones.  Regardless of which style you go with though, replacing grody old switches/outlets can really make a big difference.


*Spraining your foot when you live on the 3rd floor with no elevator is not pleasant.

Save

Save

Save

Bathroom Reveal

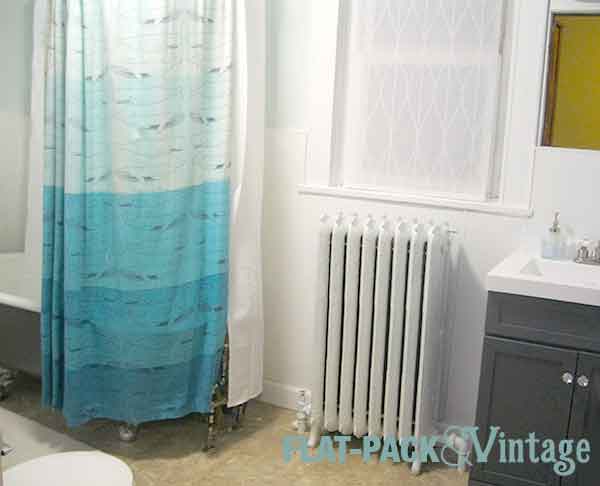
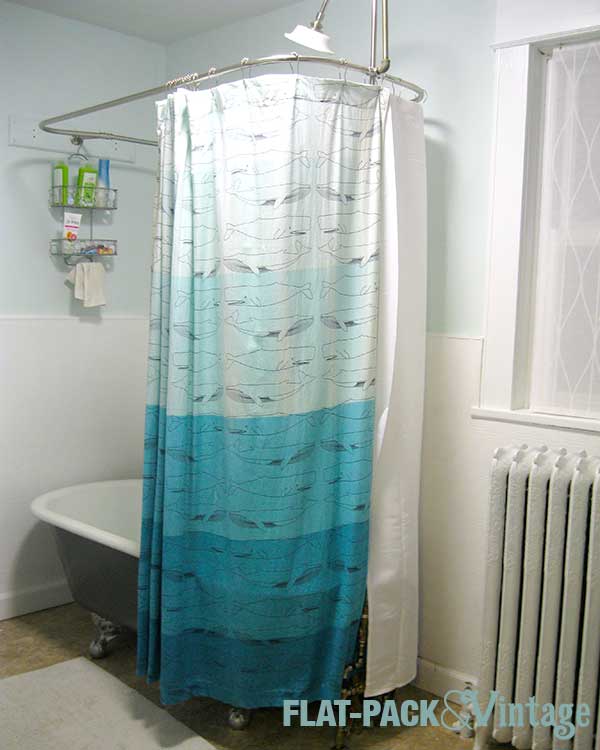
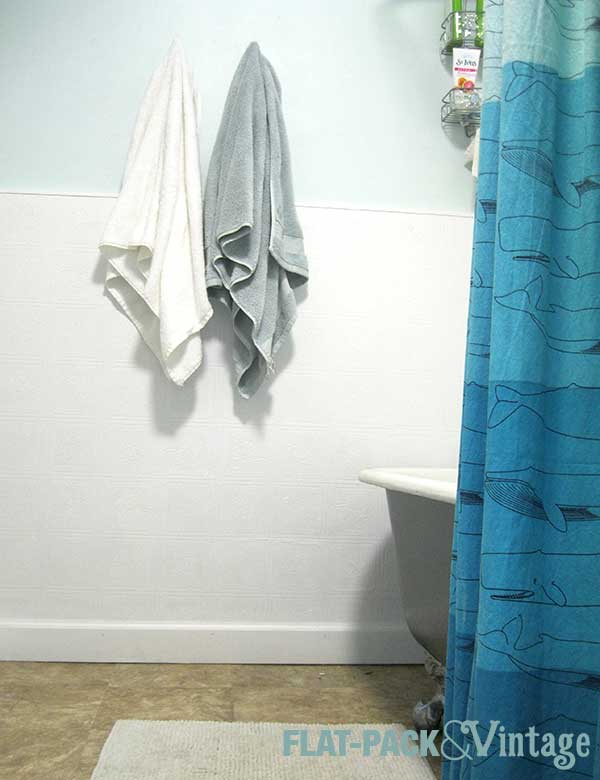
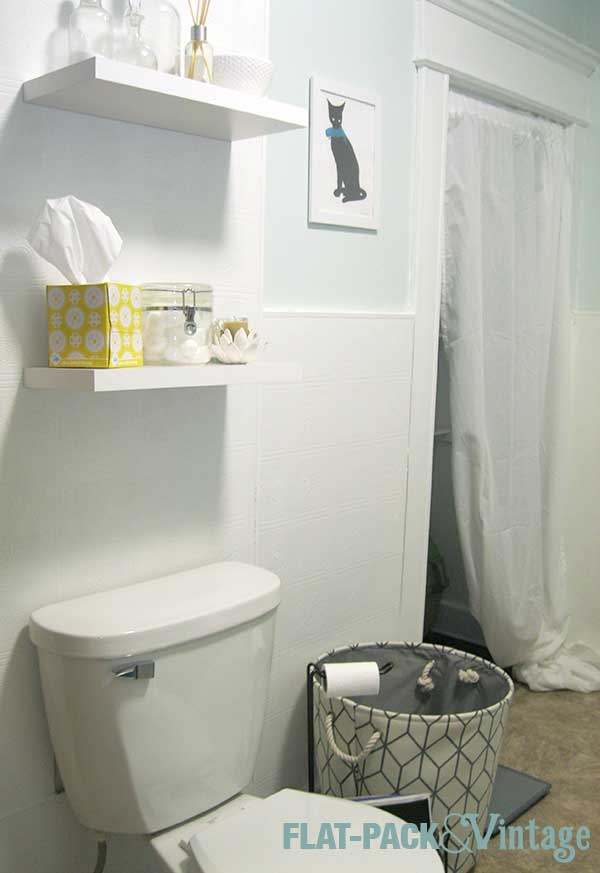
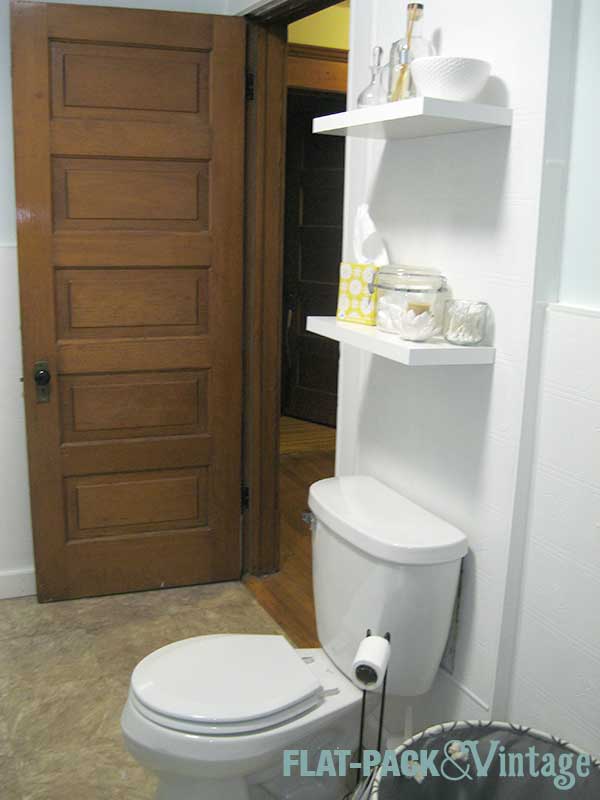
At long last, Phase 1* of the bathroom update is DONE!

bathroom

Remember what we started with?  Believe it or not this picture makes it look significantly better than it did in real life.

And now?

bathFinal1

I am thrilled with the result.  Instead of dingy and depressing, it’s bright, cheerful, and practical.

bathFinal3

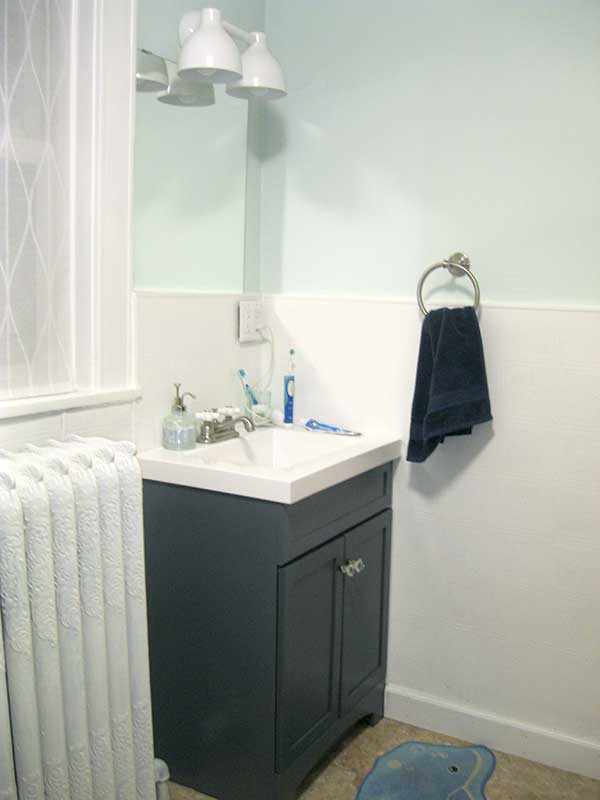
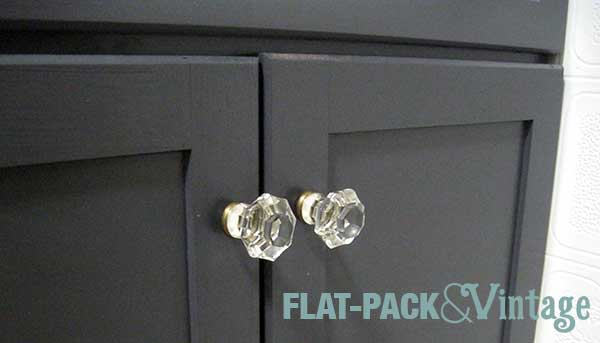
Finding a vanity I liked was difficult, but after a coat of paint and some adorable knobs from Anthropologie I think I picked a winner.

bathFinal6

I used the same window panels that I had hung in the bedroom so we could have both privacy and natural light. I also PAINTED ALL THE THINGS and successfully patched the missing chunk of our window trim

bathFinal2

If you remember the picture I posted a while back of the tub base you’ll see I changed my mind.  Originally I had freshened it up with a coat of white paint and some gunmetal feet, but after bringing in the vanity I wanted something to balance the dark gray.  The tub base is now the same color as the vanity and I repainted the feet silver for contrast. We also had to bite the bullet and hire a plumber to switch out our old leaky tub faucet.

bathFinal4

We now have a bright, practical closet and convenient towel hooks (before the only hooks were on the back of the door–nowhere near the tub).

bathFinal5

I brought in some more shelving above the toilet and added a hamper since laundry always seems to pile up in the bathroom.

bathFinal7


*Long term plan is to gut most of the room, tile the floor and partially tile the walls, but it will be quite a while before that happens because moving our cast iron tub and radiator is definitely not a DIY.

Weekend Report

My mom and step-dad came up this weekend to drop off a snowblower and spend some less chaotic holiday time together.

  • Cookies baked: approximately 4378 dozen
  • Cookies decorated*: All 4378 dozen
  • Christmas shopped completed: 85%
  • Bathroom knobs replaced: 2
  • Bathroom shelves fitted: 3**
  • Presents wrapped: 11
  • Cats who don’t understand personal space: 2***

xmasCookies


*After the parents left I had people over for more cookie baking/decorating.  Less of a cookie party and more of a “I have baking to get done, you have baking to get done? Come over and we’ll get shit done together.  With wine.” sort of deal.

**Just have to paint and screw into place!

***Schmutz especially does not really understand people with cat allergies who don’t want her all up in their face.  She thinks they just need more snuggles to make them happier.

Weekend Report

It’s beginning to look a lot like Christmas….

  • Hours stuck going into work: 3.5
  • Feet of lights hung: 36
  • Christmas trees decorated: 1
  • Feet of edging painted: 20
  • Shelves hung: 1*
  • Hardware store trips: 1
  • Craft store trips: 1
  • Christmas presents purchased: 1
  • Messiah concerts avoided: 1**
  • SPCO concerts attended: 1***
  • Hanukkah meltdowns witnessed: 1****

ricePark

*While writing this I just realized I managed to hang it upside down.  It’s a floating shelf where you mount a support bracket to the first and I very carefully made sure I had the guide arrow pointing down. Doh!

**Matt plays viola in a community orchestra and while I try to go to every concert, I put my foot down at the Messiah.  I went 2 years in a row and decided I REALLY do not like it. Actually, the majority of Christmas music makes me twitchy after too long.

***Their violin section is incredibly dramatic; this time I was mildly concerned there was going to be a horrible collision between the Concert Master, Associate Concert Master, and the next person down that line of chairs.  Matt also got to have a fan boy moment since a group of them took the table when we out for dessert after the concert.

****Don’t ever get me started on the “war on Christmas.”  Row after row of Christmas decor at Target and one teenie-tiny end-cap of Hanukkah decor.  Little boy was near tears because he couldn’t find a dreidel and Mom was getting a little flustered since no one was apparently selling gelt (chocolate coins).

Out With the Old

In a perfect world I’d love to reconfigure the bathroom.  It’s a pretty good size bathroom, but the layout doesn’t make the best use of the space.  Sure it would be fabulous if I could rotate the tub so the plumbing connections are against the wall, and swap the toilet and vanity around so I could fit in a sink with actual counter space… but rerouting plumbing is pricey and probably not going to happen.  This means I have to work with what I have, which happens to be enough room for a 24″ vanity. Sigh.

It gets even better though. The plumbing for our sink comes up through the floor instead of through the wall so anything raised on legs is out as well.  I also had to wave goodbye to a practically perfect option because the drawers were a 1/4″ too wide to accommodate our existing plumbing. That was devastation right there. I found another practically perfect option, but not only was it raised (I could work around that if I had too) but it was nearly all sink and no counter.  No bueno.

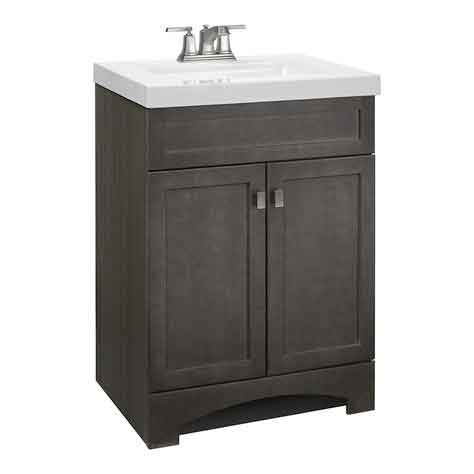
There was only one option left at this point.  Custom.  Not 100% from scratch kind of custom, but a custom mod to a mediocre cabinet.

newBathCabinet

I ended up with this as my base for several reasons. 1) I liked the counter top on it.  Too many had goofy recesses (mini soap dish? really?) and backsplashes that were unnecessary.  I wanted a white, streamlined sink and didn’t want to shell out another several hundred bucks to replace it in the future.  2) I liked the overall shape–simple and reasonably classic.  3) Price point was good.  I almost picked out a boring-as-hell builder-grade yawn-fest that was cheaper and the only reason I paid more was to get the counter/sink I liked more.

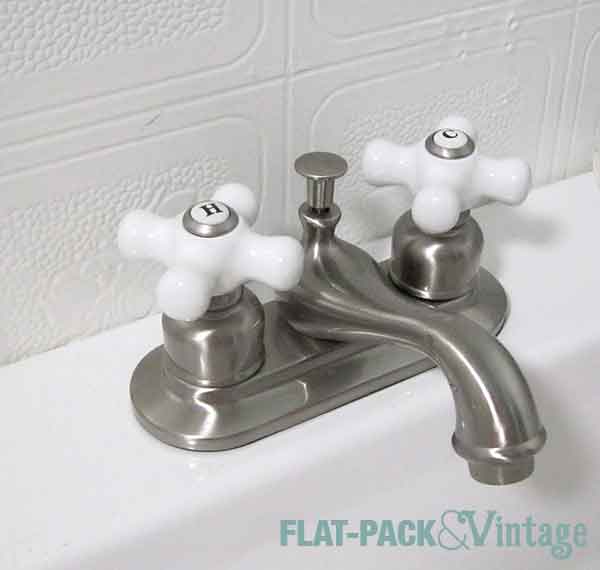
bathFaucet

We also picked up this lovely little faucet.  I am absolutely crazy about the ceramic X shaped knobs.  I really wanted a wide-spread faucet with 3 separate pieces instead of everything mounted on a base, but that was over 3x the price so I had to pass on absolute perfection. This one is pretty near perfect though and so I think I can live with that.

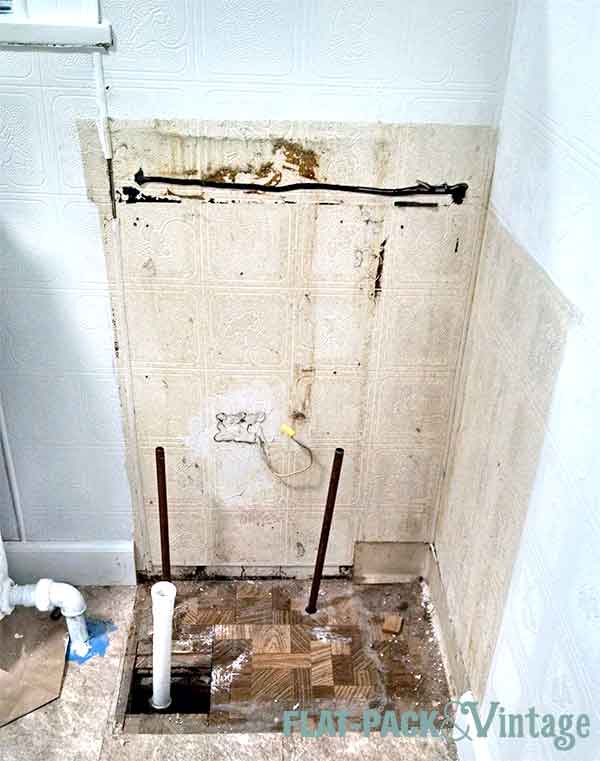
Next up we ripped out the old vanity/sink.  In the process we discovered the shut-off valves were not completely shutting off the water so we had to turn off the water to the house, cut the pipes, install new compression fittings and shut-offs, turn the water back on, and pray we go it right.  We did.

newVanity1

The line of black on the wall is some rubbery adhesive I had to scrap off with a putty knife and razor blade.  And that wood pattern on the floor? Vinyl. Thank god they covered that up is all I can say! Then we measured where all the pipes were and cut holes into the base of our new vanity cabinet.

Luckily the sink did not come attached to the cabinet (which would have been good to know before we hauled the whole box up the stairs) so it was easy for one person to lift and the other to make sure everything was lining up right.  We also discovered this cabinet was  deeper than our old one (measure people!) and had to rip off the baseboard on the side wall (it will be going back once we trim it down).

The sink itself just attached with some silicone caulk so that was pretty simple.

Getting the faucet in was another story… Actually the faucet was easy, the pop-up assembly was the hard part.  If you’re just switching out a faucet you may not even need to deal with the pop-up assembly (drain stopper) but if you’ve added a brand new sink you’ll definitely have to.  The instructions that came with ours were AWFUL.  Part of the reason we were confused was that the part that came with our faucet was designed for a sink with an overflow, but our sink didn’t have that. We got it all sorted out eventually though.

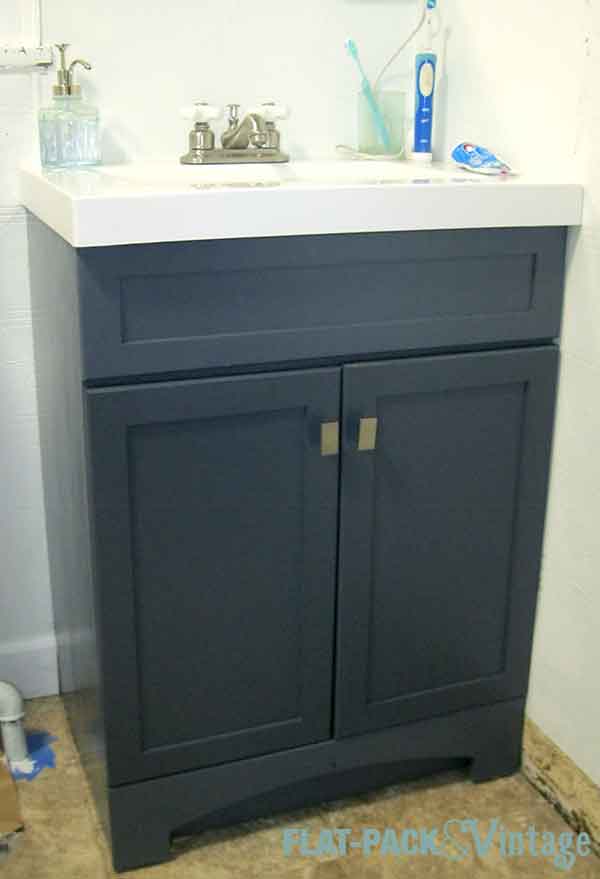
So we’ve got the vanity cabinet in place.  We’ve got the sink installed.  We’ve got the faucet installed.  Go us!  Me being me, this wasn’t good enough, so then I painted the vanity.  The existing color wasn’t bad, but there were going to be some additions made and I didn’t want to stress over getting an exact finish match.

bathVanity

I wish I could tell you the color I used, but I can’t.  I started out with Benjamin Moore Temptation (Advance, satin) and thought it was too light, so I brought it back to get it re-tinted.  The next shade darker was French Beret and the awesome paint people couldn’t quite get that because of the amount of white in the previous mix so the color is somewhere in between the too, but still probably closest to Temptation (you can see the difference where I tried the dark version on the doors, although you can barely tell in real life).

Looking pretty good, right?  Not even the vanity is done yet though…

Weekend Report

Oof-dah this weekend was a trip.  Off went our water, out came our vanity, and in went a new vanity, sink, and faucet.

  • Hardware store trips: 7
  • Paint store trips: 2
  • Hours spent without water to the entire house: 3*
  • Days without being able to use our upstairs bath: 2
  • Pipes cut: 2
  • Feet of PVC replaced: 2
  • Compression fittings bought: 4
  • Compression fittings used: 2
  • Holes cut in bottom of brand new cabinet: 3


newVanity1


*This was better than expected, but somehow I didn’t think about things like flushing the toilet, or washing the paint off of me.  Consequently Matt informed me if I had to use the bathroom I could use the one at the hardware store and pick up new compression fittings while I was there.  Also we went to dinner at friend’s house, she saw dark splotches all down my arm and asked what the heck happened to me.  Paint.  Paint happened to me.