Not gonna lie, my first thought was holy shit Matt just threw away part of my fan. He had been cleaning up all the excess packaging that’s been taking over our living room between baby-related deliveries and home improvement crap and he already threw out the styrofoam packaging from the ceiling fan box. He insisted he checked everything he threw out for stray parts beforehand and I have no reason not to believe him. Buuuut I still may have went slightly catatonic and then decided I wanted ice cream (Izzy’s!) for dinner.
First I called Lowes, because that’s who we ordered it from. They then contacted Hunter (the company who made the fan) who gave them a reference number which they passed on to me so I could call Hunter back.
The first person I talked to didn’t care about my reference number and seemed very confused as to why I was even calling in the first place. She eventually said she was going to transfer me over to parts but instead I got trapped in the Automated Phone System From Hell. If you keep pressing zero enough times you can usually get to a real person and thankfully that worked this time. I may handle automated phone systems rather badly. The second live person I talked to was actually helpful but apparently shipping just the missing part was impossible and then had to send a whole new fan. Over-night shipping was also apparently impossible but she eventually caved and requested it be sent out as 2 day shipping (which translates to 2-5 days). We did end up getting the new fan on Saturday though–score!
Matt handled the installation by himself (I may have possibly been napping….). I went up to check on things as he was nearing the end and he had a laundry list of complaints.
Some of the screws provided did not actually fit, but he was able to scrounge spare screws from fan #1.
One of the screw holes for attaching the fan blades was miss-threaded making it damn near impossible to get the screw through.
The biggest issue though was installing the plate with the socket. It attached with 3 small screws that were practically impossible to line up correctly. It seriously took him a solid 1/2 hour to get that one piece in, it was also accompanied by a level of swearing straight out of the beginning of Four Weddings and a Funeral.
The lesson learned from this is pretty much whoever designed this fan only designed it to be pretty. They also possibly designed it to give electricians more business because it is a giant PITA to install on your own.
But daaamn is it gorgeous!
It came with an LED Edison bulb that’s pretty wussy so I’m going to try and swap it out for one of these pretty LED globe bulbs from IKEA.
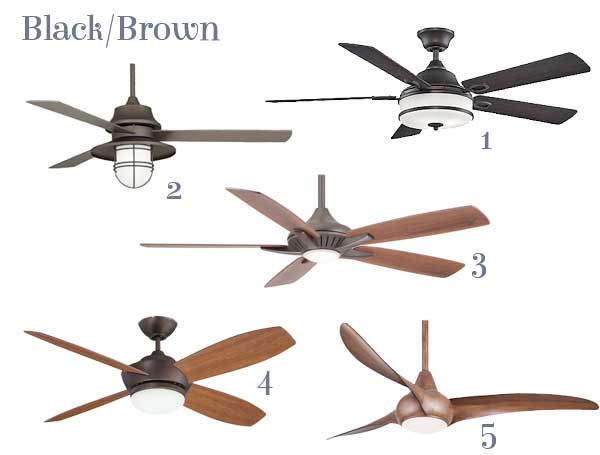
Yup, you read that right. Ceiling fans get a pretty bad design rap and it’s often rightly deserved. Unfortunately, in some places (like, say 100+ year old homes that don’t have central air) they’re quite necessary. They don’t have to be eyesores though!
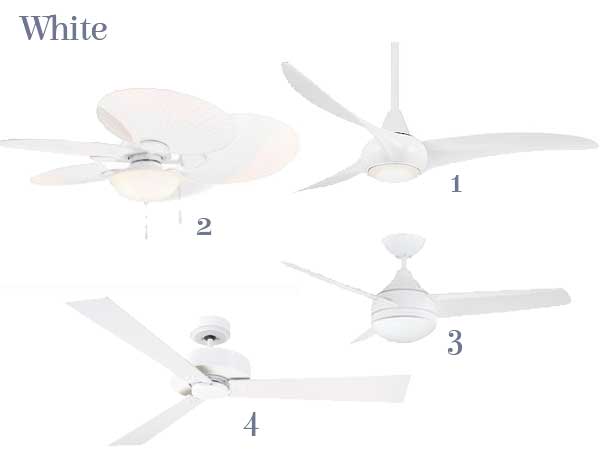
White I think is the hardest, which is a bummer because they’re the most likely to recede into (but they should still look good though!) A number of the options above come in white but I think the white finish looks cheap on lot of them. These guys stand out from the pack a bit though.
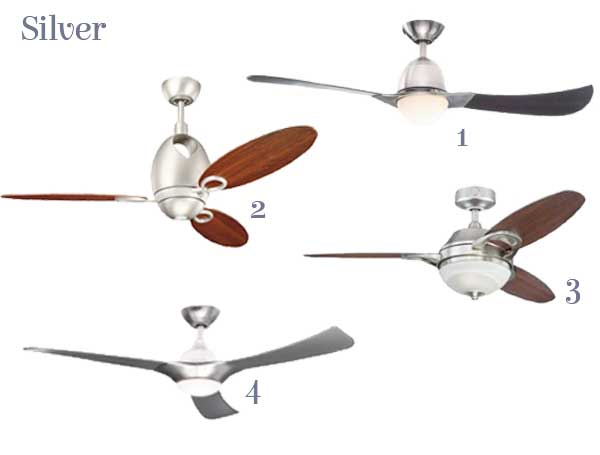
You know what was cool about all of the above? Everyone one of those was under $300. Not dirt cheap, but not ridiculous either.
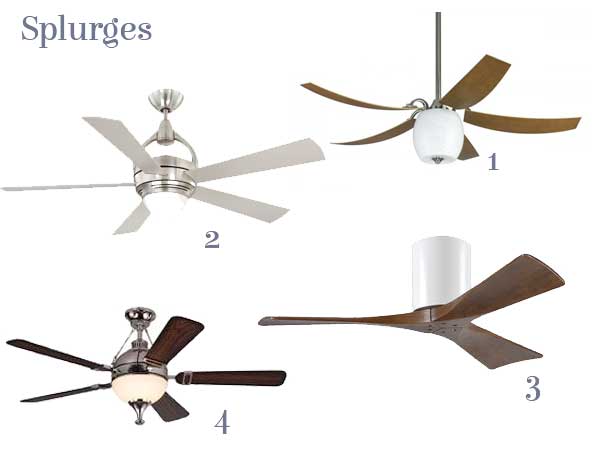
If you’re in a place to splurge there are definitely some more beauties out there. I really wish I had a place for #3, that one may be my favorite out the entire roundup!
A couple weeks ago we started tackling some of the upstairs light fixtures. The vanity fixture I ordered for the bathroom finally arrived and the bedroom ceiling fan was making some unpleasant grinding noises (and wobbled when you pulled on the cords) so we decided those 2 were up next.
We started in the bedroom and dismantled our sad old fan.
No one will miss it.
I got a little excited at first because there was modern wiring! Modern wiring! There would be an electrical box! This would be as easy as it should be! Right?
Wrong.
There was modern wiring, but no electrical box and the new fan was significantly heavier than the wussy little old fan. Shit. We’d have to do this right.
The good news was that since we were on the second floor we had ceiling access through our unfinished attic. The bad news was that the way the joists and other supports were configured left no space to mount an electric box over the existing hole. So we had to cut a new hole in our ceiling. Joy.
Cutting a hole in old lath and plaster (with a crappy saw no less) is mildly terrifying. At least it was for me as I stood underneath and started yelling at Matt to stop what he was doing because some hairline cracks started to form. The take-away here? Just buy a good saw already.
We did successfully cut a hole in the ceiling AND securely mount an electrical box. After that installing the fan was pretty easy.
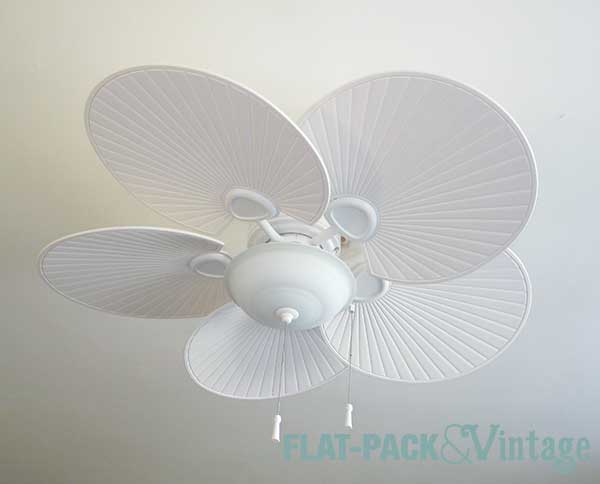
Much better! I agonized over a ceiling fan for he bedroom for a while (like I agonize over nearly all lighting choices). The ceiling fan was a must since we don’t have A/C and I don’t sleep well if I’m too warm. I eventually settled on the Hampton Bay Havana ceiling fan from Home Depot. I usually think the fake palm blades are a little kitschy, but something about this one just seemed nicely textural without totally screaming tacky Palm Beach hotel.
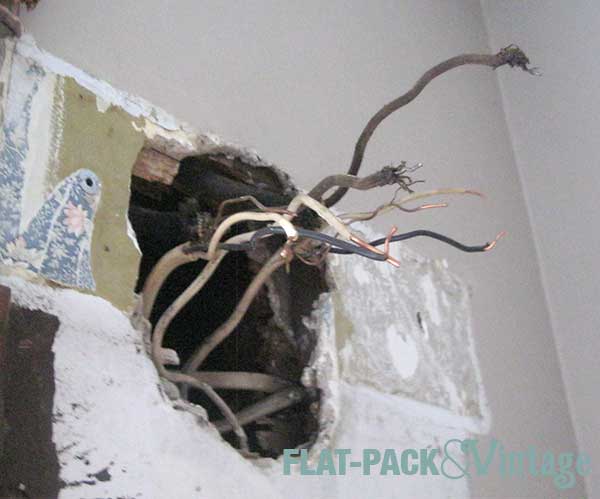
Up next was the bathroom. That fugly vanity light HAD to go. During our demo process we discovered the medicine cabinet was hiding a hole in the wall and the light fixture was hiding even more of a hole in the wall.
And an absolute cluster fuck of wires. You can’t really see what’s going on here, but there are 3 hot wires, 4 neutral wires, and 2 grounds for a single light fixture. There was some crazy splicing happening to get everything hooked up to power and to the light switch above the sink.
We also had to enlarge the hole in the wall so we could center the new fixture the best we could and, you guessed it, install an electrical box. It was a giant headache and we were left with a big honking hole in the wall that needed patching (more on that later) but once again we had a HUGE improvement over the the existing light (even if it’s a little crooked at the moment).
We went with the Contour Double Sconce from West Elm and I may order another on the these for the downstairs bathroom cuz I kind of adore it.
My dad and step-mom came into town over the weekend to see our place to help us out with some projects. My dad is kind of awesome (HI DAD!) and super handy and good with the problem solving necessary for old goofy houses. Our project for the weekend was light fixtures. Pretty much every light fixture in our house I want to replace, but I’ve never changed a hard-wired fixture before since I’ve only ever had apartments. I figured I could learn how to do it through the power of You Tube, but it would be way easier to have someone here walking me through.
Sometimes I do actually make smart life choices.
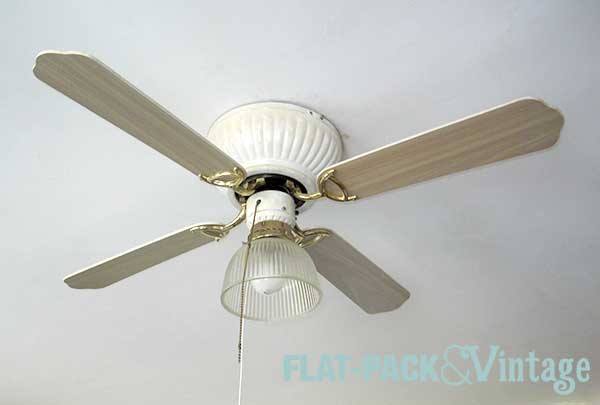
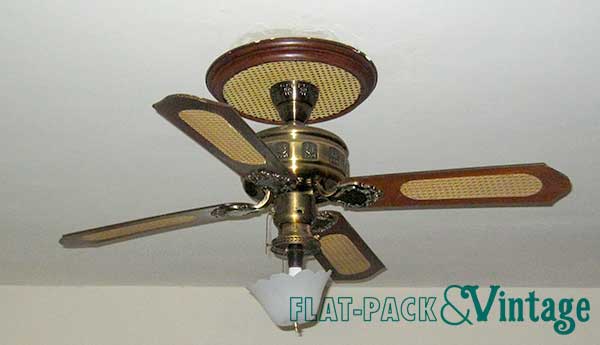
The first light fixture we tackled was the family room ceiling fan which by far the most depressing of the 3. We had also been unable to use the fan feature since the fixture was hanging out of the ceiling a good inch so we were not terribly confident in how well it was attached. We also figured it would be the most difficult to deal with.
We were right.
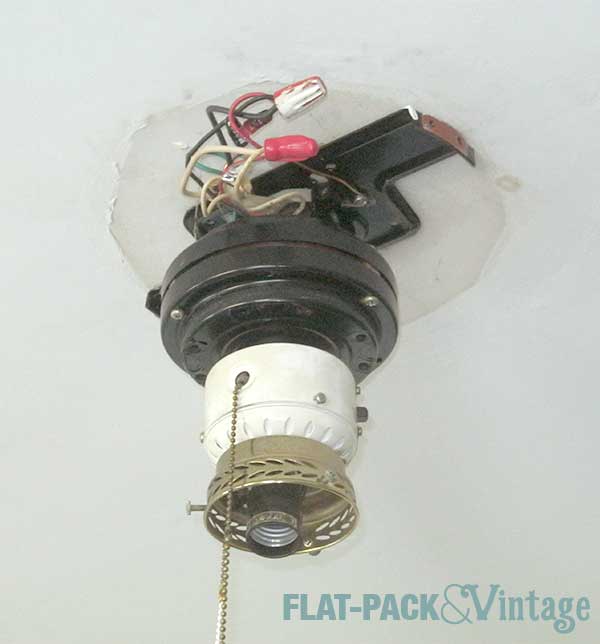
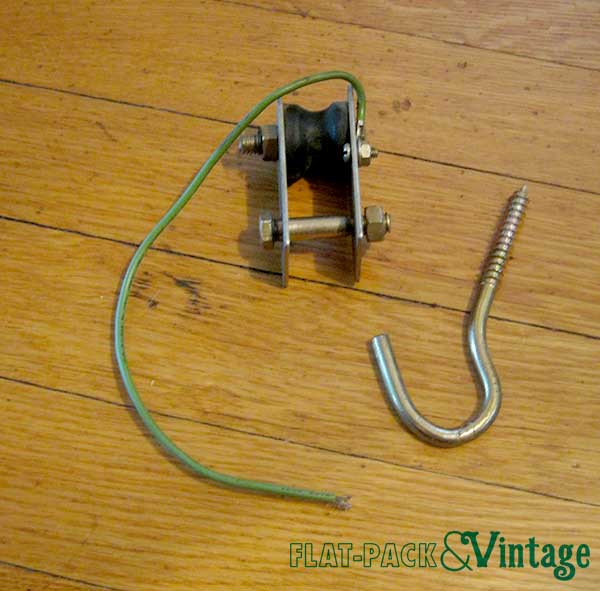
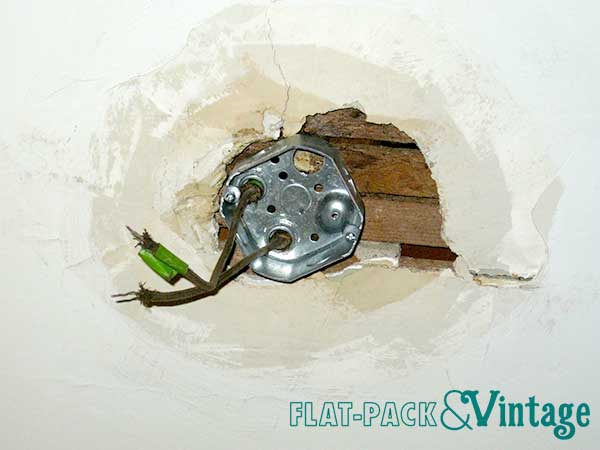
The concern was that the electrical box in the ceiling would not actually be rated for ceiling fans. The problem ended up being there was not actually an electric box in place. Nope. Instead there big ol’ screw in a ceiling joist that the fixture was hanging from. Awesome. I don’t actually have pictures of this step since I guess I was mildly in shock, but these are the pieces we pulled out:
WTF house?
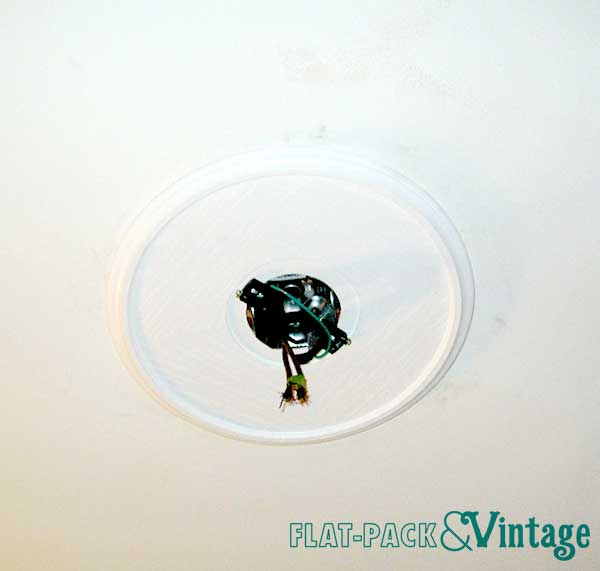
The good news was that with the joist right there we had a really solid mounting surface. I’m not really going to go into detail about what we did because it’s one of those things is not technically up to code (although still an improvement over what was there) so I don’t really want to encourage people. But let’s be honest here, in an old home sometime you gotta do what you gotta do.
There was also a decent amount of ceiling damage that the previous medallion was covering. I hadn’t planned on putting a ceiling medallion in the family room, but at this point it seemed like the easiest solution and I was ok with it.
Better already. At this point we could actually install the damn fan. Word of advice for old home owners, the hot and neutral wires may not be color-coded so you want to make sure which is which (our existing fan had the hot and neutral reversed… joy). Everything else was following the instruction manual that came with the fan. Putzy and annoying, but not ungodly difficult.
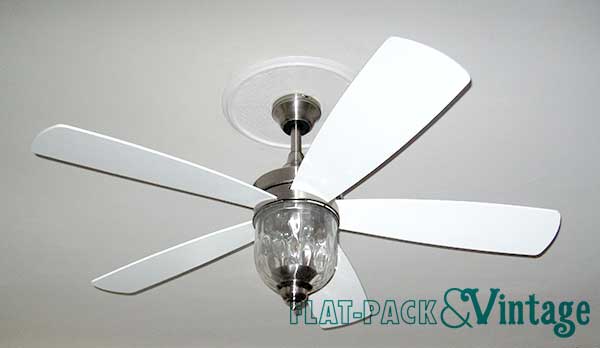
Ta-da! Much much better. The light patterns from the water glass are a little crazy and it kind of turns into a disco in here when the fan is on so we’re going to try and find some more diffuse bulbs. This fan was also the last of its kind within 100+ miles of us. I was scouring websites trying to find a ceiling with a some-what vintagey feel (nearly impossible) and finally found this one at Menards and had to drive out to Apple Valley to snag their last one on clearance.* It’s a Turn of the Century Cosmos 52″ fan in satin nickel. The blades were faux birch on one side and silver on the other, so I just painted them white. It looks a little stark in the room at the moment so it may get another mini-facelift down the road.
The two other ceiling fixtures we tackled also had two more radically different mounting situations.
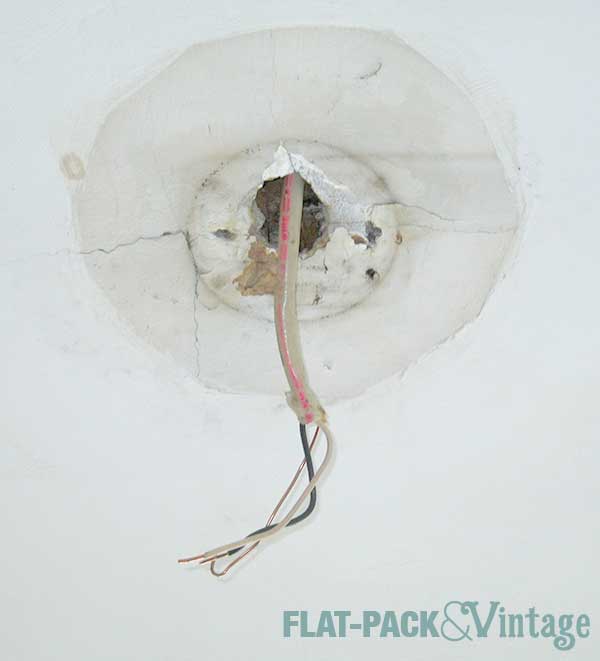
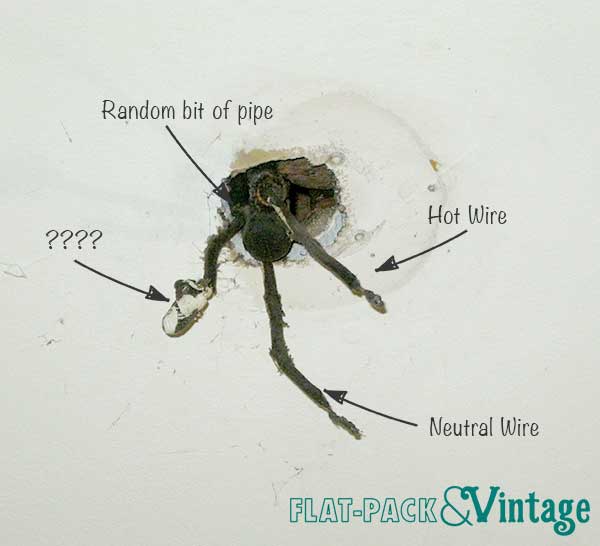
The living room was also lacking an electrical box AND there was what appeared to be a gas pipe (from when the house probably had gas lighting) jutting out of the hole. There was also a third random wire which in any sort of normal situation would have been the ground wire, but I think I’ve already established that we’re pretty far removed from normal in this house. (The picture make the wires look a frayed and scary, but they were actually in surprising good shape, just dusty)
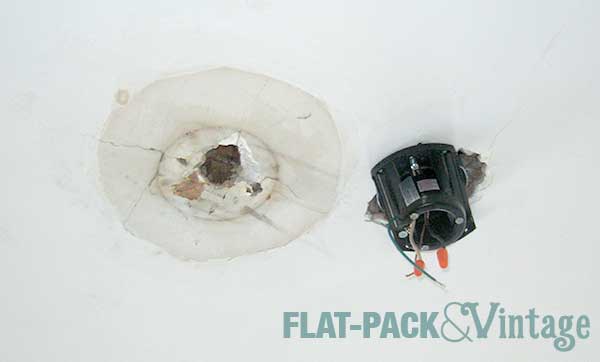
Even though we were pretty sure the gas pipe was no longer connected to anything we didn’t want to mess with it so we went back to the hardware store (again) to get a different electrical box (technically an extender since it had an open back). We also had to saw a chunk out of the ceiling medallion to have it fit around the new electrical box that would be sticking out of the ceiling a bit.
Then we had to run to a hardware store (yet again) to get a 100 watt equivalent candelabra bulb** since the single bulb in the living room is kind of wussy and we wanted the bulb in before we finished assembling the fixture.
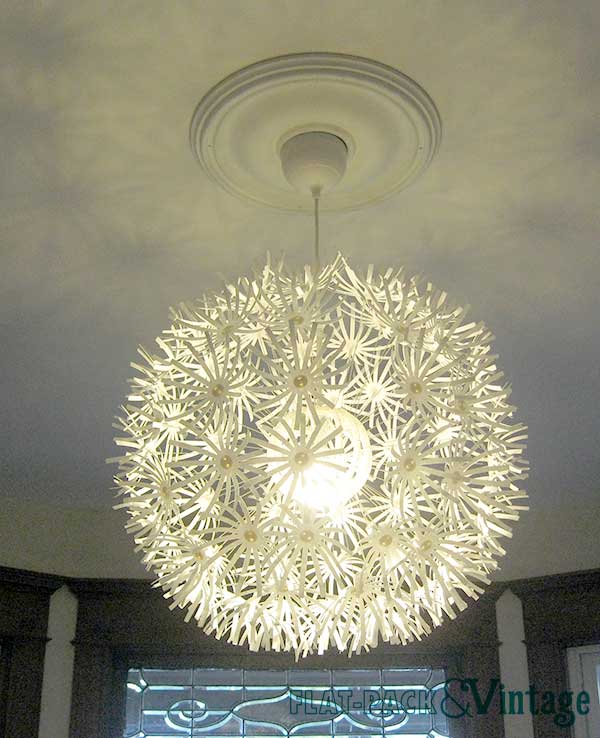
Voila! Matt was skeptical about the crazy mod MASKROS light in our fairly traditional (architecturally) home, but I think everyone was pretty impressed with the end result.
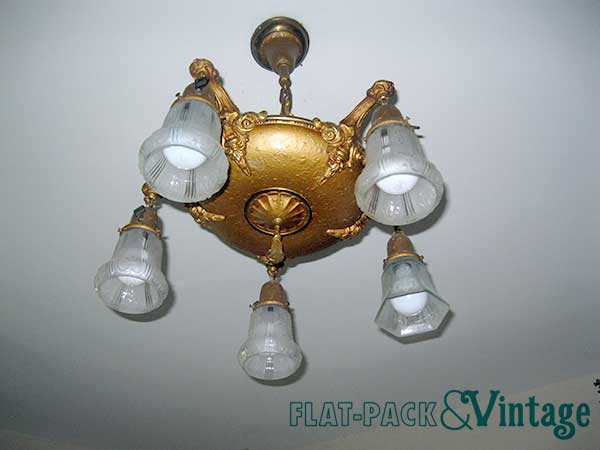
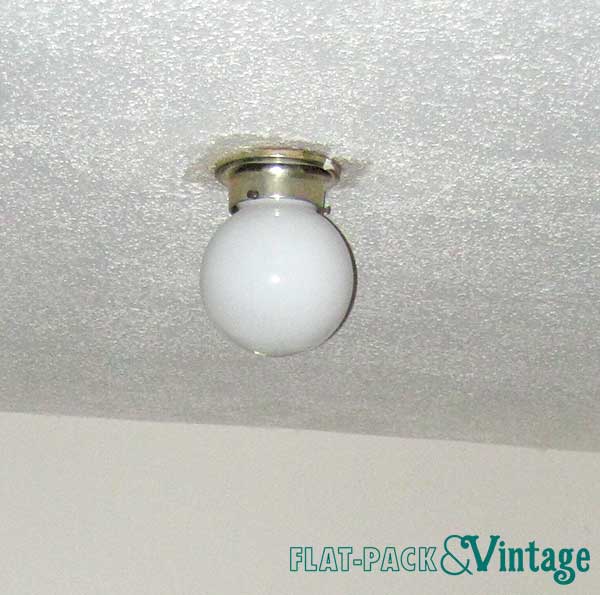
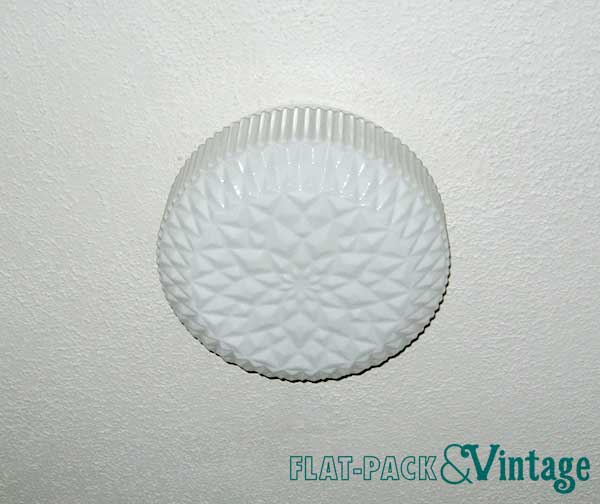
Fixture #3 was the entry light. The existing light was this boring old (tiny) globe.
Not awful, but not so nice either. Enter IKEA once again. I loooove their VANADIN ceiling light. Pretty simple, still interesting, cheap, and most definitely not a boob light. It also has a vintagey vibe. Win.
When we took this light down there was actually an electrical box in place. WOOT! And color-coded hot/neutral wires! There was even a ground wire! Craziness! ….Only the electrical box wasn’t exactly attached to anything. Luckily there were screw holes in the base of the VANADIN so we were still able to solidly attach that to the ceiling with drywall screws.
This one was hands down the easiest out of the three fixtures we tackled, but nothing was 100% as straightforward as it should have been so it took the whole weekend to change out three lights. We also answered the slightly lesser asked question of “How many people does it take to change a light fixture.” Answer: 4 people, 2 days, and 5 trips to the hardware store.
* The lighting department guy is possibly my hero and also quite probably thinks I’m just slightly unhinged. I called to make sure the store still had it and how much it was since the website didn’t list the price. $80. “I’LL BE THERE IN 20 MINUTES!” *click*
** The only 100 watt equivalent candelabra bulb we found was at Lowes and the closest one to us was in West St Paul. Nearly every frickin’ road our GPS tried to direct us down was closed. And then we went the wrong way on the expressway on our way home. It was an adventure… or something.