In Which I Decide to Destroy My Closet

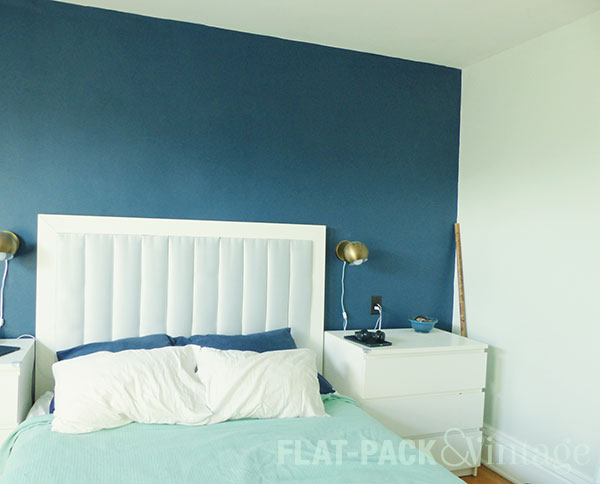
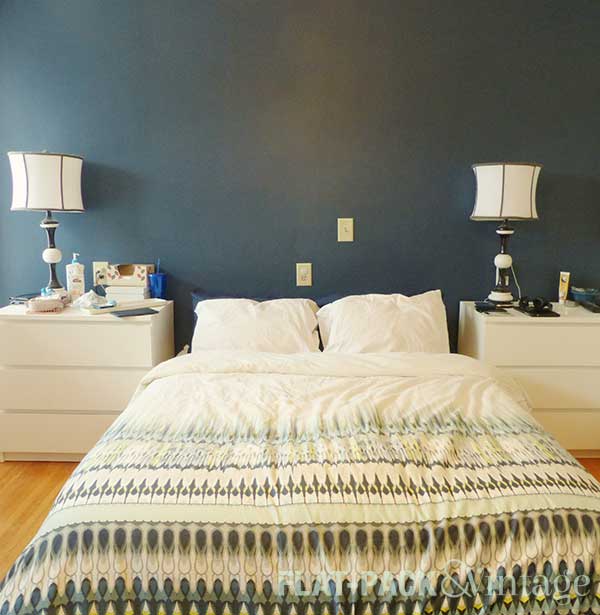
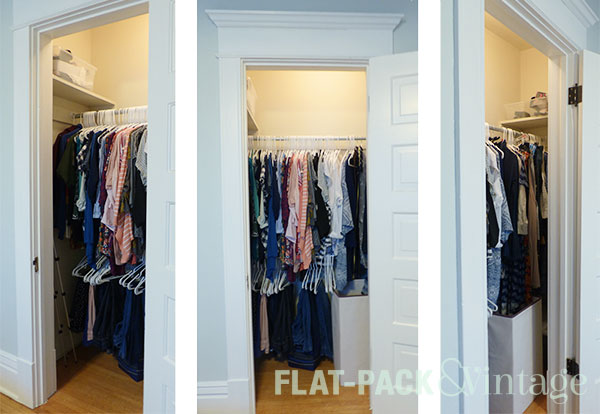
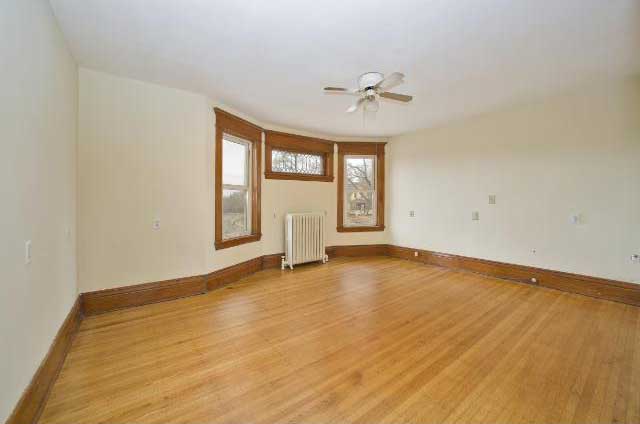
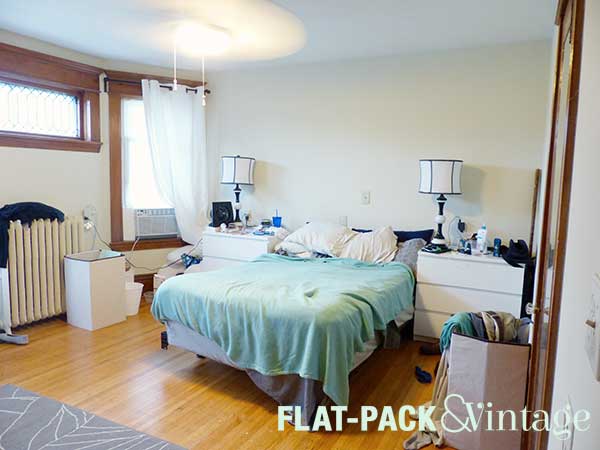
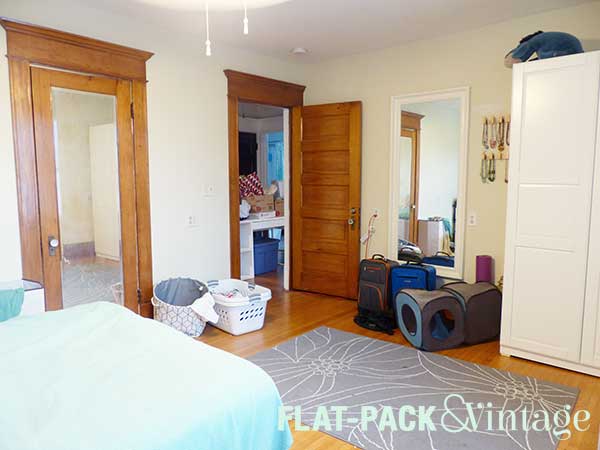
The closet in our master bedroom is a shockingly good size for a 100+ year old house…which pretty much means it’s on OK size for one person.

The current configuration is decidedly meh–a single rod and some small shelves on each end. I added another hanging rod for a nice tiered effect, but the height isn’t ideal and it’s wobbly.

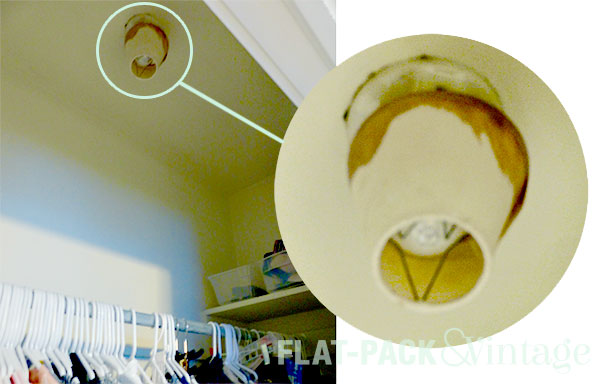
There is a light in the closet, which is a nice feature…except the light is simply a bulb with a really gross-looking clip on shade.

Meanwhile I’m sitting around waiting for the wallpaper for the micro-bath,* so it seemed like a good time for a closet makeover.

I found a stock closet organizer that had everything I was looking for–double rods on one side (for shirts and pants), single rod on the other (for dresses and longer skirts), and usable shelving in the center.  Plus, the 16″ option was wide enough to slide my hamper into the shelf area with some minor adjustments.  All we had to do was rip out the existing rod, shelving, and baseboards (so the organizer would fit flush against the wall).  Sounds pretty simple, right?

Hahaha!

Last Wednesday night I decided to start on some demo. I knew some repair would be needed, so I was hoping to get the demo done and joint compound any dings in the wall during the week so I’d be able to throw on a coat of paint over the weekend and hopefully even get the organizer up and functioning.

Although it sounded like a good plan, this is what happened once I started to pry the baseboards off:
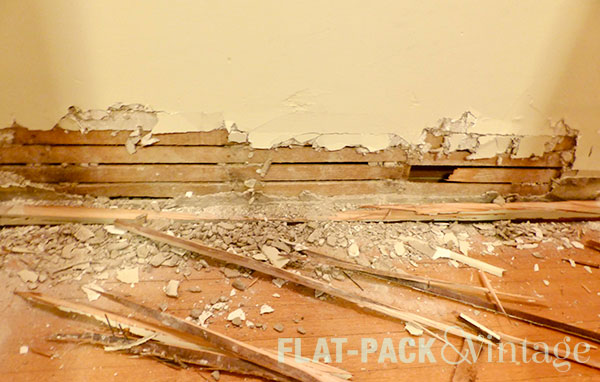
*twitch*

It turns out that part of the problem was that the corners where not actually mitered and the butt joints that were used were pushing the back section of baseboard into place. Unlike me, Matt figured this out and by the end of the evening he had almost finished removing the boards…which went much more smoothly when you weren’t fighting against the butt joints.

Matt could have made more progress, but I made him stop because I actually wanted Wesley to go to bed at his normal time.

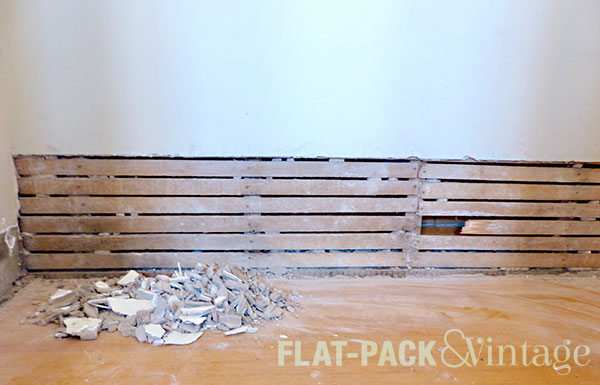
Thursday saw the removal of the upper shelves:

I just love the smell of demo in the morning… only not because 1) this was all happening in the evenings after work and 2) it really just smells like dust and sweat.

And on Friday, she rested. With a glass of wine.

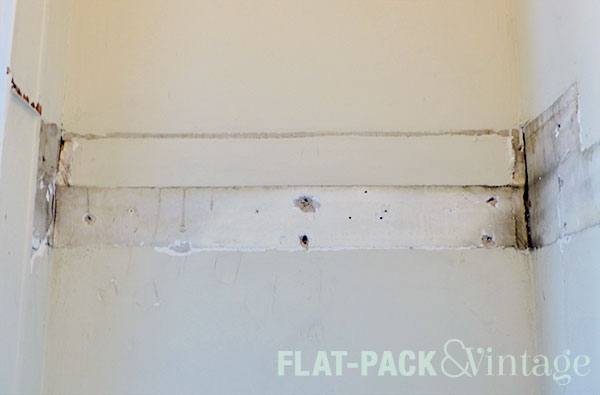
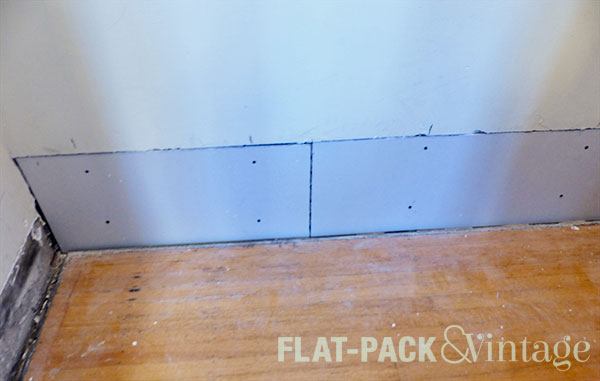
My plans of joint-compounding any “dings” were looking incredible optimistic. This was going to a full-on patch job on the back wall. So on Saturday, I squared off the holes in the plaster (and knocked off any remaining plaster where my patches needed to fit) and filled in the large damaged areas with drywall. Then I taped and finally joint compounded. Sunday brought on a couple more rounds of sanding and joint compounding. Because this was in a closet, I didn’t go full-on perfectionist in my patch job.  That being said, I was probably more neurotic than most people would be while working on a closet.

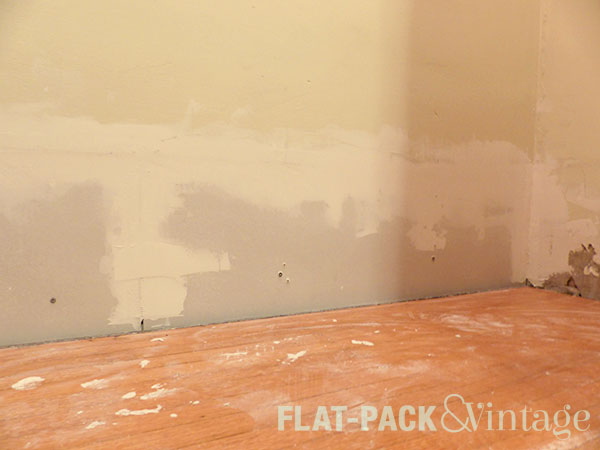
The upper part of the walls also got a layer of joint compound to fill in nail holes and dings, repair corners, and even up the paint build up that accumulated around the edges of the shelves.

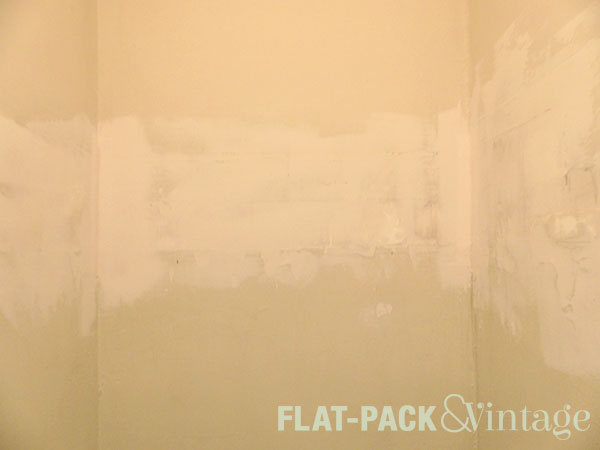
I feel like I could make millions on this as a abstract painting–White on Dirty White.

We’ll see how this week goes and if I’m feeling ridiculously productive I may be able to get the walls painted some evening…more likely I won’t do much else until next weekend.


*The sample I ordered FINALLY arrived yesterday.

Master Bedroom Reveal!

Ooof, it’s been a while!  The master bedroom is finally done though!

Let’s take a look back at what we started with:

One of the major pros of this house was the room sizes; you rarely find 100+ year old homes with generous room sizes and the master bedroom was especially generous.

It was also very generous with the outlets–12 pairs (and all of them about 3′ off the ground)!

After moving in, it pretty much morphed into this:

And then stayed that way for a while as we focused on other projects. Whomp whomp

A little paint, some new furniture, and let’s see where we’re at today.

SO much better. It looks like adults actually live here now!

The headboard, nightstands, sconces, and rug are all at a much better scale.  The proper bed frame and drawers on the bedside tables add some much needed polish (it’s really nice to be able to stash things like deodorant, hairbrush, chapstick, etc out of view but still easily accessible). We also upgraded the outlets next to the bed to the fancy ones with the USB ports because we’re always charging phones and tablets on our nightstands.

I love the drama of the accent wall and it really helps highlight the bed (which is the pretty standard focal point in a bedroom). The pale green-blue-gray walls are wonderfully soothing.

I found the candle holder at World Market and had a beast of time getting it into my tiny little car, but here it is! The circle pattern compliments the sconces and the round mirror on the opposite side the room, and the bronze really pops against the teal wall.

Especially when working with cool colors (blues, greens, purples) adding a touch of warmth really helps balance out the space. I scored an amazing vintage dresser and then found some side tables in a similar tone at Target.  The pops of natural wood add so much more than sticking with all white furniture like we had previously.

Added bonus: the mid-century dresser paired beautifully with my Cherner chair. I literally pulled it out of a dumpster years ago! It works well in the bedroom because it gives me a place to stash a robe or PJs, but it’s not big enough to let a giant pile of laundry accumulate.

The rug seems a bit crazy, right? I absolutely love it though! A different color and pattern would have completely changed the entire feel of the room.  This one just seems to add a bit of playfulness and quirkiness that appeals to me.  Matt may try and argue that we’re fairly formal people, but I will always enjoy of pop of the unexpected.*

There are still some tweaks needed–the solid green pillows are a bit too intense and the print needs a new frame. I’m eyeing this print from Spoonflower for the pillows since the citron color pulls from the duvet and breaks up the mostly blue color scheme. My closet is also in need of a complete overhaul, but that will be a project for another time.

I am so glad we finally have a respectable bedroom! Especially since now that we’re done I can go back to working on the downstairs. Next up are going to be the living room and TV room. I’m looking forward to getting those done. I always have a little self-guilt whenever we have people over because half of our main entertaining space is decidedly meh which makes me look like a shitty designer…but you can’t do everything at once.


*I still can’t convince him to buy one of the reindeer heads from the vintage store down the street.  The fossilized rhino skull was also shot down, despite the fact that it could never be broken by cats or kids…some complaint about not paying $7k for a rock or something…


Let’s Style a Dresser

Ladies and gentlemen, we have a dresser!

My original plan was to take the two IKEA dressers we currently had on each side of the bed and move them between the wardrobe and the door. Unfortunately, the dressers were a few inches too big to fit there.

Whomp whomp. Time for plan B and it ended up being gorgeous.

I originally though plan B was going to involve more IKEA.  Not fancy, but affordable. I wasn’t ready to give in to more flat-pack just yet,* so I would periodically browse Craigslist and  Facebook Marketplace. One day I stumbled across this beauty.  It had been up for over a week so I figured it was long gone, but I messaged the seller anyway and it was still available. The seller was even willing to hold it for me until the weekend so I could recruit a friend with an SUV. I have never felt so damn lucky.

We used to have a full-length mirror on this wall which obviously wasn’t going to work with the dresser. No biggie, I could turn the mirror and hang in horizontally above the dresser.  Or at least I thought I could…only I failed to actually measure the mirror ahead of time. It was longer than the dresser so it would have stuck out past the end and that would have just looked awkward.

So now the mirror’s scrapped and I need something to fill the space above the dresser and I’m thinking….another mirror. Matt thinks I’m nuts, but bows to my superior design skills.**

Here’s where you guys come in.  I’ve got a handful of mirror options, but I think I’m too close to the project at the moment so I need to get some outside opinions.

Watcha think? I’m sticking with brass accents in this room because there is so much blue/teal/cool gray happening that it really needs a pop of warmth.  I’m also trying to find a mirror that’s roughly 24″x30″ because then I can mount it to a stud*** and it will still look well positioned. Next to the mirror I have plans for some jewelry storage so whichever mirror I choose won’t be lonely for long.

Now that we have a new dresser (and some new nightstands!) we just have to bring in artwork and accessories and we’ll be ready for the full room reveal in no time!  Woot woot!


*Remember Matt’s challenge?

**Or just doesn’t care enough to argue.  Same dif really.

***Mirrors = heavy, plaster walls = wussy.


DIY Channeled Headboard

Hey hey hey!  We have a new headboard! Did you think you had lost me to baby posts? Yeah… hopefully those will be slowing down and I’ll be focusing more on the house again. If you are interested in some down-to-earth baby talk, I finally did something with my Twitter account. Yup, I’m officially a Twit.

And our new sconces? How cute are they???

We seriously haven’t had a headboard since we moved into this house, so it’s been really nice to finally get this project out of the way. And yes, this was all custom-made and not terribly difficult. If you can use a miter saw and staple gun without losing a hand, this is for you!

I based this on the ah-maze-ing looking headboard from Fabric Paper Glue, but made a couple modifications to make it work better in our space.  Most notably:

  • I switched out the 1×8’s for 1×6’s (personal preference, plus 8-1×6’s + a 1×4 frame fit our bed frame perfectly)
  • I opted for it not to run all the way to the floor (our chunky baseboards would get in the way)
  • I chose to mount it on the wall using a cleat, which is a great way to hang big, heavy things.

Here’s what you need (measurements/amounts based on a Queen-sized bed)

Supplies

  • 5-1″x6″x8′ boards (they just need to be straight, they don’t need to be pretty)
  • 2-1″x4″x8′ boards (paintable/stainable quality)
  • 2-2″x6″x6′ boards
  • 1 or 2-1″x2″x6′ boards
  • 2-L-shaped metal plates
  • 10-straight metal plates
  • Batting (1-90″x108″ roll of “classic loft” gave me 3 layers/board)
  • Fabric (about 3yds)
  • Spray adhesive (optional)

Tools

  • Scissors
  • Miter saw
  • Table saw
  • Staple gun (+ 1/4″ staples)–an electric staple gun is totally worth it!

Because we didn’t take our headboard all the way to the floor, we measured from the top of our bed frame (without the mattress) to our desired height. We cut 8 1x6s to this measurement.

I used spray adhesive to adhere 2 layers of batting to each board. The adhesive will help prevent your base layers from shifting, but isn’t necessary. I rough-cut the batting first, then trimmed it to size after gluing it down.

Cut your third layer of batting a few inches longer on each side–you’ll need enough to wrap around the board and staple down.  Cut your fabric about the same size.

Lay your fabric on the ground right-side down. Layer your batting, and then your board (fabric side down).

Oh hey, look! I finally remembered to take some pictures! I blame mom-brain (it’s a convenient excuse for everything).

I also cut out the corners of the batting to de-bulk when I got to wrapping the ends.

Starting from the center, staple the batting and fabric to the back of the board.  You’ll want to pull the fabric snug, but not super-tight. Work your way around the board, alternating sides.

Once all your board are wrapped you’ll need to attach them all together.  Cut a 1×2 a few inches shorter than the entire width of the boards. Use a convenient stretch of baseboard to keep the top of your boards lined up evenly (because of our shoe molding, I put an extra board in front of our baseboards).  Recruit a helper to pull the boards tightly together as you screw the 1×2 into them. Depending on how you choose to mount the headboard, you may opt to do more rows of 1x2s, but we were attaching some additional boards.

After the panels were secured together, we measured, cut, and attached the frame. First I dry-fit everything to check that everything was cut right. Then I attached the corners together with L-shaped plates. The frame then slipped around the panels and got attached to each board with straight plates.

We added a 2×6 along the bottom to give us an area to screw our bed frame directly into the head board. Our bed was constantly inching forward on our hardwood floors so we wanted to put a stop to that. Only about half of the 2×6 overlaps the headboard, the remaining overhang fills the gap between our bed frame and the wall. If you have less-chunky baseboards, you may not not need a 2″ board here.  Just measure the gap between your bed frame and the wall when your frame is pushed up as close as it will go.

At this point, some of you may be wondering why one of the boards of the frame appears to be painted on the back side.  This is because my husband–the math major–forgot how angles work.

Matt: I probably shouldn’t have bothered getting the pre-primed boards.  I still had to prime one of them again anyway.

Me: Why?

Matt: Because after cutting the first the side piece you need to flip it over to cut the angle for the opposite side.

Me: Or you could just reverse the saw.

Matt: No no, because see, this side needs to be angled this way so to get the opposite angle on the other side you need to flip the board over and…. oh… well I feel stupid now.

The picture above also show the cleat on the back of the baseboard.  Cleats are a great way to mount heavy objects on a wall–the length helps distribute weight while allowing you to hit multiple studs. If you have a table saw, they’re also super easy to make.

We chose to mount half of the cleat on the back of the headboard first and then measure for the correct height for the corresponding wall

I don’t have a lot of specific guidance for lining up each half of the cleat other than measure.  Measure lots.  And make chalk mark for guides.  It probably easier if your headboard rests on the ground, but ours rests on the top of our bed frame (because we just like to be difficult here).

FYI: That’s not a phone resting on the cleat, it’s just one of the 50 million awkwardly placed outlets in the room.  Matt removed the outlets, capped the wires, and put a solid plate over the electrical boxes.

So to recap: The headboard is attached to both the wall and the bed frame. It’s secured to the wall with a French Cleat, and bolted to the frame using a spacer.

.

Awesome diagram, no? One of these days I’d like to install Windows XP on my old (Windows 7) laptop so I can install my copy of AutoCAD again…but that’s a lot of work. #lazygirl

So yay! We have a headboard! And new sconces! Our bedroom is actually starting to come together! I have one wall left to paint (that I won’t be able to fully finish until we take out the window AC unit). I have an area rug ready to go (I just don’t want to put it down until I’m done painting). The biggest element I’m missing at the moment is a pair of nightstands.  The dressers aren’t really working there, especially with a lower bed frame…but hey, we’re getting close to done!


The Difference a Wall Makes

We’ve officially started work on our bedroom makeover!* It’s slow goings, because baby, but I got one whole wall painted the other weekend!  Whoohoo! A wall!

The bedroom plan was to have a dramatic, dark accent wall behind the bed, so I decided to start there.

Gorgeous, no? The color is Benjamin Moore Gentleman’s Gray… although don’t be fooled by the name because it is decidedly greenish-blue.

I painted the baseboard along that wall at the same time (yup, white trim EVERYWHERE) so we could shove our bed back into place. I’ll probably be tackling one wall at a time so it will look pretty hodge-podgey for a while.  I’m also going to wait until spring to paint the radiator because I really want to be able to open windows for that!

I had hoped to make some more progress by now, but cold and flu season took a pretty nasty toll on me, so it’s been sitting like this for a few weeks. We do have a headboard up now too, so those pictures (and tutorial) will be coming soon!


*Although, is it really a makeover if it wasn’t really “made” in the first place?

Brainstorming: Master Bedroom

This is probably super optimistic since we now have a demanding baby in our household, but our next project room is going to be the master bedroom.  This room is way overdue for some TLC since we’ve done nothing to it since we moved it.  Heck, Matt just fixed the closet door so it actually stays closed!

There are a couple reasons I chose to tackle the bedroom next.  Part if it is because we now have a kiddo (whose toys will gradually start taking over the house) it will be nice to have an adult retreat space.  I’ve also been spending more time in this room lately and it’s really hit me just how blah the space is.

masterBefore2

masterBefore1

Yaaaaawn. Also, please pardon the mess.  I didn’t even get a nap in today and had no motivation to style a Before shot.

So what’s the plan?

masterMoodBoard

Thankfully this room only needs cosmetic work so the bulk of the work will be painting. We also need to replace our mattress so we’ll be upgrading to a queen sized bed (and actual bed frame). I also want the headboard to really be a focal point of the room and the entire wall behind it will be painted a bold accent color. After that it’s a matter of replacing pretty much all our existing furniture and getting a rug that’s the proper size for the space.

Not gonna lie, but this makeover will probably take a while.  I’ll hoping we can at least make a start on the painting while Matt and I are still out on leave.  We’ll see since we’ve got a couple other (smaller) projects we’re trying to finish up too.

Save