We’ve officially started work on our bedroom makeover!* It’s slow goings, because baby, but I got one whole wall painted the other weekend! Whoohoo! A wall!
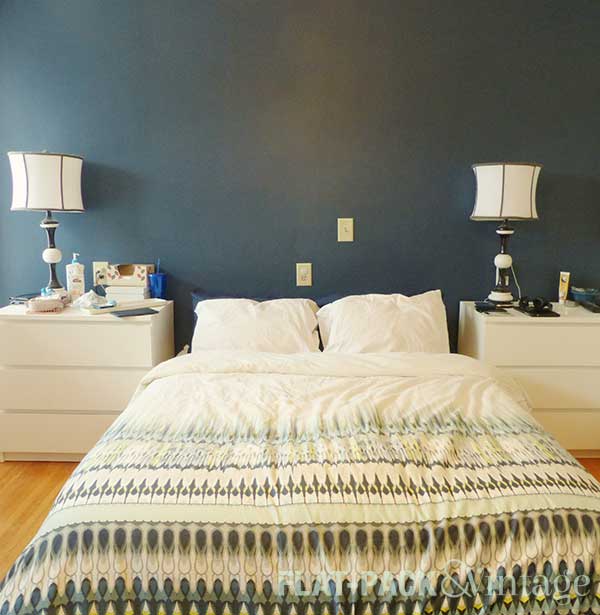
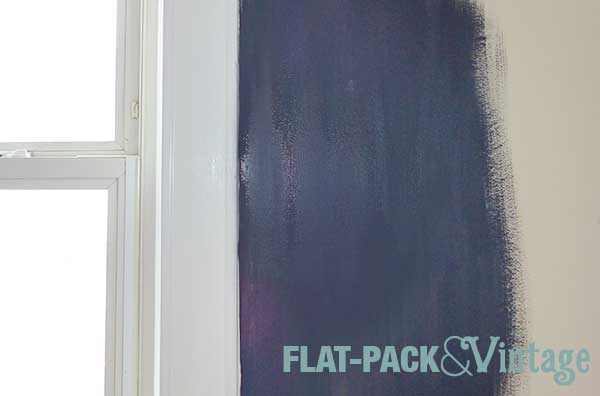
The bedroom plan was to have a dramatic, dark accent wall behind the bed, so I decided to start there.
Gorgeous, no? The color is Benjamin Moore Gentleman’s Gray… although don’t be fooled by the name because it is decidedly greenish-blue.
I painted the baseboard along that wall at the same time (yup, white trim EVERYWHERE) so we could shove our bed back into place. I’ll probably be tackling one wall at a time so it will look pretty hodge-podgey for a while. I’m also going to wait until spring to paint the radiator because I really want to be able to open windows for that!
I had hoped to make some more progress by now, but cold and flu season took a pretty nasty toll on me, so it’s been sitting like this for a few weeks. We do have a headboard up now too, so those pictures (and tutorial) will be coming soon!
*Although, is it really a makeover if it wasn’t really “made” in the first place?
A while back my sister if I asked me I wanted some furniture for the nursery. She had a changing table and chifferobe, both of which were ours when we were babies. The changing table was a little big for the room (and not really my style) but the chifferobe was really cute and I remembered growing up with it. I thought that was kind of cool too, to work in a piece of furniture that I had used as a baby/kid.
Later I was talking to my dad and he was mentioning how happy he was I was taking the chifferobe because his grandfather had made it for him. Whoa. I seriously never knew that and always just assumed it was something my parents picked up when they started having kids. I don’t know exactly why, but there is something kind of cool about being able to tell our son that he has furniture made by his great-great-grandfather.
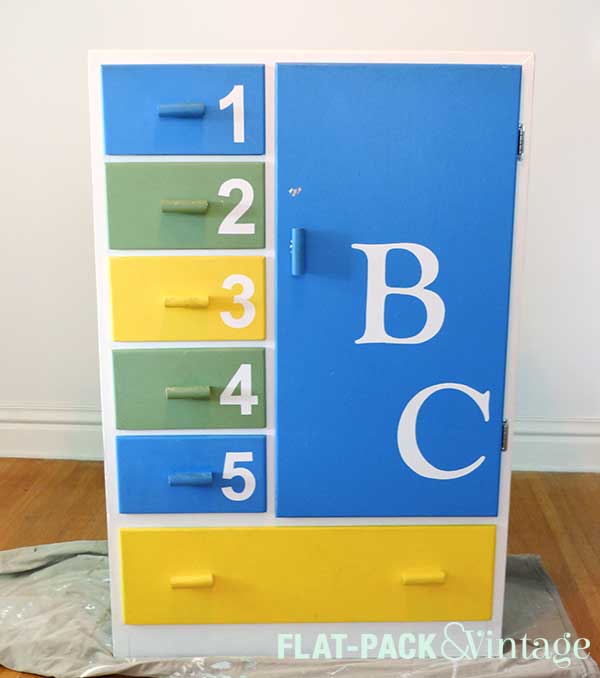
The piece has obviously gone through several makeovers in its 60+ years. When I had it the frame was white with yellow drawers/door and white numbers painted on the drawers (maybe letters on the door? I don’t remember…). My sister re-painted when she took it for her kids’ nurseries and added vinyl numbers and letters.
Super cute, but the wrong colors for our space. And the A was totally there when I got it, I was just curious to see how easily the vinyl peeled off.
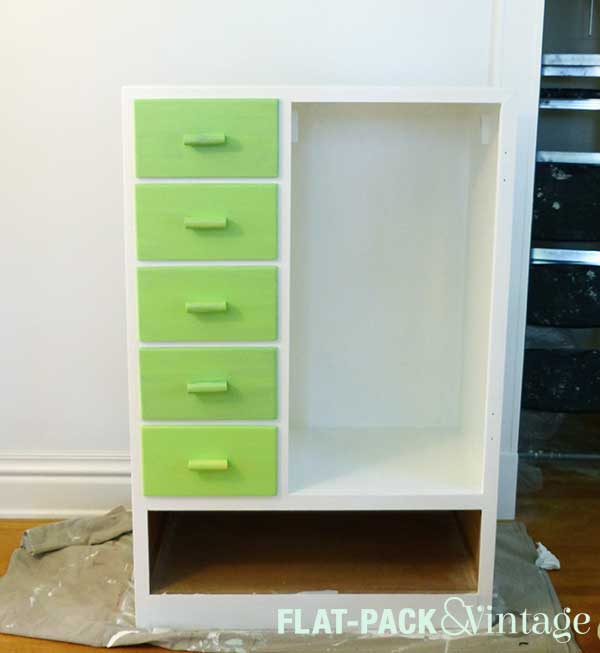
I decided to keep the frame white and did a quick touch up coat with (of course!) Benjamin Moore Advance (satin) in Simply White. Kids are tough on things and it just needed a little pick-me-up. I was really torn on what to do about the drawers and door, but eventually decided on green. I thought I had a good grasp on what shade I wanted, but, alas, it turned out a little too pastel-y
Guys, don’t do what I did. At $30 a quart, Advance is pretty pricey and I didn’t want to buy a new quart when I’m literally using about an 1/8th of it. I should have bought some cheap sample pots but was over-confident. I ended up going back to the store and asking them if they were able to re-tint it at all. If you ever need to do this, just be aware that there are limitations to how much they can do based on the pigments and the original base. I already knew that and just asked them to do what they could.
This was essentially the color progression as they experimented.
It’s better, but I have a feeling I may have some sort of color breakdown once the room is more put together and try yet another shade of green. I’m also debating if I want to add anything to the drawers or door.
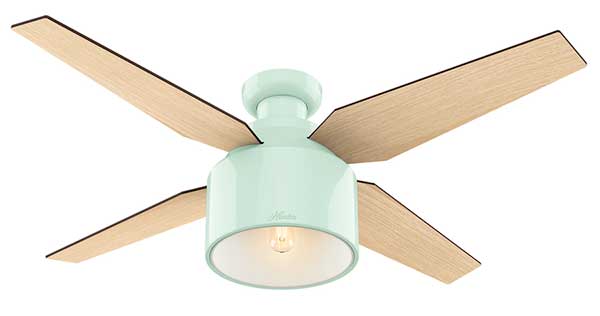
No, not the baby, that would be waaaay too early, but my ceiling fan for the nursery is finally here!
I ordered it back in February, knowing it was back-ordered until the end of March. Ok, I can wait. At the end of March I get a call saying it won’t be available until the end of April. Arghhhh. We were ready to paint at this point, but I couldn’t pick out the paint until I had the fan. At the end of April my already vivid pregnancy dreams started feeding off of my design neurosis and I had a nightmare in which I got shipped a broken and decrepit version of my fan and was told I couldn’t exchange it because it was the last one on the planet ever. The next day I called up Lowes asking them to check on the status and they assured me it would be ready for pickup the next week.
Sure enough, I got a call last Thursday (also Star Wars Day, our 3rd Wedding Anniversary, and the official start of my third trimester) saying it was FINALLY ready for pickup. The employee who called me was officially my BFF of the day.
Matt was hoping we could just pick up paint while we were already out. Nope, sorry, hardware stores are possibly the worst place to choose a paint color. That’s why they have all the swatches, so you can take them home and look at them in the same light you’ll be using the paint in. Luckily for Matt, I already knew roughly what colors I wanted, I just needed to narrow down the exact shade so we were able to pick up paint first thing on Saturday and get to work.
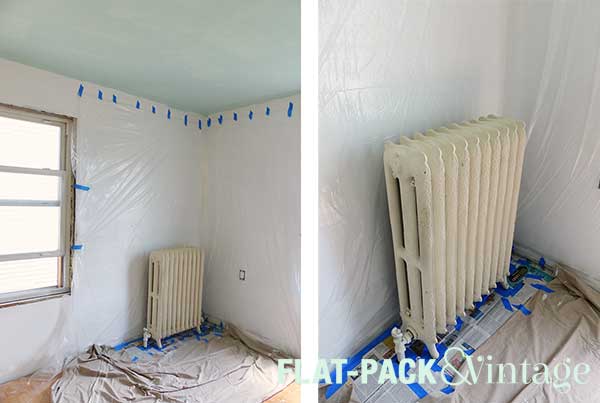
Matt started on the ceiling while I started prepping the radiator. My spray booth game is really improving.
How awesome is that ceiling???? The color is Breaktime by Sherwin Williams (flat finish). I think it’s bright and fun without being too candy-colored like sooo much kid stuff.
The radiator was currently a flat beige-y color. Once we get everything painted and the bright white trim installed it was going to look really dirty. I went over it with 3 coats of white spray paint* (satin finish). Soooooo much better!
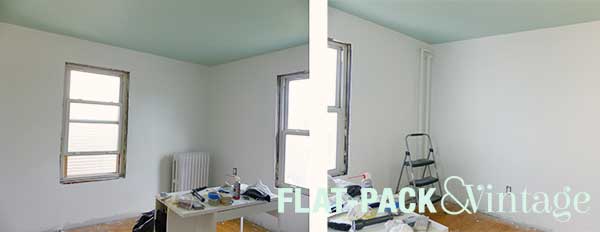
The ceiling and radiator took up all of Saturday, then Sunday we were able to start the walls! Painting goes MUCH faster when you don’t have trim to cut in around so we were able to finish the walls in one day.
We have paint! It looks pretty white, but it’s Palest Pistachio by Benjamin Moore (eggshell finish) and has a very faint gray/green tinge to it. The next step is getting all the baseboards and casings primed, painted, cut, and installed. Ooof! Our goal is to have the baby room looking like an actual room (instead of a construction zone) by my baby shower at the end of the month. I think we can do it!
*Don’t worry, I had open windows and a full respirator. I would have pawned it off on someone else, but spray paint is a technique and I have trust issues.
This past weekend we vacationed it up lakeside in honor of the 4th. Tons of fun, but no housework got tackled. Totally worth it though.
We are almost ready to tackle the painting the upstairs hallway and this area is packed with doors. The trim is for sure going to be white, but I’ve seen a number of examples where people paired white trim with black doors and I have to say I’m totally diggin’ it.
What I love about both these examples is that they’re used in homes that are similar in age and style to mine. I think the brass hardware looks especially amazing on them.
I think the trick is to not use a straight-off-the-shelf pure black; you need something with a little bit of depth to it. I also think a very dark stain (like an espresso, ebony, or java) could look pretty awesome too since you’d still see a little wood grain. Plus, since this will probably end up being more trendy that classic, doors are pretty simple to repaint if you feel the need to bring them back to white.
I don’t think Matt’s going to go for it*, but what do you think? Black doors: yay or nay?
*In fact he just told me he doesn’t like it. Party-pooper.
When we bought our house every room was “builder beige” (expect for the Brown Bathroom of Despair which was straight-up brown). You know, that warm, slightly off-white that’s like the go-to color when you want to remove all personality from a space?
Ok… that’s a bit harsh, but that’s often what realtors try to do when they’re selling homes–remove the existing personality so the future owners can better imagine themselves in the space. I get it… I think it’s unnecessary (although I’m a good visualizer so I may be biased), but I get it.
What I don’t get is living with a neutral color that isn’t working for you just because it’s “neutral.”
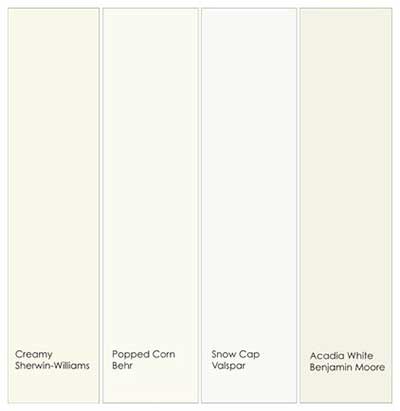
There are a million different flavors of “neutral.” You’ve got white, beige, gray, cream, and then assorted shades of each. Is it a warm or cool grey? Is it a yellow or pinky cream? The changes are subtle, but they can make a big difference.
Which is why the “builder beige” had to go in our house.
If you look at the rooms we’ve redone so far you can see there’s a decided cool (blue-green-purple) theme happening. A yellowy cream isn’t going to cut it. My personal favorite neutral is Benjamin Moore’s Paper White. It’s a slightly cool, pale gray–bright enough for low-light spaces (like hallways) but has enough contrast to make white trim stand out nicely. I knew we would be using a bunch of it in our house so I stocked up last year when Home Depot had their 4th of July paint sale ($15/gallon for Behr!!!!! and they can easily tint to BM colors).
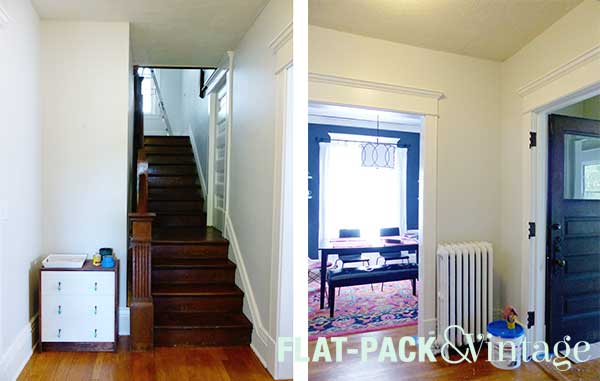
Before:
After:
Before our hallway was decidedly yellowy… it actually looked kind of dirty compared to rich blue-gray in the neighboring dining room. The after picture may be pretty subtle, but there’s a much more natural flow between the two rooms now.
If there are spaces in your house that are “builder beige” and you’re totally fine with it, go you! Just don’t talk yourself out of painting over one neutral wall color with another neutral wall color because you don’t think it will change anything.
Think about what your primary decorating color choices are. Red/Orange/Yellow are your Warm colors and Green/Blue/Purple (and usually Pink) are your Cool colors. If you’re using mostly cool colors chances are a yellowy (warm) beige may look a little out of place. If you’ve got a primarily warm palette happening than my choice of Paper White (cool) may not be for you. I also personally think earthier colors look better with creamy (warmer) neutrals, even if green is technically cool…. it all depends on the big picture.
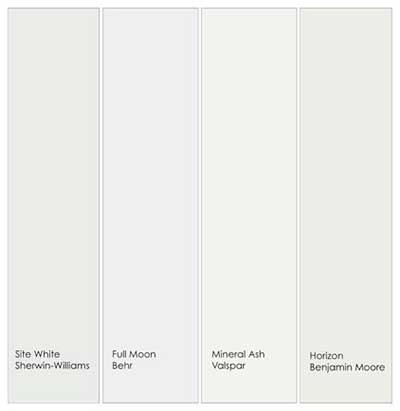
The Behr swatch section in Home Depot has very nicely labeled their whites by red toned white, yellow toned white, blue toned white, etc. If you’re somewhere that doesn’t have it spelled out (or you’re veering away from white), snapping a quick picture can make the undertones of a color really pop, especially if you get multiple swatches in the same shot, then you can directly compare them. And, of course, tape up the swatches you’re thinking of in the room so you can seem them in their correct lighting environment (and take another picture as the lighting changes). Picking up a couple sample pots once you have it narrowed down can be a huge help too.
A while back Matt was reading an article on restoring old homes and it mentioned that you shouldn’t insulate because it would “destroy the historical fabric.” It’s one of the reasons the Historical Preservation Society is often referred to as the Hysterical Preservation Society and has been a running joke with me and Matt ever sense.
Don’t get me wrong, the HPS is important, and recognizing historically significant homes is important. Here’s the thing though, not every old home is historically significant. Our house is an American Foursquare… sort of the cookie-cutter house the early 1900s. Is it pretty awesome compared to more recent architectural styles? Hells yes! It this specific house historically significant? Our neighborhood is filled with the same style houses, are they all historically significant? No and no.
When I shared my dining room reveal on Apartment Therapy a while back, a handful of people decided to ream me out for painting the trim. They claim I had “destroyed” the house and the final design was a “travesty” and merely “trendy” (*gasp*). What do I have to say to that? BAH!
Your home is a reflection of YOU. Unless you own a house that’s on the historical register you can do whatever you damn well please (and people often do*). I have been trying to keep the bones of the house pretty traditional, but have some fun with the fixtures and furnishings which suits my more eclectic nature. I also don’t feel like white trim is trendy and I’ve seen it in tons of similarly aged homes including million dollar properties and historically recognized homes (ok, only certain rooms in this one–but important, public rooms). It also lets me brighten our home and cost-effectively replace damaged trim pieces.
Which is why we’re continuing to paint the trim.
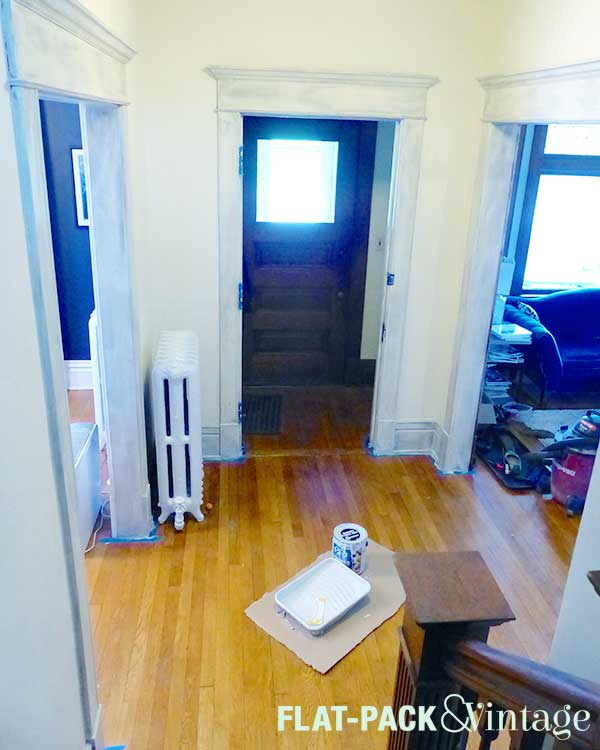
Yup. The critics haven’t dissuaded me and we’re continuing the paint into our entry way/stairwell/hallway.
We also picked an awesome weekend to start painting. Saturday was in the upper 90’s and Sunday was (only!) in the 80s. Keep in mind we do not have central air. Yeah, it was boiling.
We got the first section primed on Saturday by working in the morning and then late at night when the temps were a little cooler. We were still dripping buckets of sweat. Lovely.
Notice our lack of a door? It’s currently hanging out (haha!) between our living room and TV room. It’s not the locking door so I insisted we take it off so I could better paint the trim. Matt rolled his eyes and said I was crazy, but humored me anyway because that’s what makes our marriage work.
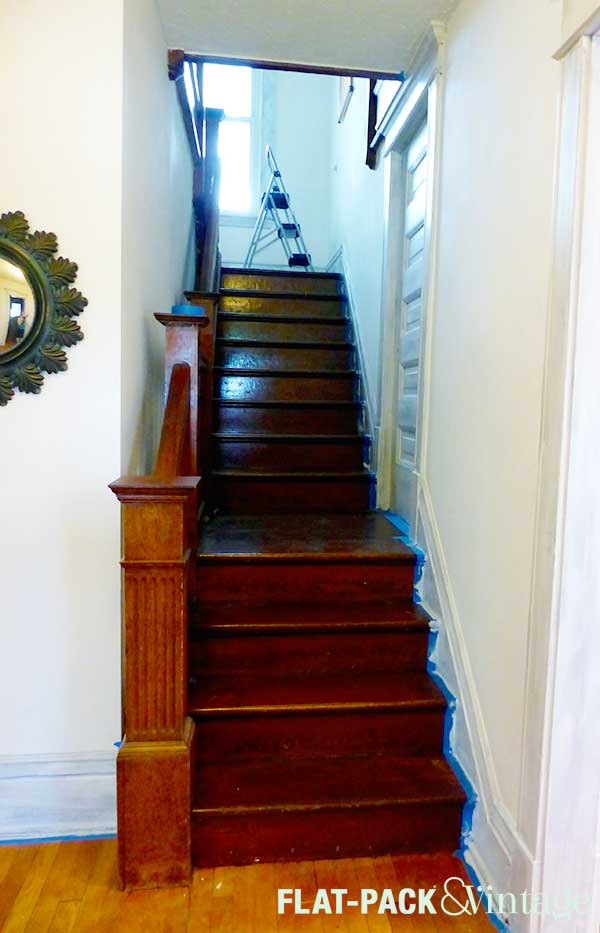
Big difference right? This is just the primer, but it’s already made a huge difference on the stairs–that smaller landing was nearly invisible on the way down (leading to many missteps and trips), now you see the changes outlined against the white and it is SO much easier to see!
We continued to power through on Sunday so everything has its first coat of paint now too. It’s been super cloudy and rainy all week so I don’t have any good pictures of that, but it won’t be impressive until the final coat of paint anyway.
* Sure people make crappy decisions all the time but the worse case scenario is that future homeowners will roll their eyes, mutter WTF? and change it all. Big whoop. The less rehab inclined may just not buy the house in the first place, so it’s good to at least keep resale value in the back of your mind, just don’t let it paralyze your own dreams.
Last week I went over my favorite tools and products for painting. Today I’m going to cover my process for painting walls. Painting walls really isn’t difficult so if you have the time and aren’t afraid of getting a little messy it’s probably not worth hiring out,* especially if you’re working on a budget.
There are multiple different techniques for painting, but this is what works well for me. If you’ve got your own awesome tips, tricks, and techniques feel free to chime in in the comments!
If you have carpeting, you’re going to want to drop cloth the bejeezus out of it (unless you’re planning on replacing it, then make sure you paint first and voila! Built-in drop cloth). I’ve had hardwood floors for years and, um, don’t actually do much of anything to protect them. If you drip a little paint you can wipe it right off while it’s still wet and even if you don’t catch it before it dries you can scrape it off or use some Goof Off. I really just use a big scrap of cardboard to pile my roller tray and paint can on and just shove it around the room with me as I go. Carpet is not as forgiving, so you’re going to want to be careful about protecting it.
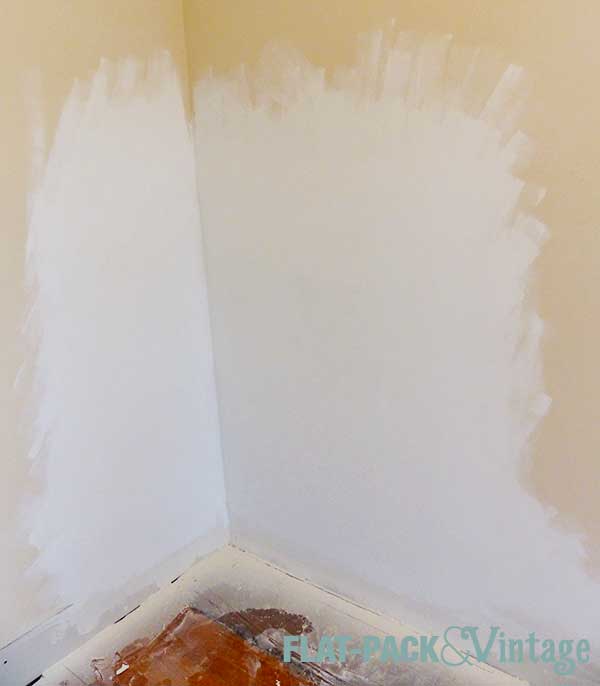
Cutting In
I start by cutting in. In a perfect world you’d keep a wet edge everywhere you go, but if you’re working solo that’s not always practical. I cut in using a 2″ angled brush (I hardly ever tape anymore) and make sure I cover at least 4″ or so away from the edge so I don’t have to worry about my roller bumping the ceiling or trim. When cutting in you also want to feather out your wet edge so you don’t end up with a line as it dries. Basically, once you have most of the paint off your brush (or edger) come back over inner edge of your paint and smooth it out any excess paint.
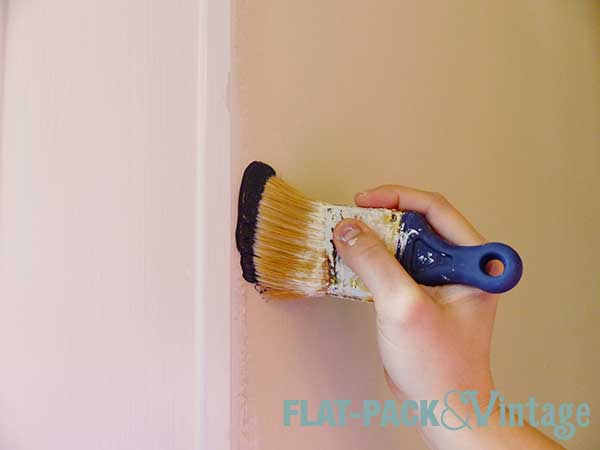
To get a nice clean line (without tape!) I start by dipping just the tip of my brush into the paint.
***It’s important to have a good brush if you’re going to do this. I used a crappy one once and it was a gigantic mess! I’ve been super happy with the Wooster Shortcut for cutting in and I think the short handle makes it very easy to control.***
Set the brush down on the wall a little bit away from the edge,
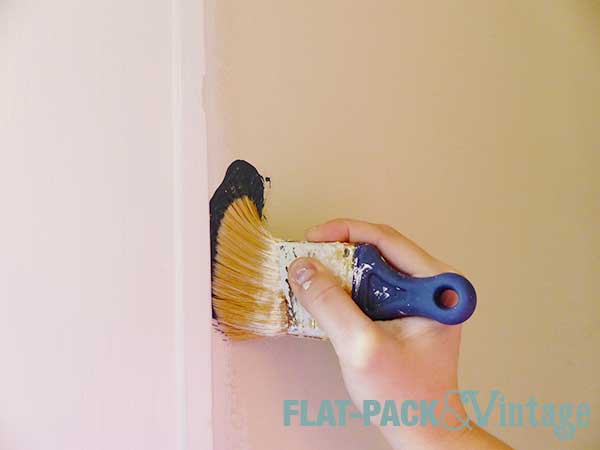
Then smoosh the bristles down a bit so they fan out slightly.
Then slowly sweep the brush towards the edge.
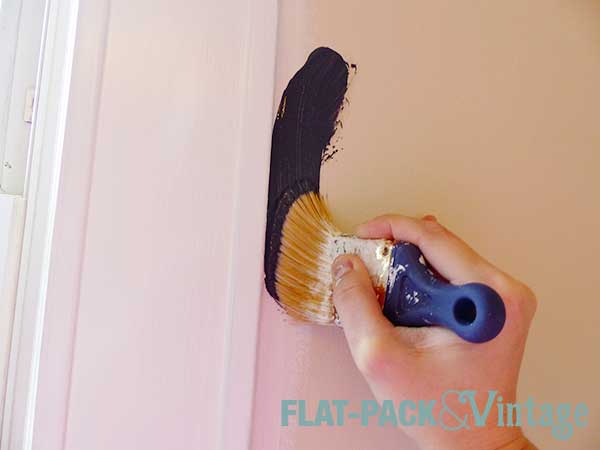
And finally, drag the brush downward (or across for horizontal edges) keeping only the very tip the bristles against the edge. You can see I also still keep the brush at a slight angle so only a small section of it is coming into direct contact with the trim.
Work slowly and don’t load too much paint onto your brush. If you’re worried about your cutting-in skills, you can still tape your edges and practice to see how much paint really ends up on the tape.
Walls
The open areas of walls are the easy parts. Load your roller up with paint and then use the textured part of your paint try to roll off excess.
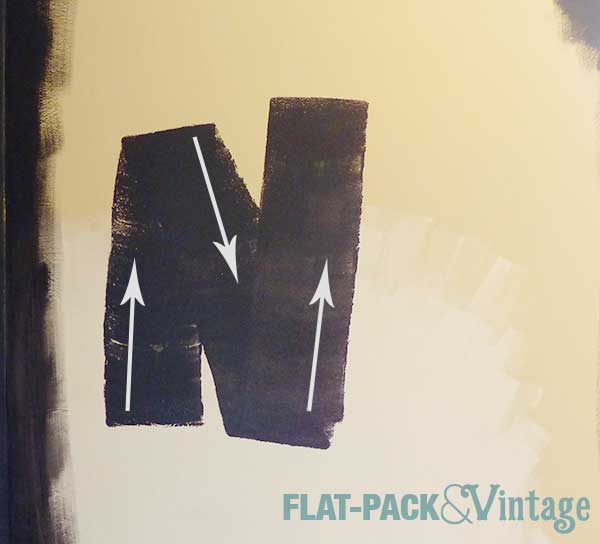
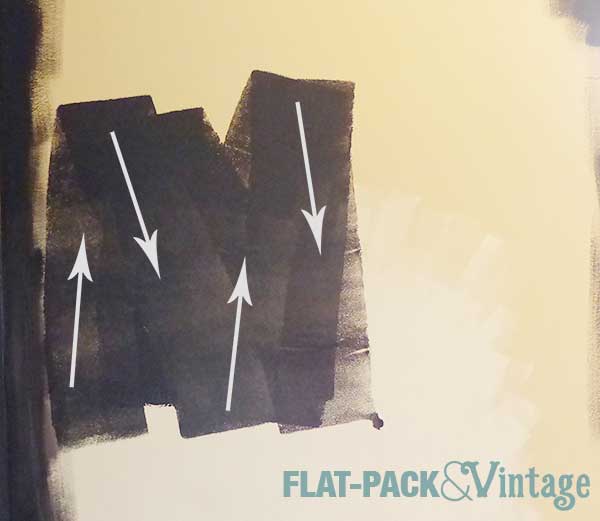
I work in a N pattern on the walls (most people say W, but I tend to actually make an N or M)–roll your paint on in a 2-3 foot N….
….and then roll right back to fill it in. This distributes the bulk of the paint from your roller and then spreads and evens it out as you come back over it. I set my roller down to get the picture so I starting rolling again on the same side I started with. If I’m not pausing in between I’d naturally roll my N then double back the way I came, just slightly off-set… whatever works.
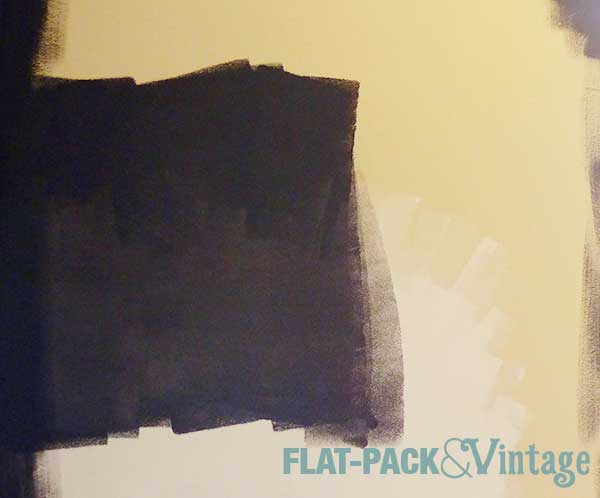
Your may have to go back and forth a couple times to fill it in nicely, but don’t add more paint to your roller, just work with what’s already up on the wall.
Once you’ve filled in your N then you can go back for more paint. Start a new N (or M or W) shape, slightly overlapping your previous section and repeat.
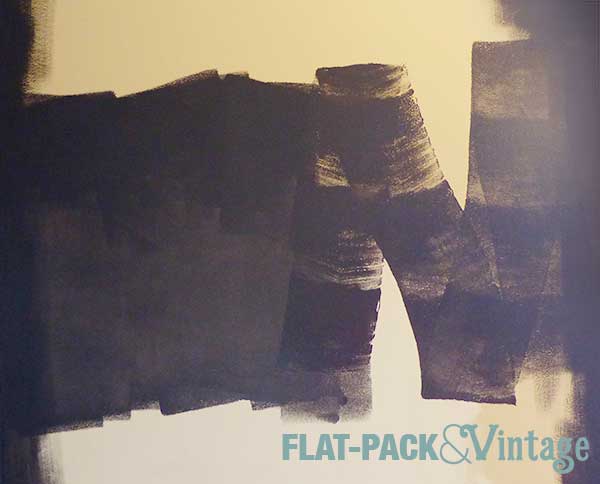
When working with a roller make sure you don’t have too much paint on it (it should be saturated but not dripping) and roll slowly. This will minimize both paint drips and spray from the roller. You also want to slightly overlap your previous section each time. This keeps a wet edge and helps each section of paint better blend into the other. You also don’t need to put a lot of the pressure on the roller–remember, you’re rolling, not scrubbing. If you find yourself scrubbing with the roller it’s probably a sign you need a new cover.
If you need to stop partway through (waiting a couples hours until the next coat, ran out of time for day, etc) you don’t have to wash out your brush and roller. Wrap them in plastic wrap, and if you’re not picking back up until the next day, stick them in a cool place like the fridge (we were out of room in our fridge, but our basement’s pretty cold so I stuck mine there).
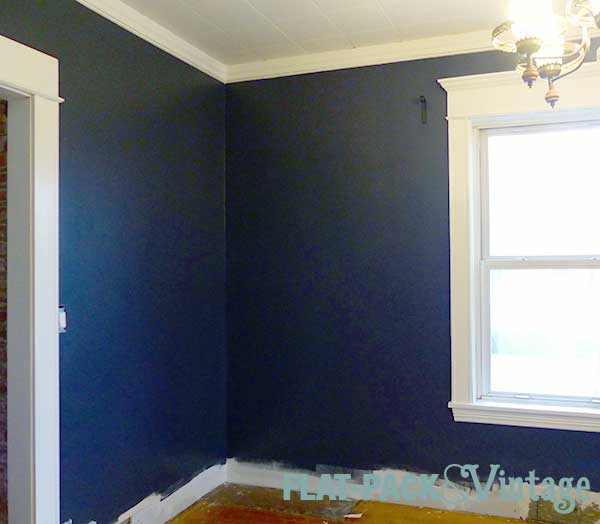
No too scary, right?
Also, how absolutely amazeballs does this color look????
*Super tall walls and stairwells are TOTALLY worth hiring out in my opinion, but I’m not so good with ladders. Also ceilings. Painting ceilings is a bitch.
I started painting the dining room today. I got about 1/2 done but now have to shove the furniture into the other corner so I can paint the other 2 walls. I’ve done quite a bit of painting over the years–walls, trim, furniture.* I know not everyone has painting experience though so I’m going go over the supplies I use, and then run through my process.
At the time of writing this I have no sponsors, no advertisers, no one slipping me convenient wads of cash behind the scenes. This is what I use and my honest, unbiased opinions.
Priming:
Almost all paints I see these days are a paint + primer, but a separate primer is still definitely worth on some things. If you’re painting over bare wood or drywall, you should probably prime. If you’re painting over a finish that may be a little grimy (kitchens, homes previously owned by heavy smokers…. that sort of thing) you’ll probably want to prime. I’ve been using the water-based Bullseye 1-2-3 primer and have been pretty happy with it. An oil-based primer will give you even better adhesion, but will also need more ventilation and special cleanup. Also, you can use latex paint over oil-based but shouldn’t oil-based over latex.
Walls:
I always use an Eggshell finish on walls in all rooms. Sure there are lists that specify certain finishes for certain rooms based on durability, but my go-to is always eggshell. It’s cleanable, but not shiny (quick n’ dirty breakdown: the shinier the finish the more scrub-able it will be, but shinier will also highlight any imperfections or texture changes on the walls). If you have kids who are prone to drawing on walls, you might want to bump up the sheen in problem areas.
My paint brands of choice for walls are Behr (Home Depot) and Clark + Kensington (Ace). They’re pretty inexpensive as far as paints go, but have pretty respectable coverage.
Trim, Cabinets, and Furniture:
I used to always use a high gloss on furniture, and then I discovered satin. To me the satin is more in the range of a “factory finish” level of shine for most things and the high gloss can leave things looking obviously painted. Painting my kitchen cabinets turned me into a Benjamin Moore Advance convert (fangirl!). I’d read good things about it so decided to give it a shot. It’s a little pricey, but the coverage is excellent and the finish is beautiful. I was raving to my sister about it and when she saw our cabinets her comment was “I can see why you liked this some much.”
We also used Advance (satin finish) on our trim… after the kitchen. I went to buy Advance but the Ace near us didn’t carry Benjamin Moore since they’re too close to another BM dealer and the guy there highly recommended Clark + Kensington. I’d used it on walls and been really impressed for the price point and at half the price of Advance I thought sure, why the hell not. 3 coats plus primer (and could probably use another) is why the hell not. And painting trim is a beast so I think it’s better to splurge on better coverage here (but I’ve personally never found the pricier paints worth it for walls). After the kitchen we switched over to my original plan of Advance. It still needed 2 coats + primer, but was definitely looking good at that point (and if you’re only using about 1/2 the amount of paint, it’s not really even a splurge anymore)!
Tools:
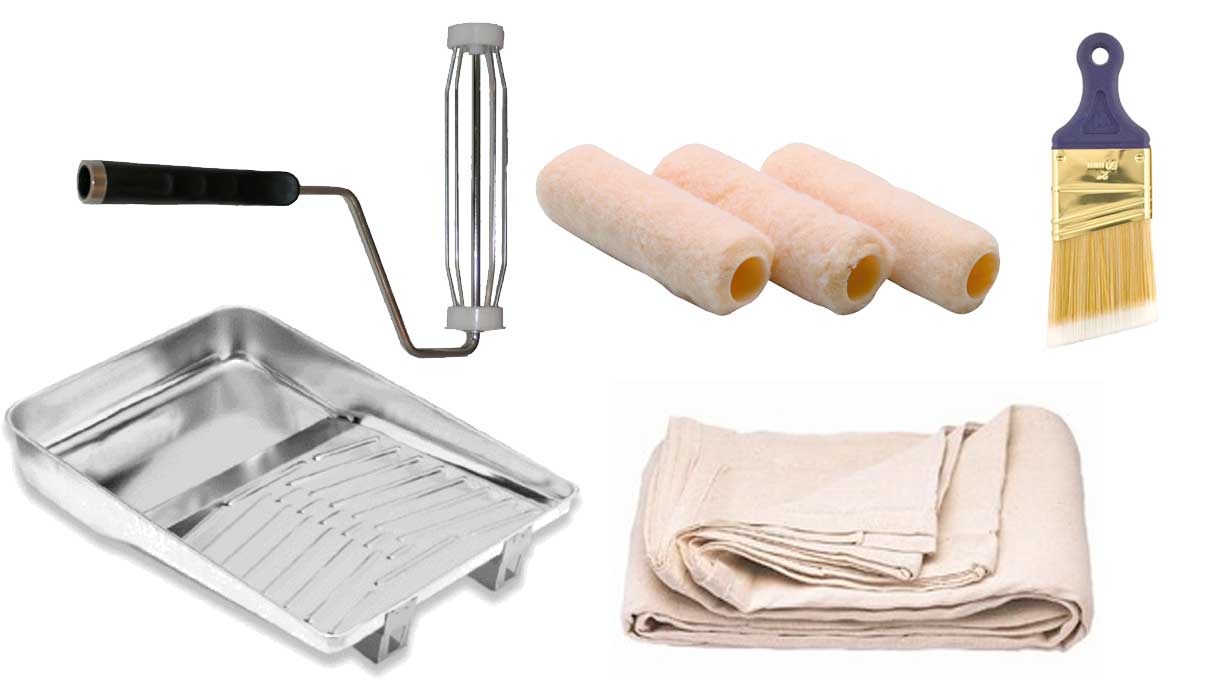
The basics: paint tray, roller, roller covers (don’t be afraid to splurge on roller covers, or at the very least, don’t reuse your covers to death –>guilty) drop clothes, 2″ angled brush. I really like the Wooster Shortcut, but there is a little bit of personal preference involved. This is another area where you don’t want to choose the absolute cheapest option and take good care of your brushes.
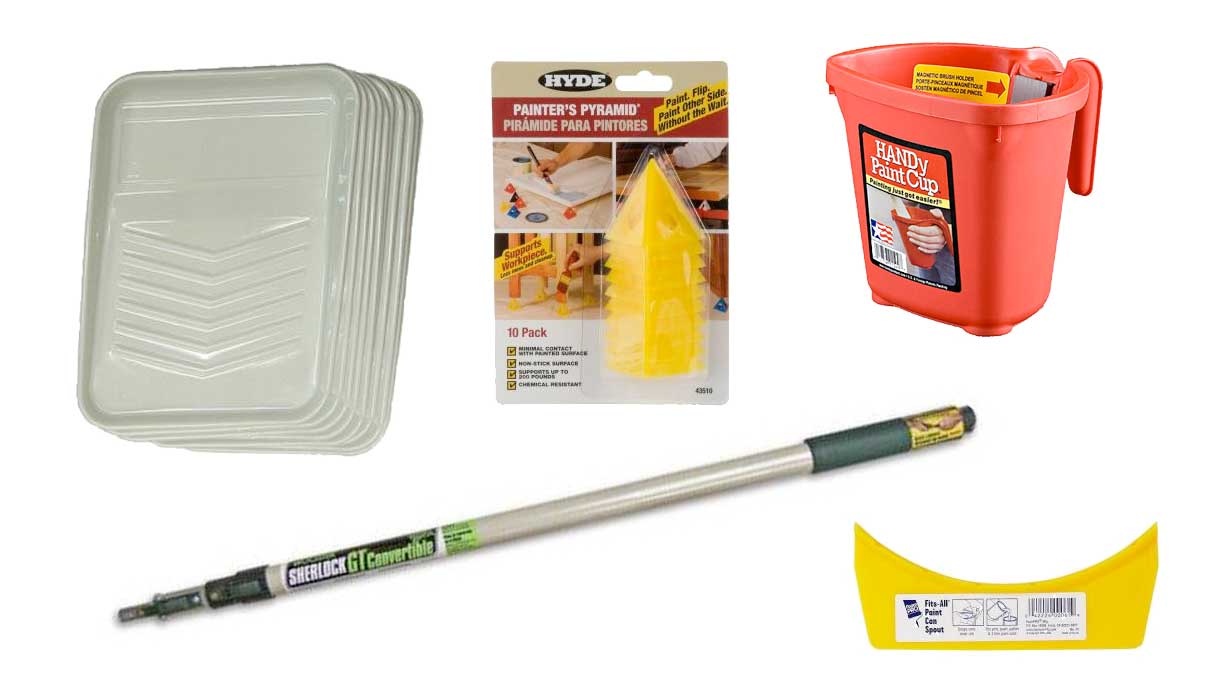
Very useful extras: pole/extender for your roller (I really wish I had an adjustable one!), painters pyramids (if you need to prop up something flat to paint the edges), paint pail (sure, you could use any old plastic container, but the handle and magnetic brush holder are pretty sweet), paint tray liners (they make clean up waaay easier, I dump as much extra paint back into the can, let the rest dry, and then peel it off and reuse the liner**), and a flexible pour spout (they conform to both gallon and quart cans, make the paint easier to pour, and prevent paint from clogging up the rim of the can).
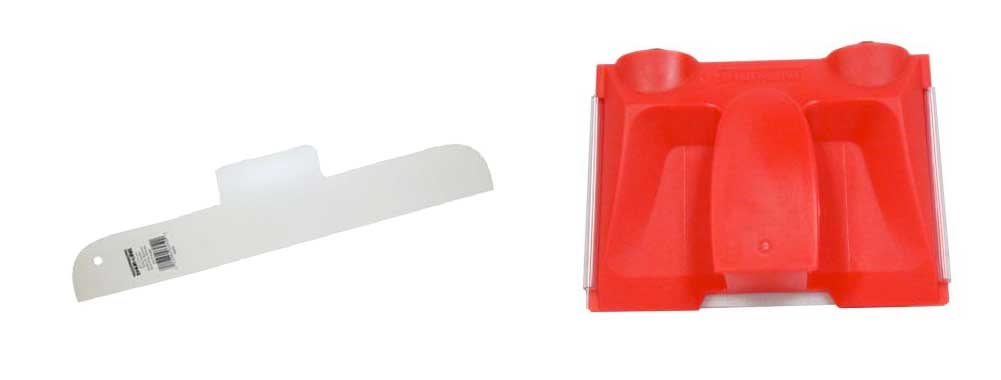
Marginally useful extras: Edger (I have had various levels of luck with these, they work well in some situations but not others, and some of them constantly fall apart or get paint where they shouldn’t), paint guide (like the edger it works well in some areas and less so in others, if you use one keep a damp rag around and wipe it down constantly).
To Tape or Not to Tape?
I used to be a taper because I was told that was just a normal part of prep work… then I read an article over at Apartment Therapy and it changed my life. They claimed that taping was actually more time consuming and even a little more risky than just cutting in by hand. So I tried cutting in the old fashioned way…and it was wonderful! You need a good quality angled brush and a steady hand, but if you go slow it’s not that hard.
The “risky” part of taping is that it can lead to overconfidence because if your tape is not perfectly sealed or you’re a little too globby with your paint it can ooze underneath. Also, there’s a risk of peeling off some of your new paint if you don’t time your tape removal right.
Ultimately it comes down to personal preference. If you’re new to the painting game you may still want to tape everything, but maybe still try your hand at cutting in carefully and see how much paint you really get on the tape.
*Ceilings are hands down the worst. If I ever want to repaint our ceilings I may just hire it out. Really.
I’ve been obsessing over this patch job for WEEKS now! The better the mudding comes out, the better your paint will look… especially if you pick a paint with any sort of sheen to it–that sheen will just make every imperfection pop. I happen to like eggshell for walls, it’s not shiny, but it’s not flat either (and if you have kids or a tendency to beat the crap out of spiders you find on your wall, you really don’t want a flat finish because it’s not cleanable At All).
Eyeballing your finish isn’t quite enough; if you really want it to turn out well run your hand over it. You’ll end up feeling bumps you might not have caught otherwise.* After things were feeling pretty good with the hand test (not perfect mind you, but pretty good) I went over everything with a coat of primer. Once everything’s an even color it’s also easier to pick out areas that looks a little off, just make sure to check it out as the lighting changes throughout the day.
I was crazy happy with how good the spot looked after priming. 1) It looked way more even than expected and 2) the texture left the primer and roller seemed to be just enough to match the subtle wall texture that was already there. I was a little worried about that and had started to look into some of aerosol texture sprays, but think we may be ok!
I also (mostly) finished painting the trim. I started last week on our day of rest after Vegas and got one coat of paint on about 1/2 the room. This weekend I got almost everything else done (I couldn’t reach everything since our table is shoved against one wall, so I’ll be working in sections). Trim is the most tedious thing to paint I think. Walls are a piece of cake, but trim… it’s more of a souffle–time consuming and finicky.
Because I’m impatient, I also put a little patch of paint up to see how it looked against the trim.
SO excited to get this room painted!
I switched my day off for this coming week from Monday to Wednesday to help out a co-worker and it ended up working well for me too. I get a break from manual labor and can hopefully dive into painting on Wednesday. Karma.
I spent the last week working on smoothing out the patch job. It’s a fairly timing consuming project since you have to wait for the previous layer of joint compound to fully dry before you can add another… which pretty much means waiting a full day in between coats.
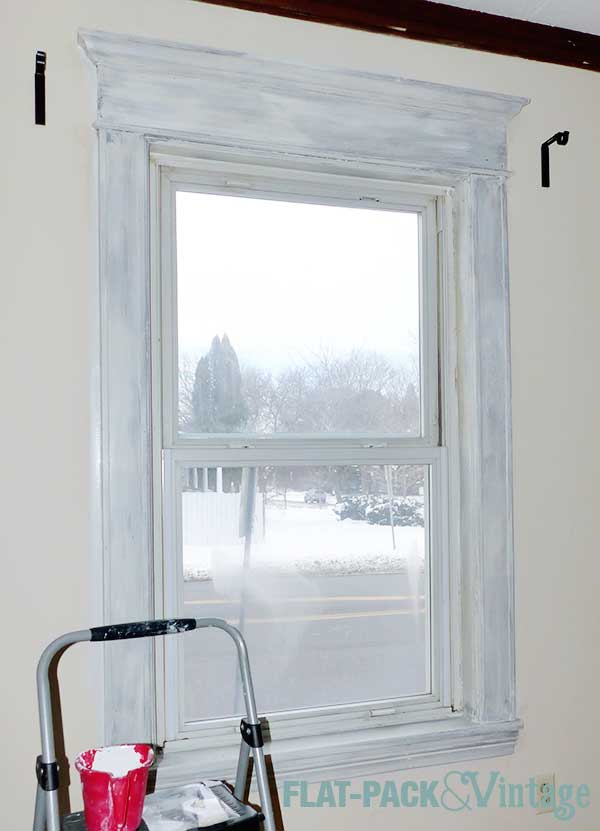
With the walls well underway I decided to start tackling the trim. The baseboards are going to come later, but I wanted to get the door and window trim and the crown molding painted before painting the walls. I think it’s easier to paint trim first (personal preference) and I could knock out the trim while still finishing up the patch job on the wall.
Priming isn’t that exciting, but solid prep-work is important. All the trim got wiped down with a liquid deglosser and then got hit with a coat of primer. What I’ve read about using deglossers is that they tend to lose their effectiveness if they sit too long, so I worked in small sections. Deglossed the kitchen doorframe, let it dry to the touch (about 10 minutes), primed. Then I moved on to one of the windows, degloss, dry, prime… next window, etc.
I’ve been using Bulls Eye 1 2 3 primer and have been pretty happy with it. If you can stomach it, an oil-based would be even better, but it’s cold here and the windows are staying closed. No matter which primer you choose just make sure to follow the directions on how long to wait between coats because if you don’t give it enough drying time it won’t end up bonding as well as it should.
If you’ve never primed anything before, don’t panic if it looks splotchy and awful, because it will. It will make your top coat(s) look SO much better though and it will reduce the number coats you’ll need.
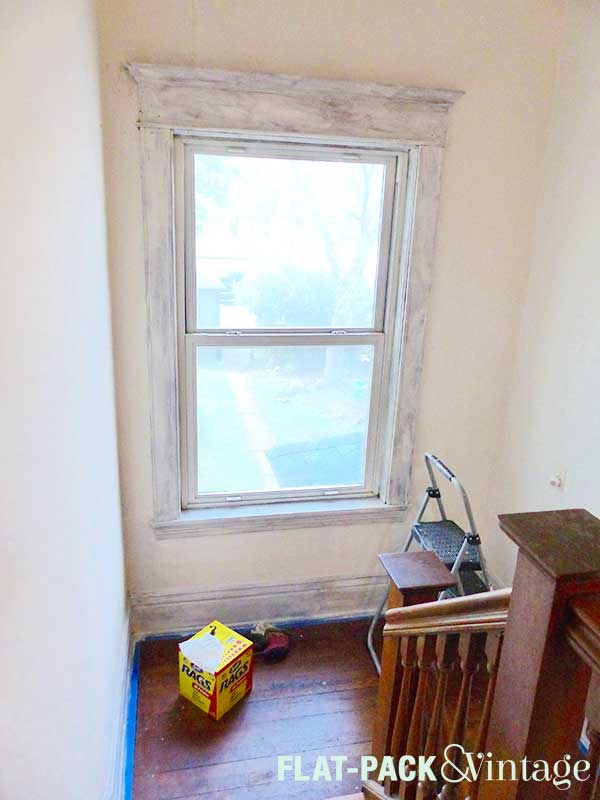
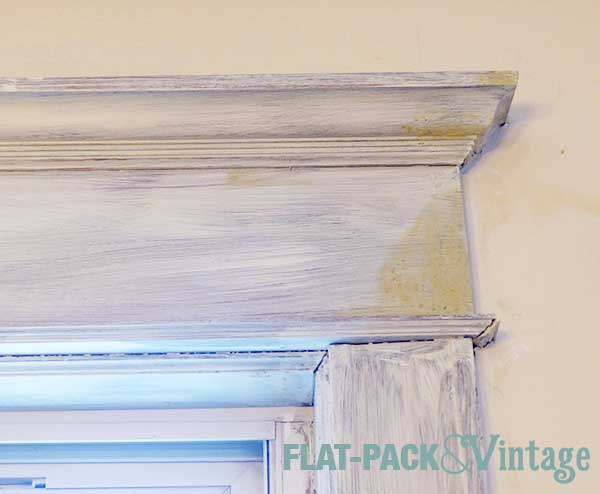
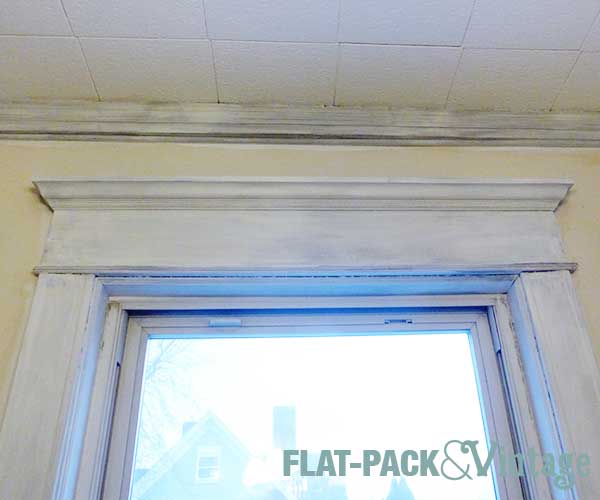
After priming, a bunch of old nail holes and assorted wear spots popped up. I should have touched them up before priming, but I wanted to illustrate the shape our trim was in.
All the top edges were like this from years of, I dunno, mounting curtain hardware directly to the trim? There were also holes and chips like this everywhere. Bits of the decorative moldings were chipped and the inside frame had gouges around the nail heads holding it in. I didn’t manage to get a good shot of the sill, but it was even worse.
I touched them up with wood filler and then went back the next day to sand and spot prime.
I’d say it’s looking better, but it really still looks like a construction zone here.