PAINT ALL THE THINGS

paintAllThings
Original image: Hyperbole and a Half, Modifications: me


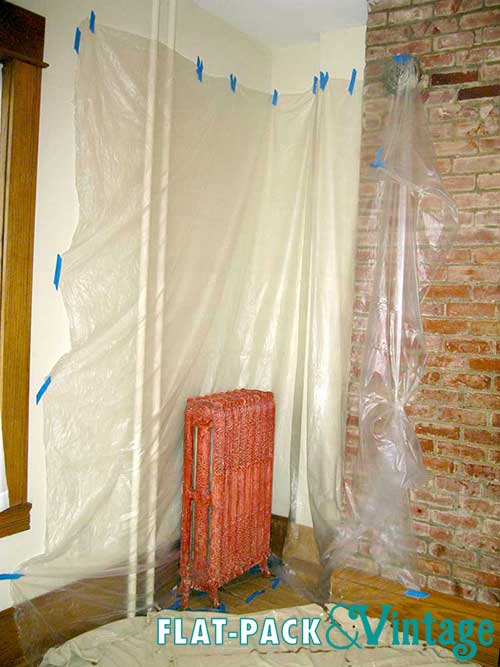
This is basically the mantra for the bathroom.  The vinyl is nasty, the wood is in sorry shape, and the wall color is just plain unfortunate.  Because I don’t know when we’ll have the budget for a full gut job I’m pretty much painting every square inch of this room.

After I tackled repairing the window trim, I moved on to demo-ing the closet shelves.  Their configuration was bizarre and they’d be annoying to paint around.  Unfortunately as I removed them I notice the paint on the inside of the closet was peeling badly.  Bad news: it will probably need to be skim coated.  Good news: it’s the inside of a closet so I probably can’t fuck it up too badly.

Luckily, skim coat or not, priming everything was the first step. Ok, second step.  First I scraped off all the really lose bits with a putty knife and filled in what I could with spackle and then primed everything in sight.

bath4

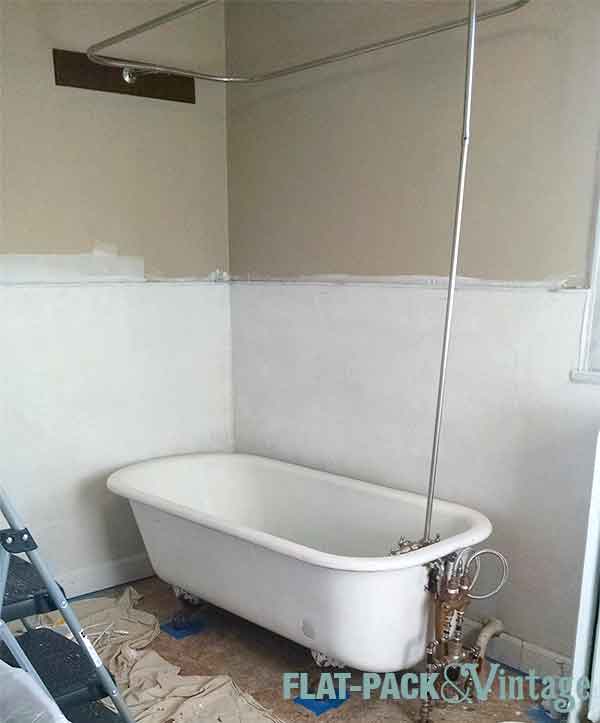
Doesn’t that already look so much better?  The beigey vinyl was absolutely disgusting and even just seeing it primed makes a huge difference! The tub base got primed too since it is certainly not staying it’s previous dirty-beige color.

Personally I think it’s easier to paint trim first.  My dad disagrees so this is a clearly a personal preference thing.  Coat #2 for me though was all the vinyl and trim.  You don’t need to worry about a clean edge, just a smooth edge.  Basically any paint you get onto the next surface you’re going to paint make sure you feather out so you don’t see brush lines or blotches. The trim, vinyl, and closet interior are all Clark + Kensington (satin) tinted to Benjamin Moore Simply White (mostly because I had it to use up… I was unimpressed with Clark + Kensington for trim*). The trim did get a second coat of Benjamin More Advance too.

bath2

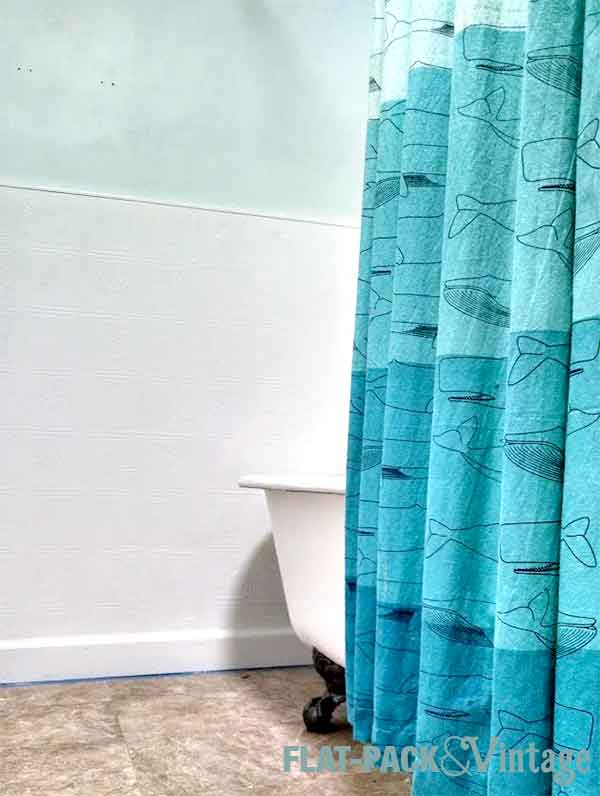
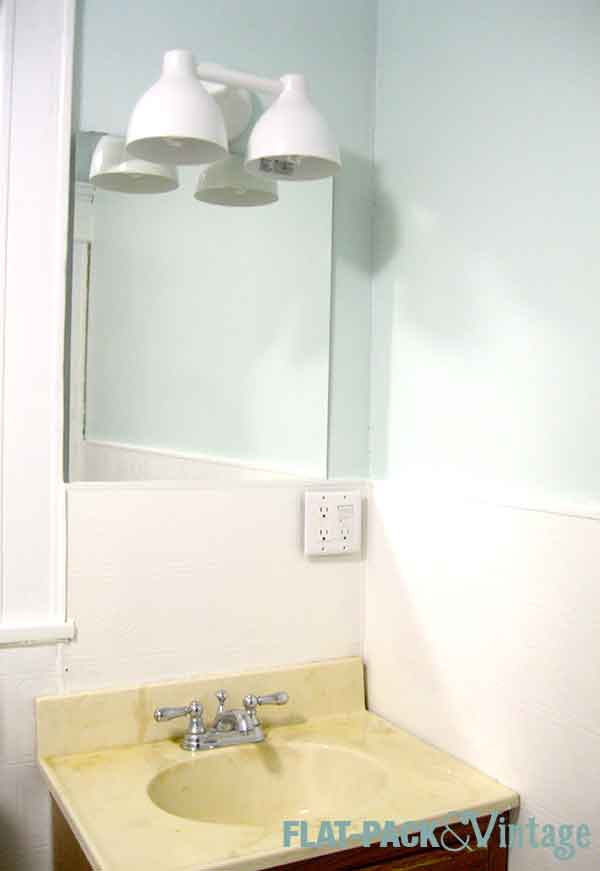
Aaaaannd now for some blue (Behr tinted to Benjamin Moore’s Opal Essence to be exact).  MAN this was a long time coming! This is just a sneak peak for you.  The bathroom’s not quite done yet–we have a new vanity and faucet to install, closet shelves to rebuild, and additional shelving to add.

bath3

Up next we tackle our pretty dismal counter space issue.


*Still love it for walls though–that and Behr are my go-to for walls, but BM Advance has won my heart for trim, cabinetry, and furniture.

50 Shades of White

If there are any wood-purists reading this, get your pearls ready. The first thing EVERYONE has said upon seeing this house was some variant of “omg look at all that wood!” Um well… get ready for some disappointment.

I’m painting the trim.

Commence clutching of pearls.

I know this is a very polarizing topic and I’m not going to change anyone’s mind, but here’s my thought process:

I’m a very firm believer of that if it’s yours you can do whatever you want to it to make you love it. Enjoy your space, your furniture, your whatever to the fullest. The wood trim just isn’t doing it for me. I think it works better with a more classic style and I’m very eclectic. The last couple apartments I’ve lived in have been from around the same time period and have had white trim. I personally think this is gorgeous in turn of the century homes. The trim is also not in nearly as good a shape as it looks form the general pictures. There’s a decent amount of damage, some missing quarter round, and assorted areas that just need some patching.  The trim in the kitchen/mud room is also completely different from the rest of the house and the dining room will need all new base boards after we rip the bookcases out.  I’m not sure what I’m going to do in the family room since the paneling is actually in really good shape so I don’t really want to paint that, but I still want to maintain continuity.

I know there will be plenty of people out there who think I’m doing a horrible thing (heck, I’m pretty sure my own mother is one of them), and that’s ok. We really all have to go with our own guts for our design choices because your home design isn’t really for anyone else but you. If you try and make every decision based around “the future home buyer” you’ll just go crazy.

ANYWAY

Do you know how frackin hard it is to choose a white paint? Hard. I could have just used an off-the-shelf white white, but I though that would be a little too stark, especially in an old home. But once you get away from pure white you get grey tints, yellow tints, blue tints…. basically every color of the rainbow tinted whites. This means your “white” can end up reading a little funky as the light changes.

Here’s the thing though, there’s no single solution for the “perfect white trim color.” Colors depend a lot on the environment they’re in—what’s the light like? What are the surrounding colors like? Yeah… the only thing to do is pick up a crap-ton of swatches and tape them up everywhere. I did do a little bit of googling to find out other people’s go-to trim colors (otherwise I’d be bringing home every single white swatch in the store…which I came close to doing anyway).

So if you’re trying to decide on a white trim color, here’s are what seem to be the top 5 go-to colors I found:

simplyWhiteBM

Benjamin Moore: Simply White

WhiteDoveBM

Benjamin Moore: White Dove

decoratorsWhiteBM

Benjamin Moore: Decorators White

cloudWhiteBM

Benjamin Moore: Cloud White

chantillyLaceBM

Benjamin Moore: Chantilly Lace

(Apparently designers/decorators really like Benjamin Moore…The nice thing though is that pretty much any paint place can color match to anything nowadays)

For the past few weeks I have had about 15 swatches (Benjamin Moore, Behr, Ralph Lauren… I just kind of hoarded white samples when I would walk by a paint display) taped to a shelf from a BILLY bookcase that I’ve moved from room to room and stared at. Eventually I hope to give our existing BILLYs an custom built-in look in the living so I want the trim color compliment them.  It doesn’t have to match exactly for my plans, but it can’t leave them looking dingy, so an ultra white is right out.

After 3 weeks of staring at the swatches in nearly every room and in nearly every light condition I think I’ve made a decision.  And the winner is…. BM Simply White.  It’s just ever-so-slightly not quite pure white but unlike the other swatches it doesn’t get too creamy, too gray, or even (as happened with a couple samples) too brown.  I also used it to paint our bedroom dressers a while back so I know it does actually read white. It was a close race with that and BM Cotton Balls for a while. Cotton Balls looked the absolute best with the bookcases, but a tad dingy against the white appliances and future carrera marble/subway tile plans for the kitchen.  Ultimately I figured I could always paint the bookcases, but that would be harder for appliances and tile.

Paint in my hair, don’t care

I attacked the horrible brick red radiator this week and man is spray paint a bitch in confined spaces!  If you’ve never tackled painting a radiator before, here’s my quick rundown.

Step 1: Prepwork

Give the radiator a good cleaning.  A flexible dryer vent brush is seriously your best friend here.  If you have never cleaned out the inside of a radiator before, be prepared to be amazed at how much nastiness you’ll knock out.  If there’s any flaking or bubbling paint, take it off with a wire brush or sandpaper (if you think the paint could be lead based, be careful and look into appropriate precautions).  You’ll also want to wash it all down to get ride of any remaining dust or particles.


Step 2: Tape off everything like you’re trying to make your own hazmat decon unit.

radiatorPrep

The biggest problem with spray paint is over-spray. Not a big deal if you’re outside, but if you have ANYTHING you don’t want paint on in the same room, cover it.  I didn’t cover absolutely everything and there’s a fine dust all over the floor (the particulates dry pretty quickly as they drift, so this actually isn’t a bad clean up).  I taped around all the feet and pipes, layered craft paper (or cut up grocery bags) over that, drop clothed to cover a wider spread, and taped lightweight plastic sheeting to the walls and over the brick (FYI painters tape does not like brick.  At. All.).


Step 3: Light Layers

radiator1

I really didn’t use anything special for paint, just Rustoleum Universal white in a satin finish.  The sprayer on these bottles is pretty sweet and doesn’t cause annoying finger cramps like the standard spray nozzles can.  Rustoleum sells a High Heat spray as well, but since their normal spray paint is good up to 200 degrees there’s really no need for the high heat stuff.  They also make a Radiator Enamel… but I couldn’t find it in stores near me so Universal it was.  Don’t worry about getting a good coat on the first pass.  In fact, don’t even try.  You want light layers so they dry faster and don’t get all drippy. Also, get as much ventilation as you can cuz this stuff is pretty potent.  If you know several friendly weightlifters you they can also disconnect the radiator and haul it outside making a lot of this considerably easier.


Step 4-Infinity: Lather, Rinse, and Repeat

radiator2

Lots and lots of light layers.  Patience is important here… and it’s totally not one of my strong points.  I got up to coat 5 before I ran out of paint.  Trying to cover up red is probably especially difficult… so is trying to paint something complicated that’s stuck in a corner.


Step 5: Fuck it, just use a brush

After coat 5 I was out of spray paint and didn’t really want to keep going.  Plus I had also covered myself in a layer of spray paint and didn’t really feel like another day of trying to scrub it all off.  I picked up a tiny can of Rustoleum white paint in a satin finish and used a foam brush to touch up the areas I failed at spraying.  If I had to do this all over again, I’d probably just brush paint from the start. I also forgot my camera at home at this point and then collapsed into a puddle of moving exhaustion, but you’ll get to see it soon once I’ve got the cabinets finished.  Spoiler: It looks a lot like the last picture from step 4, just a lot better close up.  Crazy.