All the Trimmings

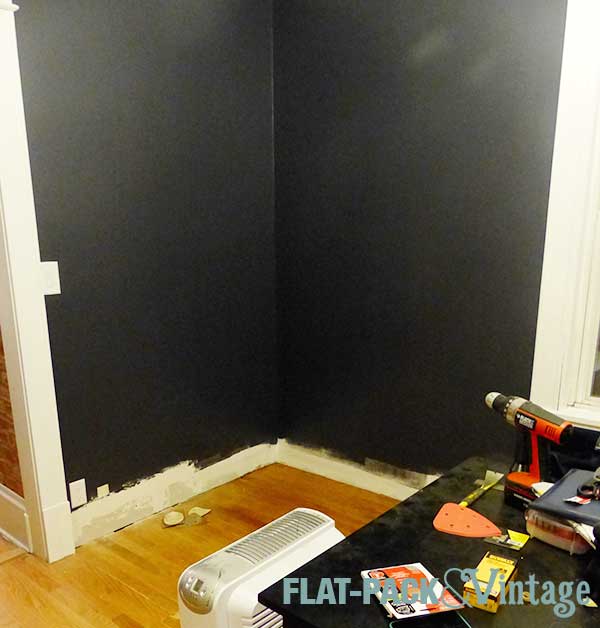
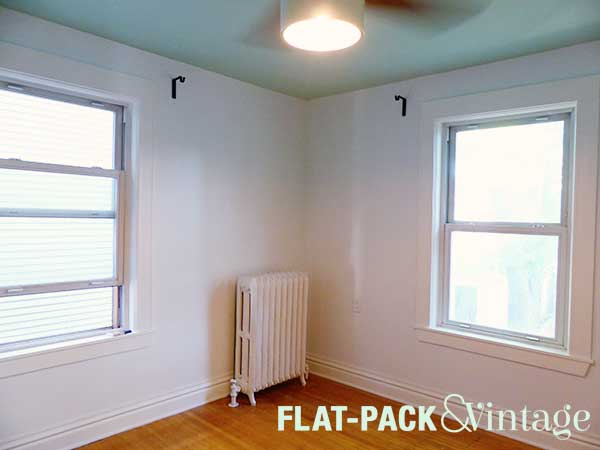
We have walls, we have a light fixture, and we now have mouldings!
NurseryTrim11

Oh my god it’s finally like a real room.

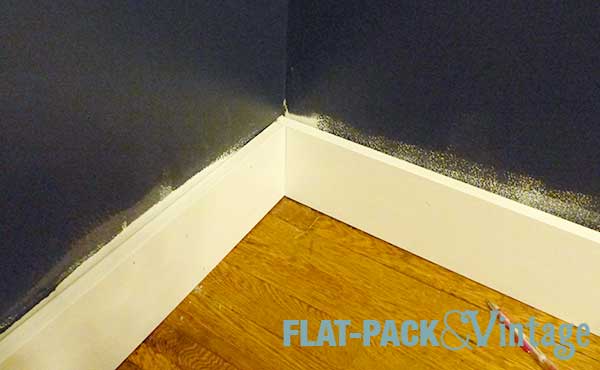
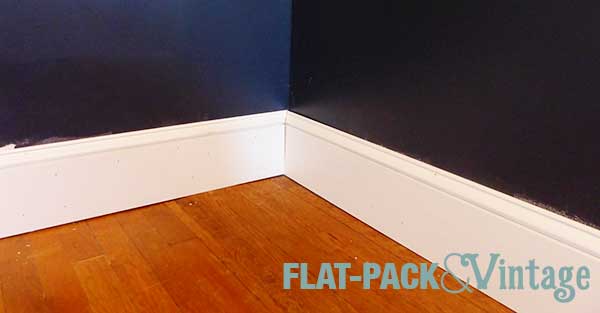
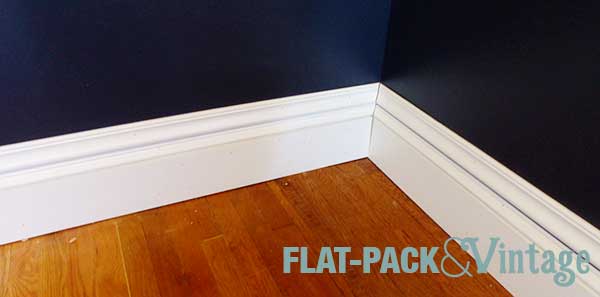
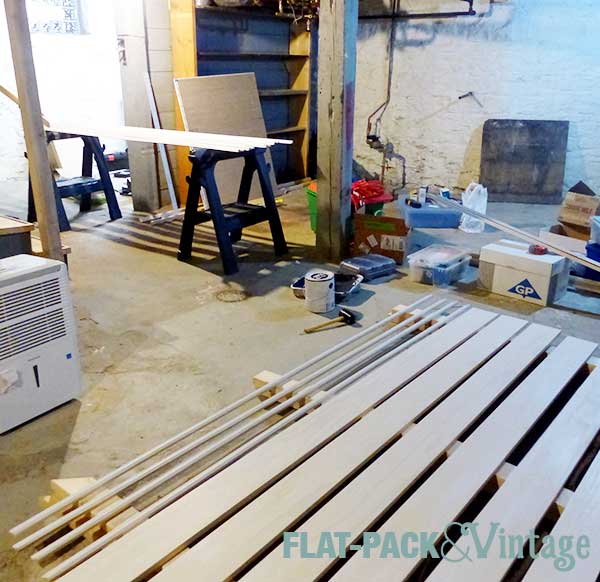
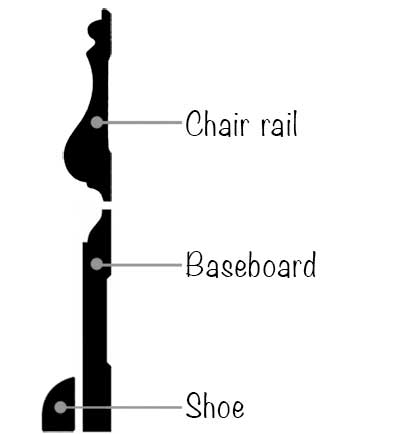
We started with the baseboards.  Once again I spent a while agonizing over trim pieces (since trying to duplicate 100 year old moulding with contemporary, mass-produced pieces is a bit of a pain).  We had a little more leeway in this room since the upstairs was already a bit mis-matched so I decided to simplify things from when I did the dining room baseboards.

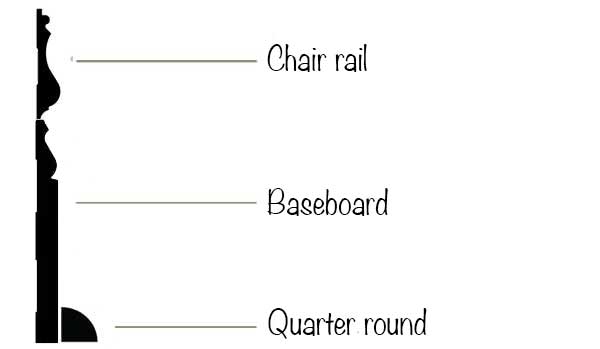
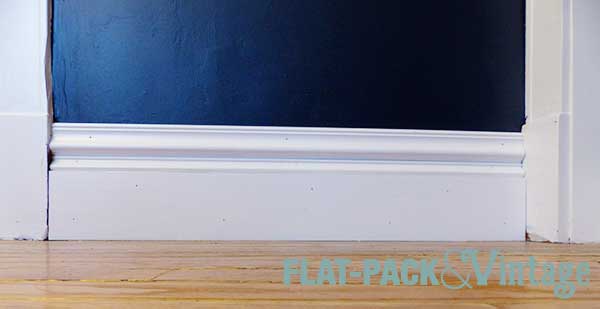
This time I settled on a 3 part baseboard instead of the 4 part plan I used before.  We picked up a 4″ baseboard, chair rail, and shoe molding.
NurseryMouldingDiagram

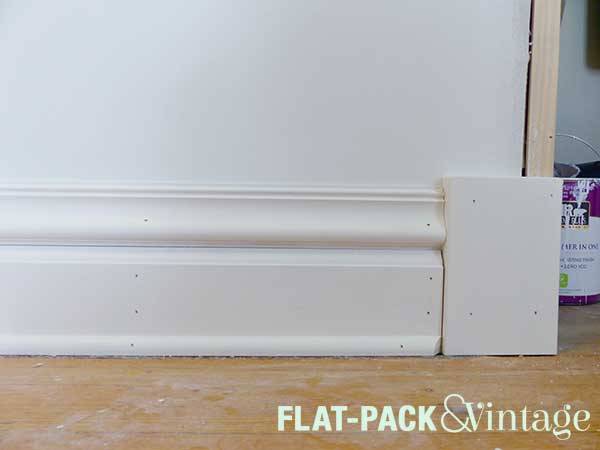
We really should have started with the plinths, but I was still painting them.  You can buy fancier plinths at the hardware store, but the ones in the rest of our house are super-simple so I made them myself.  I measured the width of the door casings, added about a 1/4″ (seriously, I just eyeballed it) and ripped some down.  We had a scrap board of 10″ select pine so I used that since it would be plenty tall. Then I took my palm sander and rounded down all the edges and corners, primed and painted… and waited for them to dry.

While the plinths were being finished, we put up the 2 main parts of the base.  We started with the bottom layer, went around the entire room, then added the top layer rather than fully finishing a wall at a time.  My best advice for installing baseboards (or pretty much any trim) is to just tack it in place until you’re sure all the edges/corners line up well.  If there’s an oopsie down the road it’s way easier to pull off and fix.  Oh, and also start with your longest pieces first so if you cut them too short you can still re-use them elsewhere. We were able to leave the right amount of space for the plinths because I had extra one that was originally intended for backup but had a pretty nasty split in the wood.
NurseryTrim5

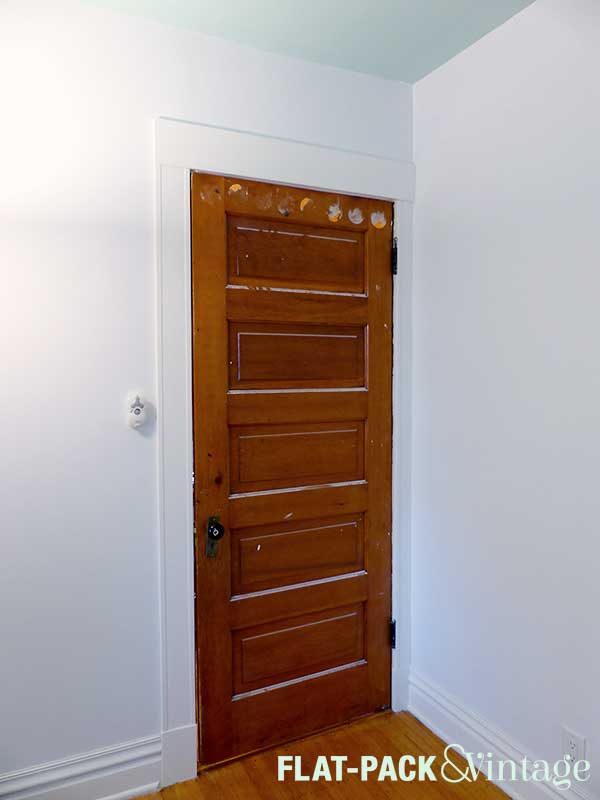
Once the baseboards were up we were able to add in the plinths, followed by the vertical door casings.  I was a little paranoid about installing them because my dad and I custom routed them and didn’t have any extra. Matt totally rocked it though!  We went with a simple header cut from a 1×6 since that’s what’s in the 3rd bedroom.
NurseryTrim13

SHAZAAM! We have door mouldings! (and a door that needs to be refinished, but that’s a project for another day)

After the doors, we moved onto the poor, naked windows.
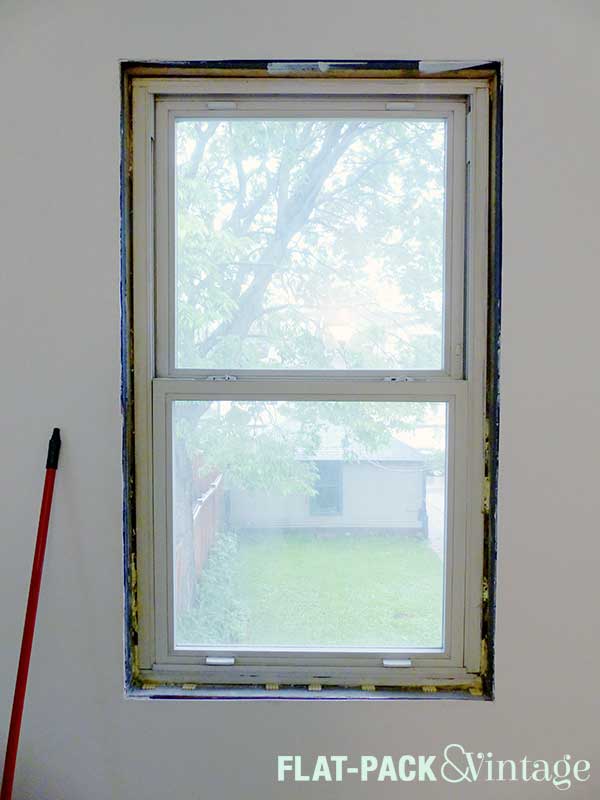
NurseryTrim4

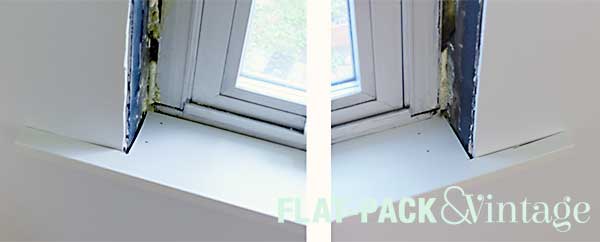
Here we started with the sills, which sound intimidating, but they were really easy. First we figured out the depth of the other sills in our house and ripped a couple boards down to that measurement.  Then we measured the depth of the window opening + the depth of the casing (A) and the width of the casing + 1/2″ (B).  This gave up the dimensions of the cutouts we needed to make. The length of your board will be the window width + (B x 2).

SillTemplateI actually added a little more than a 1/2″ to the ends and cut it down after we dry-fit the sill.  We used a jig saw to cut out the corners.  It’s a pretty crappy jigsaw and we probably didn’t have the right blade for this this so my cuts were a little wonky.  I also used my palm sander to slightly round off all the edges and corners.
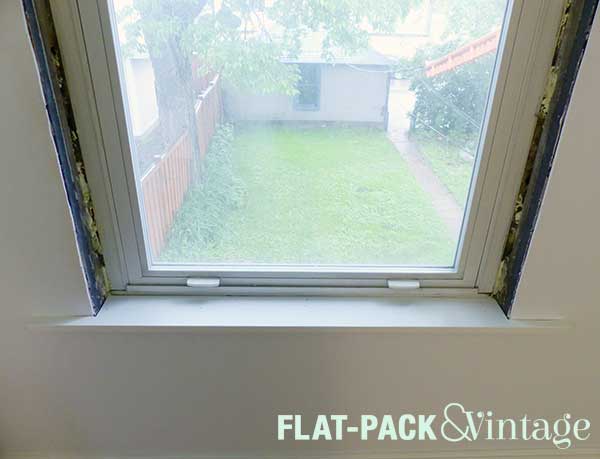
NurseryTrim3

NurseryTrim6

All of this will get covered by the window trim pieces though so we’re ok!

After the sills were nailed down, we added the inside trim.  We found a 3 1/4″ baseboard which was shockingly perfect. Yes, ok, there’s a bit of a gap in the middle, but our house isn’t square/level/standard in anyway so we’re used to these things.
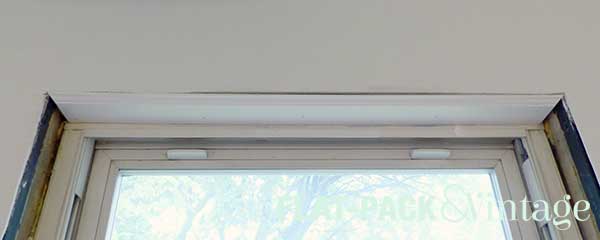
NurseryTrim7

I think it’s easiest to start from the top when you’re dealing with mitered cuts like these.  You’ll know the top piece fits snugly and then you only have 1 mitered edge on the side pieces and shave off extra length with just a straight cut until those fit snugly too.
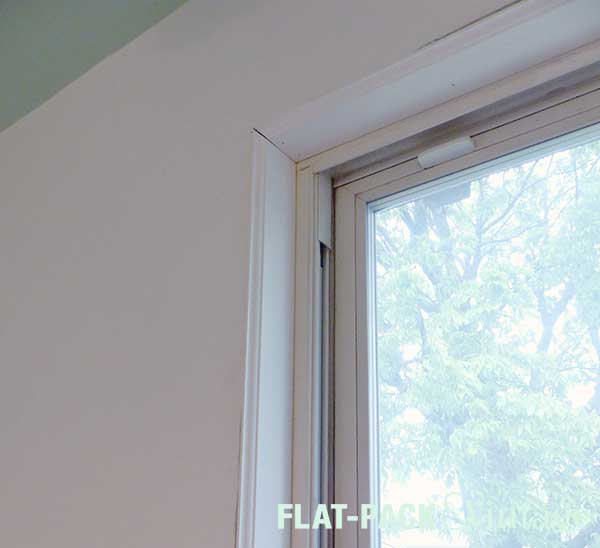
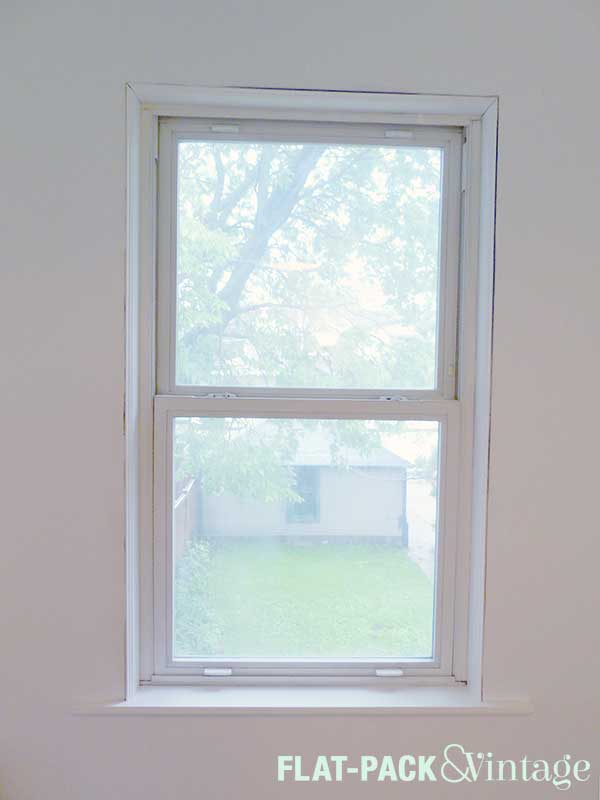
NurseryTrim8

NurseryTrim9

Next we added the vertical casings and the header. Thanks to our old house and wonky walls, there’s quite a bit of gap between the header.  We’re going to add some wood filler and no one will ever be the wiser.
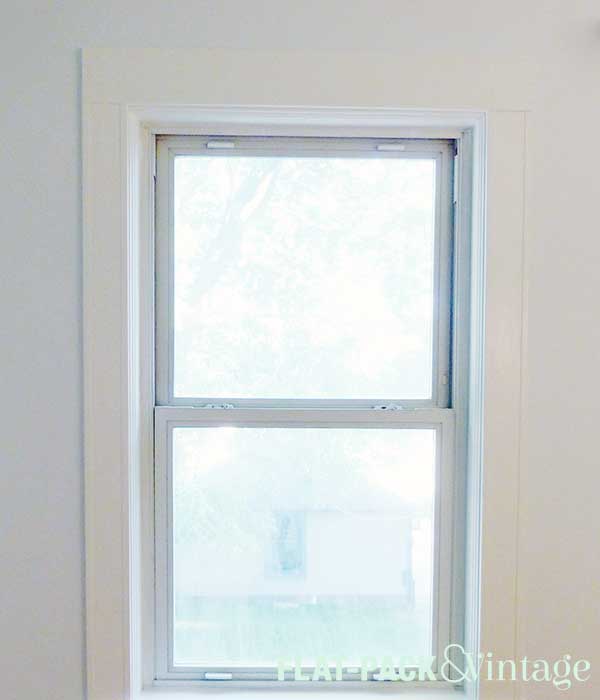
NurseryTrim15

Finally we added sill base (there may be a technical term here, but I don’t know it….).  Again, we just copied what was happening in the 3rd bedroom which was simpler than the trim in the rest of the house.  Here we used a 1×4 cut to an 18 degree angle on the ends… I don’t know how they came up with 18 degrees, but it’s consistent with the other small bedroom.
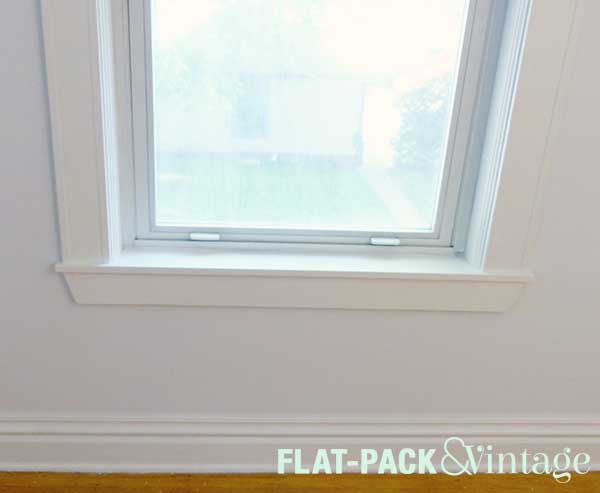
NurseryTrim12

And that’s the window!  Lots of parts, but mostly easy cuts.
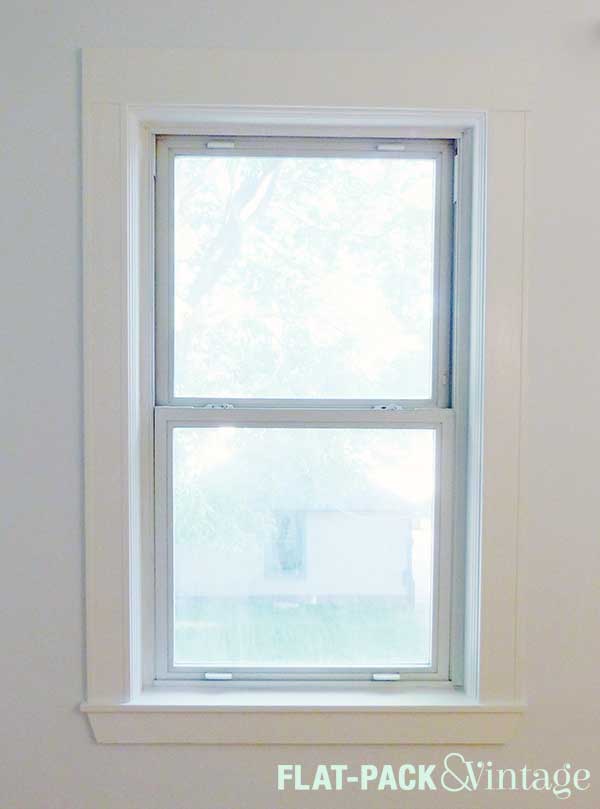
nurseryTrim14

After all the trim was nailed up Matt went around and caulked everything.

CaulkAllTheThings
Original image via Hyperbole and a Half

I have to give a HUGE shout out to Matt for pretty much everything in this room.  I may write the blog, but he’s been working so hard on and picking up my slack when I need a nap break.  He’s really been the moulding (and painting, and ceiling fan) champ here and installed everything with pretty minimal help from me.

 

Save

Save

Save

Save

Save

Save

Save

Save

Save

Gettin’ Our Groove On

I know I’ve been light on the house updates lately, but this past week should make up for it! Last Wednesday night * Two Wednesdays ago my dad came into town and then my brother-in-law joined us on Friday night.  Matt and I had taken off work for an Epic DIY Weekend and had a big ‘ol list of projects to try and tackle.
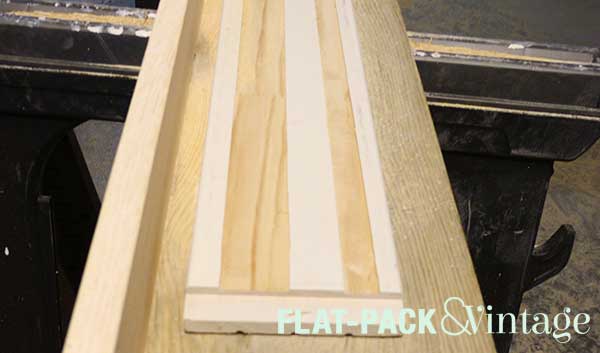
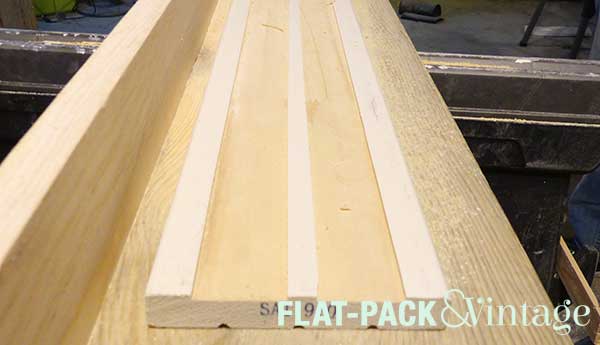
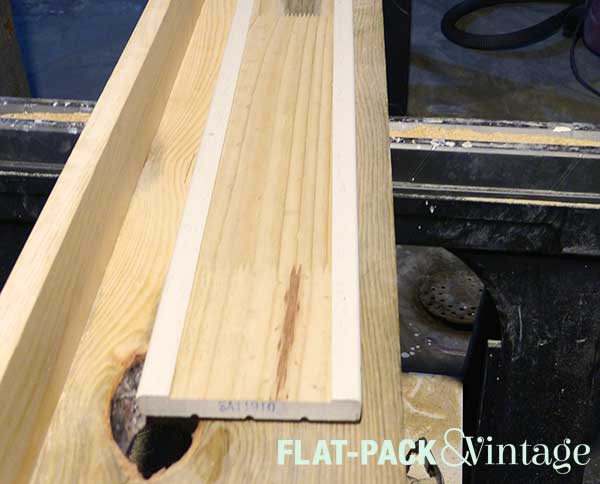
On Thursday we started looking for wood for our door and window casings.  We already knew we had to custom route the vertical casings so we just need to get wood in the correct dimensions.  Well, since the original casings in the rest of the house were 4.5″ inches wide, which meant dimensional lumber wouldn’t cut it.

We poked around through the trim section to see if there were any flat trim pieces that were 4.5″ wide.  Nope.  A bunch of 3.5, some 5.5, but no 4.5.  Figures.  At the end of the trim aisle though, were some door jamb pieces and kits.  Do you know how wide a door jamb is?  4.5 inches!  BOO-YA!  Plus, the outside edges are slightly rounded like our moldings.  Can I get another boo-ya?  The only minor problem is that they’re 81″ tall, which is a bit short but we have plinths in every other room so that’s an easy fix.

Sounds perfect right?  Only all the jambs at Home Depot were pretty warped.  Arrrgh!  Plan C now was to get 1×6’s and rip them down to size on a table saw.  A table we don’t have….  My dad offered to buy us a table saw though!  Some people give cribs as new baby gifts, my dad gives table saws.  I pointed this out at the store and a nearby customer laughed and pointed out that table saws were way more useful.

Ok, so we have a plan!  We have lumber!  We have a saw! We’re good to go, right?  Ehhhh.  Because the door jambs were so incredibly perfect and my dad and I make up Team Insane Perfectionist we decided to swing by Menards to see if they sold the same thing and if they were any straighter.  Success!  Let’s roll!

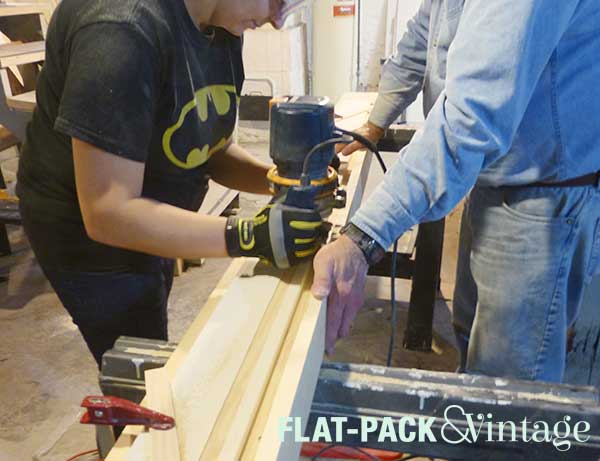
My dad had brought along his router and router table so we figured we’d get that all set up and then zip the boards through like you would with a table saw.  Easy-peasy right?

Um, nope.

There’s more resistence with a router blade than a table saw blade so it takes a LOT more effort to feed the wood though.  Pair that with a longer board and it’s really hard to get a nice, consistent groove.  The amount of effort it took to get one edge done (that didn’t even end up being a good edge), was clearly not going to work.

Ok, time for Plan B.

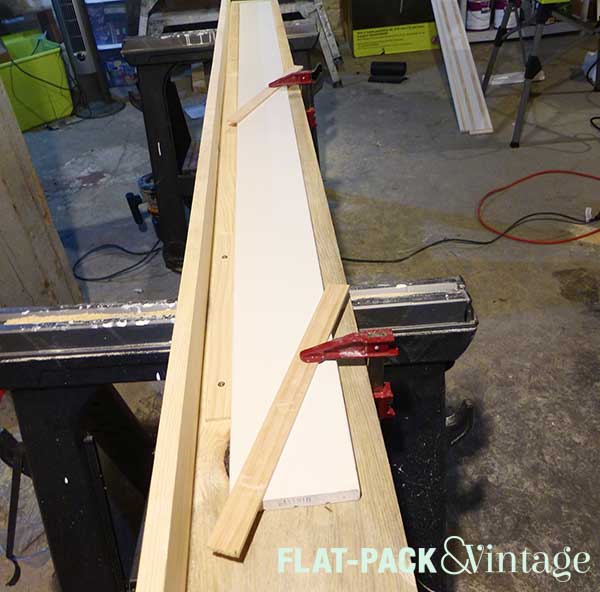
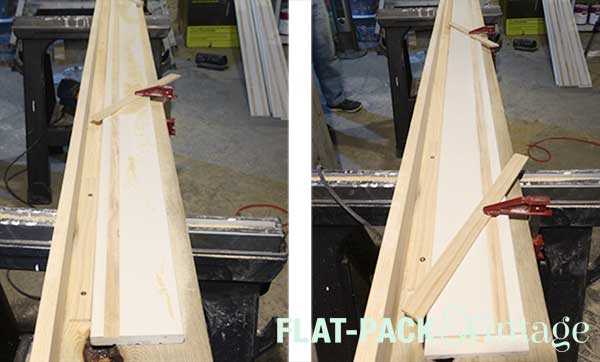
Back we go to the hardware store to pick up some inexpensive pine to make a jig. The jig consists of a 1×8 for the base and a 1×4 for the back guide that are screwed together in an L shape.

casings1

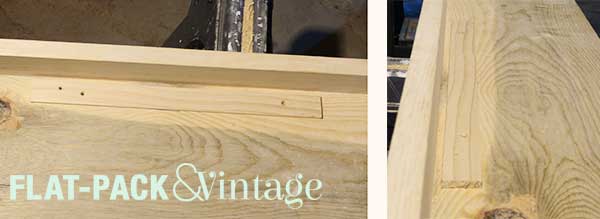
We knew we needed the raised edges on the casings to be 3/4″ wide so we did some quick math to determine where we would need to position the board, then screwed in some thin scrap wood as spacers.  It needed to be tall enough to butt the board up against, but short enough that it wouldn’t interfere with the router.

casings2

You don’t need to run your spacer pieces along the full length of the jig.  The board won’t be moving, just the router, so you really just need to make sure you have nice, even spacers on each end so you can position the board well.  It’s also worth mentioning that if you’re going to build a jig you want all the lumber you’ll be using to be as straight as possible.  We may have spent a good 10 minutes pulling out board after board and checking it for straightness.  Knots and splits don’t really matter, it just needs to be as straight as possible.

casings3

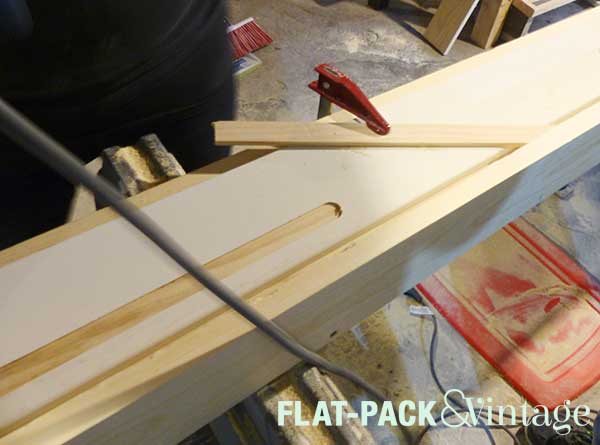
Once we had our jig set up, we clamped the wood into place and got to routing.  We did have to stop at each clamp to re-position it, but that’s not a big issue.

casings4

casings5

See my lack of a mask?  Don’t do that.**  Routing kicks up shit-tons of sawdust.  I didn’t realize that right away (yes, I’m an idiot) so I didn’t put on a mask until I was about 1/2 way done… and then 2 days later I was in the ER with an asthma flair-up.

We did one pass, then flipped the board around to do the other edge.

casings6

casings7

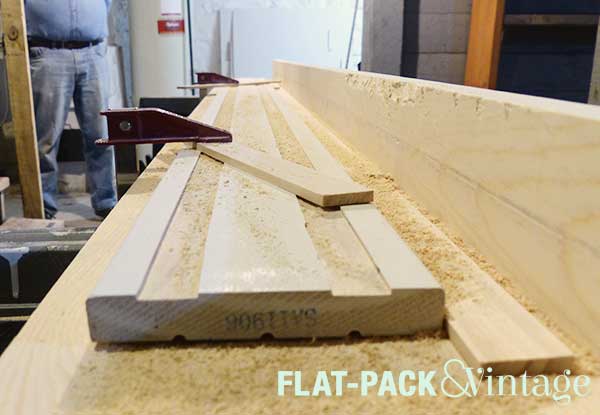
Bee-yoo-teee-ful.  But now there’s still a chunk left in the center.  We re-measured to see how far out the next pass would have to be, but this time just marked lines on our jig.  The outermost passes were the ones that really had to be precise, so for these we just lined the board up with the marks and had the second person simply hold it in place.

casings8

casings9

Aaand then you flip it around and do the same thing to the other side.

casings10

Now we’re left with one tiny strip in the middle.  Now, you guessed it, we measured, marked, and re-positioned the board.  The narrow strips we used as spacers for the edges were the perfect width to position the board to get the center strip.  We flipped them vertical to line up the board and pulled them out once someone was holding the board in place.

casings11

SHAZAAM!

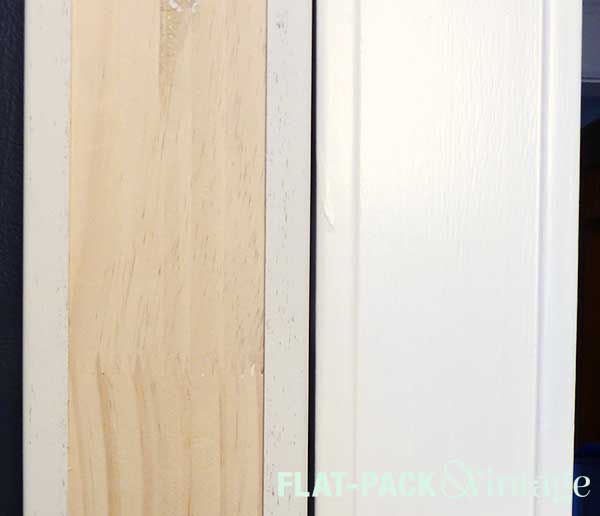
Some of you may be wondering why we bothered painted the boards if we were just going to strip a bunch of it off.  Well, we didn’t; the boards came pre-primed.  We didn’t need them too, but they were the only real wood (not particle board or MDF option).  The bonus is there’s a much better contrast in my pictures.

Just take a look at these beauties compared the original casings!

casings12

I’m giving them a rating of PDG: Pretty Darn Good.


*I may have been a little slow in publishing this….

**See my awesomely coordinated gloves and Batman shirt?  Not planned at all, but you can totally copy that.  Also, I hate pregnant-me in pictures.  In real life I feel totally fine but I see a picture and can only quote Spaceballs–“Why didn’t anyone ever tell me my ass was so big?!”  My amazing and supportive husband responded to this with “Well, you’re supposed to be getting bigger.”  This is the same amazing guy who once told me “I like how fat you are” and said I looked like “a yellow whale” after trying on a very unflattering maxi dress.  He may suffer from foot-in-mouth disease.  I’m hoping for the “pregnant glow” before we get a professional pregnancy shoot done, but so far I’ve just been breaking out like a teenager.

Save

Save

Save

Save

Save

Save

Save

Save

Checking in on the Hallway

I had visions of being completely done with the hallway by now!  Unfortunately life and a pissy thyroid ate up a lot the time I had planned for this so I’ve very much not done yet. I thought I’d share my progress anyway though.

If you need a refresher on what I started with, check out this post.

The Staircase

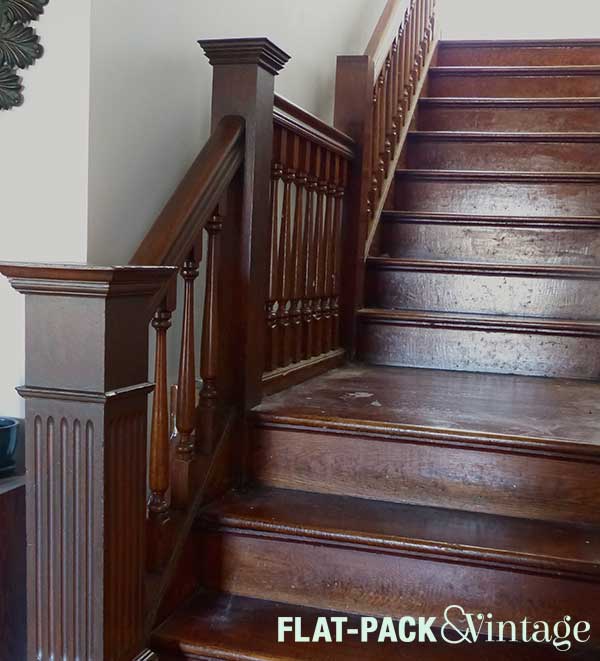
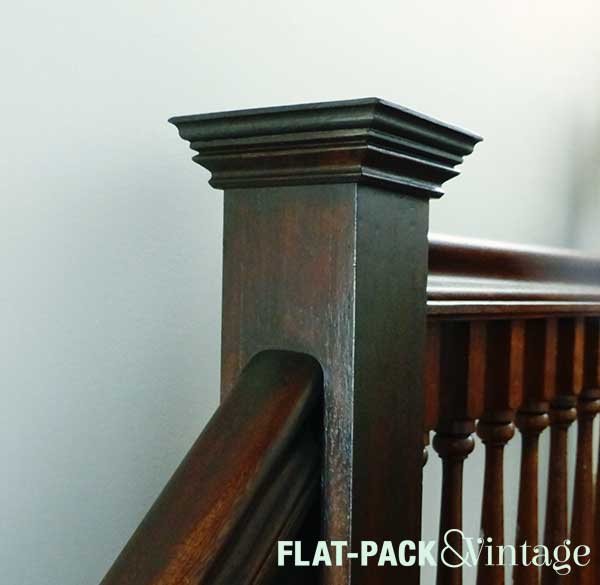
One of the first projects I had planned was replacing all the busted newel caps on our staircase.  I had a good start on it but petered out.  So right now I have replaced…. one.  Yes. One.  But that one looks good!

hallcheckin_3

The chunky post at the base of the stairs in all original, but the second post has a brand-spankin-new newel cap.  Is a it a perfect match?  No.  But is pretty darn good?  I think so!

hallcheckin_4

Even in old houses I think it makes sense to weigh every investment.  Is it 100% historically accurate?  No.  Is the cost of a 100% historically accurate reproduction worth it for this particular house?  Sorry, but no.  It’s a pretty basic, standard old house for St Paul (heck, there’s even a near-perfect doppelganger house a couple blocks away!).  It’s sort of like trying to make an average 1950’s ranch a high-end MCM masterpiece. We’re also not restoring this house, we’re renovating it.  We’re just renovating it while still trying to be mindful of it’s origins.

Ahem.

Anyways… one newel cap down, 5 more to go!

The Doors

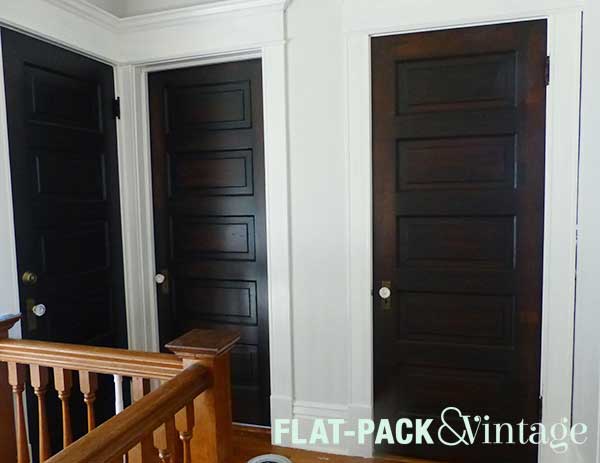
Oh the doors!  I had such high hopes that they would have been done weeks ago!  Unfortunately barely being able to get off the couch for nearly a month set me back a bit.  We’re 1/2 way there though!

hallcheckin_2

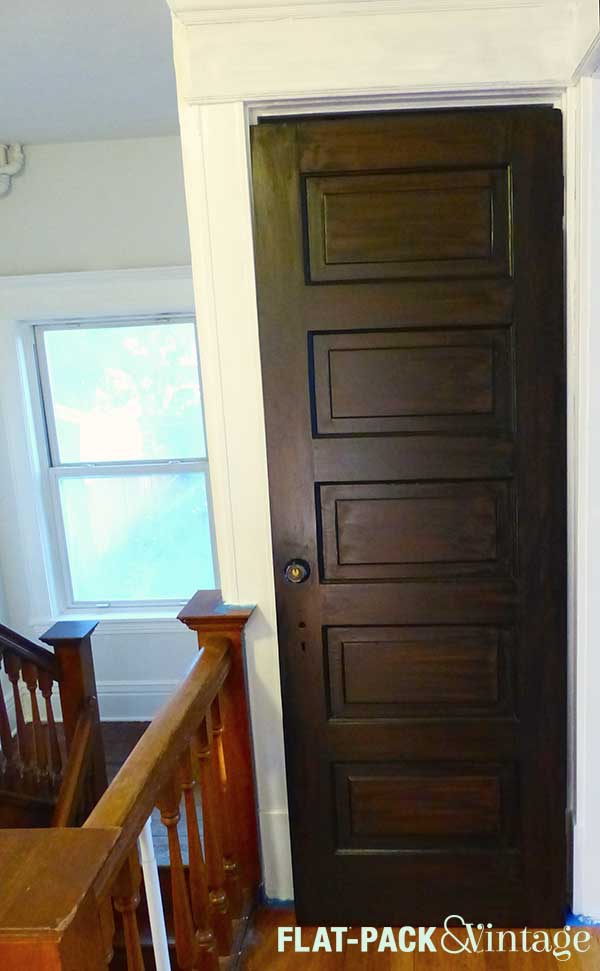
I posted about my love of black doors a while back, but Matt was adamantly against it.  He also didn’t want to paint them white (so picky!) so we compromised with a darkdark stain.  It’s a shit-ton of work, but I think it looks pretty fab.  Please ignore the orange-y railing, I’m working on it.  Slowly.

hallcheckin_1

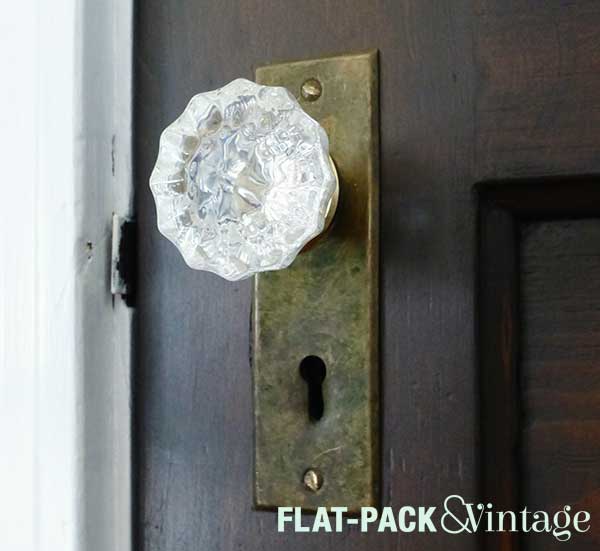
I also ordered glass knobs to replace the black ceramic ones.  Yeah, the ceramic ones were probably original, but they just disappeared into the dark stain (the brass back-plates are more noticeable in real life, but I’m still thinking of cleaning them up a bit).  Half the upstairs door knobs were already glass anyway and I wanted continuity.  I ordered these beauties from House of Antique Hardware.  It might be my new favorite place on the internet.  I could make a shopping list a mile long from this place if I had the budget for it, but alas. I still may get the dust corners at some point because they’re super cute and cat fur clogging up the stairs is a legit problem in this household.

The Cat Tree

Why is pet furniture so often really ugly?  I mean, where are the homes where the standard fleshy-beige cat upholstery fits in?  My best guess is that it’s designed to hide most fur colors.  These are the sorts of things I tell myself to make sense of this crazy world.*

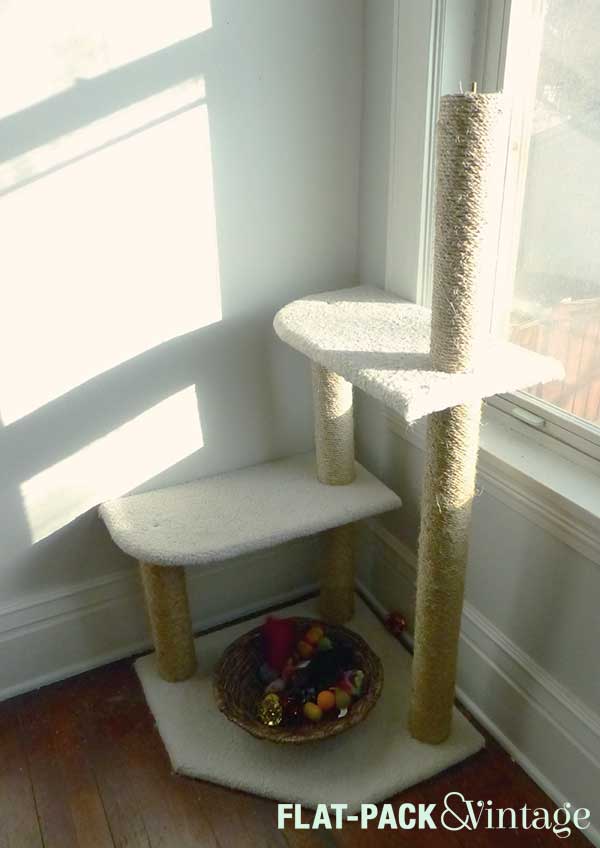
Regardless of the reason, the fleshy-beige had to go! The scratching posts sections had also gotten pretty beat up over the few years we’ve  had it.  It’s seen a lot of love from the cats and needed  a makeover.

hallcheckin_5

I dissembled the whole thing, wrapped the flat pieces with a faux sherpa fabric, and wrapped the polls top-to-bottom with jute.  I did a bit of reconfiguration of the pieces too to make it visually lighter and provides the cats with a taller section they so they stretch out and scratch. They usually only hang out on the top section anyway, so it really didn’t need the extra bulk. I still am not sure what to do about the top basket yet (helloooo weird blank space and lonely screw), but I’m working on it.

Still Working on:
  • Newel caps
  • Staining the railing
  • Refinishing the doors
  • Planning a gallery wall
  • Lighting
  • Building a new cabinet for the entryway


So that’s the current State of House address.  I’m planning on doing a check-in with the kitchen too to let you know how my temporary fixes are holding up. I just need to clean it first…


*At least I’m not alone in my “Why does pet furniture have to be ugly” thoughts.  There is a shop in St Paul called–I shit you not–Custom Cat Purrinture.   Yes, Purr-niture.  Believe it or not Matt and I haven’t checked it out yet.

Save

Save

Save

Save

Save

Save

Lies My Hardware Store Told Me

No, don’t worry, this isn’t another customer service rant.  Our stove is still here and functioning well, and for the record, the local Home Depot employees are awesome when it comes to in-store help (it just broke down for us once there was a special order involved…. sigh).

No, today I’m going to talk about stain.

I’ve been working on refinishing our upstairs doors and, well, let’s just say there’s a reason I haven’t shared more pictures yet.  Last time I mentioned that I got  a color I liked, but the finish was kinda splotchy.

Annoyingly splotching in fact.

Matt was fine with it, but it was steadily driving me crazy.  Ultimately I decided I couldn’t live with it and decided I needed to try a different technique to get the same dark color minus the streaky-blotchiness.

Easier said than done.

stainlies

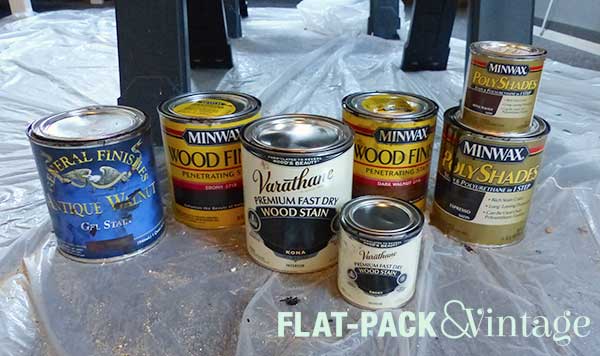
I currently have 6–count them 6–cans of different stains that I have experimented with.  Gel stain + polyshades was my first attempt, but it completely hid the wood grain really just looked like a crappy paint job.  The problem was trying to duplicate that same rich color, but with a better finish because you know what?  All those little samples they have in the stain aisle showing the stain colors on little bits of oak and pine? LIES!  I’d see a beautiful, rich, dark espresso stain in the store, try and on my door and  whomp whomp, it would only be a shade or two darker than the honey oak I started with.  I went through 4 rounds of stripping, 3 brands of stain and 6 colors before I finally found something that worked (more to come on that–I promise).  This is also why you only do one door at a time…

I even had a mini-meltdown in Menards bemoaning my inability to find a properly DARK (but not black!) stain.  Let that be a lesson to all you helpful employees who come up to customers and ask if they need any help–you may find a lunatic (although mystery lady–you were the single most helpful Menards employee I’ve met–thank you for putting up with me!)

Do you have any DIY disasters you need to vent about?  Knock yourselves out.  I feel your pain, really.

The Great Door Compromise of 2016

It’s been a little quiet around here lately.  My actual, money-making job has been insanely busy–we’re operating at about 1/2 staff between vacations/medical leave/maternity leave so stress levels have been through the roof and my energy level once I get home hits the floor (or rather, the couch).  We’re still working away, just slowly, so I thought I’d give you a little sneak peak at my current project.

A while back I mentioned that I was sort of swooning over the white trim + black door combo.  Matt, however, was Not a Fan…. but he didn’t want me to paint the upstairs doors white either and I certainly wasn’t leaving them honey oak.

Ok, I can stain them super dark, it will be almost like my beloved black doors, right?  Only re-staining is rather a giant pain in the ass.  But wait, there’s this magical gel stain that is all over the Pinterest!  I bet it’s a miracle worker.  I bet its secret ingredient is unicorn snot.*  I bet it…. doesn’t do a damn thing to these doors.

Yup.  I tried the General Finishes Gel Stain with minimal prep (mineral spirits and an abrasive scrubbie) and it did absolutely jack.  Sure, some of the inside corners got a little darker but otherwise it was very underwhelming. Sorry, no pictures, I was too distraught.  Just imagine a door that toddler wiped a brown ink pad over.

And Matt still didn’t want me to paint the doors.  Matt, I’m continuing to try because I love you.

Now it was time to try what I had wanted to avoid in the first place–stripping and refinishing.  Ugh.  It’s not that it’s a difficult process, it’s just time consuming–strip, sand, wash, stain, poly, with waiting or dry time between nearly every step.

I had already taken 2 of the hallway doors down while I was painting the trim, so I used one of them as my guinea pig.

DoorCompromise

I’m on the fence if I think it’s really worth the effort (that’s about a week’s worth of work right there!) but Matt really likes it and marriage is about compromise or some such crap.

Actual conversation we had as I was pondering the door (which by the way, is currently just leaning in place and missing all hardware, just FYI):

Matt: We should really try to get together with some people this weekend.

Me: Sounds good, go ahead and email people.

Matt: Why me?

Me: Because I’m busy stripping and refinishing your damn doors!

I’m going to try and start door #2 tonight and try a slightly different technique once I get to the stain.  I like the final color on the one I have done, but the finish is a little splotchy.  It’s also worth noting that the staircase railing is going to get darkened up (and de-oranged) too, and we have dreams of refinishing the floors to be much darker (although the latter may not happen for quite a while…).


*Because unicorn tears would make it too runny to be a gel stain.  Duh.

Save

Dreaming of Black Doors

This past weekend we vacationed it up lakeside in honor of the 4th.  Tons of fun, but no housework got tackled.  Totally worth it though.

july042016

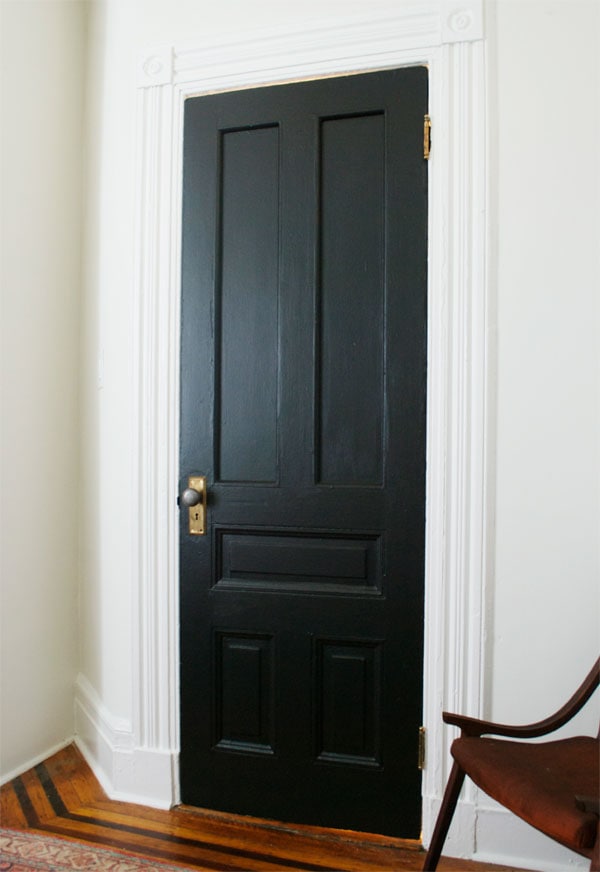
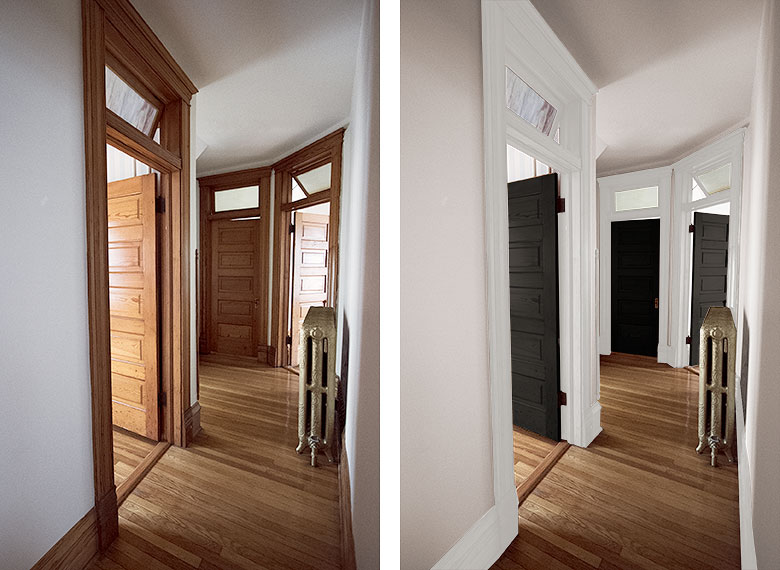
We are almost ready to tackle the painting the upstairs hallway and this area is packed with doors. The trim is for sure going to be white, but I’ve seen a number of examples where people paired white trim with black doors and I have to say I’m totally diggin’ it.

Via Manhattan Nest


Hallway Before and After Mockup
Via Making it Lovely

What I love about both these examples is that they’re used in homes that are similar in age and style to mine.  I think the brass hardware looks especially amazing on them.

I think the trick is to not use a straight-off-the-shelf pure black; you need something with a little bit of depth to it.  I also think a very dark stain (like an espresso, ebony, or java) could look pretty awesome too since you’d still see a little wood grain.  Plus, since this will probably end up being more trendy that classic, doors are pretty simple to repaint if you feel the need to bring them back to white.

I don’t think Matt’s going to go for it*, but what do you think?  Black doors: yay or nay?


*In fact he just told me he doesn’t like it.  Party-pooper.

Save

Save

Save

Destroying Historical Fabric One Room at a Time

A while back Matt was reading an article on restoring old homes and it mentioned that you shouldn’t insulate because it would “destroy the historical fabric.”  It’s one of the reasons the Historical Preservation Society is often referred to as the Hysterical Preservation Society and has been a running joke with me and Matt ever sense.

Don’t get me wrong, the HPS is important, and recognizing historically significant homes is important. Here’s the thing though, not every old home is historically significant.  Our house is an American Foursquare… sort of the cookie-cutter house the early 1900s.  Is it pretty awesome compared to more recent architectural styles?  Hells yes!  It this specific house historically significant? Our neighborhood is filled with the same style houses, are they all historically significant?  No and no.

When I shared my dining room reveal on Apartment Therapy a while back, a handful of people decided to ream me out for painting the trim.  They claim I had “destroyed” the house and the final design was a “travesty” and merely “trendy” (*gasp*).  What do I have to say to that?  BAH!

Your home is a reflection of YOU.  Unless you own a house that’s on the historical register you can do whatever you damn well please (and people often do*).  I have been trying to keep the bones of the house pretty traditional, but have some fun with the fixtures and furnishings which suits my more eclectic nature.  I also don’t feel like white trim is trendy and I’ve seen it in tons of similarly aged homes including million dollar properties and historically recognized homes (ok, only certain rooms in this one–but important, public rooms).  It also lets me brighten our home and cost-effectively replace damaged trim pieces.

Which is why we’re continuing to paint the trim.

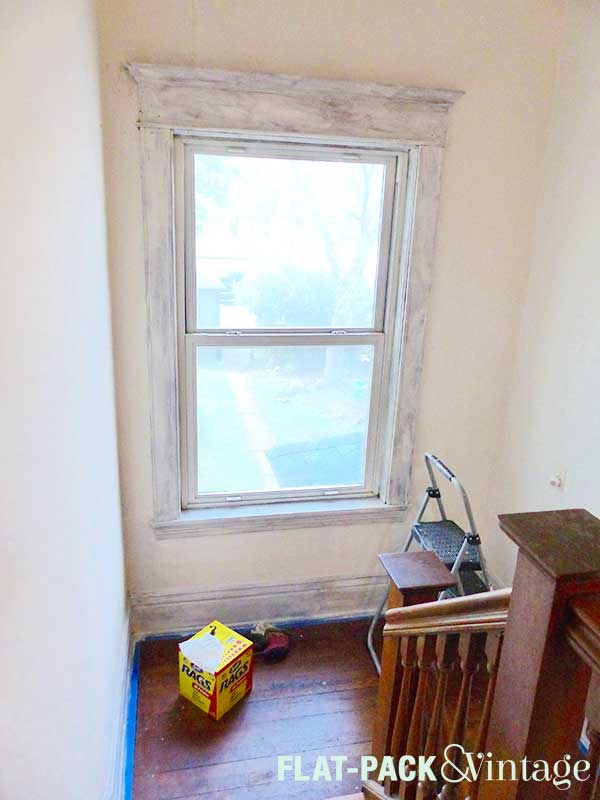
Yup.  The critics haven’t dissuaded me and we’re continuing the paint into our entry way/stairwell/hallway.

We also picked an awesome weekend to start painting.  Saturday was in the upper 90’s and Sunday was (only!) in the 80s. Keep in mind we do not have central air.  Yeah, it was boiling.

HallwayPrimed_1

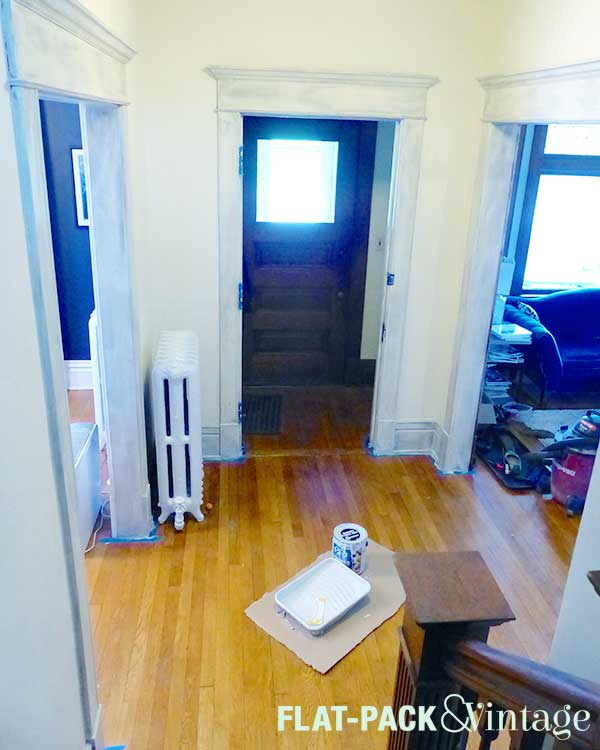
We got the first section primed on Saturday by working in the morning and then late at night when the temps were a little cooler.  We were still dripping buckets of sweat.  Lovely.

hallwayPrimed_2

Notice our lack of a door?  It’s currently hanging out  (haha!) between our living room and TV room.  It’s not the locking door so I insisted we take it off so I could better paint the trim.  Matt rolled his eyes and said I was crazy, but humored me anyway because that’s what makes our marriage work.

hallwayPrimed_3

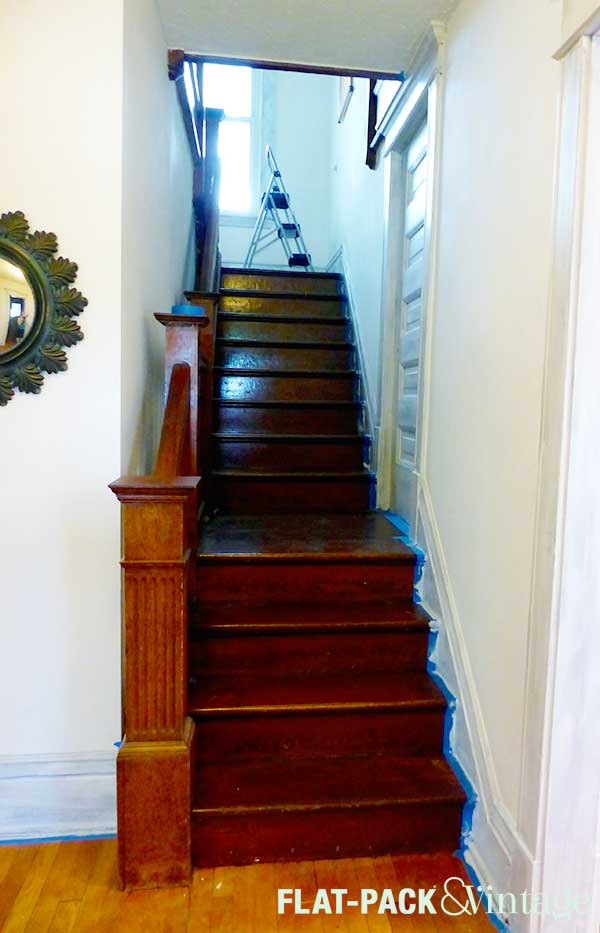
Big difference right?  This is just the primer, but it’s already made a huge difference on the stairs–that smaller landing was nearly invisible on the way down (leading to many missteps and trips), now you see the changes outlined against the white and it is SO much easier to see!

We continued to power through on Sunday so everything has its first coat of paint now too.  It’s been super cloudy and rainy all week so I don’t have any good pictures of that, but it won’t be impressive until the final coat of paint anyway.


* Sure people make crappy decisions all the time but the worse case scenario is that future homeowners will roll their eyes, mutter WTF? and change it all.  Big whoop. The less rehab inclined may just not buy the house in the first place, so it’s good to at least keep resale value in the back of your mind, just don’t let it paralyze your own dreams.

Save

Dining Room: Faux Tin Install

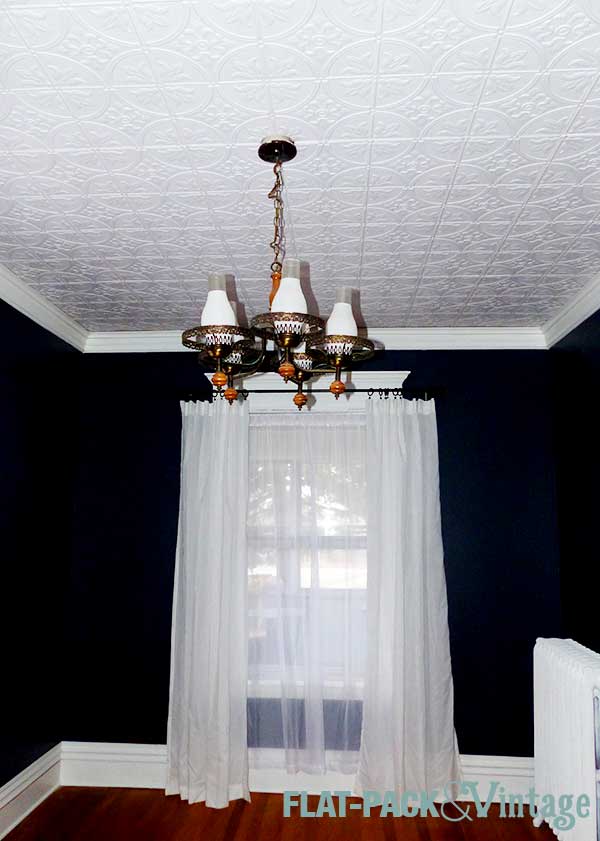
We have a ceiling!!!! I have been positively pumped for this moment ever since I decided to add faux tin panels to our dining room ceiling!

Why faux tin?  Tin ceilings are fairly period-appropriate for the house but legit tin is super pricey and would need to be nailed up.  Plus, the fake stuff is super easy to cut and manipulate–scissors and glue is all you need.  I also wanted the ceiling to remain white, like someone had painted the tin (which is totally even a thing) and that seemed like a waste of good tin. If you’re feeling super hard core though, check your local salvage places for tin panels. If you’re local, The Mall of St Paul on has some and I would assume Architectural Antiques in Northeast Minneapolis has some too (I got distracted by doorknobs last time I was there…. omg that place is pure heaven).

If you’re going to jazz up a ceiling with faux tin, here’s what you need.

  • Tiles in your pattern of choice (there are loads of options!)
  • Locktite Power Grab (you need an adhesive that holds instantly because gravity)*
  • Caulk gun
  • Scissors and utility knife
  • Chalk line
  • Measuring tape
  • Straight edge
  • Another person

Yup, that’s about it.

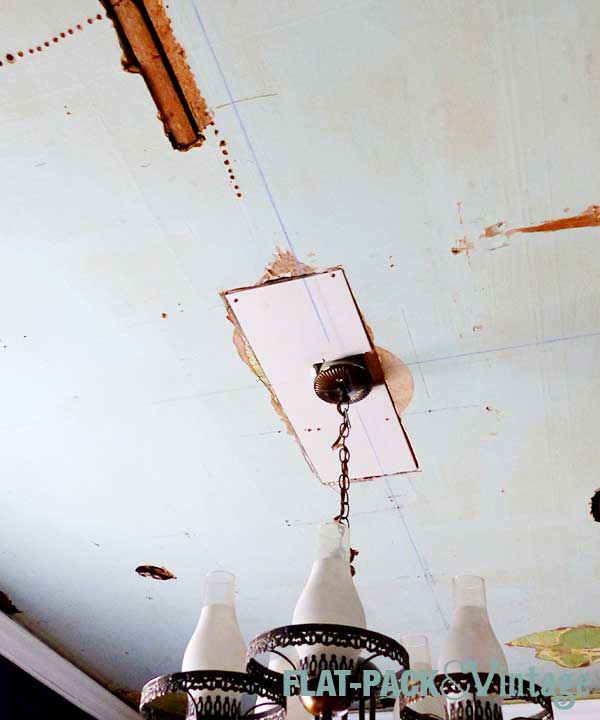
We had ordered 160sqft of tile and had 150sqft of ceiling, so we didn’t have a ton of wiggle-room in how the pattern fell.  Thankfully the electrical box for the ceiling light was already nearly perfectly centered.

Then we chalk-lined the center lines on the ceiling….and then adjusted them ever-so-slightly to make sure the pattern was centered on the light.

DR_tin_ceiling_1

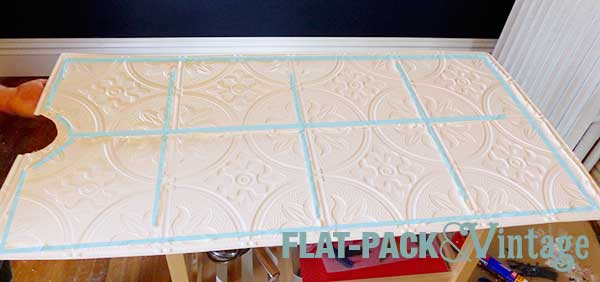
We followed the directions that came with the tiles and ran a bead of adhesive around the perimeter, and then in 3 cross-shaped sections in the middle. (White-on-white isn’t so visible in photos, so I traced the glue lines in blue)

DR_tin_ceiling_2

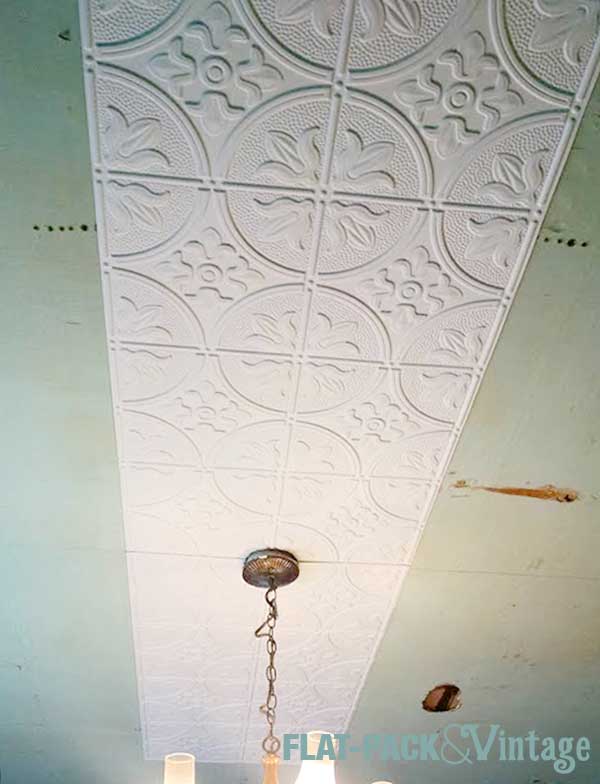
We started in the center, cutting out a semi-circle out of 2 panels to sandwich around the light fixture.  Ideally you should cut the power and take out the fixture,  but we’ll be replacing this one soon, we just don’t have the new one yet.  #poorplanning

If you’re working with 2×4′ panels it’s really a two person job.  Because the panels are very thin, they’re also very bendy so having an extra set of hands to both support the other end and help line up that end is incredibly useful.

Depending on the shape of your room and the placement of any fixtures, you could start in a corner.  I just wanted to get our ceiling fixture centered on the pattern.  You may want to sketch up a quick layout too so you can figure out where the panels will fall.  Because our room was a simple shape and our light fixture was nearly perfectly centered, I was able to just visualize the layout and go.

DR_tin_ceiling_3

From there we added all the panels that wouldn’t need to be trimmed down.  Because the panels are designed to interlock, as long as you get the first one well-placed, the rest should follow suit.

DR_tin_ceiling_4

And then filled everything else in.


(sorry for the ucky pictures… we were working on this mainly after work so natural light wasn’t on our side)

These panels are super easy to cut–scissors will work just fine.  If you’re not putting up crown molding (although I would suggest it) you may want to use a utility knife and straight-edge for your cuts.   It did take us several nights of work to get them all up, mainly because the caulk gun started to give me blisters, so we’d max out at around 5 panels per night.

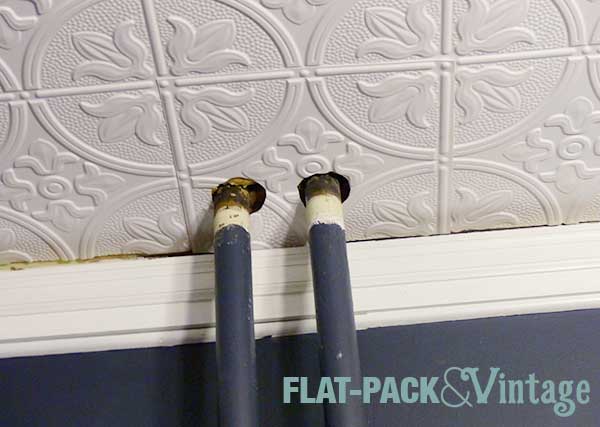
We saved the panel that would go over the radiator pipes for (second to) last because we figured it would be really annoying to get the cutouts just right.  We cut out one of the squares from the pattern so we had a big gap around the pipes.  Then I tested the cuts on some poster board and used that as a template.  Using some of our scrap pieces, I used a straight edge to cut out a single square (I cut just to the outside of the pattern sections that overlap so it would fit into place) and traced my template onto there.  Now it was much easier to manipulate a single square around the pipes.  We wedged it into place and pulled down the edges to add the adhesive (it would have gotten everywhere if we had put the adhesive on first).  Sorry I don’t have more pictures of this… I got sucked into the process and neglected my camera.

DR_tin_ceiling_5

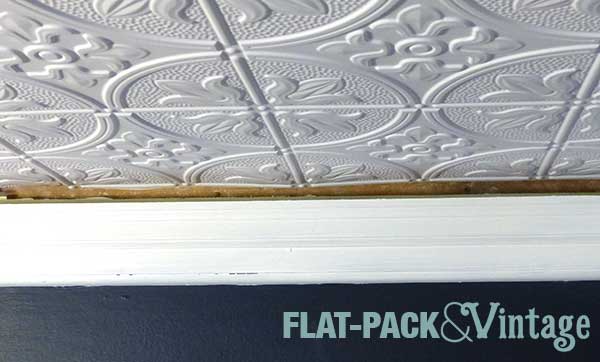
Because the previous tiles were stapled onto 1×2’s we were left with a small gap between the crown molding and the ceiling.  No bueno.

DR_tin_ceiling_6

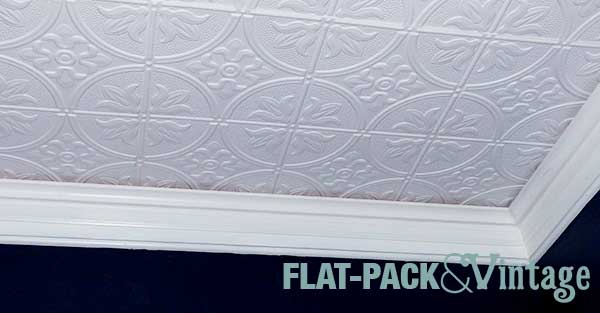
We could have just moved the existing crown up, but I decided to add on to what was already there.  I found some approximately 1.5″ cove molding at Menards (I can’t find it on their site, otherwise I would link) which was exactly what I was looking for!  Now the crown molding sort of curves into the ceiling.

DR_tin_ceiling_7

Crown molding is an absolute beast to put up by the way.  It’s an exercise in geometry and I’m pretty sure luck plays into it as well.  Uneven, not square walls make it especially beastly.  Basically I’m saying I’m not even remotely qualified to give you a tutorial on installing crown molding because we’re not even entirely sure how we managed it at this point.  There are tons of tutorials out there on youtube though.  Good luck.

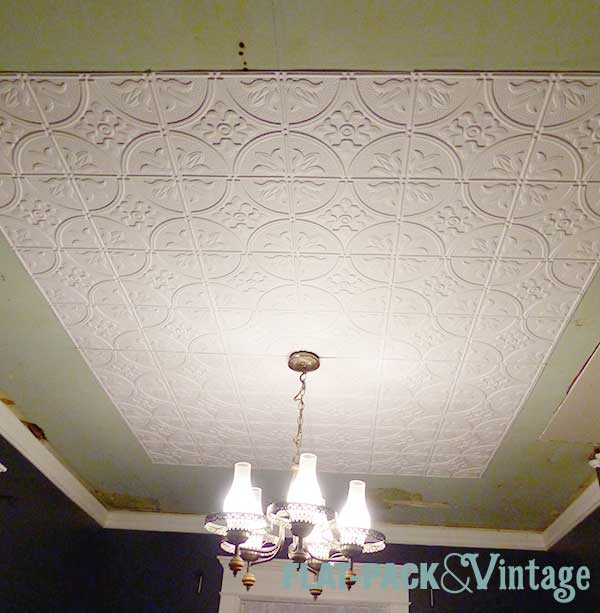
And now we have an actually nice looking ceiling!  Pretty amazing right?  I think it’s amazing a least, so please just humor me here….

DR_tin_ceiling_8

The electrical box for the light sticks out a little bit because of the drop in the previous ceiling, but we should be able to find either a canopy or medallion that will hide that.  Our new light fixture has been ordered and is on its way so the end of this makeover is in sight!


*You’ll need LOTS.  I originally picked up 3 tubes, then went back for another 12… we ended up using 11 total for our 150sqft ceiling


All About That Baseboard*

After fighting with them for a week, the dining room baseboards are now installed and they look FABULOUS!  Trying to mimic Victorian baseboards with trim you can find at an accessible hardware store can be a bit of a pain in the ass, but guess what?  It’s doable!  It’s not exactly cheap (it cost us around $200 for a 150sqft room), but it is still reasonably affordable.

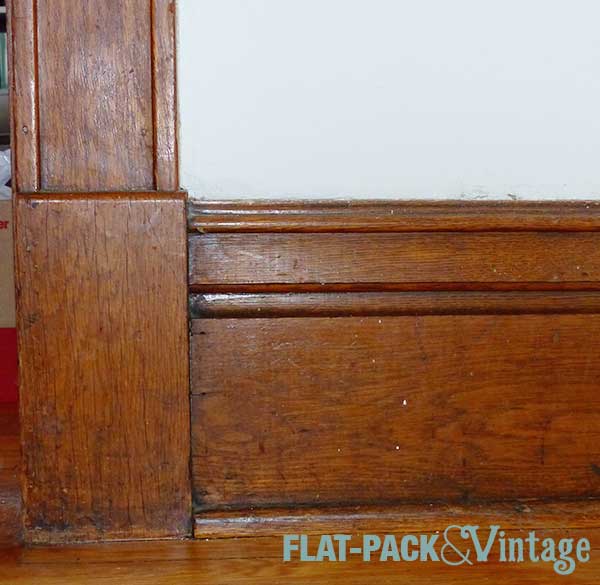
To recap: This is what the rest of the house has that I was trying to at least somewhat match.

diningBase_existing

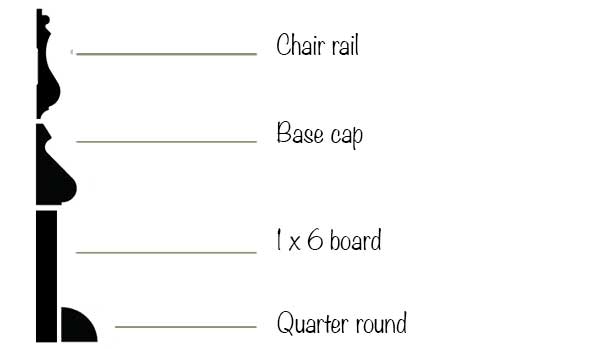
And I ended up being my neurotic self and choosing a 4 part baseboard option.

diningBase

(This image isn’t exactly too scale since, so the base cap really isn’t that chunky)

If I hadn’t had a specific plinth height to work around at all the doorways, I probably would have gone with a 5 1/4″ baseboard, the chair rail, and quarter round since the look would be very similar, but about an inch or so shorter than what I needed.

diningBase2

I’m pretty sure I saw all the same pieces at Home Depot, Menards, and Lowes (I’m positive of everything except the base cap), but I ended up buying the Chair Rail and Base Cap from Lowes and the 1×6 (select pine) and quarter round from Home Depot, just because I happened to be at Lowes when I had my trim meltdown.

When buying your trim pieces, not only do you need to measure your total length of trim, but you should also calculate how many pieces you’ll need to avoid as may same-wall joints as possible.  Example: our longest wall was 15′, we could only fit 8′ boards into our car so after cutting pieces to fit that wall we’d have 1′ of board that would effectively be dead to us since we don’t have either a 1′ long run or a 9′ long run anywhere and piecing in a 1′ long piece unnecessarily would look a little awkward (you want to try and limit as many seams as possible). Basically just be aware that you may have to overestimate more than you might think.

I decided to paint everything before installing it (although you will still need to fill and touch up your nail holes later on).  I used 2 coats of primer (the bare wood absorbed quite a bit of the first coat so I decided to play and it safe) and then one coat of Benjamin Moore Advance.

After everything was dry, I moved on to the install.  Matt and I decided to buy a brad nailer for this very purpose since, let’s be honest, while you can definitely hammer everything in by hand it will be a beast.  We also have other trim we’ll be replacing in the house later on so buying seemed like the best option.  Most hardware stores have tool rental options you could look into as well.

We started off with the easiest section of wall–single length of board, no miters.  You want to measure as precisely as possible because if you cut your pieces too short they’ll be gappy, too long and they won’t fit.

I dry-fit after each cut: cut my 1×6, dry fit; cut my base cap, dry fit; cut my chair rail, dry fit.  This way I could figure out after one cut if I screwed up my measurement somewhere before possibly ruining any of the other pieces.

base_1

I felt like a champ after doing this bit!  It fit together like a dream and looked perfect!  I was on top of the world! I was going to conquer this dining room in less time than I thought!

And then I moved on to a corner.

Oh sweetzombiejesus kill me now.

A pretty well known fact about old houses is that nothing is square.  As a teenager I once watched my dad, my aunt, and my uncle work to install a hardwood floor into a 150 year old farm house… you think I would have learned something from that.  Apparently not, but here’s my best advice for tackling a baseboard install.

1- Dry-fit ALL your pieces before nailing anything in.

I started by working wall-by-wall (luckily only with the 1×6) and at my very first corner I hit a snag (see above re: walls not square).  So I had to rip off the first board and yank all the nails out of it.  Ugh.  THEN I did the same damn thing while trying to join the boards on the long wall. *headdesk*

Also, pick a start point and work consecutively from there.  If you have sections of walls that don’t have corners you can do those independently.  Otherwise though you want to go in order rather than trying to make something meet in the middle.  We had a couple spots where we had to shim up the 1×6 to make it level with the previous board and other places where we had to grind off a bit of the floor to make a piece sit level (what we took off from the floor was entirely under the previous baseboard and was a combination of some sort of adhesive and a height change from years of refinishing the exposed floor).

2- Keep your saw close by

We keep our miter saw in the basement so I had maneuver 8′ boards up the stairs and around a couple corners and sometimes the cuts require a  bit of tweaking so I’d to haul them BACK downstairs and back up again.  This  virtually destroys my motivation.  After 2 days of not much progress we shoved the dining room table into the  living room and I moved the saw into the same room I was working in.

3- Saw blades have width

I actually knew this before starting, but if you’re new to power tools this is worth noting.  Basically, when you’re going for very precise cuts where you line your saw blade up with your cut mark matters.  It’s also why if you’re cutting multiple lengths out of one board you don’t mark off all the measurements an then cut–you’ll get progressively more off the more cuts you make.

4- Know your joints

There are 3 main types of joints you’ll deal with for trim: butt, miter, and scarf.

woodJoins

You can use a butt joint for corners when you have straight pieces (I used it for the 1×6’s).  You can also do a version of a butt joint with fancier trim pieces; this would be a coped corner.

The other option for corners is a mitered joint, but this can get finicky when your walls are not square.  If you’re painting the trim and it’s just a little off, it’s not a big deal because you can caulk the gap unless it’s ginormous.

The scarf joint is for joining two straight pieces of trim because most trim you find will be 8-10′ long and many walls are longer than that.

5- Cut your longest pieces first

This way if you screw up you can just keep cutting them down and use them in a shorter space.  I managed to do this without even thinking about it–go me!

So after a couple of false starts and a few headaches we got all the baseboard molding up!

The 1×6 was the worst to deal with–it’s not flexible and has the most area to line up well for corners.  I opted for butt joints with this because the mitered corners were not lining up well at all.  It also didn’t help matters that the miter saw would slide a little on our hardwood floor, making some of my cuts off because the board I was cutting would no longer be square against the blade.  ARGH!!!!  This took a couple evenings of work, but getting the first layer installed well would make everything else a lot easier.

diningBase_done_1

Next up I added the base cap.  SO much easier.  I was able to knock out this layer in about an hour and my scarf joint were much, much cleaner.

diningBase_done_2

And finally, the chair rail.

diningBase_done_3

I still have to add the quarter round,  fill the holes, caulk any gaps, and touch up with paint.  The worst is over though and it’s looking good!


*I don’t think any reasonable person could truthfully admit that they wouldn’t have even considered that title.


In Which I Inevitably Complicate Matters

I’ve been on the hunt for baseboard molding for a couple weeks now.  We have to replace all of it in the dining room because chunks were cut out behind the bookcases and we’d never get a perfect match unless we had someone custom make it. So I’ve been trying to find something with a similar weight and style to the rest of the house.

diningBase_existing

Finding something comparable to Victorian trim in today’s shops is hard.  The existing trim was about 10″ tall and you can’t detour too far from that height because there are 10″ tall plinths at the base of all the door moldings and it’s designed to be a similar height as the baseboards.

I figured I’ve have to get two different trim pieces (technically 3 once you figure in quarter-round) and that’s even how the existing trim was made.  The trouble was that I couldn’t find two pieces of trim that, when combined, gave me the look I wanted at the height I needed.

At this point normal people may have settled.  It’s clearly what happened in our kitchen and it’s not bad… but the base trim is barely visible in the kitchen and will be quite prominent in the dining room given the contrast with the walls.

Also, I am far from normal.

After being disappointed with Home Depot and Menards I trekked out to West St Paul to hit up Lowes.  At this point I was ready to buy trim come hell or high water.  I spent a good 45 minutes there laying out different combinations of trim on the floor and muttering to myself and eventually I settled on a 4 part baseboard plan. (FYI: All the stores seem to have nearly identical trim options).

It goes as such:

diningBase

Because that’s not going to be a pain in the ass to install at all.

Since we’re painting, I went with pine for all the pieces since it’s inexpensive (and the MDF was more warped and I think the plasticy stuff is just gross).  I chose Select Pine for the flat base piece because it’s straighter and less knot-y than standard pine boards and paint won’t hide knots.

This weekend we also picked up a new toy to help us with the install.

nailGunWheeeeeee!  I did NOT want to hammering in 4 different types of trim pieces by hand.  Plus, we’re also going to end up adding on to the crown molding AND we’re going to redo all the moldings in Matt’s study at some point* AND fixing some broken quarter-round throughout the house so this seemed like a reasonable investment vs renting. Plus it’s cordless and doesn’t require a compressor, how cool issat???

Pro-tip: If you go with cordless tools, try and stick to the same line so the batteries are interchangeable.  We’ve opted for Ryobi since it seems pretty well reviewed for the price point (not necessarily for the professional user, but good for the homeowner with some projects, i.e. us). Added (and completely useless) bonus: I love the green color.

We were originally hoping to install the baseboards this weekend, but since I didn’t pick out trim until Thursday night and it all needs to be primed and painted, this is the current state of things:

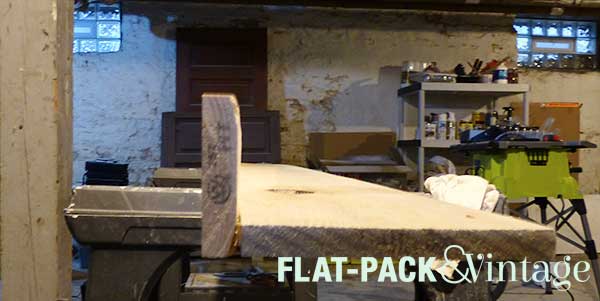
diningBase_progress_2(Isn’t our basement lovely?)

and this:

diningBase_progress_1

But it’s going to look spectacular!


*Somebody really hated that room.  It has the same janky ceiling tile as the dining room, trim that belongs in a 1950’s ranch and walls that appear to have been paneled and then heavily painted? Poorly skim-coated? Something… Needless to same that room does not quite match the rest of the house.