We recently hit the height of Minnesota Summer. The last couple weeks have been toasty. Like temps in the high 90’s and heat index of 110+ kind of toasty. Yeah, yeah, anyone in Florida or Arizona or some such place may be laughing at me, but I’m sure ya’ll have central air.
Point is, we haven’t the ideal conditions for painting an upstairs hallway so I’ve had to turn my attention elsewhere. I decided to tackle my basement work space because it’s virtually nonexistent at the moment.
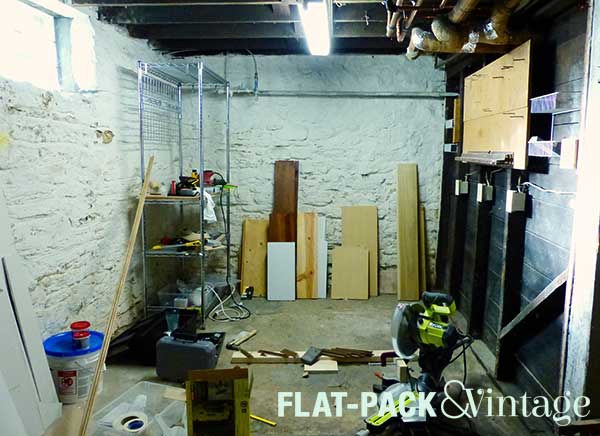
It’s really just a corner of the basement where we stash our tools, but it’s totally disorganized and generally ucky. I needed a place to organize tools and store supplies, and also a place to work without me constantly crouching on the ground since my back has decided to rebel ever since I turned 30.
I started by peg-boarding the ucky wall. The space was 3 inches too long to get away with 2 sheets of peg board so I had to buy 3 sheets. ARGH! Luckily it’s cheap. I had the hardware store cut the sheets down to the sizes I needed because I have a small car and no table saw.
The boards were all cut so the edges would center on the existing studs. This was so I could both anchor the edges well and fit everything into our car. And, of course, because it’s our house, none of the studs were evenly spaced so had boards that were 30.5, 22.5, 23.5, and 24.5 inches wide. Brilliant.
Now I just had to cut out holes for the outlets and pipes. First I tried using a handsaw but it was way more of a PITA than I anticipated. Then I tried my dremel with a cutting wheel but it started smoking and then the wheel shattered. Oops. Finally I broke down and demanded that we buy a jigsaw. They’re actually cheaper than I expected (at least they can be, they can also be pretty splurgey, but I didn’t need anything fancy).

It’s been YEARS since I used a jigsaw and I didn’t actually have the correct blade to cut hardboard so the cuts are pretty rough. I also started with the most complicated panel and ended with the easiest. Brilliant right? And then in the middle I totally effed one of my measurements around the the outlet. So basically it looks kind of crappy, but it’s a basement right? It doesn’t have to be perfect, just functional, RIGHT???. Please humor me here otherwise I may go out and buy more pegboard to fix it because, yes, I am that insane.
Speaking of insane, I also switched out all the outlets for white ones so they’d match the pegboard. While switching out the outlets, I added spacers to bring the outlets even with the front of the pegboard as well.
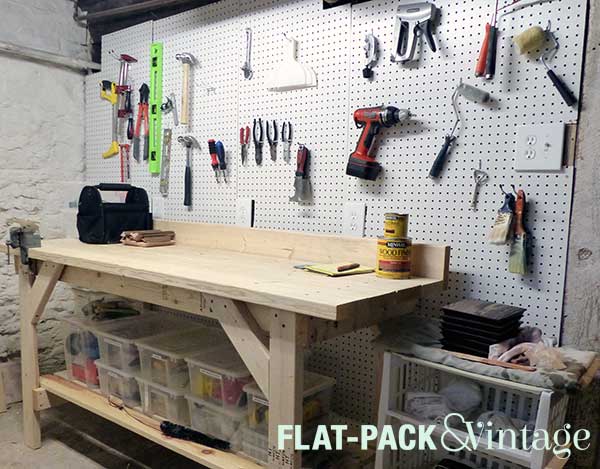
Once the pegboard was all set up, I picked up a work bench kit. I wanted to use the 2×4 Basics connectors to make a custom sized one, but an 8′ long top would be really hard to fit in my car so I opted for a 6′ kit instead.
When you see “kit” would you assume pre-drilled holes? ‘Cause I sure did and was incredibly disappointed. What I imagined taking a couple hours ended up taking several evenings worth of work because I would get frustrated and walk away. It went way smoother when Matt was free to help me–he held stuff in place and drilled pilot holes while I followed with another drill to screw everything together.
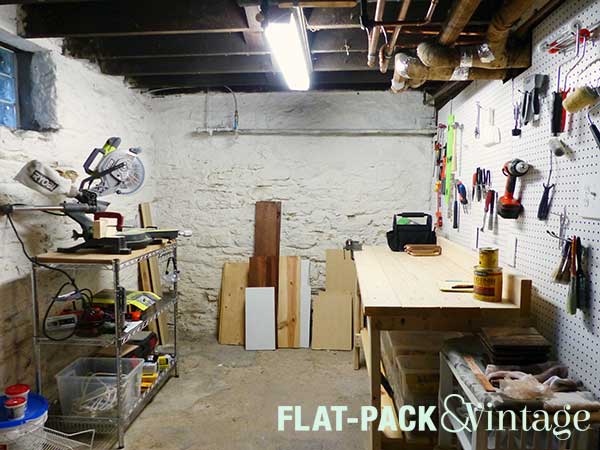
Fast forward through a few hours of swearing, a trip to IKEA, and a few more hours for organization and voila! I have a somewhat organized work space! I still need to pick up a miter saw table since the work bench isn’t big enough to set that on, and I’ll be need a stool as well. All and all though it’s a pretty awesome improvement, and I got do it all while hanging out in our (comparatively) cool basement.