First Things First: Let’s Build a New Room

A big part of deciding to move was the need for better home office space. Our new house has a finished basement, but Matt is apparently needy and wanted a window and actual natural light if he’s going to be working from home all day. Can you imagine?

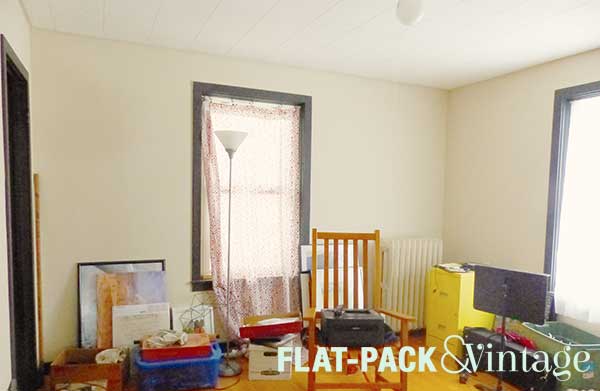
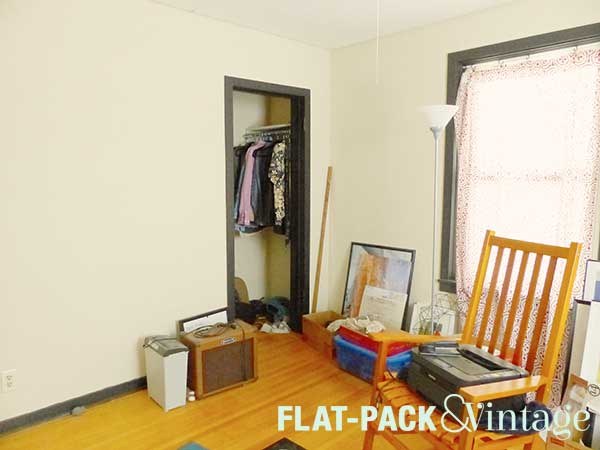
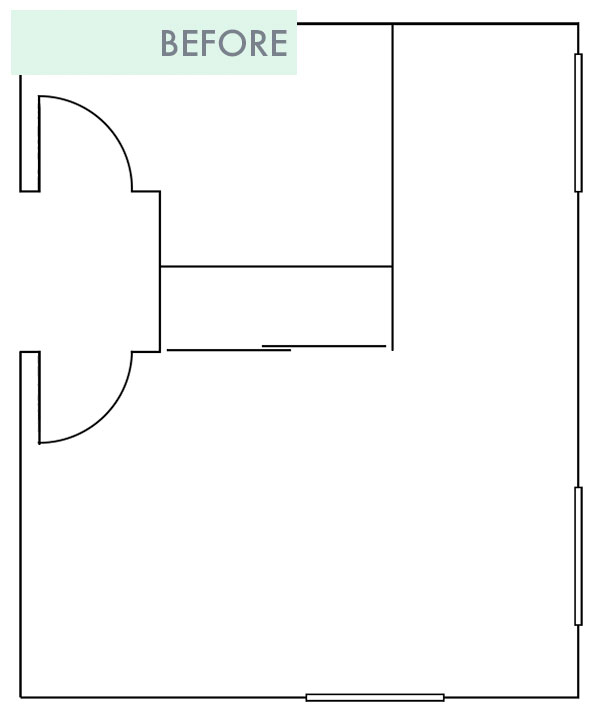
In the House Tour I shared before I showed some awkward spaces upstairs that we planned on reworking and that was the first big project we decided to tackle. It’s a little hard to visualize from photos (especially since the hall closet was difficult to photograph, so here’s how the spaces were laid out when we moved in:

Not to scale

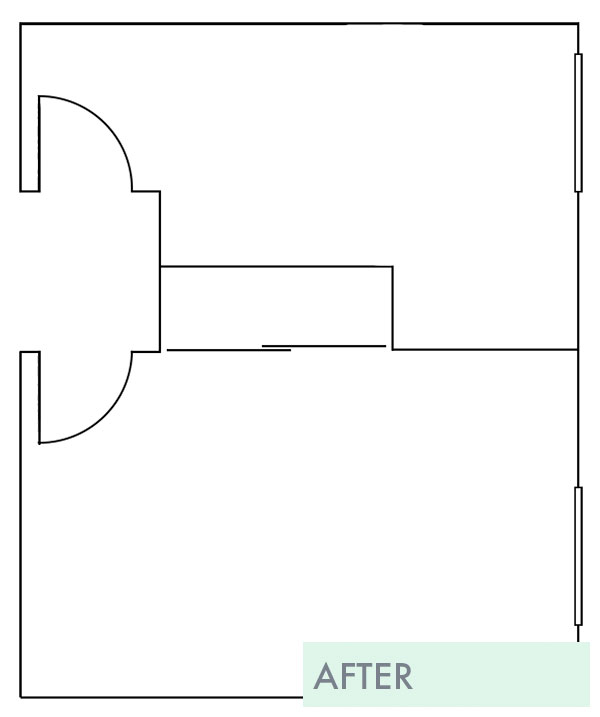
We discussed a few different options that included changing around the closet in the bedroom and adding a closet to the new room. These ideas led to complications involving vents and ceiling lights that we didn’t really want to deal with. Ultimately we followed Occam’s Razor theory and went with simplest solution:

Not to scale

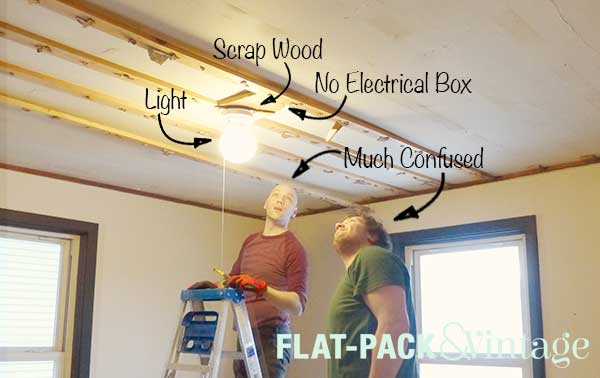
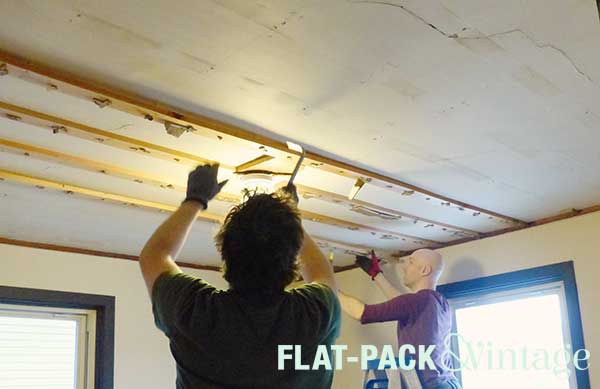
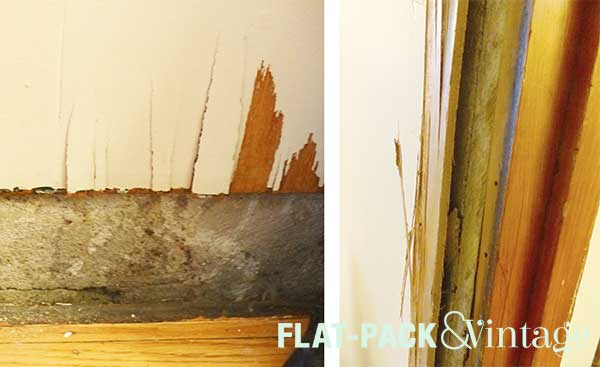
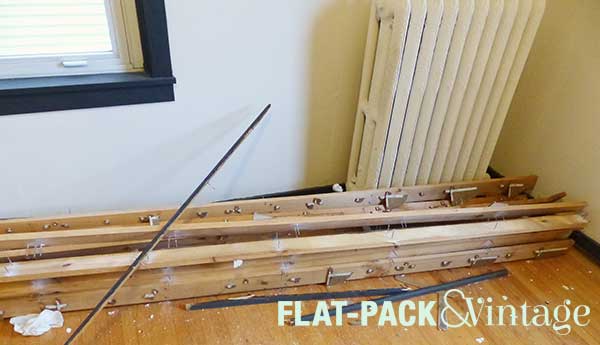
To contain the mess a little bit, we started by building the new wall in the existing bedroom. We had to remove a strip of carpet and a strip of ceiling in order to add 2×4’s along the top and bottom. Because this is a pretty small project in the world of drywalling, we didn’t bother renting a drywall lift. Matt still decided to tackle a bunch of this while I was working in the office so he temporarily attached a brace to support the top piece of drywall while he screwed it into place.

Once the drywall was up, we demoed the wall between the closet and alcove.

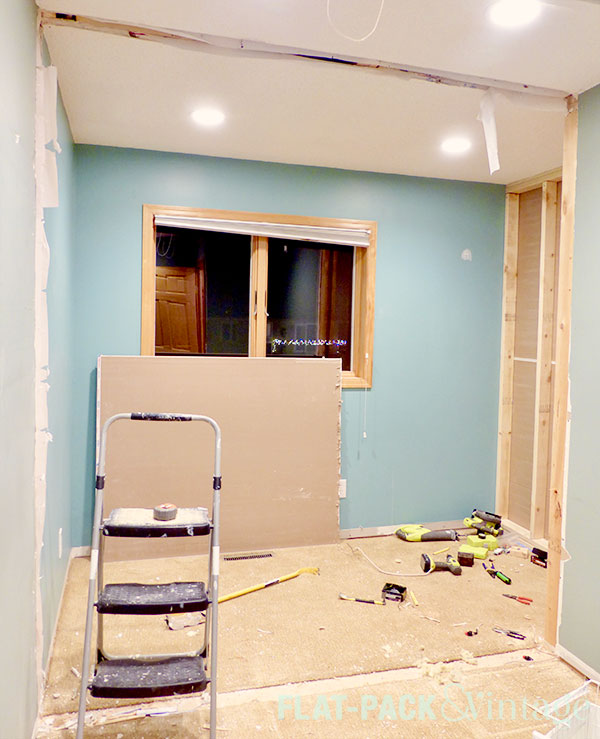
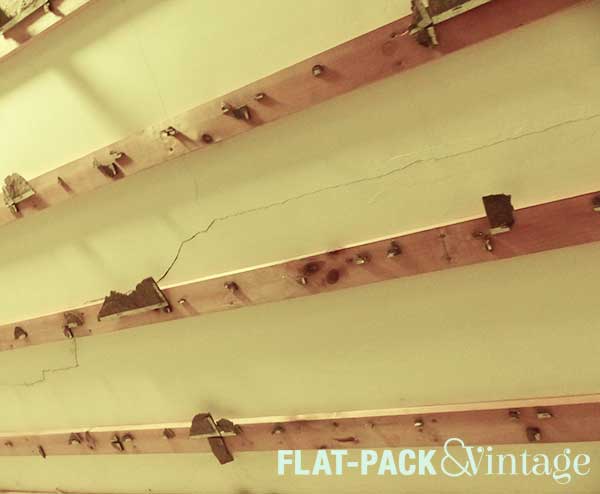
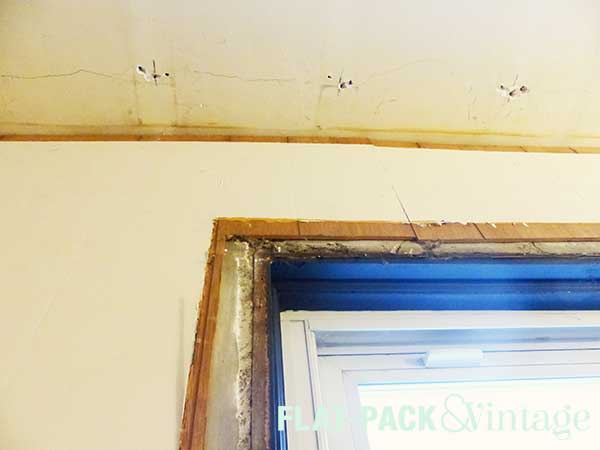
After that was just patching, patching, and more patching. Walls needed new drywall, the ceiling needed new drywall + popcorn texture, the carpet needed to be filled in*… this was possibly the longest part of the whole process.

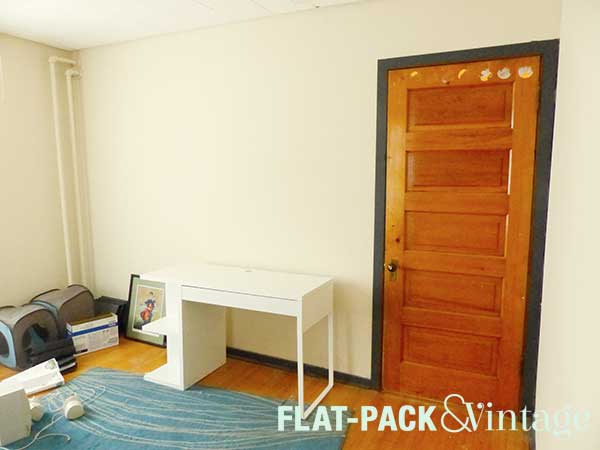
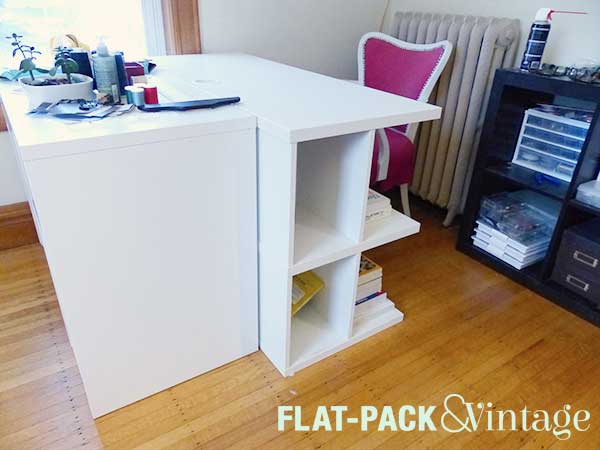
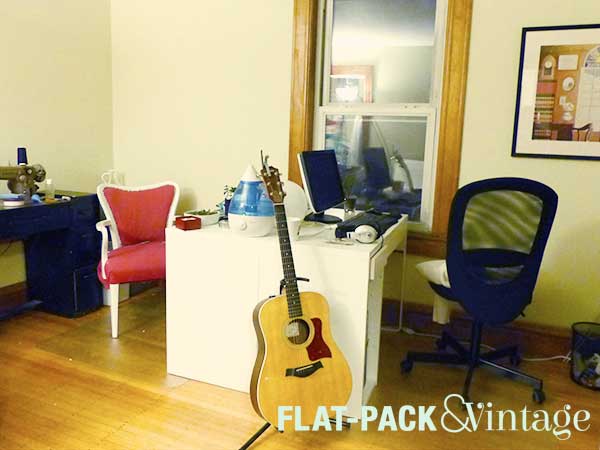
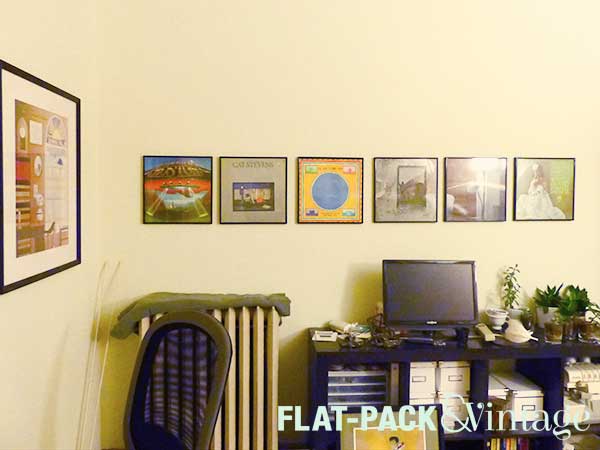
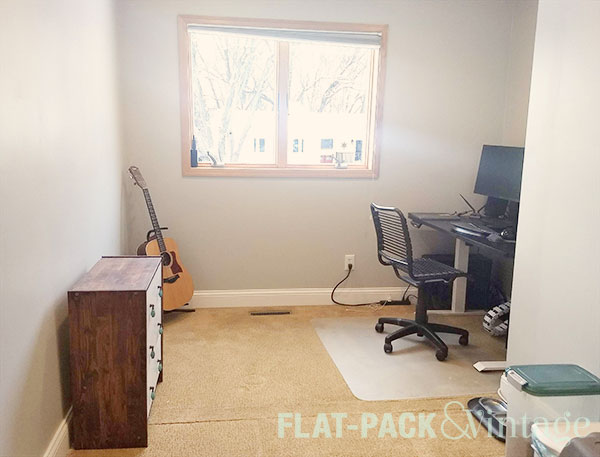
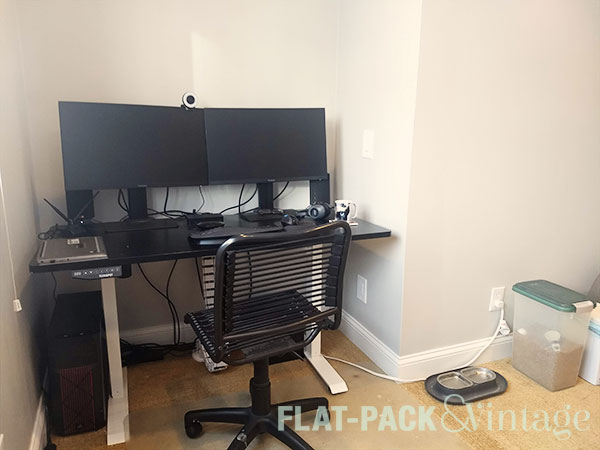
Most of the house is painted Sherwin Williams: Repose Gray and they had some left in the basement so we used that for now. Matt’s more or less in charge of this room and the bigger goal was having a functional space vs. and impeccably styled space. Heck, right now he still pretty much only has his desk in there (which fits perfectly in the alcove).

It may not be the most stunning visual makeover, but spatially it has been an awesome improvement to the house!

* My goal is to replace all the carpet sometime this year so we just patched in some leftover carpet from the basement. If a full carpet replacement wasn’t in our plans for the near future we would have come up with a better flooring solution.

Let the Demo Begin!

Now that Matt has moved into my study, we’re ready to start tackling the demo work on his study (well, he’s starting the demo, I’m still trying to tame all my crap in the other room).  The main reason we decided to work on this room next is because it is currently the grossest room in the house.  While we have plenty of rooms that still need a good ‘ole paint-and-style, this is the room that actually needs WORK.

studybefore2

Whomp whomp.

Do you see that trim?  Matte-black, skinny trim in a 115+ year old house?  Are you kidding me?!  Half the reason I love old houses is for the big, chunky, amazing trim!  This makes me want to cry.

studybefore1

And the ceiling… we had this same nasty acoustical tile treatment happening in our dining room.  I’m terrified of what we’re going to find underneath it… but it absolutely HAS to go.

studybefore3

We’re also missing a closet door in here…. and it’s currently Matt’s closet.  We’re planning on getting a wardrobe for the master bedroom so he can keep is clothes in there, but I still want this closet to have an actual door.  Thank god it’s a standard size at least!

studybefore4

What you can’t really tell from the pictures is that these walls we also all paneled at some point.  It’s actually fairly hard to tell in person too so I think the paneling may have gotten skim-coated too.  We’re a little on the fence about what to do about the paneling.  And by “we” I really mean me (Matt doesn’t want to deal with the walls at all).  It’s honestly pretty inoffensive in person so the tentative plan is to leave it alone unless it gets damaged as we rip the trim out.

This past week Matt already got started on the demo and took out all the ceiling tiles.

studydemo5

Wow… that is nowhere near as bad as it could have been!  We’re a little concerned about some of the bigger cracks causing issues when we rip out the furring strips, but I’m keeping my fingers crossed for the moment!  Hopefully all it will need is some crack repair and a fresh skim coat…hopefully!

studydemo8

We also found some more awesome electrical work!  And “awesome” I mean wtf?  It’s been a total crap-shoot if fixtures here have an electrical box and/or modern wiring or not and this one seems to be another not on both counts.  I want to get this light wired to a switch anyway and adding an electrical box isn’t a huge undertaking.  I am a little concerned that an electrician will want to redo the wiring as well.  It’s not a bad thing by any means, just a more expensive thing.

We spent Christmas in Wisconsin and then brought Matt’s mom and brother back with us.  If there’s one thing college boys are great for, it’s manual labor, so we put him to work with Matt.

studydemo2

The furring strips were soon removed. And the ceiling stayed up!  I was a little concerned that the furring strips might be propping up some of the cracked areas, but so far so good!

studydemo6

The offensive trim soon followed the ceiling into the garbage.

studydemp7

The paneling took a bit of a beating in the process so Matt is finally coming around to just taking it all down and re-drywalling.  It may be a lot of work, but I think it will be worth it in the end.  I’m hoping the ceiling just needs a skim-coat.  I do NOT want to deal with the ceiling so I’m hoping for a budget-friendly project that can be hired out.

Most of the demo was done with pretty small pry-bars, about 1 foot long or so.  They’re better for getting into tight spots.  We’ve got a 3 footer too which is better if you need a lot of leverage.  As sissy as the tiny ones look though, they’re super useful to have around.

studydemo4

Here’s to ending 2016 on a destructive note! If we had a fire pit we’d probably be ending it with a bonfire as well.  Hopefully we get it all put back together next year.

2016meme
Via Twitter, @HeatherGenua

More IKEA Adventures

Ok, so I took more than a week off.  It’s full on cold and flu season here in Minnesota and I’ve been feeling a little under the weather.  Plus, I finally had an appointment with an Endocrinologist right before Thanksgiving.  She supported the first Doctor’s conclusion that my wacky thyroid was only a temporary/viral thing but ran some more tests (have I mentioned I HATE needles? This fall has been miserable) and found that in body’s attempt to fix the situation it had over compensated and now my thyroid levels are too low.  So now I’m being medicated for that. Yeah, it’s been fun (and hopefully, still all temporary… I go back for still more blood work after Christmas and will hopefully be able to stop the drugs).

Now onto the house stuff! If you follow me on Facebook you may have seen me have a small IKEA breakdown a couple weeks ago.

Basically we’re putting the hallway work on hold for the winter.  It’s too cold to work on the porch and I don’t relish the idea of stripping and staining inside with no ventilation.  Instead we’re moving on to Matt’s study.  It’s a bit of an anomaly in the house–I think the floor, the radiator, and the door are the only original elements remaining.  The ceiling is the same gross acoustical tile that we had in the dining room, the walls were paneled (and possibly skim-coated?) at some point, and all the trim was replaced with boring, modern, builder-grade trim…. then painted matte-black.  The closet door is also missing.  Pretty much, I have no clue what in the hell happened here, but it’s not pretty.

This weekend we started moving all his crap into my study (we need to empty out the room in order to basically gut it).  His study will be uninhabitable for quite some time so we’re trying to make my study functional for 2 people.  We tried a few layouts for 2 desks, but ultimately liked the idea of shoving them together… the only problem was my existing desk was a smidge shorter than Matt’s.  Yes, I was neurotic enough to care. Plus, we figured a quick trip to IKEA for a (cheap!) matching desk would solve the problem.

Unfortunately, this particular desk was discontinued.  There were however 3 different models from the same line, and we assumed the one with the closed shelving would be the same size.

Wrong.

We got it home and it was six inches too short.

ikeafail_1

We brainstormed a few different options, including trying to hack the new base onto my old desk top, except the top was too deep.  Finally we agreed to suck it up and go back to IKEA for a matching one since it’s a pretty cheap desk.  Neurosis for the win!

Apologies in advance for the crap-tastic photos… this lack of daylight during the week is killing me.

ikeafail_2

Matt also hung artwork while I was taking a nap.  To his credit he googled the correct height to hang artwork…. unfortunately google is wrong.

googletall

Or at least Google is wrong if you search “how tall to hang pictures.” How tall? I’m not a grammar nazi, but that just sounds wrong. I googled “how high to hang pictures” and got an answer of 60″ to 66″.

ikeafail_3

My go-to height for art work is 60″ on center. If you’re taller than average you may want to go a little higher, but I wouldn’t go lower unless everyone in your household is incredibly petite.  Matt caught me glowering at the too-low artwork (my desk is the one facing them) and insisted that he is not adjusting them for two inches.  Fine, I understand.  Really.  But someday when I’m bored, I’m sure I will re-do all of them.

Because I’ve already shown I have no qualms about embarrassing myself online… here’s what the other half of the room looks like.

ikeafail_4

Yup, this is my life.  Just keepin’ it real, yo.

Save