We were lucky that the paint colors in Wesley’s bedroom didn’t completely clash with all of his stuff, but now that we’re wrapping up Elsie’s room and our room it will soon be time to whip his room into shape! We’re using a lot of the same stuff from our old house, but updating it a little for the space (and Wesley’s opinions because oh boy do three year olds have opinions…).
I asked Wesley what color he wanted his room to be and his answer? “Rainbow!” Challenge accepted! I like me some color so this suited me just fine. I spent a lot of time on Pinterest looking for inspiration and what I discovered that a lot of rainbow rooms are stereo-typically girly–hearts, princesses, ruffles, etc. Now don’t get me wrong, if Wesley was into those things I’d have no problems go that direction but he is much more into stereotypical boy things (cars, dinosaurs, destroying things). I’d show him pictures and he wouldn’t be impressed. Until this one:
His exact words: “That’s the rainbow room I’m talking about!”
Perfect! It’s colorful, it’s fun, and it’s not too theme-y or trite. I can absolutely work with that! So here’s the plan:
I was already playing around with the idea of a big triangle wall accent in a corner. The walls need something bold, but to cover all the walls with an intense color would be a LOT with everything else going on in the room. We already have a solid blue comforter, and the mostly-blue rug so I’m currently thinking yellow for the wall accent while the bulk of the wall stays white. The plan is to break up the white with lots of colorful pillows (reading corner!) and artwork. The map decal arrived the other day and the colors are just what I had hoped for! I haven’t found any patterned curtains that have jumped out at me, but we already have some white curtains I can hem and add some trim so they pop from the wall a bit.
In terms of functionality, I’m thinking of adding drawers under the bed (because otherwise it turns into a black hole). We can also use that storage for extra sheets and such because our linen closet space is pretty small. In a moment of optimism I figured a toy basket would be good for all his stuffies, but if I’m being totally honest they’ll mostly live on his bed… We have a 2×3 cube shelf that I’m hoping to update with a little more color. I’m going to experiment with contact paper since I don’t think paint will stand the abuse without chipping and craft vinyl is only 12″ wide but the cubes are 13″ (bonus though: if it works, it’s significantly cheaper than craft vinyl).
Because who doesn’t wait until their child is already year old before planning the nursery?
Elsie slept in our room when she was an infant…then we decided to wait until she was sleeping reliably through the night before having the kids share a room…then we were moving…then we had some construction work to do on her bedroom here. Basically that all just sort of spiraled out of control, but now she has her own bedroom at last! Matt and I are psyched, Wesley doesn’t really care, and Elsie is just unhappy whenever she’s not co-sleeping.
Did I go full on girly with nursery design? YOU BET I DID! I happen to like pink, especially a nice blush pink, so I embraced it. Matt’s big on themes for baby rooms, so we’ll go ahead and call this “Enchanted Garden.” It’s got florals, that’s garden-y.
I started with a print from Society 6. It’s got a girly vibe and pinks, but it has some bolder colors too so it’s not too precious if you know what I mean.
We’ve been using the same crib Wesley used and I already had the vintage dresser (that I snagged off the side of road a couple years ago). The dresser has been waiting for the right spot and it looks like this is it. It still needs a coat of paint and I’m still debating if I want to go with a lighter aqua, or a darker teal. Because this is a pretty large room we still have a guest bed in here as well so I need to sort out the linen situation to make it look a little more intentional.
We currently have the room painted and Elsie is moved in, but the final touches still need to go in. In need to get some black-out shades, finish picking art, and finalize some storage, but we’re on the home stretch!
Hooo-boy it’s been a while! I suffered some major 2020 Burnout that I’m sure a lot of people can relate to. It’s probably time to share some pics of our new house and give an idea of our plans (because of course there are plans).
We closed on our old house a little before Christmas, which was a little bittersweet. I hope the new owner loves it as much as we did. The way closings are working now is that the sellers and buyers have separate appointments for signing so you don’t get to meet. I left a note for the new owner though that hopefully doesn’t make me sound like a lunatic, but I also left the address to this blog which is pretty much guaranteed to make me look like a lunatic so….
We have been enjoying our new house though. I’ll miss the character of our 100+ year old home, but come summer I know I’ll appreciate the central air and I am already enjoying the quiet neighborhood. Also having a master bathroom so I don’t have to dump all the kids’ toys out of the tub if I want to take a shower.*
Like almost every other house we toured in the general area, it’s a split-level. Split-levels aren’t really my jam, but we (obviously) liked this one more than many of the other we toured. The hardest thing about it is having a very mobile baby who does NOT appreciate being left behind and has no concept of self-preservation.
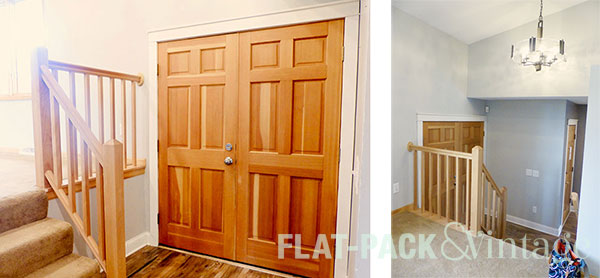
One nice thing is that there are actually rooms on the first level rather that just a landing. It’d still be nice to have slightly larger “landing pad” area, but I’ll deal.
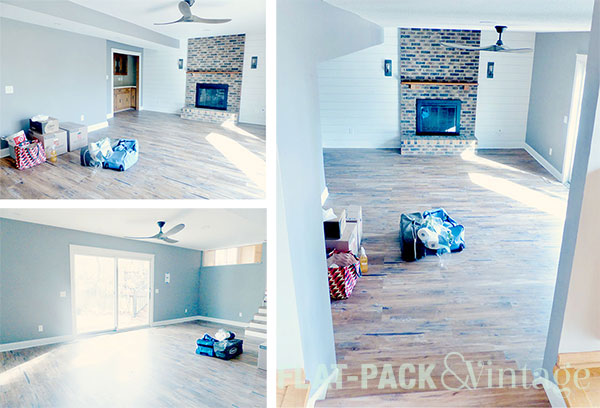
Past the entry is a 3/4 bath and then a living room. We’re planning on using this as our “formal” (ie adult) living room since it has such a nice view of the pond and a wet bar. I wish there was better wall space for a TV here since the vinyl floor + line of site to the kitchen would be great for a kid space, but currently that’s all on the “2nd” level. It is a great space for a Christmas tree though!
The ship-lap around the fireplace is fairly inoffensive, but still not really my style1 so that will come down at some point. The countertop and cabinets in the bar are pretty dated. I’d like to completely replace the countertop, but hopefully we can just swap out the cabinet doors and/or add some paint to keep it a fairly budget makeover. I may possibly replace the upper cabinets with open shelving, and of course add some funky tile or wallpaper for a little drama. The mantel could also use a modern upgrade and I’m debating if I should white-wash the brick or not.
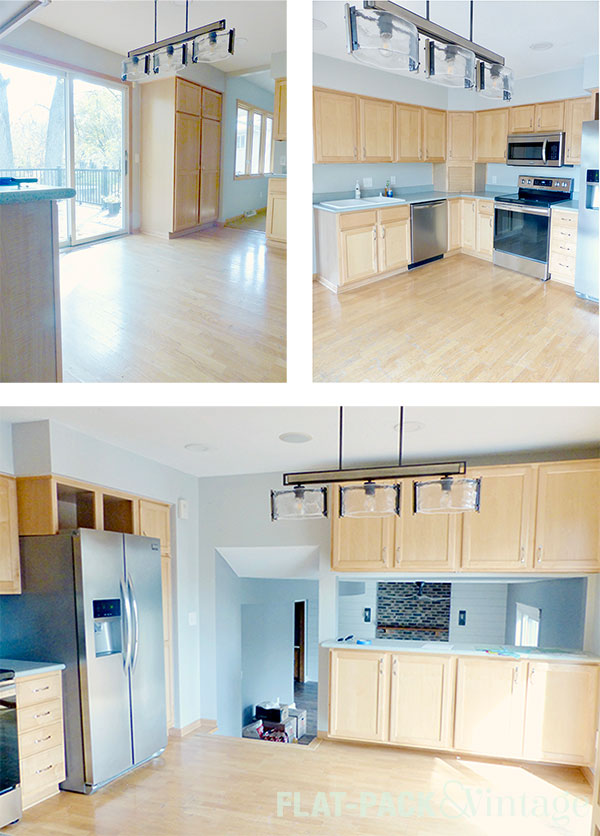
Half a flight up from the entry/living room is the kitchen, dining room, and family room.
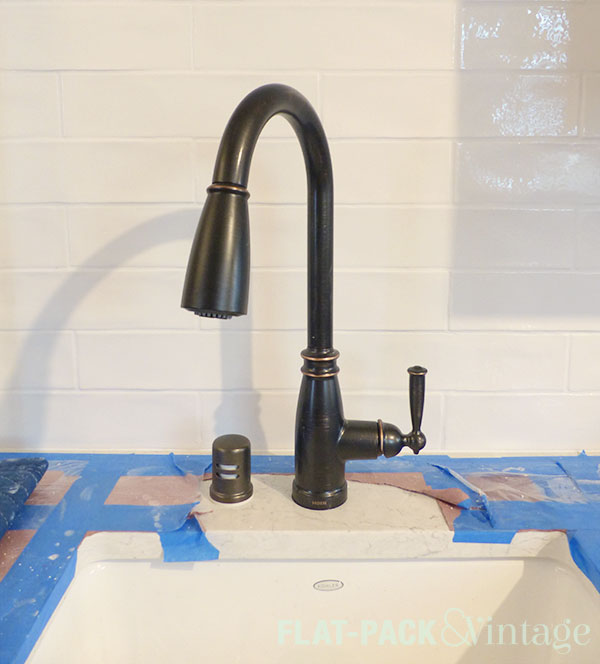
We’ve already brought in a free-standing island and replaced the faucet. Next on our list is getting a quote to run a gas line to see if it’s feasible to switch to gas stove, and refinishing the floor. I want to paint everything too, probably in the same two-tone color scheme I used before.
The dining room is small-ish but perfectly adequate. I want to replace the carpet in here ASAP. Our current plan is to continue the wood from the kitchen and refinish everything to match. The chandelier is also the only light fixture I’m truly itching to replace since it’s just not my thing at all.**
The room that connects to the entry is currently being used as our TV/Playroom. It’s been working out well so far, we just needed to add a baby gate to save Elsie from herself.
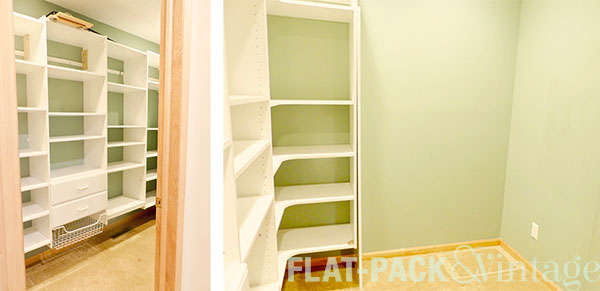
Upstairs are the master suite, 2 bedrooms, a full bath, and walk-in closet off the hallway.
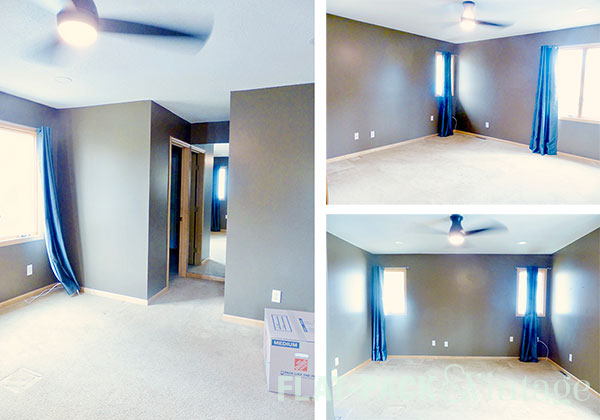
I’m pretty happy with the master suite. It’s a good size without being unnecessarily large. Elsie’s rooming with us while we do some work on the last bedroom and there’s plenty of space for her crib. The attached bath has a whirlpool tub/shower combo which Matt and I both prefer to a separate tub/shower. It also has actual counter space which is something I haven’t had since I moved to MN (almost 13 years ago!).
We’re almost done painting in here and should finish up once we move Elsie out. Other than that I just need to reconfigure the closet. It’s a nice size, the layout of the current system just isn’t quite right for our needs. Hopefully I can even reuse a lot of the current pieces.
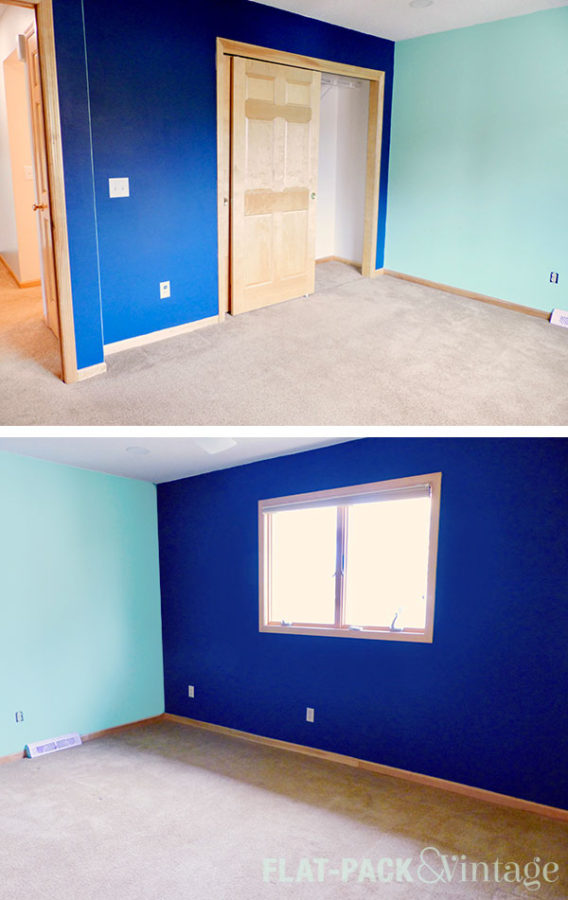
Immediately next to the master bedroom is Wesley’s room. We asked him if we wanted the other bedroom when it was done but he doesn’t really like change. This room’s a little smaller, but has a bigger closet than the other bedroom, they’re fairly comparable though.
For better or worse he’s old enough to start offering opinions about his room. I asked him what color he wanted and he said “rainbow” so rainbow it is! I can work with that! Thankfully for now the existing colors work decently well in here, but it will be repainted shortly.
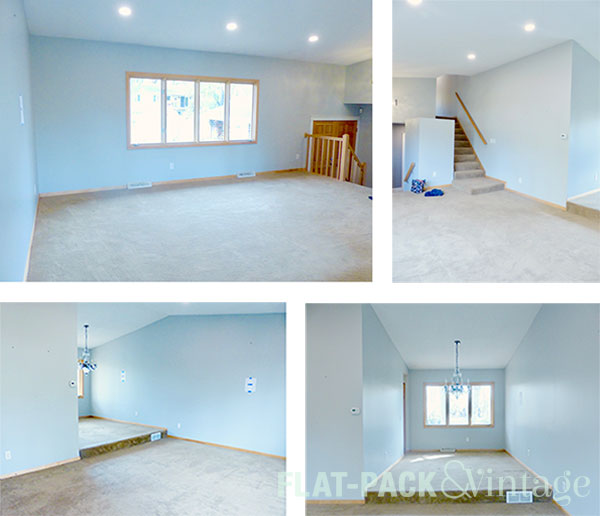
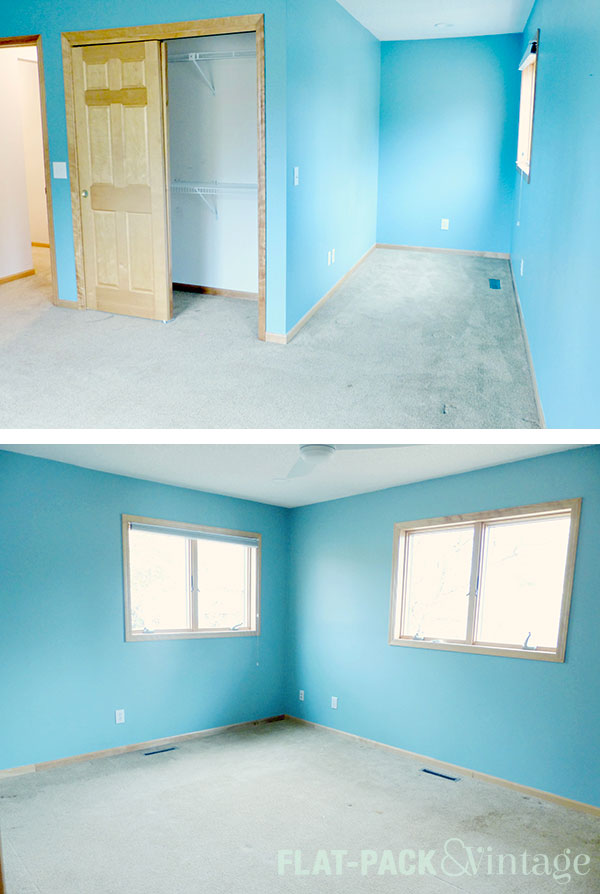
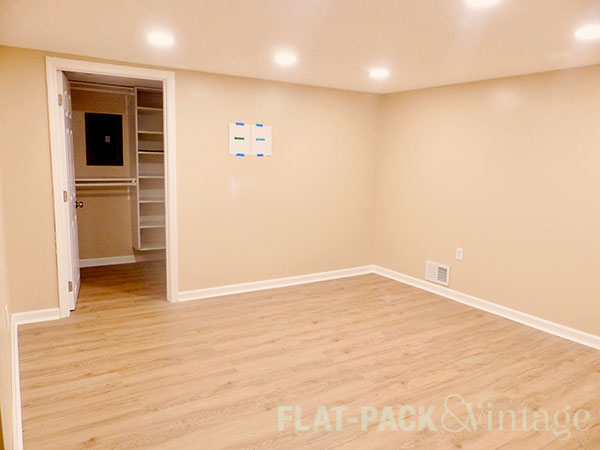
The third bedroom is at the end of the hallway.
You may be wondering what kind of work we’d be doing to render this room currently uninhabitable. Well, that random alcove? Yeah, it’s going away and the wall the closet is on will just continue straight. Not a huge remodel, but dusty enough that we’ll be keeping the room unoccupied until the drywall is done.
Don’t worry, we’re not creating a dead space just for the sake of a square room. Behind the closet in that bedroom is a walk-in closet off of the hallway. Our plan is to build a new wall in the bedroom and demo the wall between the hall closet and alcove which will leave us with us a with a small office space that has a window. Office space was a big part of us deciding to move so we tackled this right away and it’s almost done!
One of the nice things about a split-level house is that the basements are almost always finished. This basement has two finished rooms, plus an unfinished laundry/utility space. The first room down the stairs is currently serving as Matt’s office but once we build a new office space it will turn into playroom/craft room.
There’s another almost identical room to the left that we’ll just be using as a storage room. Hopefully because it’s a “nice” room we won’t let tons of extra crap take over like it did in our old basement.
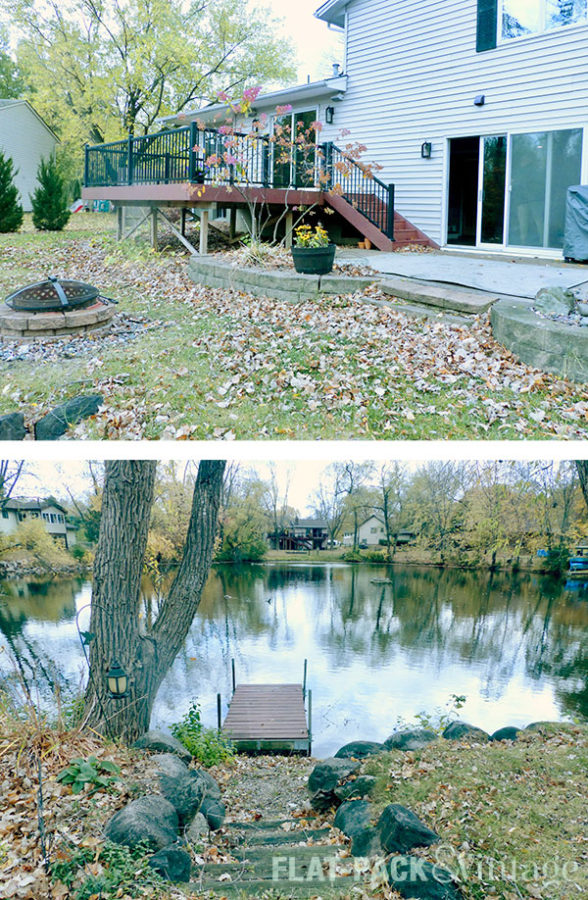
One of the big selling points of this house was the yard. Since we are terrible suburbanites*** we actually love that the yard isn’t that big. The pond in back is also delightfully peaceful and the only excessive honking we’ve had to deal with is geese. We’ve even managed to sneak in a bonfire/marshmallow roast during a warm spell before winter.
So that’s the quick overview. I’ve already been working on some mood boards so I’ll be sharing more in depth plans shortly.
*The kids’ bathtub was missing a stopper so I did actually have to deal with this for a little while longer.
**Thankfully the majority of the light fixtures are fine, but in a perfect world will get replaced eventually.
***Although we did just break down and replace one of our sub-compacts with an SUV, mostly in the hopes of being able to take trips with the kids again, but DANG do I love having all wheel drive for MN winters
Do you know how hard it is to juggle two kids, a full time job, and house projects? We’re still getting things done around here, just… slowly.
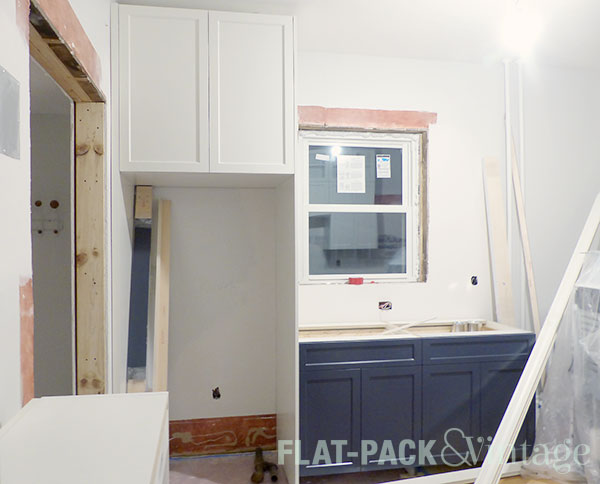
One of the projects we were DIYing for the kitchen was a built-in bench for the mudroom. Minnesota went into lockdown just as I was starting it, but thankfully we had already purchased most of the supplies.
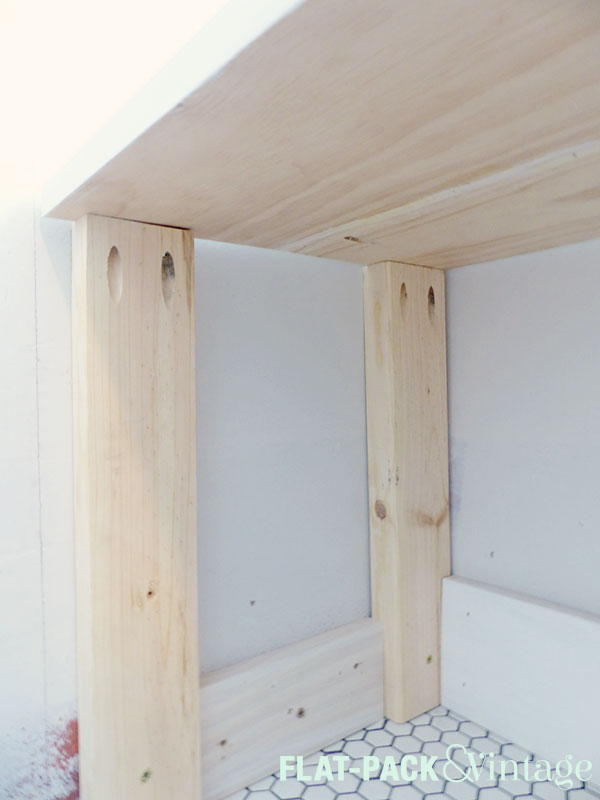
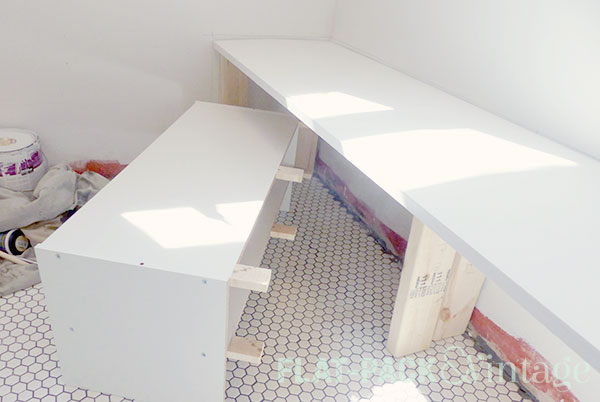
The bench plan is pretty simple. We already had existing shoe racks that we decided to reuse, especially since they fit the space almost perfectly. To encase the shoe racks I just had to add a top, support legs, and some finishing details..
The top was built out of 2 1×8’s joined with pocket holes, giving us a depth of about 15″. I used 2x4s for the support legs and connected them to the top with pocket holes as well. Why pocket holes? They allow for the strength of screws without any fasteners being seen. I officially love my Kreg jig!
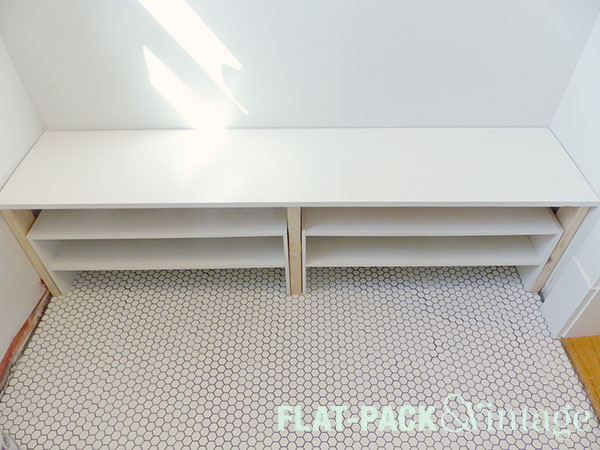
Our shoe racks fit perfectly between the legs and once some trim is added it will look like a perfect built in while still utilizing some existing pieces.
The top, however, is deeper than the shoe racks since people’s butts are usually bigger than their feet. I don’t want the shoe racks to get pushed back so I needed a spacer between them and the wall. Enter the 2×4….which I don’t have and which probably isn’t considered an essential item at this point in time.
I did have a small scrap of 2×4 though, just not enough for my ideal solution but needs must when the devil drives… so I sliced it into thin bits and glued it to the back the shoe racks.
Elegant? No, but it should do the job at least and allow me to get on with this project.
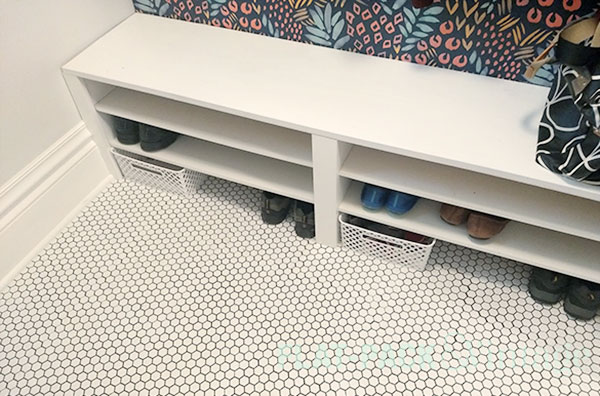
With the structure in place and everything lined up it still needed some finishing work. We cut and painted some scrap MDF to hide the 2×4 legs on the inside then ripped down a 1×4 to hide the supports on the outside. These pieces just got brad nailed into place.
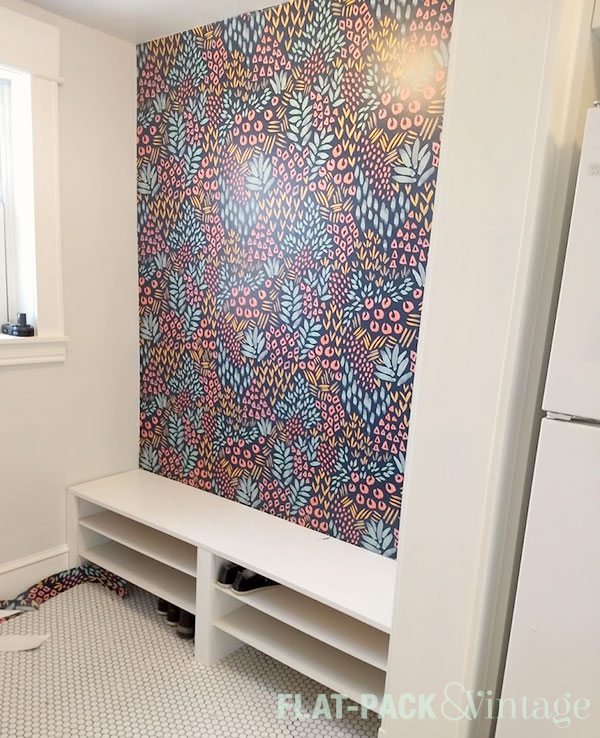
While I was working on the bench I was waiting for my wallpaper to arrive. Oh yeah, that’s right, MORE wallpaper. People still think I’m completely nuts, but that’s ok!* Matt even helped me hang it on his birthday while the kids were sleeping since it goes much more easily with two people.
I think it look fabulous! We don’t have much wall space for art in the kitchen so it also adds a much needed pop of interest. Once I’m free to go to the hardware store again I still have a few more details to add. I want to paint the inside of the back door a brighter blue and add a little more trim to bench to camouflage the fact that the walls are not at all square. This room was even more modern addition and it’s STILL not remotely square. Or level.
All hell started breaking loose in Minnesota with COVID-19 last week but thankfully our contractors kept on trucking! None of them seemed terribly phased, but then we also try to stay out of their way and were already pretty much social distancing for the past two months (because new baby + winter).
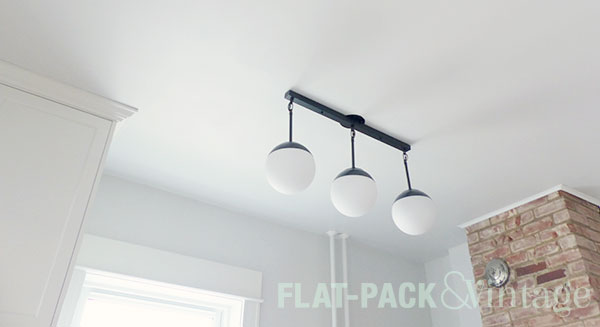
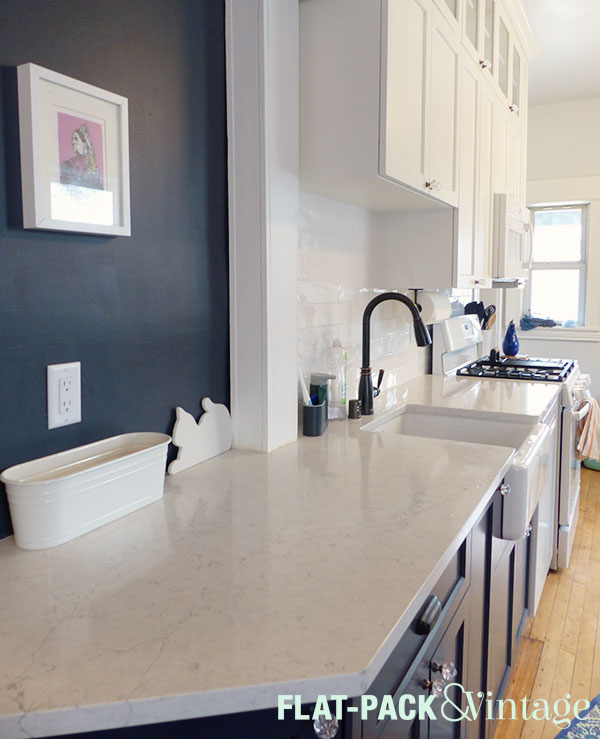
One of the electricians came back on Monday to finally finish up the kitchen electrical. We have outlets! We have a light fixture!
The light fixture was interesting since it apparently had multiple wiring options but didn’t come with instructions. One of the down-rods also didn’t seem threaded correctly and we discovered a little too late that the fixture was designed for the electrical box to be oriented a very specific way. Thankfully the electrician was able to come up with solutions for both these issues and still get the fixture up!
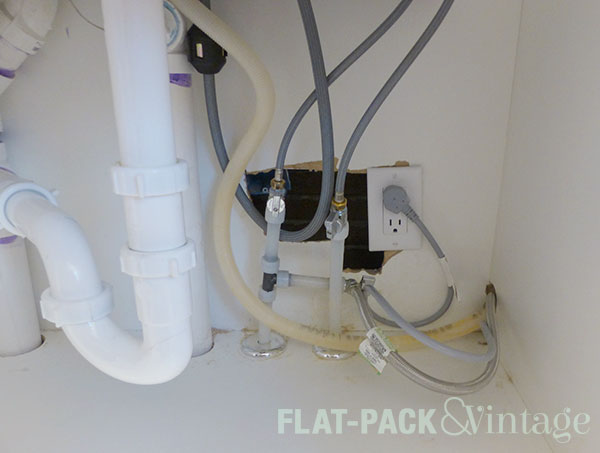
Unfortunately he also discovered that a hole had never been cut in the back of the sink base cabinet for the outlet for the dishwasher and when he tried to cut a hole it didn’t go so well.
He was also short one breaker for the electrical box and Menards was out* so only half our kitchen had power by the end of the day.
On Tuesday the plumber came back to hook up our dishwasher and stove. Do you have any idea how happy I am to have a dishwasher again?! The stove, however, was still part of the half of the kitchen that didn’t have power so we had our eleventy-billionth instant pot meal.
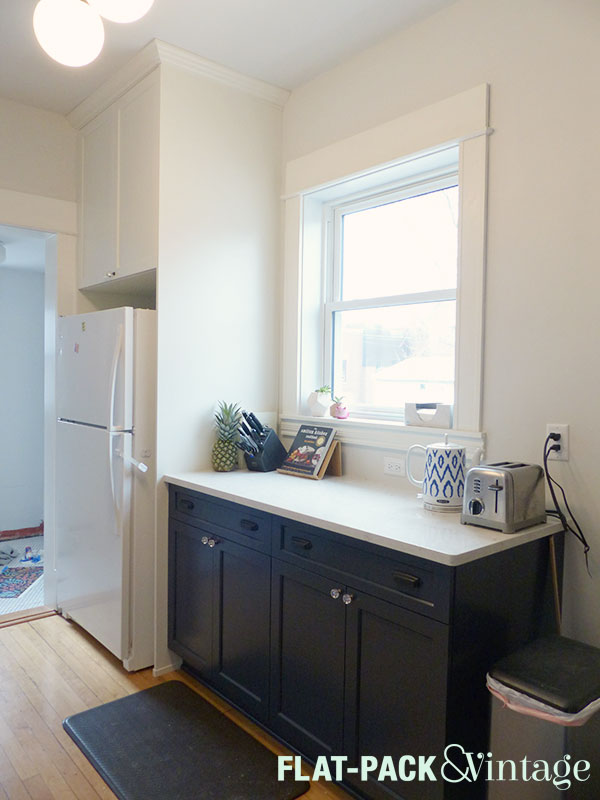
Wednesday seem to be the big day around here. The electrician came back and got ALL the outlets working! They moved our fridge out of our dining room! They patched the hole under the sink! And do you know what that means?
WE’RE DONE!
At least with the big stuff anyway… Matt and I still have a bunch of small(ish) stuff left to do:
Hold onto your hats folks, last week was quite a ride even without the COVID-19 uproar.
Do you want to know how to give a perfectionist an aneurysm? Use non-paintable caulk on painted trim pieces.
Not only was this a Shit My Husband Broke situation, it was also a Stupid Shit My Contractors Did situation. I can forgive Matt* because he’s not a professional, but it was a majorly rookie mistake for the contractors so I was pretty miffed. There’s something incredibly disheartening about going to paint your trim** and watching the paint just bead up over every spot that was caulked.
*twitch*
I had Matt be the one to contact our project manager because I was pretty pissed/ready to cry and figured he would be much more polite about it. I think I was even more offended by the whole situation because I thought I had finally freed myself of all the old un-paintable caulk that had been in the mudroom from the beginning.
I pried off all the bad caulk that Matt had put around the window (which thankfully came off very easily) and on Tuesday our Project Manager and another worker spent several hours scraping off and redoing all the caulk that they had done. I did not envy their job since the offending caulk was not just in long beads along the edges but had also been used to fill all the nail holes left from putting the trim up.
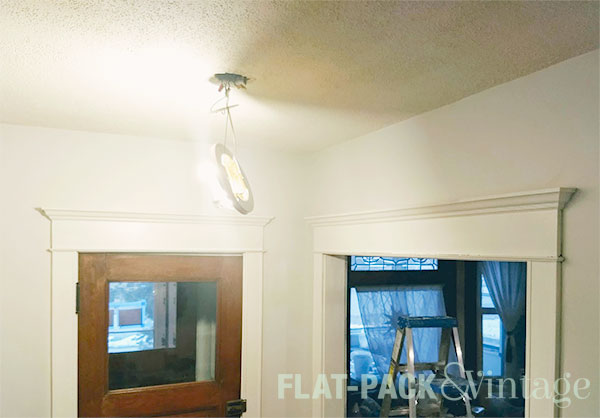
The electricians also came back on Tuesday afternoon to figure out what the heck was going on with our living room light. Turns out something had happened to the (very old) neutral wire during the breaker box work so they were going to have to run a new one. By the time they left the living room light had been removed and the hallway light was mostly detached, but there was at least a plan.
Finally we reached Wednesday. WEDNESDAY! Countertop day. It seriously felt like Christmas. The countertop guys got here bright and early…. and then things started going downhill.
The contractors had had to cut out a chunk of the casing between the kitchen and dining to be able to slide the slab under it, but it was still a little to low on one side. Ok, problem solved with a multi-tool…whose battery died almost instantly. Luckily they had a spare. Then there was concern about the stove opening not being wide enough to fit the stove back in. Cabinet got shifted a bit, problem solved again.
Then the installers seemed surprised that our existing faucet did in fact require three holes (plus optional sprayer). Wait, what? We said we planned on keeping that faucet from the beginning, it shouldn’t have been a surprise! Turns out based on where the seams were on the counter slabs they would only be able to drill 3 holes at most and we needed a minimum of 4 for the dishwasher air gap.
I have no idea why they didn’t realize this was going to be a problem ahead of time…like, oh, when they came and measured. Even if they couldn’t have changed the seam placement, we could have at least had advance warning to find a new faucet. Thankfully Menards had a single-hole faucet in stock that 1) I liked and 2) was affordable.
While the installers were explaining the faucet situation, the electricians were on day number three of trying to sort out the living room ceiling light and running into new and exciting problems on their end. They had planned to run a neutral wire over to ceiling box in the hallway, but there were joists in the way so they would need to cut a hole in the ceiling which would need to be covered by a plate (I’m assuming there was going to be some sort of junction there which it why it couldn’t just be patched). No bueno. Well, would we be ok with installing different light fixture to hide it, like an elongated LED? Nope nope nope. Ultimately they did some more extensive rewiring in the living room, but still had to cut a hole in the wall. At least it was a patch-able hole.
After those issues got sorted out things went a little more smoothly. We hadn’t expected the plumber back until Friday, but he was able to swing by to hook up the sink. They also got all the backsplash tile set.
After people left for the day things went downhill again when Matt discovered we no longer had power to our bedroom. What in the hell is wrong with our house? It was annoying, but not a big enough problem to call the electricians back outside of their normal work hours.
So on Thursday the electricians came back bright an early for round #4. Luckily the bedroom issue was just a tripped breaker and the reason we didn’t figure it out ourselves was because it was on a 20 amp breaker*** and we assumed all those were related to the kitchen and therefore intentionally flipped off because the wiring wasn’t finished yet.**** They also got the ceiling light in the living room working again!
Also on Thursday the backsplash tile got grouted then they came back on Friday to seal it.
I didn’t have a chance for many pictures since I try to stay out of the contractors way and most things were already covered up/fixed by the time people left for the day. But hey, it will make for a more dramatic reveal, right?
*Well, I could have forgiven Matt… but then he dressed poor Elsie in a horrendously clashing outfit and decided to test all out smoke alarms while I was sitting with a previously-calm infant. I wasn’t that mad at about the caulk but he seemed bound and determined to piss me off that day.
**It was taken down then re-installed so all of it needed a touchup
***Long story short, the wiring is jacked up so it made it very confusing when the electricians were installing the new box.
****Matt would like to make it abundantly clear that he had thought about trying to flip the 20 amp breakers, but was told not to do it by our project manager (which was the right call to make given the knowledge at the time).
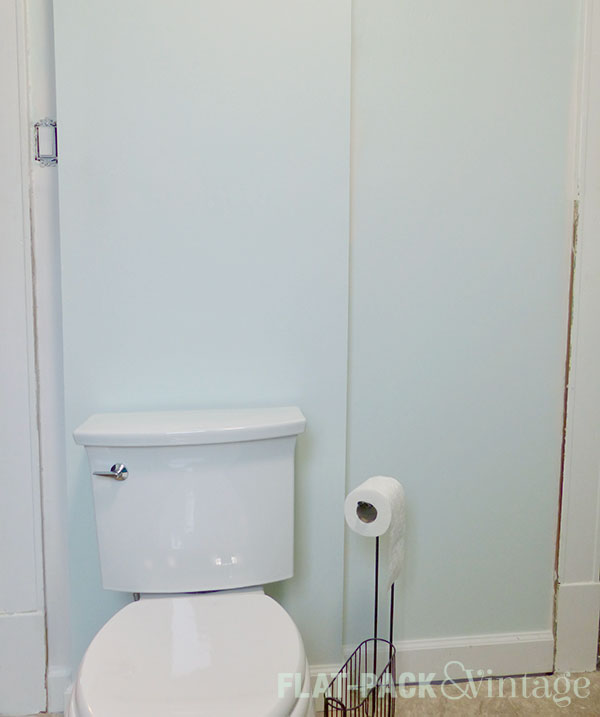
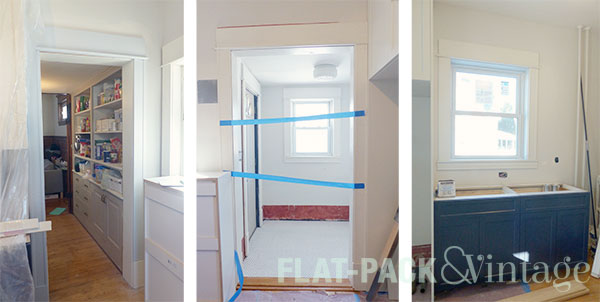
This was another week mostly dedicated to mudding and sanding the patches that got put in last week. Once the drywall was finished we got our toilet back!
Matt and I did some speedy priming and painting before the plumber got here so we could easily reach behind the toilet. We still have to touch up the trim that was covered by the vinyl and cut in all the edges, but it already looks so much better!
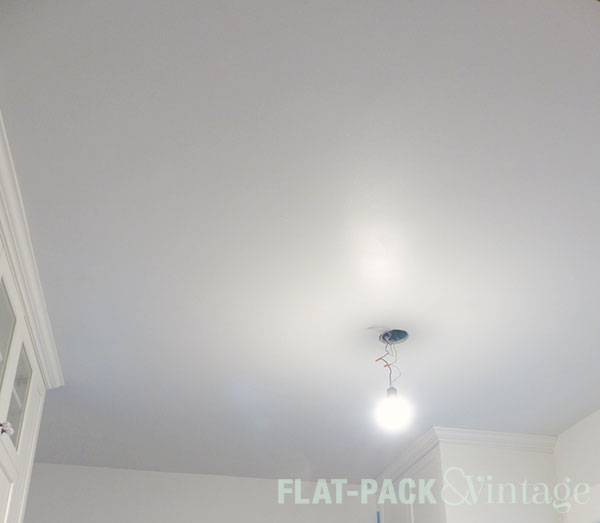
While we’re fine with painting walls and trim ourselves, I was adamantly against painting the ceiling so we included that in the work for the contractors. Not only did the kitchen ceiling need to be painted because of the patching, but it also had some weird splatters that needed to be covered up as well. With how tall the ceilings are I have no idea how gunk got splattered up there, but the good news is that it’s covered up now!
This may be one of the most boring photos in the history of blog posts, but seriously, do not underestimate the power of a freshly-painted ceiling.
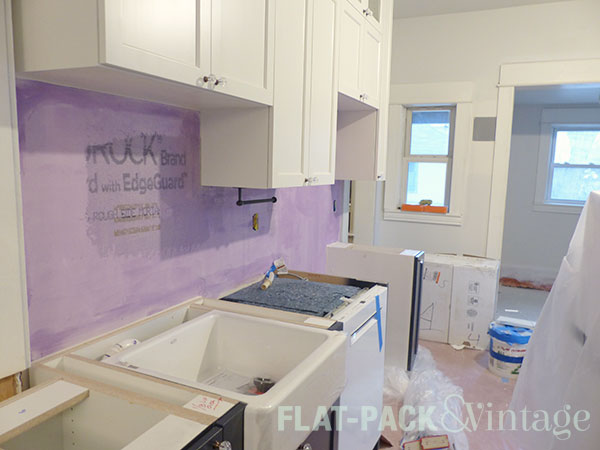
Some mysterious purple paint, which I believe is a water-proofer, got put up where the backsplash tile will be.
On Wednesday they replaced our breaker box…which meant we were without power for most of the day. We dealt with the lack of power by leaving the house to run errands and bringing Elsie to visit Matt’s co-workers. By the time we got back they were just finishing up restoring power, except for the ceiling light in our living room which was mysteriously not turning on. And yes, we did try the obvious fix of trying a different bulb just in case there had been a freak timing incident. The electricians had originally hoped to do the breaker box and tackle all the kitchen work, but because of the mystery light incident they’ll need to come back another day.
Since it was a quieter week for the contractors, Matt and I started prepping some of the work that we’re going to be doing ourselves. We’re going to be re-painting the mudroom (same color, it just needs a refresh), replacing the baseboards, and adding a built-in bench so we’ve been priming, caulking, and buying wood.
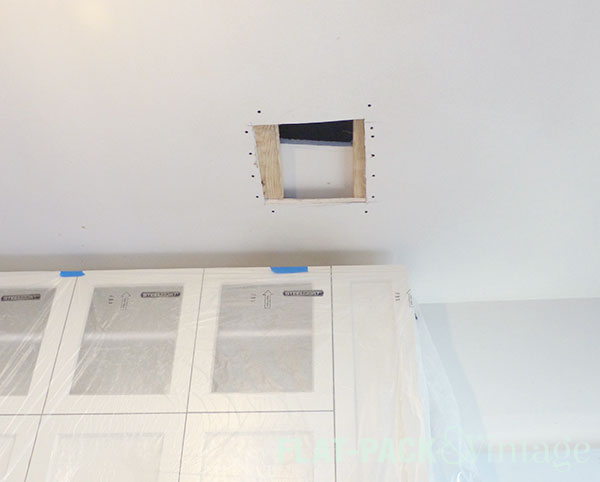
On Monday the fabricators came to measure for the countertops. The plumber also came back to keep troubleshooting. Unfortunately they exhausted all the less-invasive options they could think of and decided a hole really would need to be cut into the ceiling to find a place to tie the sink vent into to.
…which meant on Tuesday we had a hole cut into our ceiling.
Good news: that’s the extent of the damage to the kitchen ceiling. Bad news: they’ll need to cut into the upstairs bathroom wall instead. Good news: it’s an excuse to start removing the awful vinyl from the bathroom walls. Bad news: $$$
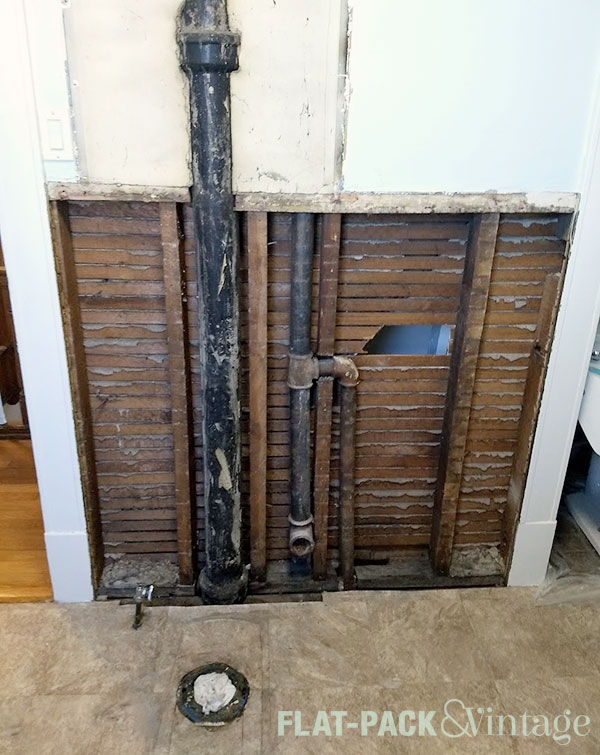
Turns out the pipe they were trying to connect to for venting is downright decaying near the top. It’s also full of vermiculite which is what has foiled any attempts to trace the path from the kitchen to the exterior. In order to replace the damaged pipe they need to cut open the wall behind the toilet in our upstairs bathroom… just as Matt’s sister is coming to visit us. Awesome timing.
On Tuesday they also sealed the mudroom tile and started re-attaching trim. Honestly, I’ll probably re-do the baseboards to match the dining room at some point (which is much closer to the house’s original trim) but it’s easy enough to DIY and given the extra unexpected expenses that have popped up during this, I don’t want to pay a premium for professionals to do it.
They also demoed the bathroom the bathroom wall.
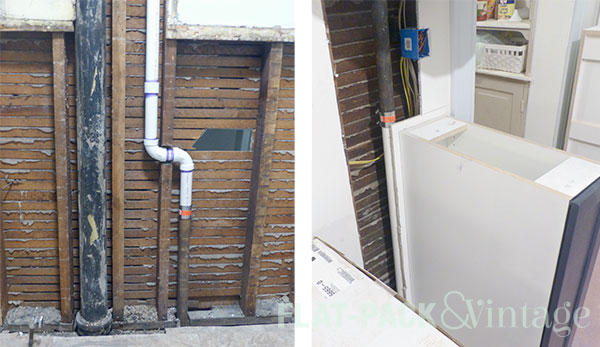
On Thursday the plumbing FINALLY got sorted out. Matt’s sister arrived that morning and nothing says “Welcome Guest!” quite like being down to one (mini) bathroom and having your water turned off for a chunk of the day.
There’s also new PVC pipe in our basement and attic since they replaced pretty much everything that they could access. I suppose it could have been worse. My aunt and uncle used to have a 1850’s-ish farmhouse and a lot of the plumbing was put in just as plumbing fixtures were getting standardized. Whoever did the work chose to use the discount fixtures which meant that they weren’t compatible with today’s fixtures.
And on Friday we rested. And by “rested” I mean “waited for the contractors to schedule the inspector since the walls can’t be put back together until then.”
This week was mostly putzy finishing work on the walls–Monday, Tuesday, and Wednesday were devoted to mudding and sanding the drywall joints. It takes an annoyingly long time since you have to wait for each layer of mud to dry before moving on.
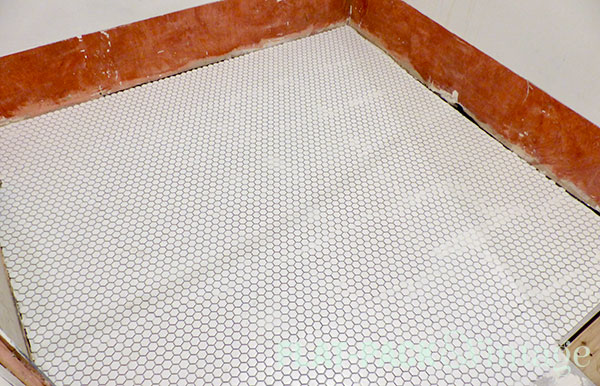
On Tuesday the mudroom tile got installed!
…and then on Wednesday it got strategically pried up. Turns out the mosaic squares aren’t perfectly square. That combined with our non-level, not-square floor meant some of the spacing would be wonky and really obvious once black grout was added. This meant the tile guy and our project manager spent a chunk of the day popping out certain tiles and then re-laying them to even out the spacing. While not a fun time, this was apparently the easiest option (and I greatly appreciate their attention to detail).
See all those whiter/hazier spots where the mastic has oozed up and is showing? Yeah…those are all the spots they had to fix tile by tile. (The weird dark line across the middle of the floor is just a shadow)
Wednesday also brought a little inspection drama. We’ve been going back and forth about how to get the sink properly vented and the last plumber who looked at it thought he had a solution that wouldn’t involve ripping out the walls and ceiling. Then he talked to the inspector about it and the inspector wasn’t on board. So then our project manager brought the inspector over to show him what we’re working with…which is a hot mess. Now they have to figure out a way to vent the sink that will make everyone happy.
On Thursday the mudroom tile got grouted! I am ridiculously excited about this fairly simple floor. So excited I apparently missed getting a picture in time for this post…whoops! We also continued the plumbing drama and hauled the plumber back in to brainstorm. He says he hasn’t been stumped yet… which is all fine and dandy, but there’s a big difference between “this can’t be done” and “this will cost several thousand more than you expected to get done.”
Despite the plumbing complications, the cabinets were (mostly) installed on Friday! They didn’t permanently secure some of the base cabinets or hang the cabinet above the sink since parts of that may need to be demoed (again).
Basically this week was one giant effing headache for a lot of people.
I got a call last Thursday from our contractor asking if they could start working on the window on Friday. While this may be rather short notice for most people, I had already told them our schedule was very flexible since Matt and I are both sitting at home with a newborn for 3 months. I was actually thrilled to hear to they could get working on it!
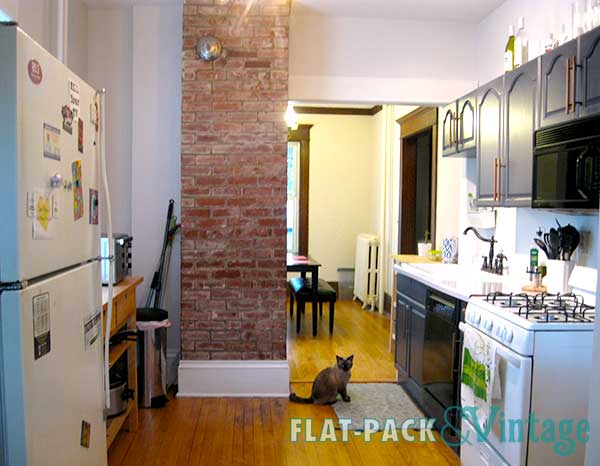
So here it is, one last look at our current kitchen. (Ok, these pics are actually a little old but I didn’t have a chance to take new ones and it looks more-or-less the same, we just upgraded the appliances since then).
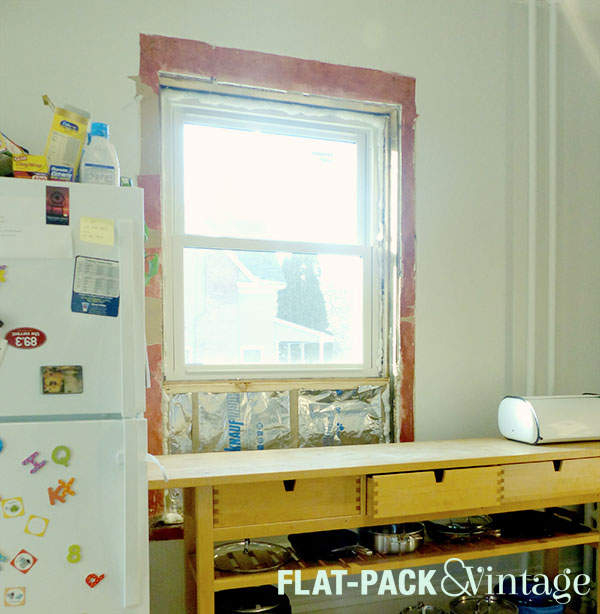
Time to say buh-bye to the old window and helloooo window that will allow for cabinetry!
Isn’t it lovely? Very industrial-chic. Not to worry though, there will (obviously) be more finishing work happening.
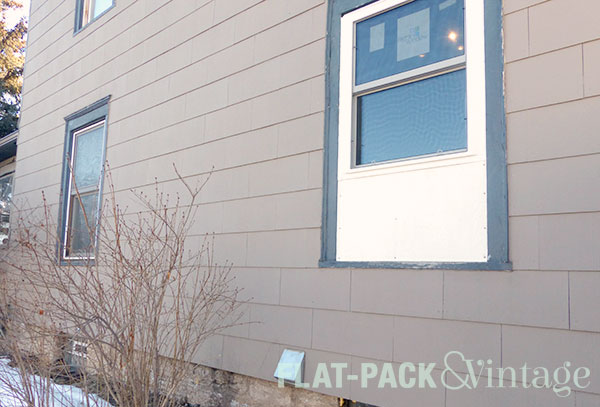
The outside looks a little less classy at the moment. Because we have asbestos siding, the contractor had to do a little bit of a hack fix to avoid disturbing it. We’re going to paint the filler panel to match the window trim for now, but I’m thinking about adding window boxes to help hide the panel and visually balance both windows.
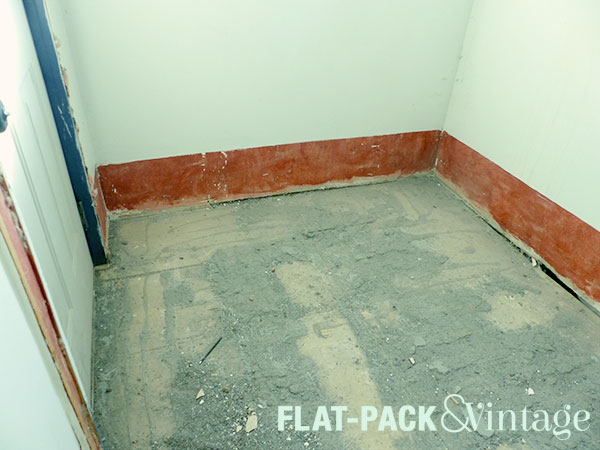
They also demo-ed the mudroom tile while they were here! It’s hard to see in the Before pictures, but it was an unfortunate pinky-beige and I am VERY glad to have it gone.
Apparently this was some very stubborn tile and they had to pretty much pulverize it in order to remove it. Bad news: there is a coating of dust that permeated most of the house. Good news: this is probably the worst (read: dirtiest) part of the demo work.
“Week” One was really only one day since they started on Friday, but I’m already happy with the progress!