Updated Big Boy Room

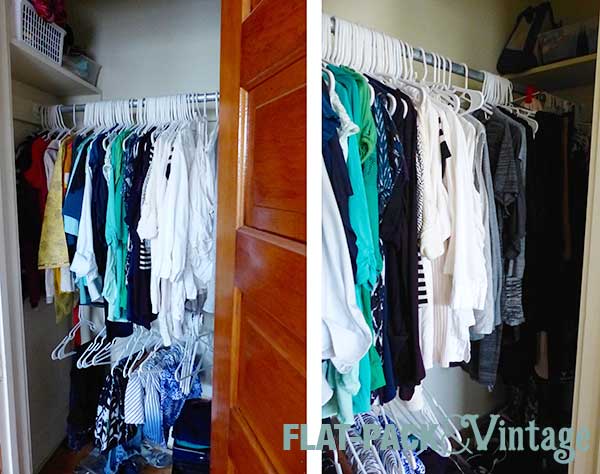
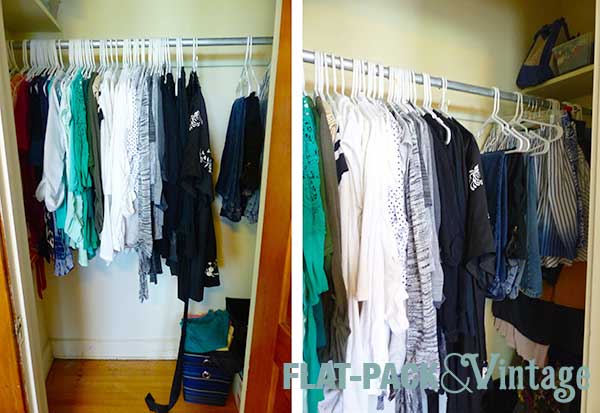
We were lucky that the paint colors in Wesley’s bedroom didn’t completely clash with all of his stuff, but now that we’re wrapping up Elsie’s room and our room it will soon be time to whip his room into shape! We’re using a lot of the same stuff from our old house, but updating it a little for the space (and Wesley’s opinions because oh boy do three year olds have opinions…).

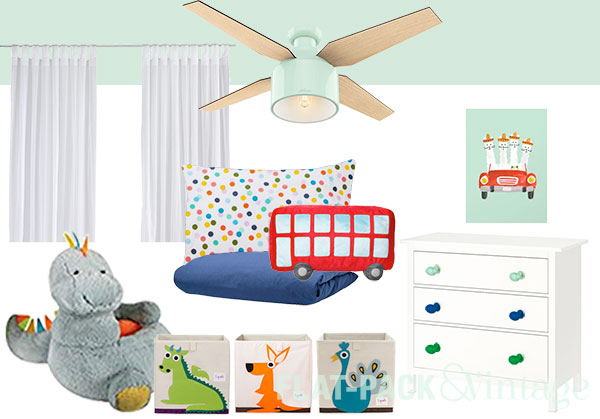
I asked Wesley what color he wanted his room to be and his answer? “Rainbow!” Challenge accepted! I like me some color so this suited me just fine. I spent a lot of time on Pinterest looking for inspiration and what I discovered that a lot of rainbow rooms are stereo-typically girly–hearts, princesses, ruffles, etc. Now don’t get me wrong, if Wesley was into those things I’d have no problems go that direction but he is much more into stereotypical boy things (cars, dinosaurs, destroying things). I’d show him pictures and he wouldn’t be impressed. Until this one:

Via Historias de Casa

His exact words: “That’s the rainbow room I’m talking about!”

Perfect! It’s colorful, it’s fun, and it’s not too theme-y or trite. I can absolutely work with that! So here’s the plan:

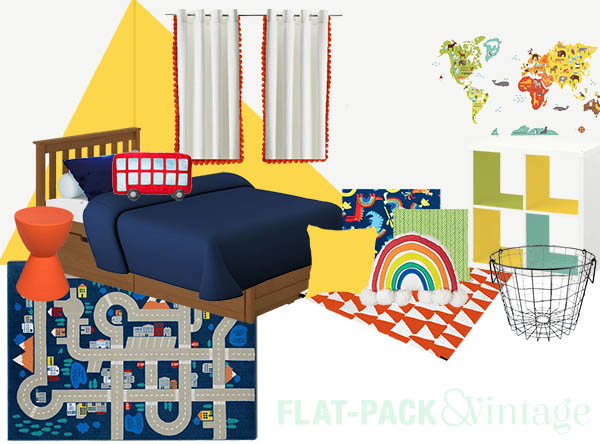
I was already playing around with the idea of a big triangle wall accent in a corner. The walls need something bold, but to cover all the walls with an intense color would be a LOT with everything else going on in the room. We already have a solid blue comforter, and the mostly-blue rug so I’m currently thinking yellow for the wall accent while the bulk of the wall stays white. The plan is to break up the white with lots of colorful pillows (reading corner!) and artwork. The map decal arrived the other day and the colors are just what I had hoped for! I haven’t found any patterned curtains that have jumped out at me, but we already have some white curtains I can hem and add some trim so they pop from the wall a bit.

In terms of functionality, I’m thinking of adding drawers under the bed (because otherwise it turns into a black hole). We can also use that storage for extra sheets and such because our linen closet space is pretty small. In a moment of optimism I figured a toy basket would be good for all his stuffies, but if I’m being totally honest they’ll mostly live on his bed… We have a 2×3 cube shelf that I’m hoping to update with a little more color. I’m going to experiment with contact paper since I don’t think paint will stand the abuse without chipping and craft vinyl is only 12″ wide but the cubes are 13″ (bonus though: if it works, it’s significantly cheaper than craft vinyl).

Mood Board Monday: Big Boy Shared Room

With Wesley graduating out of his toddler bed and Elsie about to need the crib I’ve been brainstorming shared room ideas. We’re still attached to our study/guest room so the plan is to have the kiddos share as long as possible.

The trickiest thing for me has been the ceiling color.  I don’t want to change it because 1) I really like it and 2) painting ceilings is one giant PITA. This has been problematic because that minty color is apparently a “girl” color. Insert all the eye rolls here.

This wouldn’t be a huge problem except that Welsey is really into more stereo-typically “boy” things (mainly cars, cars, and more cars). Since he starting to show a distinct preference for certain things I want to respect that, but I also want to create a room that looks put together.

After a LOT of searching I stumbled across these really cute (cotton!*) polka dot sheets at Target that work with the ceiling color and give me lots of other colors to work with. I’m going to pair them with a solid navy duvet which will hopefully continue to grow with him. I also plan to let him pick out his own sheet set too to get him exited about changing to a new bed. I may have to give up a little control, but hey, compromise.

Eventually we’ll need to swap out our heirloom chifforobe for a dresser since a dresser has more practical storage for our needs. I’m hoping I’ll be able to re-purpose the chifforobe for a dress up closet later on though. I’m planning on getting a smallish dresser for now since it will be easier to use for an individual room later on and I plan to continue the polka dot theme with some colorful knobs. I may also switch out his current curtains for white with rainbow pom pom trim.

To play to his love of cars, I found this cute bus pillow from IKEA and a cute print from Society 6. Hopefully the bus pillow will stop him from bringing all his toy cars and trucks into bed with him.  I can dream, right? The small car touches should also make him really happy without making the room too boyish…although Elsie’s too little to have opinions on decor just yet.

Now I just have to wait for quarantine to end so I can do some more shopping.  His mattress is currently on the floor (which isn’t a bad idea for a toddler anyway) and Elsie’s crib is in our room since she isn’t sleeping through the night yet and I’d rather not have both kids awake and crabby in the middle of night. I wanted the IKEA Kura reversible bed, but I wasn’t able to order it so I got one of their simple pine frames instead.  Based on my estimated delivery date though I may not get it until the stores are back open anyway.


*Am I the only person who really dislikes microfiber?

Brainstorming: Master Bedroom

This is probably super optimistic since we now have a demanding baby in our household, but our next project room is going to be the master bedroom.  This room is way overdue for some TLC since we’ve done nothing to it since we moved it.  Heck, Matt just fixed the closet door so it actually stays closed!

There are a couple reasons I chose to tackle the bedroom next.  Part if it is because we now have a kiddo (whose toys will gradually start taking over the house) it will be nice to have an adult retreat space.  I’ve also been spending more time in this room lately and it’s really hit me just how blah the space is.

masterBefore2

masterBefore1

Yaaaaawn. Also, please pardon the mess.  I didn’t even get a nap in today and had no motivation to style a Before shot.

So what’s the plan?

masterMoodBoard

Thankfully this room only needs cosmetic work so the bulk of the work will be painting. We also need to replace our mattress so we’ll be upgrading to a queen sized bed (and actual bed frame). I also want the headboard to really be a focal point of the room and the entire wall behind it will be painted a bold accent color. After that it’s a matter of replacing pretty much all our existing furniture and getting a rug that’s the proper size for the space.

Not gonna lie, but this makeover will probably take a while.  I’ll hoping we can at least make a start on the painting while Matt and I are still out on leave.  We’ll see since we’ve got a couple other (smaller) projects we’re trying to finish up too.

Save

The Make Room Challenge: Week One–The Master Bedroom

I am such a sucker for design/organization challenges!  Sure, I can organize on my own but I tend to get a little ADD and lose steam.  But a daily or weekly goal that’s not set by me?  Bizarrely enough this makes it easier.

Clearly my failure is at goal setting.

Anyways… I saw a big, shiny banner ad for The Inspired Room’s new book Make Room for What You Love and since I pretty much am every click-bait advertisers dream I went to check it out.  I hoped it going to be like the KonMari trend without the talking to your shoes.

So I click on the ad for this book and it turns out they’re doing a promotional organizational challengey thing. SOLD.  And by “sold” I mean “signed up for free.”  Five weeks of organization goals sent to your inbox every week and since I’m in Spring Cleaning mode this works out perfectly for me!

Week One is the master bedroom.  Specifically organizing clothing and accessories.  This was very much on my to-do list anyway so the timing was perfect.

MRC_wk1_2

I am so ashamed to be showing this picture online… this is seriously what the top of our dressers have looked like for months.


MRC_wk1_1

My closet is actually fairing a little better thank god.

Step one is to take everything out of your drawers/closet.  I decided to tackle my closet and dresser separately so I didn’t have complete clothing chaos and I started with the closet.


MRC_wk1_3

Ooof-duh as we say in Minnesota.

At this point I ever-so-slightly switched gears. Ya’ll have probably heard of capsule wardrobes I’m guessing?  Where you pair done your clothing to around 30 pieces for each season?  While that’s a little too minimal for me (and I am most definitely not a minimalist) I think the concept is solid and the guidelines to get you started can be used for just about anyone to sort out unworn items and pinpoint their style. Try not to get hung up on emotional attachments.  Sure it was a gift, but is it any better for something to sit there unused rather than donating it?  Or maybe it’s something you bought with high hopes but never worn.  It happens to all of us, if it’s really not working, toss it even if it’s brand new.

The first things I put back in my closet were the things I wore constantly.  We all have those things.  After my favorites were hanging up I looked at their overall color selection and style feel. Everything I put back after this I tried to blend with that palette and style. This is the big reason I opted to do the closet first–it’s where my more stylish pieces are (my dressers is more undies, t-shirts, tanks, and PJs).

MRC_wk1_5

Better, right?


MRC_wk1_4

And the stuff I’m bidding a fond farewell to.

I did the same thing to my dresser, but the photos are less interesting and I am most definitely am not posting a photo of my knicker drawer.  My shame does have some boundaries. Trust me though, the inside is way better.


MRC_wk1_6

And so is the top!  My jewelry was the big killer–I never got a good system in place after we moved so the tops of both of dressers just became my personal dumping ground.  The shelf brackets and hooks are from IKEA and I had a leftover board to use as the shelf.  BAM storage top and bottom!  I didn’t bother painting them because, while I have an idea in mind for the bedroom, I don’t know the exact colors yet. Same goes for the mirror–that was salvaged from our bathroom (don’t you recognize the brown?).  I was trying it out in the space for balance.  I think I have a better mirror for here though, I just need to find it….

I still have a ways to go–I want to get some drawer dividers for my dresser and completely revamp my closet system.  Those are projects for another day, but purging all the clutter is the first step.

Curtain Panel DIY

When we moved in to our house there were no existing window treatments At All.  Not even the really shitty blinds like the ones that we had in our apartment.  I stocked up on inexpensive rods and curtains at IKEA and we strategically placed a few tension rods and curtains to have up until I actually start installing the curtain rods.  The problem is in the bedroom.  We have an air conditioner in one of the windows so I had to swag the curtain off to the side which leaves a big open gap of window and also leaves me to have to get dressed wedged into a corner.

NO MORE!

The last time I was at IKEA I picked up one of their panel curtains in the hopes of making a quick ‘n dirty privacy screen for our bedroom windows.  The panel curtains do let a fair amount of light filter through, but also provide a nice privacy layer for bedrooms, bathrooms, or any place where you don’t want people just staring in.  The downside is that they are only 24″ wide… our windows are about 30″ wide so it’s not a perfect solution (although there’s a fair amount of window casing in that 30″ so the panel does cover all the glass + a little overlap).

Now, you can buy the hanger IKEA sells for their panel curtains… but they’re $10 a piece so that’s $20 for our bedroom windows.  I cobbled together a way to hang both of them for around $5 and then figure I can buy a bottle of wine.  Win. (Also I didn’t really like the visual heaviness of IKEA’s system… and I do like wine).

curtainSupplies

Supplies

  • IKEA Panel Curtain (I used one GRYNET for both our windows)
  • Fusible webbing
  • 1/4″ dowel or small piece of wood, 24″ long (optional)
  • Cup hooks
  • Grommets (I like the tiny ones because they aren’t very noticeable)

Directions

Step 1: Measure your windows. Like I mentioned, the panel curtains come in very limited sizing options.  As long as your window glass is narrow than 24″ you should be able to pull this off and if you happen to have window that’s narrower than 24″ you can cut the panel down width-wise.  You also need the height of the window.  Measure from the height from the inside of the wood frame, subtract about a 1/4″ to compensate for the cup hooks and add 2″ if you’re going to hem both ends. (Full disclosure: I didn’t follow these measurement guidelines at all, I just eyeballed it cuz I’m a badass DIYer like that)

curtains1

Step 2: Hem (the easy way). I hemmed the top using a fusible web to create more stability for the grommets. Fold the top over an inch and follow the directions with your fusible web.  The panel curtain is not meant to be ironed but go slow and you should be fine. If you didn’t fail at step 1 like I did (math is hard) you can do the same thing to the bottom or glue the fabric around a dowel or other small piece of wood (but paint the wood white first).

curtains2

Step 3: Grommet.  I did 3 grommets across the top of the panel–1 in the center and other 2 about 1″ from each edge.  Grommets can be a little tricky if you’ve never used them before.  The key is getting the hole in the fabric just slightly smaller than the grommet that you will push through.  The best way I’ve found is to take a little pair of embroidery scissors and just push them through the fabric (twice, forming a small X) instead of trying to cut out a hole.  When hammering the grommets it’s also a good idea to put a magazine or piece of cardboard underneath and this will keep the shape of the “display” side of the grommet looking a little nicer.

curtains3

Step 4: Drill baby drill. Mark a spot on the underside of the top of the window molding in the center and about a 1/2″ from the back to compensate for the cup hooks and drill a small pilot hole.  I wanted the panel to hang pretty close to the window so you could hang it further out if you wanted to. The small cup hooks are a little annoying to screw in just because they’re small and can be hard to grab, especially that close to the window.  Once I got the center hook in, I hung the panel and then marked where the other 2 grommets fell.  Drill, screw, hang, and you’re done! Simple, elegant, and you won’t have to worry about flashing your neighbors.

curtains4

Now go and enjoy that bottle of wine.

curtainsDone


I’m really sorry this last photo is so crappy.  I was trying to get a respectable end result photo, but was pretty much shooting right into the light.  You can at least get the general idea though.