Keepin’ It Cool

We recently hit the height of Minnesota Summer.  The last couple weeks have been toasty.  Like temps in the high 90’s and heat index of 110+ kind of toasty.  Yeah, yeah, anyone in Florida or Arizona or some such place may be laughing at me, but I’m sure ya’ll have central air.

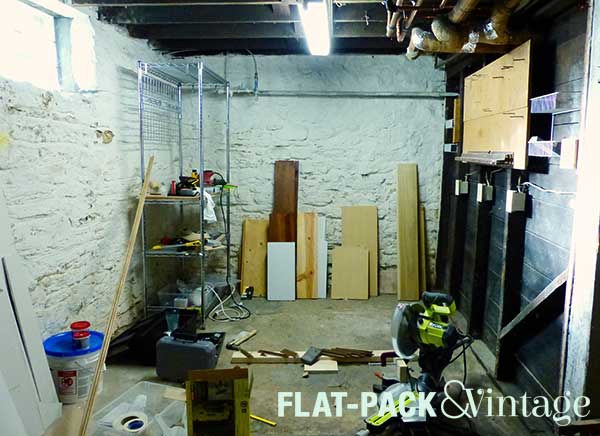
Point is, we haven’t the ideal conditions for painting an upstairs hallway so I’ve had to turn my attention elsewhere.  I decided to tackle my basement work space because it’s virtually nonexistent at the moment.
workspace1

It’s really just a corner of the basement where we stash our tools, but it’s totally disorganized and generally ucky.  I needed a place to organize tools and store supplies, and also a place to work without me constantly crouching on the ground since my back has decided to rebel ever since I turned 30.

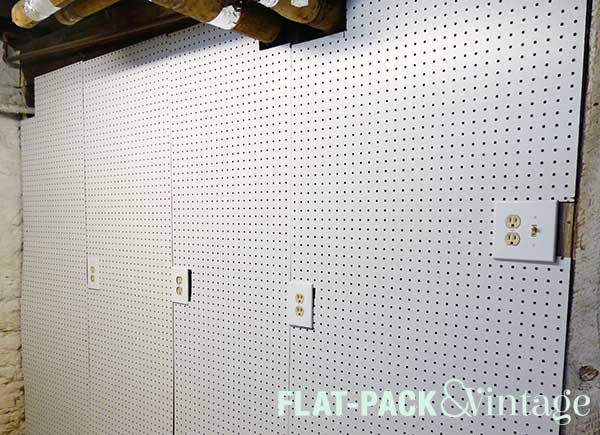
I started by peg-boarding the ucky wall.  The space was 3 inches too long to get away with 2 sheets of peg board so I had to buy 3 sheets.  ARGH!  Luckily it’s cheap.  I had the hardware store cut the sheets down to the sizes I needed because I have a small car and no table saw.

The boards were all cut so the edges would center on the existing studs.  This was so I could both anchor the edges well and fit everything into our car.  And, of course, because it’s our house, none of the studs were evenly spaced so had boards that were 30.5, 22.5, 23.5, and 24.5 inches wide.  Brilliant.

Now I just had to cut out holes for the outlets and pipes.  First I tried using a handsaw but it was way more of a PITA than I anticipated.  Then I tried my dremel with a cutting wheel but it started smoking and then the wheel shattered.  Oops.  Finally I broke down and demanded that we buy a jigsaw.  They’re actually cheaper than I expected (at least they can be, they can also be pretty splurgey, but I didn’t need anything fancy).
workspace2

It’s been YEARS since I used a jigsaw and I didn’t actually have the correct blade to cut hardboard so the cuts are pretty rough.  I also started with the most complicated panel and ended with the easiest.  Brilliant right?  And then in the middle I totally effed one of my measurements around the the outlet.  So basically it looks kind of crappy, but it’s a basement right?  It doesn’t have to be perfect, just functional, RIGHT???.  Please humor me here otherwise I may go out and buy more pegboard to fix it because, yes, I am that insane.

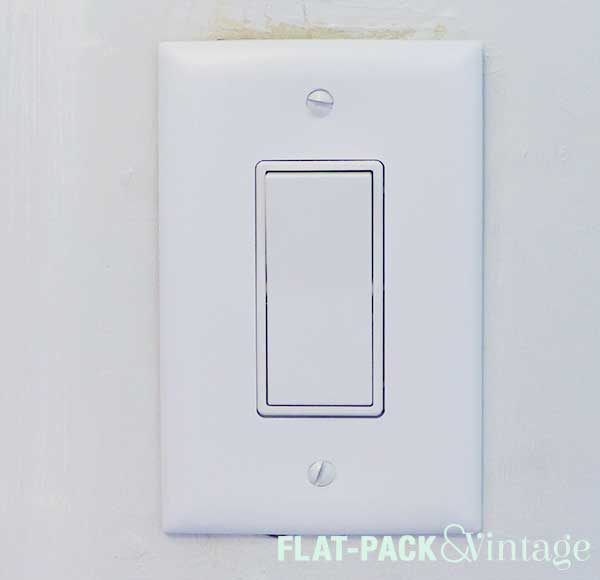
Speaking of insane, I also switched out all the outlets for white ones so they’d match the pegboard.  While switching out the outlets, I added spacers to bring the outlets even with the front of the pegboard as well.

Once the pegboard was all set up, I picked up a work bench kit.  I wanted to use the 2×4 Basics connectors to make a custom sized one, but an 8′ long top would be really hard to fit in my car so I opted for a 6′ kit instead.

When you see “kit” would you assume pre-drilled holes?  ‘Cause I sure did and was incredibly disappointed.  What I imagined taking a couple hours ended up taking several evenings worth of work because I would get frustrated and walk away.  It went way smoother when Matt was free to help me–he held stuff in place and drilled pilot holes while I followed with another drill to screw everything together.
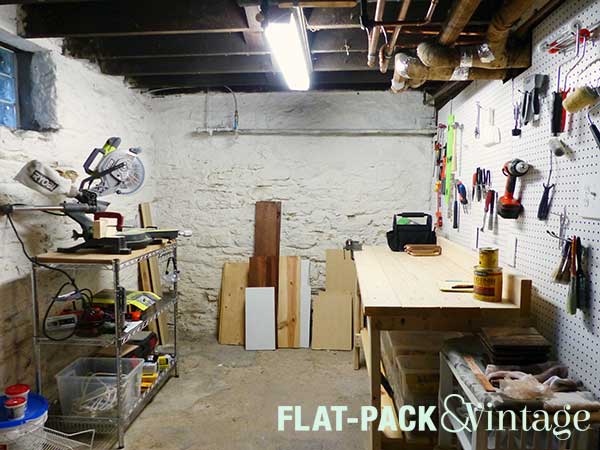
workspace3

Fast forward through a few hours of swearing, a trip to IKEA, and a few more hours for organization and voila!  I have a somewhat organized work space!  I still need to pick up a miter saw table since the work bench isn’t big enough to set that on, and I’ll be need a stool as well.  All and all though it’s a pretty awesome improvement, and I got do it all while hanging out in our (comparatively) cool basement.
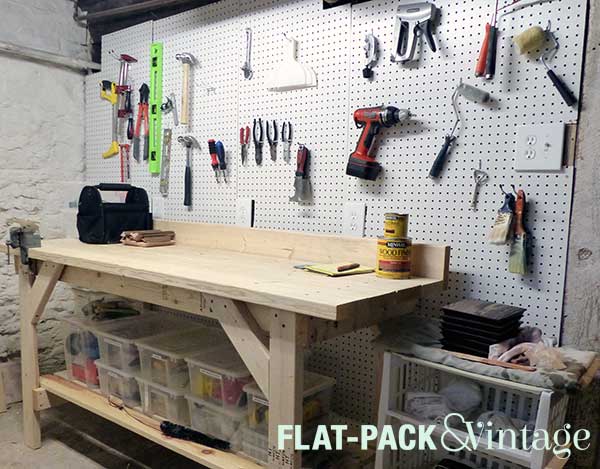
workspace4

Save

Revamping the Vestibule

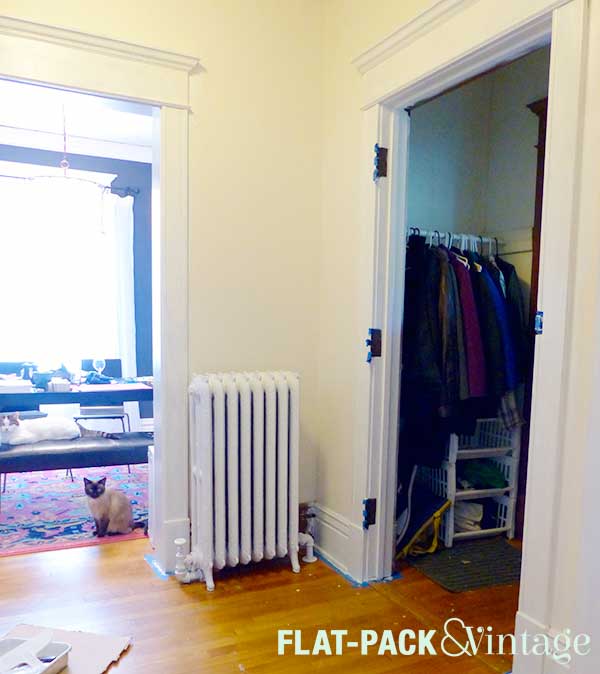
Our house has this goofy air-lock style entryway. The porch seems to be an addition so the double entry would have provided some extra insulation back in the day.  Lacking a better term, I’ll be referring to this mini space as “the vestibule.”

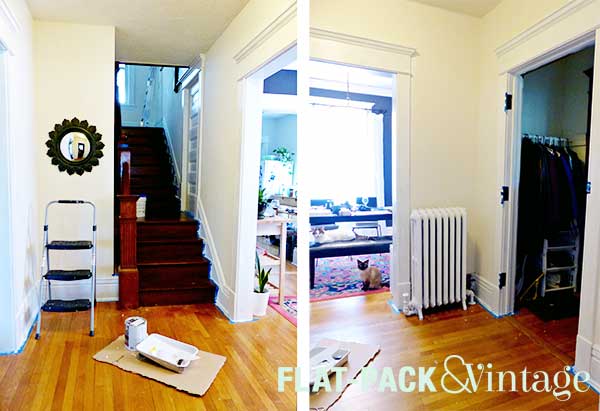
I don’t actually have any good before pictures because I honestly didn’t give the space much thought before we started working on it.  You can see a bit of it from this picture of the entryway.

vestibule_1

The storage consisted of a single, junky closet rod.  While we do need a place to store coats, we could do a little better in the style department.

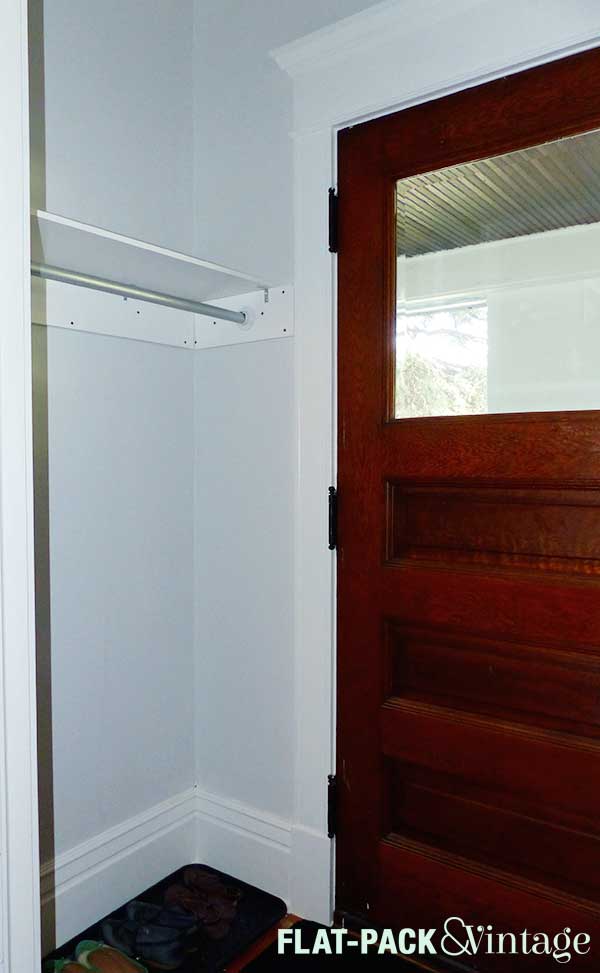
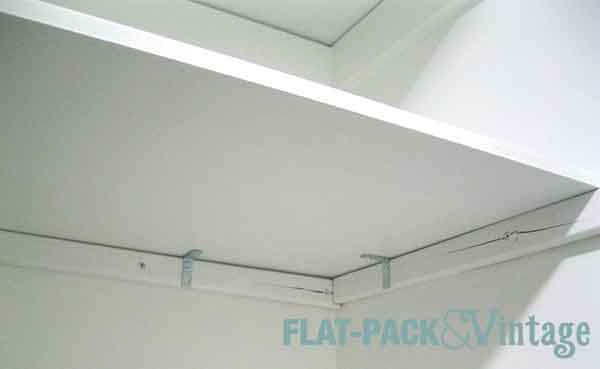
We ripped out the rod and the 2 boards that were poorly attached to the wall.  There was some wall damage underneath the boards, but that was fixed with a few layers of joint compound and some sanding.  Then we installed new boards (1x6s) so the closet rod would have better place to anchor than plaster.  We used 3 boards set in a U shape, rather than just 2 on the sides because we wanted a shelf above the rod for extra storage.

vestibule_4

Looking good, huh?  The boards are the same color as the trim (BM Simply White) and the wall color in the same as the rest of the entryway (BM Paper White).  The screws still need to be camouflaged, and the rod is getting a coat of paint this very minute so it looks less like a pipe.*

vestibule_3

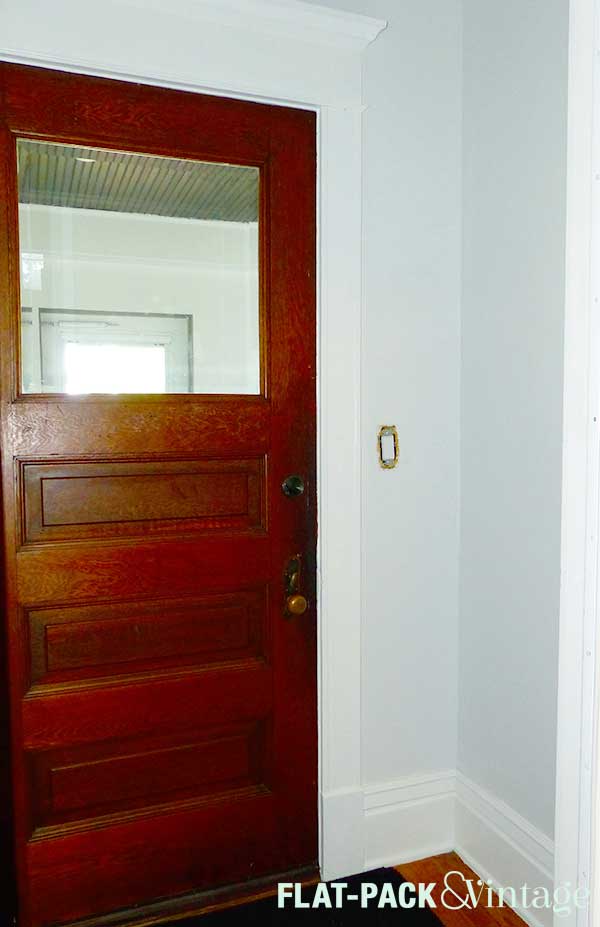
The only other notable feature in the vestibule was the light switch for the porch light.  It was sort of gross looking and the cover plate had been painted over like a billion times.  Easy fix though, right?

vestibule_2

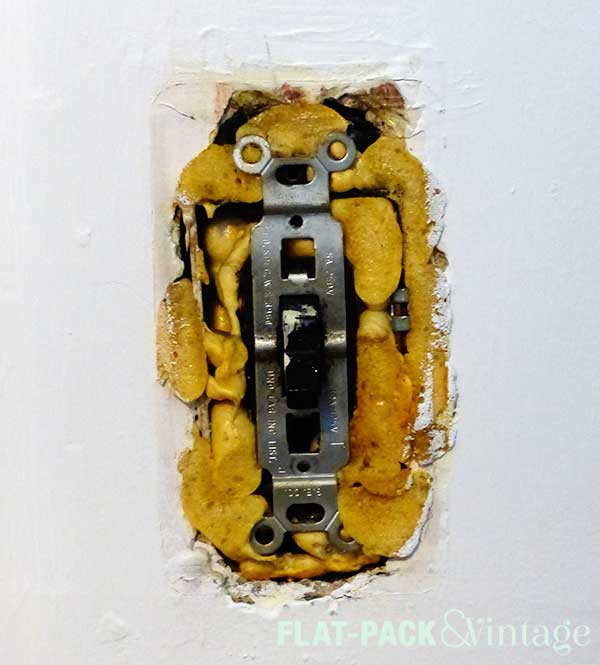
This is what I found when I removed the cover plate.  What. The. Fuck.  Apparently they wedged the switch into a mass of spray-foam insulation. There weren’t even any screws holding this thing in place. Why?  I have no freakin clue.

After cutting the power, I pried out the switch and the surrounding insulation.  Thankfully it wasn’t that difficult, I just scraped it out with a flat-head screwdriver.  I probably should have used a non-conductive tool but I wasn’t terribly concerned with the power off (plus I’d already be using a screwdriver while replacing the switch anyway).  Then it was just matter of attaching a new, non-grody switch.

vestibule_5

Not to shabby, huh?  A little touch-up paint is needed, but it’s still a huge improvement.  I also added some insulation that was actually designed for light switches/outlets.  Crazy idea huh?  You can find foam plates that are cut to fit around the switch and inside a cover plate. Easy-peasy and not a bad idea for exterior walls…. especially in older homes.
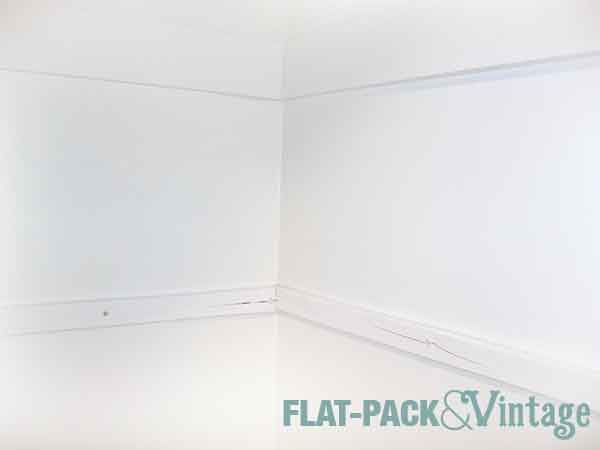
 

*Which is what it is–piping in the same diameter was cheaper than the wooden closet rods… go figure.  We had this left over from when we added a closet rod to my closet, so you get more length too.

Save

Save

The Make Room Challenge Week 4–The Craft Room

I’ve already shared my shame with the internet when I shared the state of our bathtub and the state of my dresser.  Ooof.  So what’s a little more online humiliation, right?

MRC_crafts1

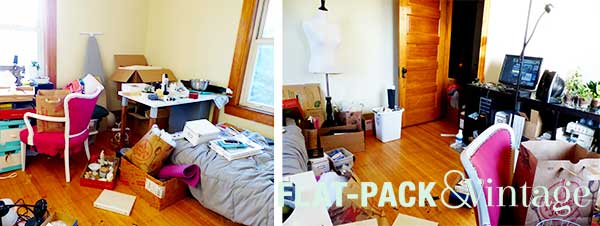
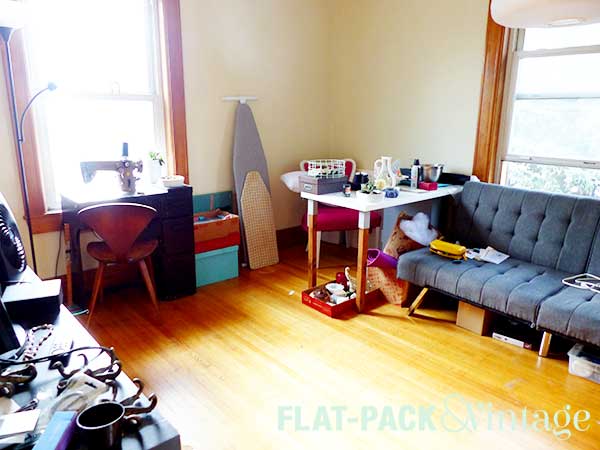
This is my craft room… studio… office… whatever you want to call it, and yes it’s looked that pretty much since we moved in.  Sure it’s been slightly more tidy off and on, but it’s always returned to this state.  If you’re wondering where my computer is, it’s a laptop I keep parked in the living because this.  Awesome, huh?

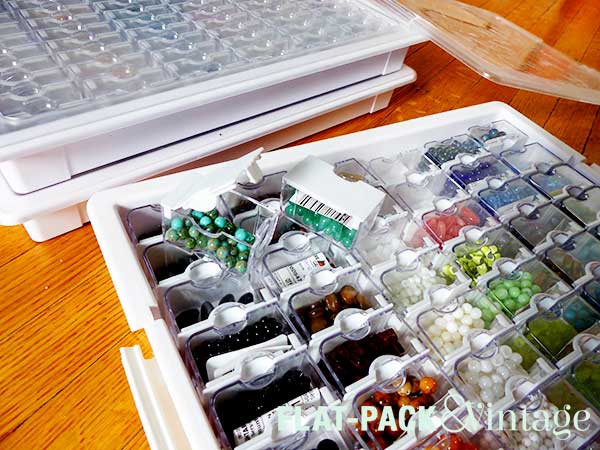
The biggest culprit is probably my jewelry supplies.

MRC_crafts5

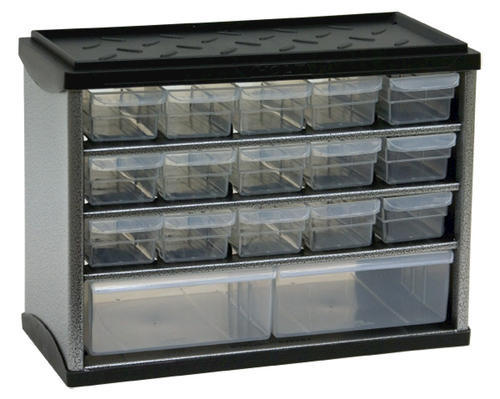
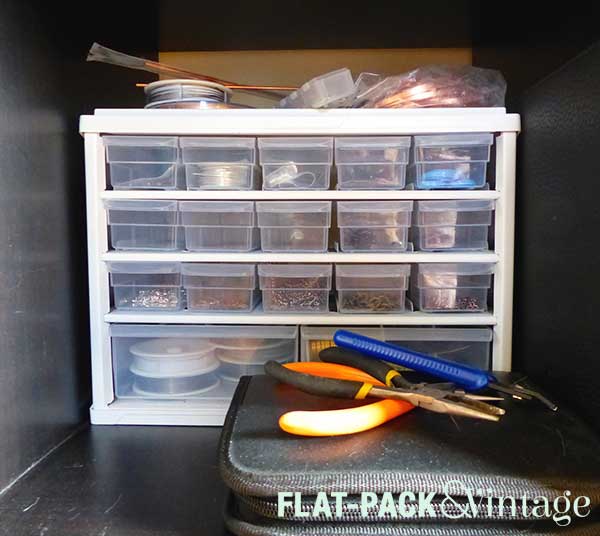
I got one of these bad boys for Christmas last year and it’s wonderful and stack-able, but a little pricey for as many as I need.  I picked up a couple more (1 tiny, 1 small–the “small” is what’s shown here) for smaller beads since it’s sooo nice to be able see them all at a glance.  The fancy case isn’t necessary for all my stuff–findings, wire, tools–so I picked up this guy last time I was at the hardware store.

Love the drawer sizes and adjustable dividers… not lovin’ the uber industrial look.  I already had some white spray paint on hand for my radiators, so I hit it with a few coats of that.

MRC_crafts3

If you think this and the container units are the extent of my jewelry supplies you are very, very wrong.  I have 4 full cubbies of my Expedit unit crammed with beads, wire, and tools and could easily use another 10 of the container units, but will probably work in more of these drawer units because they are WAY cheaper.

MRC_crafts2

Still a long ways to go, but better right?  The closet is still filled with boxes that I need to go through but I’ve also cleared out tons of stuff and rediscovered my floor so I’m calling this a success.  The room is going to be a long-term project for sure, but it’s at least no longer completely overwhelming.


The Make Room Challenge Week 3–Entryway

Ooof… this one was badly timed…. although I suppose we currently have tons of room in our entryway.

MRC_week3

Heck, we don’t even have the door taking up space!

Mail is one of those areas that tend to get out of hand for us pretty quickly.  Usually every weekend we stare down at the small mountain of mail on our table, sigh resignedly, and sort through it.  Most is of it is junk mail and just gets tossed, but we still pile it back up every week.

Part of my goal with the entryway is to (hopefully!) streamline our mail system.  I’m thinking a wall sorter (his-hers-ours) and a trash can immediately on hand may help.

Our coat-closet-that-is-also-a-vestibule needs a little work too.  We already picked up supplies to add some shelving and I’ve resigned myself to purging my coat collection.

That’s all going to have to wait until after everything’s painted though so no After photos for you today.  I’m lame, I know.

Week 1–The Master Bedroom

Week 2–The Master Bathroom

The Make Room Challenge Week 2–Master Bathroom

Last week I tackled clothing + accessories, this week was supposed to be accessories.  Oops… looks like I’m an over-achiever.  Because we don’t have a “master” bathroom (only 1.5 baths in the whole house) I don’t really keep my jewelry and whatnot in there anyway, but I do have plenty of other stuff I can organize and purge.

You’ve probably heard that everything in your bathroom has an expiration date, but, like most people, don’t really care.  If you’re trying to crack down on your household organization though, it’s time to care (added bonus is that you won’t have to worry about nasties growing in your toiletries).

The quick-n-dirty guide is as follows:

  • You haven’t used it in 12 months
  • It’s past the expiration date
  • It’s empty or nearly empty
  • You don’t need it any longer

Even if you’re still using it, my understanding of cosmetics is pretty much if it’s older than a year, it’s time to replace it.  Not too hard, right?  If you’re deposing of medication, try calling your pharmacy to find out what the disposal guidelines are.  I sat on some Vicodin left over from my wisdom teeth surgery for years because I had no clue what to do with it.  Another note about medication–if you can try and store it somewhere not the bathroom.  Lower humidity and minimal temperature variance tend to be better for just about anything with an expiration date.

MRC_week2_bath2

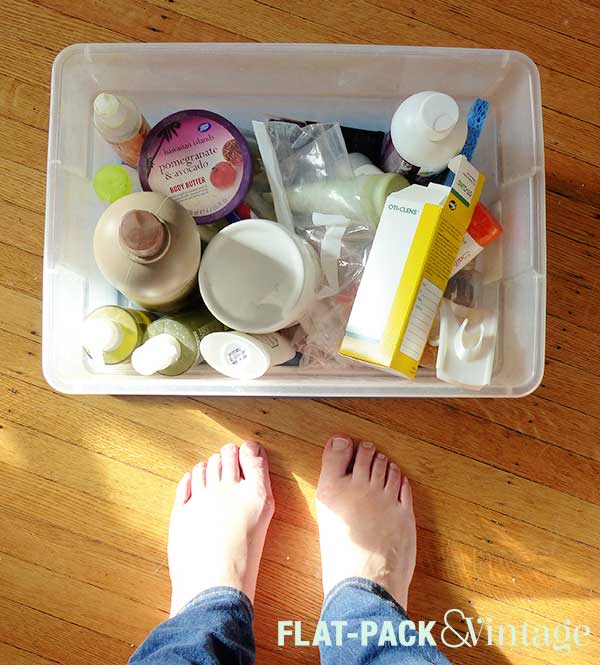
This is everything I did away with.  Daaaang it feel good!

MRC_week2_bath1

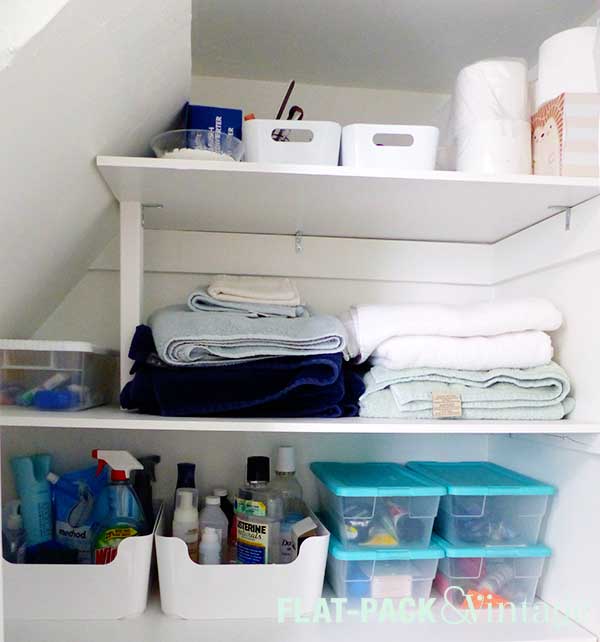
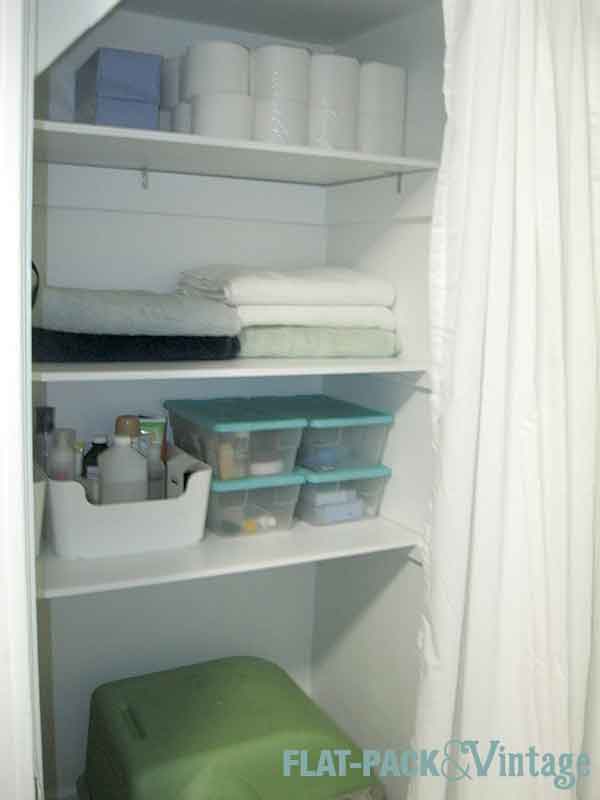
And I tidied up the bathroom closet because it was starting to get a little jumbled.  I’m working on our hallway closet too, but that’s still a little bit of a dumping ground.

I’ve also finally developed a system for quick and easy bathroom cleaning.  Seriously. You’ll still want to rotate in a deeper clean occasionally, but for for your average cleaning or oh shit my mother-in-law will be here in 5 minutes moments this is pretty sweet.

First I squirt some cleaner in the toilet bowl to give it time to sit and work its magic.  Next I spray some windex on the mirror and an all-purpose cleaner on the sink, tub, and toilet (or any other surfaces you may have in the bathroom). Then, working from cleanest to dirtiest (ie mirror, sink, tub, toilet) I give everything a good wipe-down with a micro-fiber cloth.  Toss that cloth in the laundry, scrub out the inside of the toilet bowl and BAM done.  All in around 5 minutes.  I have it ever so slightly easier because of the claw-foot tub (ie no tub surround), but even wiping down tiles or shower doors shouldn’t add a ton of extra effort.

The Make Room Challenge: Week One–The Master Bedroom

I am such a sucker for design/organization challenges!  Sure, I can organize on my own but I tend to get a little ADD and lose steam.  But a daily or weekly goal that’s not set by me?  Bizarrely enough this makes it easier.

Clearly my failure is at goal setting.

Anyways… I saw a big, shiny banner ad for The Inspired Room’s new book Make Room for What You Love and since I pretty much am every click-bait advertisers dream I went to check it out.  I hoped it going to be like the KonMari trend without the talking to your shoes.

So I click on the ad for this book and it turns out they’re doing a promotional organizational challengey thing. SOLD.  And by “sold” I mean “signed up for free.”  Five weeks of organization goals sent to your inbox every week and since I’m in Spring Cleaning mode this works out perfectly for me!

Week One is the master bedroom.  Specifically organizing clothing and accessories.  This was very much on my to-do list anyway so the timing was perfect.

MRC_wk1_2

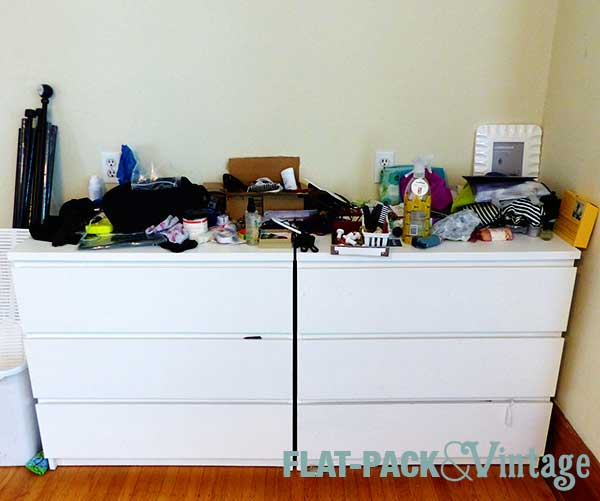
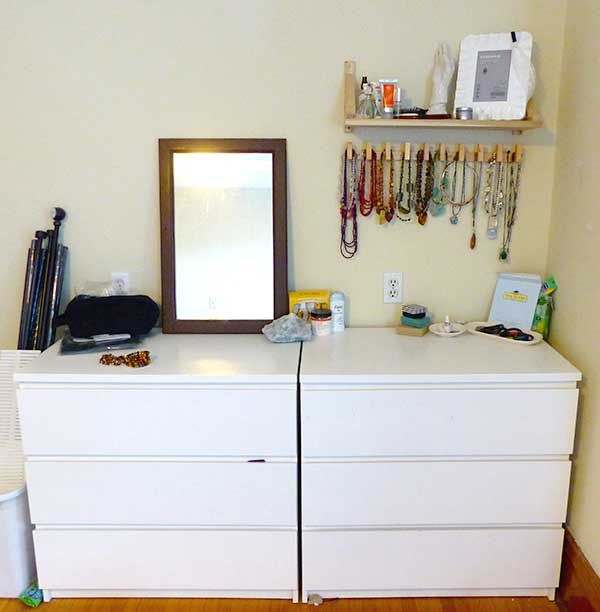
I am so ashamed to be showing this picture online… this is seriously what the top of our dressers have looked like for months.


MRC_wk1_1

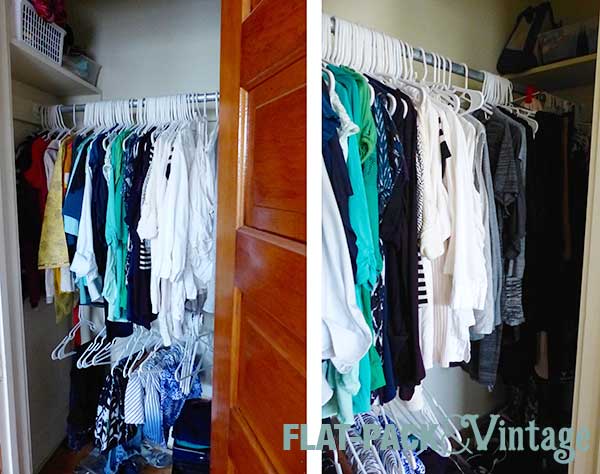
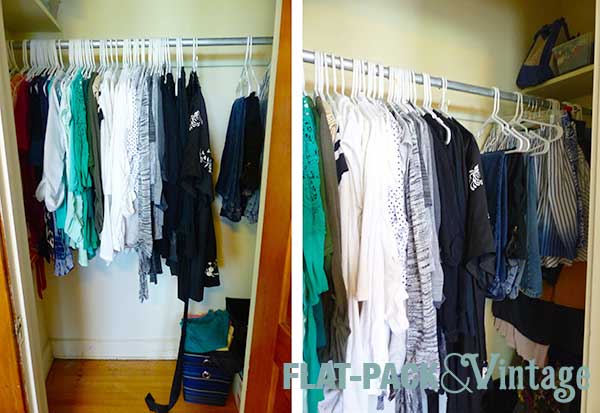
My closet is actually fairing a little better thank god.

Step one is to take everything out of your drawers/closet.  I decided to tackle my closet and dresser separately so I didn’t have complete clothing chaos and I started with the closet.


MRC_wk1_3

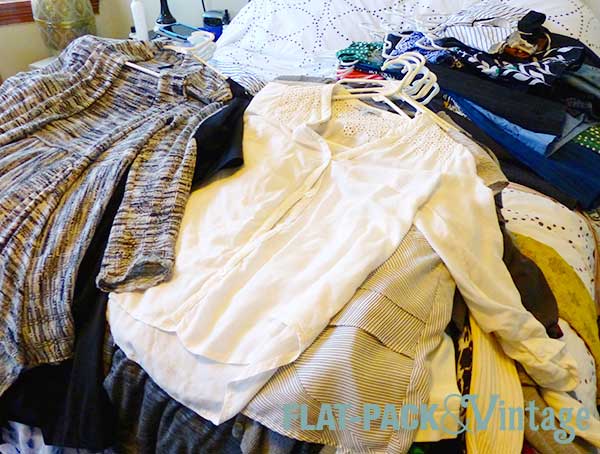
Ooof-duh as we say in Minnesota.

At this point I ever-so-slightly switched gears. Ya’ll have probably heard of capsule wardrobes I’m guessing?  Where you pair done your clothing to around 30 pieces for each season?  While that’s a little too minimal for me (and I am most definitely not a minimalist) I think the concept is solid and the guidelines to get you started can be used for just about anyone to sort out unworn items and pinpoint their style. Try not to get hung up on emotional attachments.  Sure it was a gift, but is it any better for something to sit there unused rather than donating it?  Or maybe it’s something you bought with high hopes but never worn.  It happens to all of us, if it’s really not working, toss it even if it’s brand new.

The first things I put back in my closet were the things I wore constantly.  We all have those things.  After my favorites were hanging up I looked at their overall color selection and style feel. Everything I put back after this I tried to blend with that palette and style. This is the big reason I opted to do the closet first–it’s where my more stylish pieces are (my dressers is more undies, t-shirts, tanks, and PJs).

MRC_wk1_5

Better, right?


MRC_wk1_4

And the stuff I’m bidding a fond farewell to.

I did the same thing to my dresser, but the photos are less interesting and I am most definitely am not posting a photo of my knicker drawer.  My shame does have some boundaries. Trust me though, the inside is way better.


MRC_wk1_6

And so is the top!  My jewelry was the big killer–I never got a good system in place after we moved so the tops of both of dressers just became my personal dumping ground.  The shelf brackets and hooks are from IKEA and I had a leftover board to use as the shelf.  BAM storage top and bottom!  I didn’t bother painting them because, while I have an idea in mind for the bedroom, I don’t know the exact colors yet. Same goes for the mirror–that was salvaged from our bathroom (don’t you recognize the brown?).  I was trying it out in the space for balance.  I think I have a better mirror for here though, I just need to find it….

I still have a ways to go–I want to get some drawer dividers for my dresser and completely revamp my closet system.  Those are projects for another day, but purging all the clutter is the first step.

Spring Cleaning: Media

Another trouble spot for me is Media.

springClean_media

Music

I have my music pretty solidly under control since I switched to download only for any new purchases and ripped everything else to computer several years ago. I’ve known some music snobs though who still prefer to buy CDs so they can control the settings when they rip them to their computer.  If you’re among the music snobs you may still want to back everything up on an external drive and then rid yourself of the physical  CDs.  Seriously, you Do Not Need Them.

My personal favorite media player is iTunes (yup, I’m an Apple fan girl*).  It’s free, and I really like their sorting options.  Most people know iTunes, but not everyone knows the extent of their sorting options (heck, Matt still complains about their options and I don’t think he’s used iTunes in a decade).  I also have a nice Bluetooth speaker so I don’t have to haul my computer around to listen to music around the house.

Movies + TV

DVDs are my main trouble spot.  Most downloads are protected and will only play on whatever player the seller says (ex: iTunes, Amazon Video).  I don’t particularly care for these restrictions so I continue to buy hard copy.* Unfortunately DVDs take up gobs of space.

dvd_before

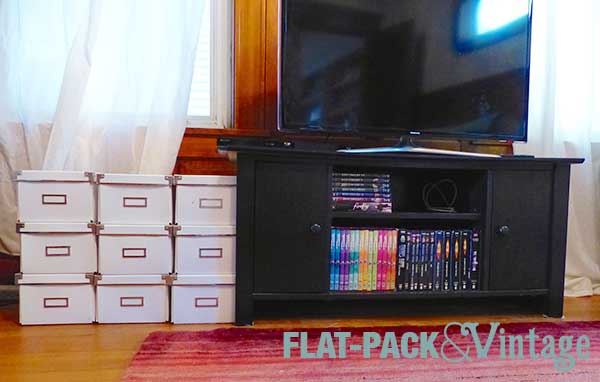
It’s not even that bad, but shuffling through all the boxes was annoying, plus Matt started to complain about my collection so I decided to compact it because I’m a good wife. Matt’s a fan of the disc binders but I think they look kind of ugly.  You can get nicer looked ones, but they’re pricey and the style still doesn’t fit what I’m looking for.  I opted for inexpensive CD sleeves, labels, and a couple small bins.

Labels: $10/350, Mircrocenter

Sleeves: $2 /100, Microcenter

Bins: $6, Target

dvd_after

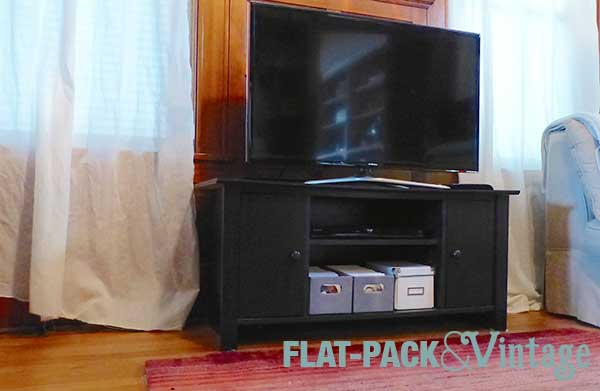
Please ignore my slightly dysfunctional curtains…

I have one bin for movies and one for TV (and a third for the extras/special features disc).  I may add some dividers for genre/TV Show Name, but right now it’s just alphabetical.  The movie labels have the movie title, rating, and run time, and the TV labels have the show name, season/disc number, and episode names.  On some I could fit the episode names on the main label, but for others I had to print a second which I just stuck on the back.

media_discs

It works for now, but I have dreams of creating a CD sized card catalog style drawer system some day.  I’ve been looking for plain wooden CD drawers that I could cobble together, but no such luck so far.  I may try and make the whole thing from scratch, but drawers are a little finicky.

If you have oodles of free time, you could also rip all your discs to a portable drive and plug that right into your computer.  My current computer is USB only and my old laptop was very slow at ripping DVDs so that may be a super long-term project for me…

Books

Oooh this one’s touchy for me.  As I’ve mentioned before, I LOVE books.  Not ebooks, real, physical books.  I also tend to hoard despite the fact I live right across the street from a library.  Basically, don’t use me as your role model for book storage (but if you do, no judgement here).  I still browse through my collection occasionally and weed out things that no longer hold my interest…. when we moved I think I got rid of about 5 books…

media_books

Also, does anyone else wish amazon paired an ebook with any hard copy books you buy like they do for CDs?  That would make travel delightful for me (which is like the only time I really use ebooks).

Photos

Last time I touched on cleaning up photo files on your computer, but what about preserving your photos?  You take them for the memories right?  So you probably want to go back through them now and again.

I’m not much of a scrapbooker, but I love having nice printed albums.  You don’t have to print off your photos before hand, you can resize as necessary, and they’re so much slimmer than if you scrapbooked by hand.  I tend to have individual albums for big trips/events, but I’ve also been toying with the idea of creating little “yearbooks” to use the random photos I take over the year.  I saw the idea on Young House Love and I think it’s a great idea.  I’ve been using Shutterfly for my printing so far because they always have coupons, but there are tons of options out there.

media_photos

If you don’t want more stuff (more power to you!) albums might not me for you.  You may still want to put together slideshows to make your digital photos a little more accessible.  iPhoto has a slideshow option, but my dad (who is not a total Apple convert) just uses Powerpoint and it works for him.  Bonus, if you hook your computer up to your TV you can show off your photos to a whole room of your captive family and friends.***


*Except for the iPhone… I have an irrational dislike of their charger.  I hit charger Zen when I realized all my small devices took a micro USB.  Why do you want to take that away from me Apple????

**Ok, Doctor Who I still buy off of iTunes so I can get instant gratification

*** I actually like seeing people’s photos, just pleaseplease spend at least a little tend editing them before showing them to other people…and I don’t even necessarily mean like Photoshop editing, just weed out the super blurry ones and the 20 bajilion duplicates, mmkay?

AT January Cure Week 2

Monday: Make a List of Projects

Oh boy, this is going to get a little lengthy, bear with me.

Entryway

  • Add a boot tray (front door and back)
  • Organize Landing Strip
  • Mirror

Living Room/Family Room

  • Put away Xmas decor
  • Unpack remaining boxes
  • Hang curtains
  • Corral DVDs

Kitchen

  • Frame & hang artwork
  • Add curtains
  • Add shelving
  • Replace wibbly-wobbly outlets
  • Touch up paint on cabinets
  • Remove paint splotches from floor

Dining Room

  • Clear off & demo bookshelves
  • Patch walls
  • Redo moldings
  • Add tin ceiling
  • Hang (and hem) curtains

My Study

  • Fix outlets!
  • Clear out random crap
  • Add shelves to closet
  • Hang curtains

Matt’s Study

  • Hang curtains
  • Remove ceiling tile
  • Connect ceiling light to switch
  • Add closet door
  • Replace moldings

Bedroom

  • Excavate dressers
  • Hang curtains
  • Add jewelry storage
  • Excavate closet
  • Remove closet door mirror
  • Fix baseboard trim

Tuesday: Purge the Pantry

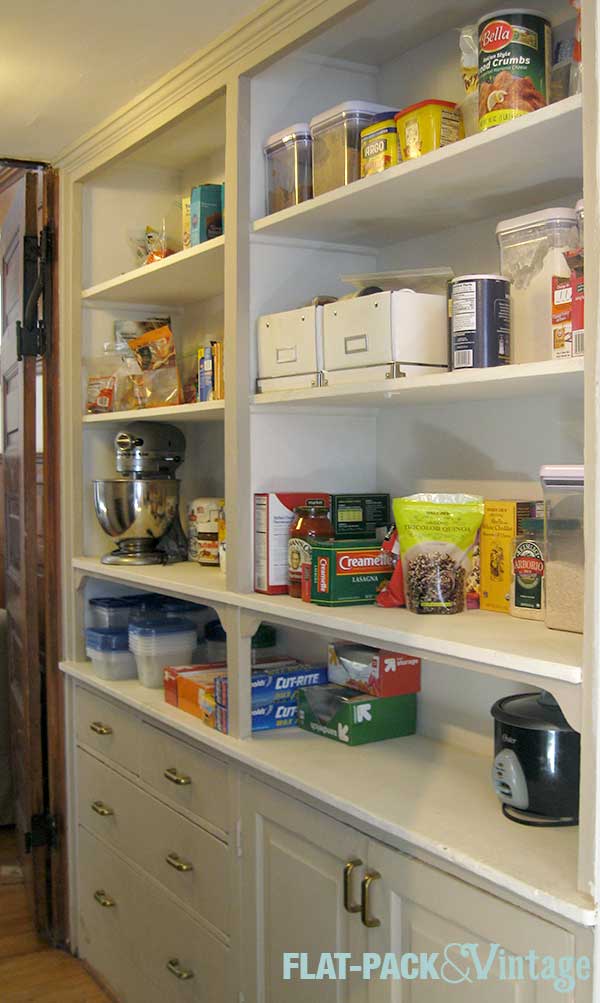
Our pantry is in relatively decent shape at the moment.  This is probably because we only moved in 6 months ago there’s no better pantry purge incentive like moving.  Our pantry is also not very deep so we don’t tend to lose things in its depths.  We do need to tame our tupperware  though and corral some smaller items in bins.  The pantry will get a complete over-hall, hopefully within the next year, but it’s functioning decently for now.
ATCure2016_pantry

Wednesday: Set up an Outbox

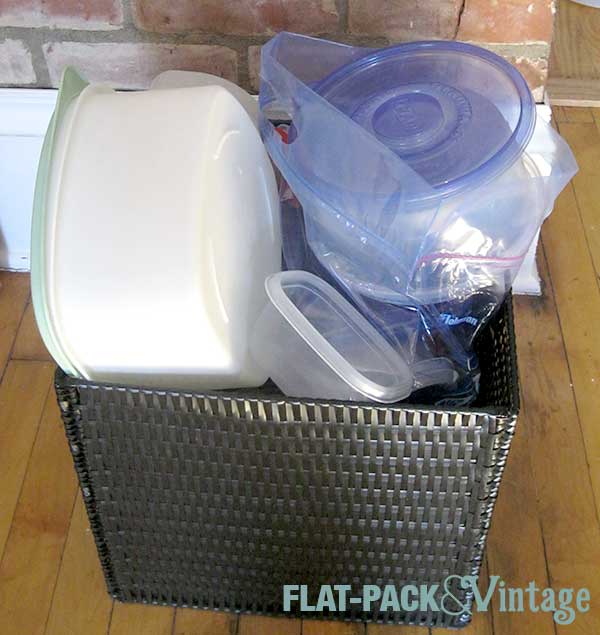
We were actually ahead of the game on this one and already started an outbox with a bunch of tupperware from our pantry. I added old hangers some clothes I don’t wear anymore as I worked on other projects during the week.

ATCure2016_outbox

Thursday: Declutter a Drawer

BAM!  I…. didn’t clean out any drawers, but I DID clean out my closet and found some clothes I didn’t even know I had (that’s a good sign your closet desperately needed cleaning).  I also picked up some foam core board to redo the dividers in my underwear drawer though.  I never put my existing ones back after we moved and I just made use of Kohl’s Intimate Stock Up Sale to refresh said underwear drawer.  I disliked my existing dividers (HOFTA from IKEA–too flimsy and doesn’t fit perfectly in a MALM dresser) so I’m going to make my own with the foam core (although I will not be sharing a picture of my knickers on the internet when it’s done.  sorrynotsorry).

Weekend: Flowers + Kitchen

There wasn’t a lot of deep cleaning to do in the kitchen since we’ve only lived here 6 months and I did a full kitchen overhaul when we moved in.  Instead I chose to do a general cleaning and then tackle a couple of the smaller kitchen projects from my list: touch up cabinet paint, replace wonky outlets, hang curtains.

The outlets turned out to be a way bigger pain in the ass than I anticipated.  Our wiring is a little jacked up (yay for old homes?) which makes things incredibly frustrating.  First one of the outlets sparked on me AFTER we cut the breaker.  Turns out it was still getting a very slight current from somewhere (which one of our testers could detect, but the other couldn’t), but we couldn’t link it to a specific breaker so we had to cut the power to the entire house.  Has anyone else had this happen to them?  Because it’s absolutely mind boggling to me.

The other 2 outlets I was working on were easier despite having some weird existing wiring happening.  Unfortunately after we brought the power back on only 1 of the 3 outlets I replaced actually worked.  ARGH!  We have idea what’s wrong with one (see “weird existing wiring”) which should be annoying, but fixable and I’m hoping the other one is just a randomly defective outlet, otherwise I’ve got nothing.

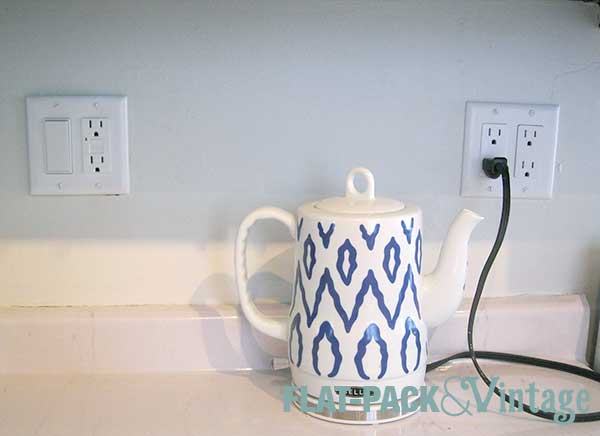
ATCure2016_kitchOutlets

At least they LOOK way better, right? We’ll fix them, but at the moment I’m still swearing at them so it’s probably better to take a break.  I also think I’m going to need to do some drywall patching around the switch/outlet pair since the reason they were all wibbly-wobbly was that the hole for the electrical box was cut too big so the tabs on the top of the outlets aren’t able to brace themselves against the wall.

By the time we were done fighting with the outlets I was all “I hate electrical!” and “Screw the curtains!” but I did touch up the cabinet paint (it suffered from a couple small drips when we painted the walls), remove the splashes of over-spray from the floor (from when I spray painted the radiator), and did a solid cleaning so I’m calling it a successful weekend.

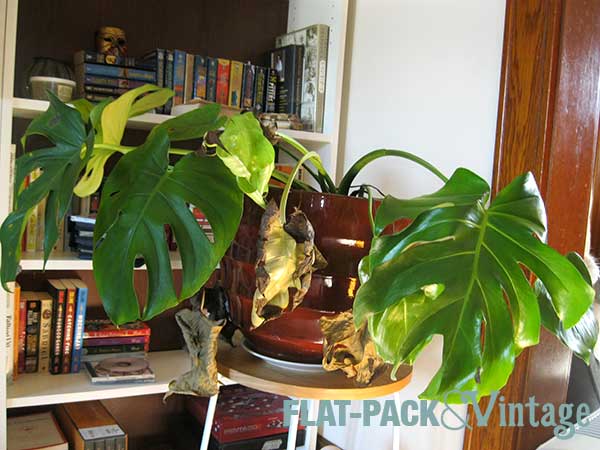
My flowers from last weekend are still going strong (go carnations!) so I’m going to wait to buy more until this bunch needs to be tossed.  Maybe I’ll buy a new potted plant though?  Menards has some nice looking spider plants and Phyllis (my cut-leaf philodendron) is looking all hella sad.

ATCure2016_phyllis

Whomp whomp.


Previous Tasks

Week 1


AT January Cure Week 1

Despite the fact that I’m not living in an apartment anymore, I’ve joined Apartment Therapy’s January Cure. It just seemed like a good way to kick start the year, it will also replace the current Weekend Reports for the month since I’ll just do a weekly wrap-up instead of a daily post.

There is nothing like the start of a new year to kick yourself into gear and make changes that last. And no, I’m not talking about resolutions, which have a sneaky way of fading along with the holiday glow. I’m talking about taking just one month and investing some effort (21 do-able assignments in total throughout January) toward a cleaner, more organized and more peaceful home. If you are ready to get your place back in shape (and reap the rewards for the whole rest of 2016) the very best way is one manageable step at a time, during our once-a-year-only January Cure. By the end of the month, you’ll be have a cleaner, fresher, more organized home, guaranteed!

Sounds pretty good, right?  At least until you start to take naps… which is exactly what I did on Day 1.  Luckily, Friday assignments are pretty much weekend assignments so I had 3 whole days to tackle Assignment #1: Flowers and Floors.  Except I actually spent those 3 days taking more naps and binge-watching Doctor Who so I’m starting now.  Yeah, don’t follow my example for sticking to a schedule.  Ever.

I dropped Matt off at the bar to watch the Packer game.  I realize most Minnesotans would probably refer to it as the Vikings games, but we’re from Wisconsin so tough cookies.  I tend to be slightly more productive when Matt’s out of the house, which is a little weird since it’s not like he gets in my way on anything when he’s here.  I picked up so flowers on my way home* and have already cleaned up the floor in the mudroom (which was living up to its name) and swept and mopped the kitchen and pantry.  My favorite wood cleaner is Method’s Almond Scented Wood Floor Cleaner. I also have a Rubbermaid Reveal mop, which has the ease of a Swiffer, but you can refill with your own cleaner and the pads are washable/reusable (I’m also pretty sure I didn’t pay anywhere near $50 for mine.. wtf Target?).

Unfortunately dropping Matt off at the bar interrupted my Doctor Who Binge in the middle of a two-parter** so I’ll possibly go back to slacking for this evening.  There’s a pint of Izzy’s Midnight Snack in the freezer too so apparently you shouldn’t follow my example for New Years Resolutions either….

ATjanCure1


*From the most expensive damn grocery stole in the area, so I semi-cheated an picked up some carnations and a bunch of greenery since I am not paying $15 for daisies.

**With Zygons no less! And, yes, I know I’m way behind on this season.  I haven’t seen Star Wars yet either, so THERE.

Conquering the Closet

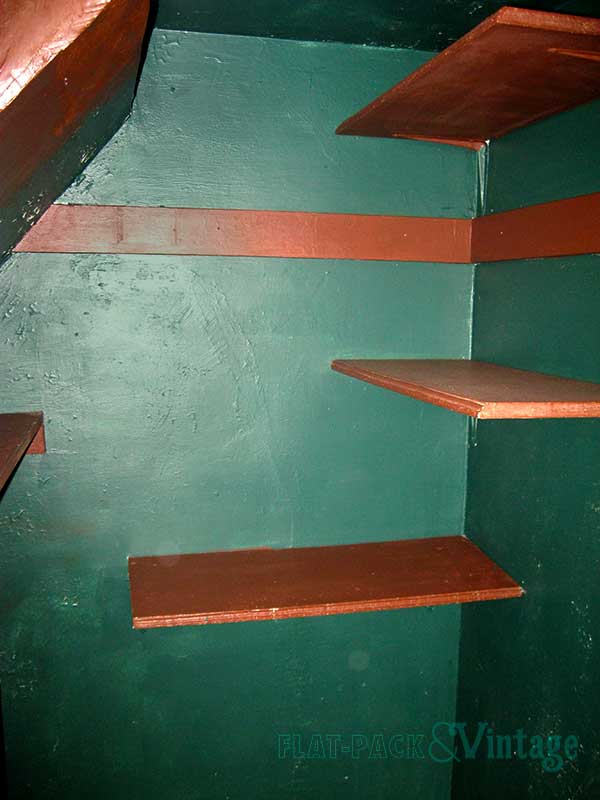
Oh the bathroom closet… It didn’t quite fit with the Brown Bathroom of Despair, it was more the Green Closet of Gloom.  Seriously people, painting the inside of a closet dark green (with painted brown shelves) when it is not lit is a terrible idea.  It’s like a black hole.  But green. The existing shelves… I don’t even know what’s happening there.

bathroomBefore4

Yeah…. this is a perfect example of a poor use of space.  It had to go.

The first step was demoing the shelves.  Should be pretty easy, right?  Wrong.  Some jerkwad had put layer after layer of paint over the screw heads so a screwdriver was completely useless. Using a combination of a hammer and brute strength I managed to get the shelves out.  The walls were already in pretty bad shape so I few more holes to patch wasn’t a big deal.

Originally I thought I’d need to skim-coat the entire inside of the closet.  Thankfully it didn’t come to that.  I used a putty knife to scrape off all the the peeling paint, then spackled over all the uneven bits.  After priming it looked pretty respectable, especially since it was the inside of a closet, so I just painted it all and called it a day.

When my mom and step-dad were in town the other weekend Matt and my step-dad went to work on the shelves (mom and I baked cookies).  I had gotten a sheet of 1/4″ MDF cut down to size earlier (I figured out the height I wanted the shelves, then measured the length since the closet is underneath our attic stairs so most of one wall is angled). I chose 18″ as the depth since it’s nice and deep, but not so deep that you end up losing things in the back.  Since my miter saw can only go up to a 12″ cross cut, I had to get everything cut to size beforehand. The hardware store people were very helpful, just in a “oh, isn’t that cute, she’s building shelves, is your husband going to help you with that?” sort of way that makes me grind my teeth a bit.*

I outlined what I wanted, and left the men to the technical stuff.  I mean, I had Christmas cookies to bake, I can’t do everything. The shelves are attached on 2 sides with cleats (we used 1×2 pine since we had that already, there were already 1×4’s where I put the top shelf so we left those there).  After some discussion we skipped using a cleat on the angled stair wall since we weren’t sure how stable the plaster was and we didn’t want the screws to end up going through the stairs.  We ended up adding legs to that end of the shelves for added stability.

bathShelves1

We also anchored the shelves to the cleats with L brackets so they couldn’t accidentally be knocked loose somehow.  If your walls are nice and square and even you could probably screw directly into the cleats.  Our walls are from a time when “square” didn’t really exist so things are slightly wonky. You can also tell we used inexpensive pine for the cleats, but only from this angle so everything does actually quite nice when you’re not sitting on the floor.

bathShelves3

The shelves, legs, and cleats got painted  after everything was dry-fit (but before it was all anchored in place).  I didn’t bother painting the edges of the shelves since only 1 would be visible and I figure it would be easy to paint an edge once the shelves were all installed.  I was actually right about that too. The shelves took a coat of primer and a coat of paint (BM Advance) and look SO much better now.

bathShelves2

The top shelf isn’t quite level but would not be worth the effort to fix it given that these are closet shelves and won’t be seen too much.  We would have had to rip out the existing board, patch the hell of the wall, put up new cleats, and repaint everything around them.  Sometimes it’s just not worth being an anal-retentive perfectionist.  Sometime I even recognize those times.

The  door was taken off shortly after we moved it and has been replaced with a tension rod and curtain.  The cat box is in the closet so it needed to be easily accessible for our furballs and I didn’t love the idea of keeping the door open constantly. Curtain it is.

bathShelves4

Can you feel that? We are SO close to being done! I’m crossing my fingers for a Christmas miracle especially since my mother-in-law and brother-in-law are coming to visit the week after Christmas so it would be really nice to have it all done.**


*I will say I take a rather perverse sort of pleasure in waltzing into a hardware store in a skirt and heels and then surprising the more chauvinistic employees by actually knowing what I’m talking about. This however was not one of those days and as I was clearly dressed as one who is Getting Shit Done.

**She’s like the least judgmental person ever so I’m not worried about that, but it would be nice to have a bathroom that’s not a construction site for guests, ya’know?