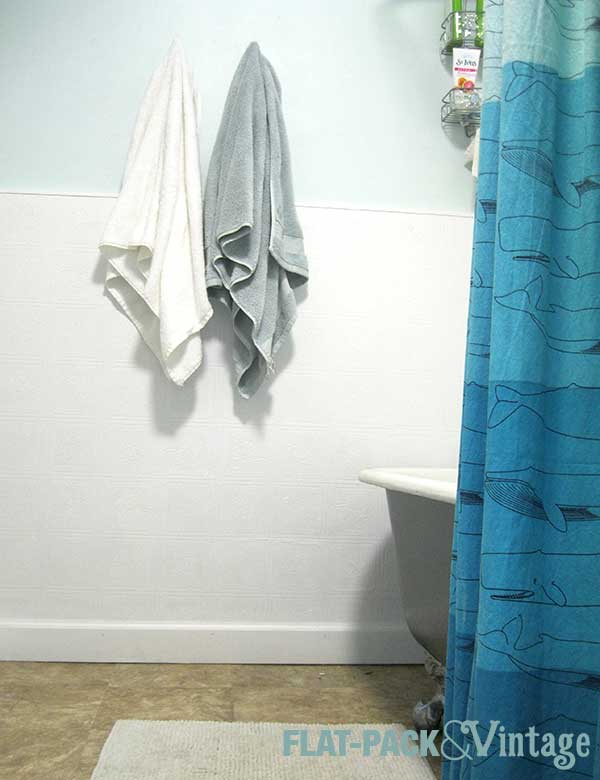
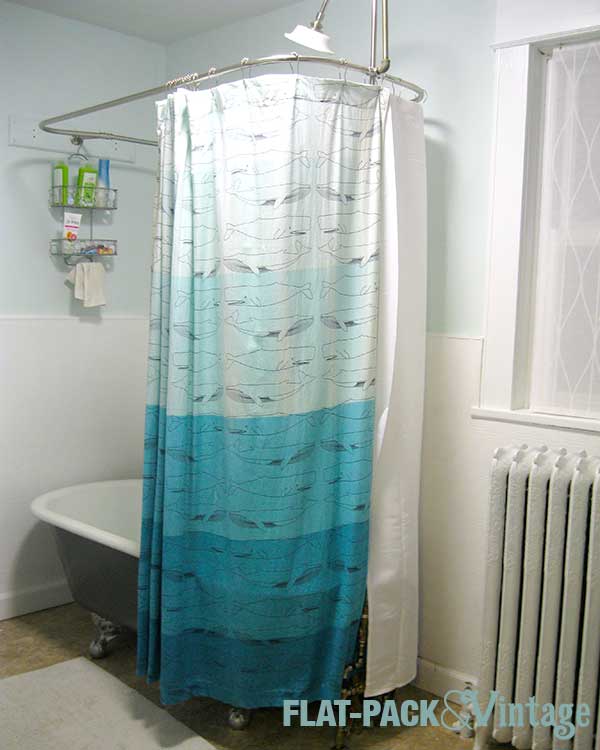
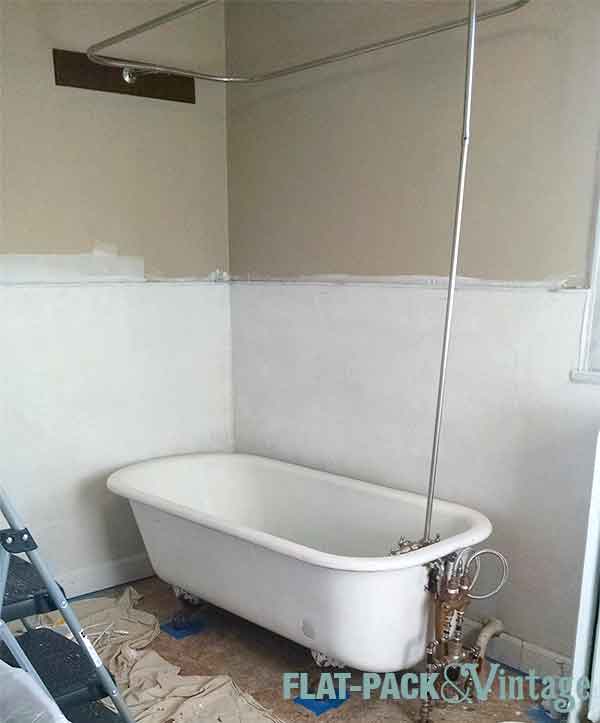
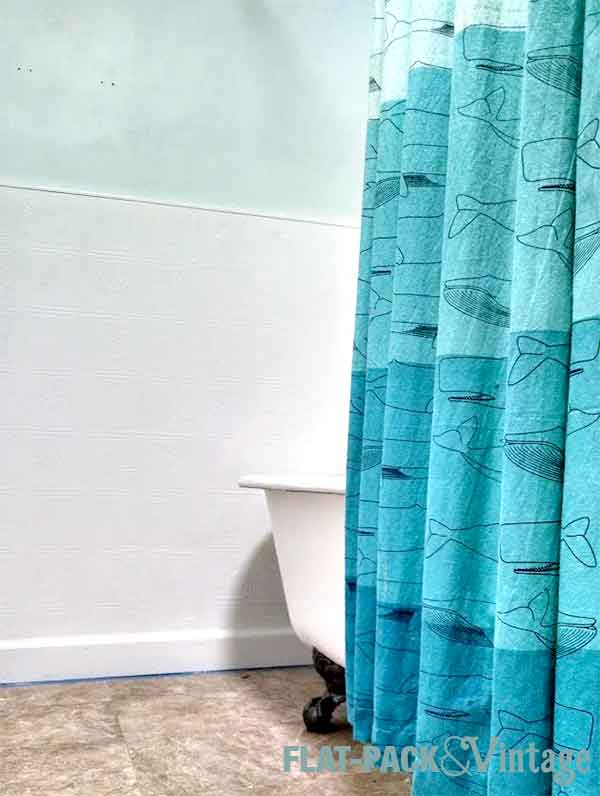
If you remember the picture I posted a while back of the tub base you’ll see I changed my mind. Originally I had freshened it up with a coat of white paint and some gunmetal feet, but after bringing in the vanity I wanted something to balance the dark gray. The tub base is now the same color as the vanity and I repainted the feet silver for contrast. We also had to bite the bullet and hire a plumber to switch out our old leaky tub faucet.
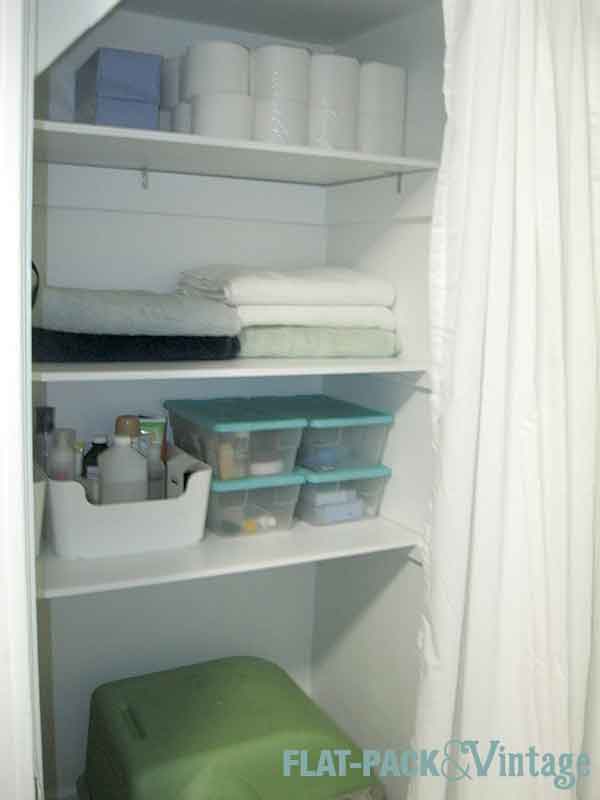
We now have a bright, practical closet and convenient towel hooks (before the only hooks were on the back of the door–nowhere near the tub).
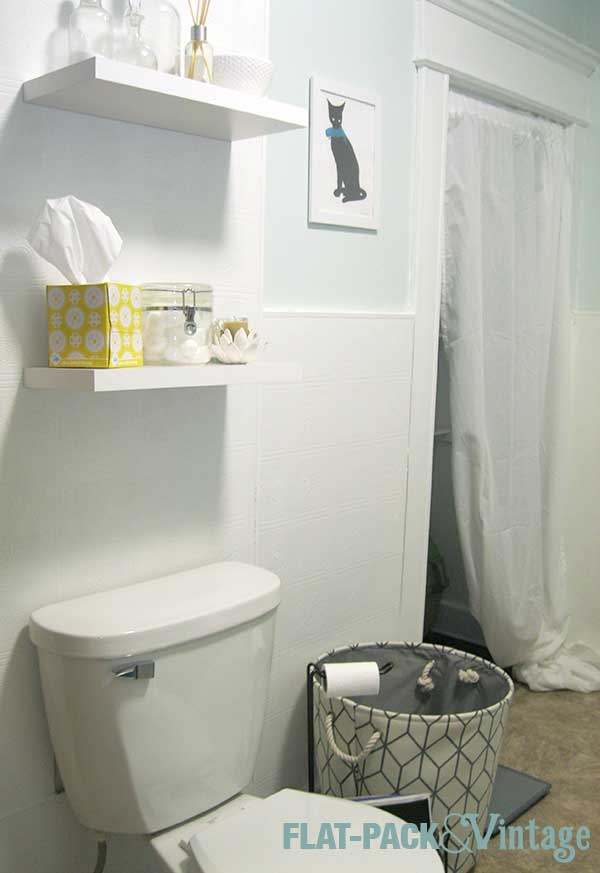
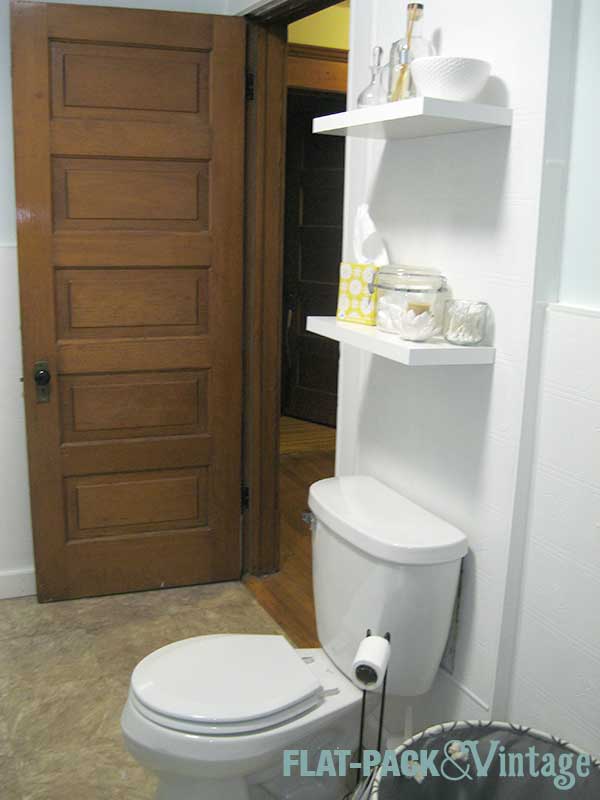
I brought in some more shelving above the toilet and added a hamper since laundry always seems to pile up in the bathroom.
*Long term plan is to gut most of the room, tile the floor and partially tile the walls, but it will be quite a while before that happens because moving our cast iron tub and radiator is definitely not a DIY.
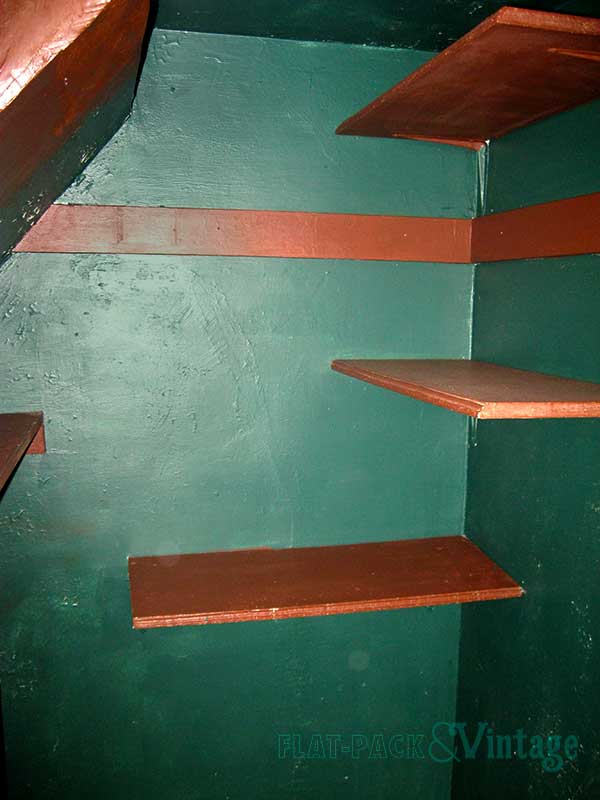
Oh the bathroom closet… It didn’t quite fit with the Brown Bathroom of Despair, it was more the Green Closet of Gloom. Seriously people, painting the inside of a closet dark green (with painted brown shelves) when it is not lit is a terrible idea. It’s like a black hole. But green. The existing shelves… I don’t even know what’s happening there.
Yeah…. this is a perfect example of a poor use of space. It had to go.
The first step was demoing the shelves. Should be pretty easy, right? Wrong. Some jerkwad had put layer after layer of paint over the screw heads so a screwdriver was completely useless. Using a combination of a hammer and brute strength I managed to get the shelves out. The walls were already in pretty bad shape so I few more holes to patch wasn’t a big deal.
Originally I thought I’d need to skim-coat the entire inside of the closet. Thankfully it didn’t come to that. I used a putty knife to scrape off all the the peeling paint, then spackled over all the uneven bits. After priming it looked pretty respectable, especially since it was the inside of a closet, so I just painted it all and called it a day.
When my mom and step-dad were in town the other weekend Matt and my step-dad went to work on the shelves (mom and I baked cookies). I had gotten a sheet of 1/4″ MDF cut down to size earlier (I figured out the height I wanted the shelves, then measured the length since the closet is underneath our attic stairs so most of one wall is angled). I chose 18″ as the depth since it’s nice and deep, but not so deep that you end up losing things in the back. Since my miter saw can only go up to a 12″ cross cut, I had to get everything cut to size beforehand. The hardware store people were very helpful, just in a “oh, isn’t that cute, she’s building shelves, is your husband going to help you with that?” sort of way that makes me grind my teeth a bit.*
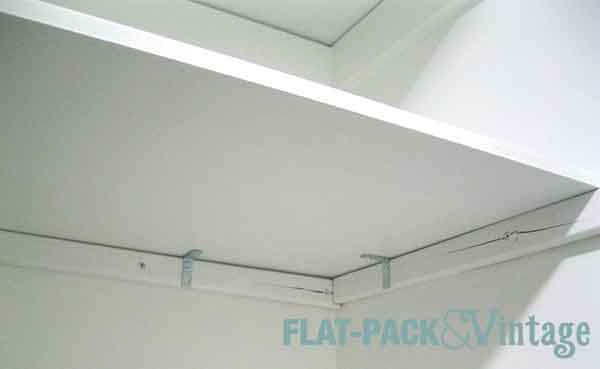
I outlined what I wanted, and left the men to the technical stuff. I mean, I had Christmas cookies to bake, I can’t do everything. The shelves are attached on 2 sides with cleats (we used 1×2 pine since we had that already, there were already 1×4’s where I put the top shelf so we left those there). After some discussion we skipped using a cleat on the angled stair wall since we weren’t sure how stable the plaster was and we didn’t want the screws to end up going through the stairs. We ended up adding legs to that end of the shelves for added stability.
We also anchored the shelves to the cleats with L brackets so they couldn’t accidentally be knocked loose somehow. If your walls are nice and square and even you could probably screw directly into the cleats. Our walls are from a time when “square” didn’t really exist so things are slightly wonky. You can also tell we used inexpensive pine for the cleats, but only from this angle so everything does actually quite nice when you’re not sitting on the floor.
The shelves, legs, and cleats got painted after everything was dry-fit (but before it was all anchored in place). I didn’t bother painting the edges of the shelves since only 1 would be visible and I figure it would be easy to paint an edge once the shelves were all installed. I was actually right about that too. The shelves took a coat of primer and a coat of paint (BM Advance) and look SO much better now.
The top shelf isn’t quite level but would not be worth the effort to fix it given that these are closet shelves and won’t be seen too much. We would have had to rip out the existing board, patch the hell of the wall, put up new cleats, and repaint everything around them. Sometimes it’s just not worth being an anal-retentive perfectionist. Sometime I even recognize those times.
The door was taken off shortly after we moved it and has been replaced with a tension rod and curtain. The cat box is in the closet so it needed to be easily accessible for our furballs and I didn’t love the idea of keeping the door open constantly. Curtain it is.
Can you feel that? We are SO close to being done! I’m crossing my fingers for a Christmas miracle especially since my mother-in-law and brother-in-law are coming to visit the week after Christmas so it would be really nice to have it all done.**
*I will say I take a rather perverse sort of pleasure in waltzing into a hardware store in a skirt and heels and then surprising the more chauvinistic employees by actually knowing what I’m talking about. This however was not one of those days and as I was clearly dressed as one who is Getting Shit Done.
**She’s like the least judgmental person ever so I’m not worried about that, but it would be nice to have a bathroom that’s not a construction site for guests, ya’know?
In a perfect world I’d love to reconfigure the bathroom. It’s a pretty good size bathroom, but the layout doesn’t make the best use of the space. Sure it would be fabulous if I could rotate the tub so the plumbing connections are against the wall, and swap the toilet and vanity around so I could fit in a sink with actual counter space… but rerouting plumbing is pricey and probably not going to happen. This means I have to work with what I have, which happens to be enough room for a 24″ vanity. Sigh.
It gets even better though. The plumbing for our sink comes up through the floor instead of through the wall so anything raised on legs is out as well. I also had to wave goodbye to a practically perfect option because the drawers were a 1/4″ too wide to accommodate our existing plumbing. That was devastation right there. I found another practically perfect option, but not only was it raised (I could work around that if I had too) but it was nearly all sink and no counter. No bueno.
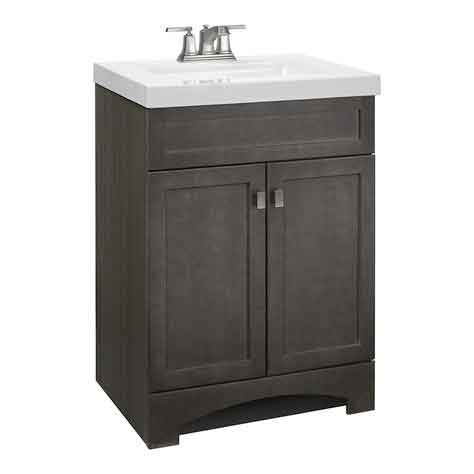
There was only one option left at this point. Custom. Not 100% from scratch kind of custom, but a custom mod to a mediocre cabinet.
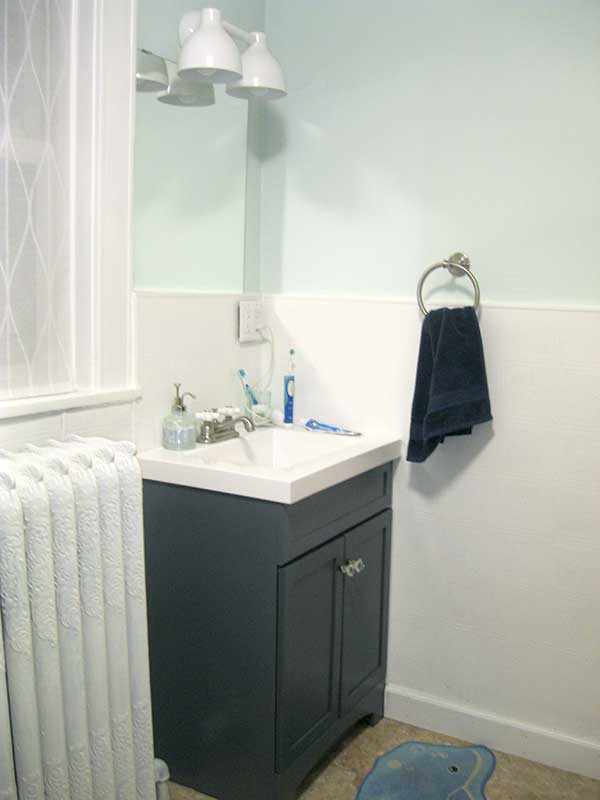
I ended up with this as my base for several reasons. 1) I liked the counter top on it. Too many had goofy recesses (mini soap dish? really?) and backsplashes that were unnecessary. I wanted a white, streamlined sink and didn’t want to shell out another several hundred bucks to replace it in the future. 2) I liked the overall shape–simple and reasonably classic. 3) Price point was good. I almost picked out a boring-as-hell builder-grade yawn-fest that was cheaper and the only reason I paid more was to get the counter/sink I liked more.
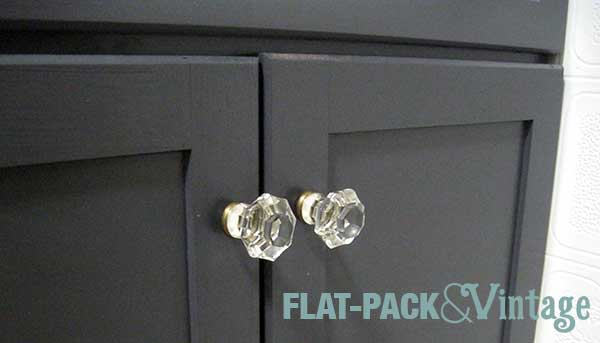
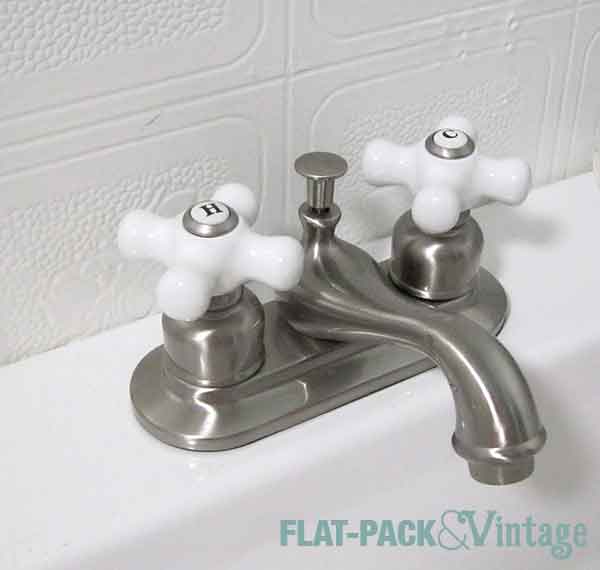
We also picked up this lovely little faucet. I am absolutely crazy about the ceramic X shaped knobs. I really wanted a wide-spread faucet with 3 separate pieces instead of everything mounted on a base, but that was over 3x the price so I had to pass on absolute perfection. This one is pretty near perfect though and so I think I can live with that.
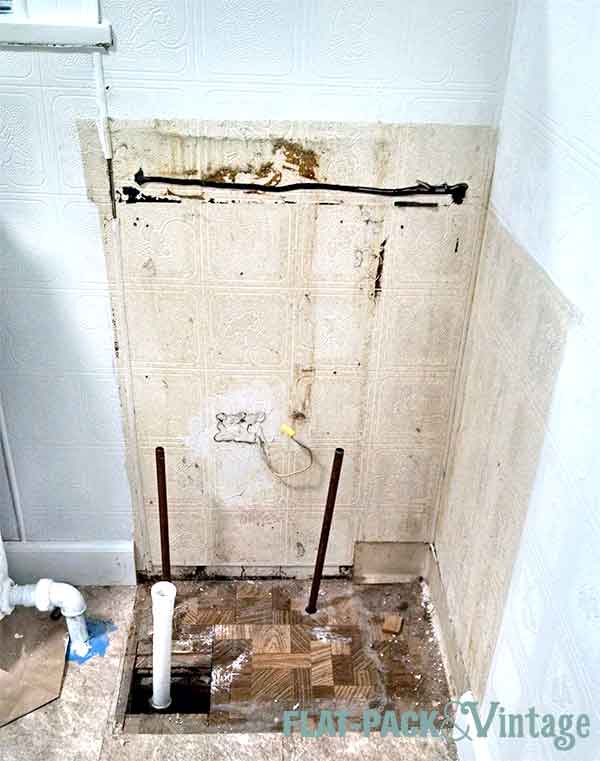
Next up we ripped out the old vanity/sink. In the process we discovered the shut-off valves were not completely shutting off the water so we had to turn off the water to the house, cut the pipes, install new compression fittings and shut-offs, turn the water back on, and pray we go it right. We did.
The line of black on the wall is some rubbery adhesive I had to scrap off with a putty knife and razor blade. And that wood pattern on the floor? Vinyl. Thank god they covered that up is all I can say! Then we measured where all the pipes were and cut holes into the base of our new vanity cabinet.
Luckily the sink did not come attached to the cabinet (which would have been good to know before we hauled the whole box up the stairs) so it was easy for one person to lift and the other to make sure everything was lining up right. We also discovered this cabinet was deeper than our old one (measure people!) and had to rip off the baseboard on the side wall (it will be going back once we trim it down).
The sink itself just attached with some silicone caulk so that was pretty simple.
Getting the faucet in was another story… Actually the faucet was easy, the pop-up assembly was the hard part. If you’re just switching out a faucet you may not even need to deal with the pop-up assembly (drain stopper) but if you’ve added a brand new sink you’ll definitely have to. The instructions that came with ours were AWFUL. Part of the reason we were confused was that the part that came with our faucet was designed for a sink with an overflow, but our sink didn’t have that. We got it all sorted out eventually though.
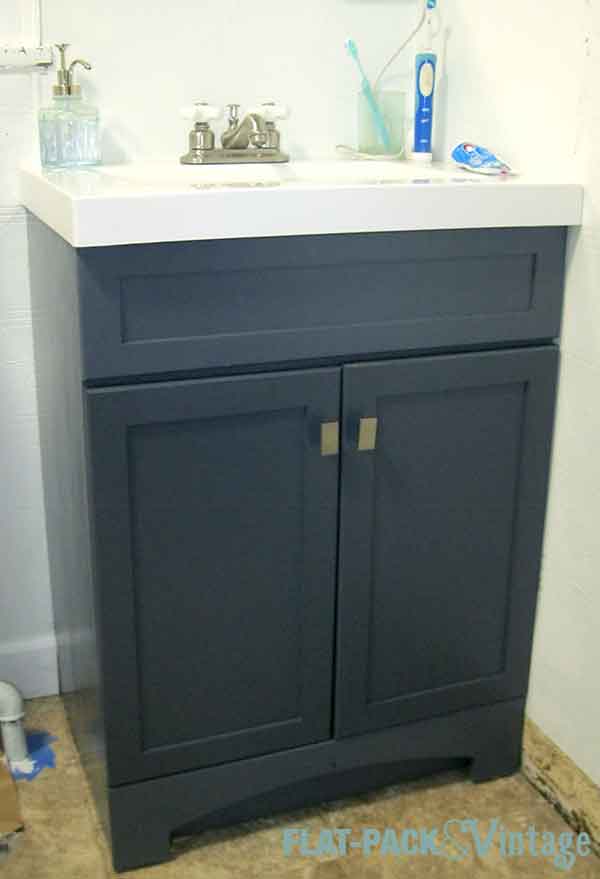
So we’ve got the vanity cabinet in place. We’ve got the sink installed. We’ve got the faucet installed. Go us! Me being me, this wasn’t good enough, so then I painted the vanity. The existing color wasn’t bad, but there were going to be some additions made and I didn’t want to stress over getting an exact finish match.
I wish I could tell you the color I used, but I can’t. I started out with Benjamin Moore Temptation (Advance, satin) and thought it was too light, so I brought it back to get it re-tinted. The next shade darker was French Beret and the awesome paint people couldn’t quite get that because of the amount of white in the previous mix so the color is somewhere in between the too, but still probably closest to Temptation (you can see the difference where I tried the dark version on the doors, although you can barely tell in real life).
Looking pretty good, right? Not even the vanity is done yet though…
This is basically the mantra for the bathroom. The vinyl is nasty, the wood is in sorry shape, and the wall color is just plain unfortunate. Because I don’t know when we’ll have the budget for a full gut job I’m pretty much painting every square inch of this room.
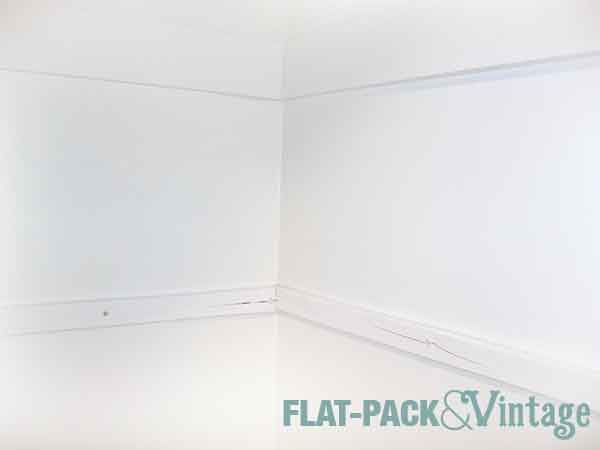
After I tackled repairing the window trim, I moved on to demo-ing the closet shelves. Their configuration was bizarre and they’d be annoying to paint around. Unfortunately as I removed them I notice the paint on the inside of the closet was peeling badly. Bad news: it will probably need to be skim coated. Good news: it’s the inside of a closet so I probably can’t fuck it up too badly.
Luckily, skim coat or not, priming everything was the first step. Ok, second step. First I scraped off all the really lose bits with a putty knife and filled in what I could with spackle and then primed everything in sight.
Doesn’t that already look so much better? The beigey vinyl was absolutely disgusting and even just seeing it primed makes a huge difference! The tub base got primed too since it is certainly not staying it’s previous dirty-beige color.
Personally I think it’s easier to paint trim first. My dad disagrees so this is a clearly a personal preference thing. Coat #2 for me though was all the vinyl and trim. You don’t need to worry about a clean edge, just a smooth edge. Basically any paint you get onto the next surface you’re going to paint make sure you feather out so you don’t see brush lines or blotches. The trim, vinyl, and closet interior are all Clark + Kensington (satin) tinted to Benjamin Moore Simply White (mostly because I had it to use up… I was unimpressed with Clark + Kensington for trim*). The trim did get a second coat of Benjamin More Advance too.
Aaaaannd now for some blue (Behr tinted to Benjamin Moore’s Opal Essence to be exact). MAN this was a long time coming! This is just a sneak peak for you. The bathroom’s not quite done yet–we have a new vanity and faucet to install, closet shelves to rebuild, and additional shelving to add.
Up next we tackle our pretty dismal counter space issue.
*Still love it for walls though–that and Behr are my go-to for walls, but BM Advance has won my heart for trim, cabinetry, and furniture.
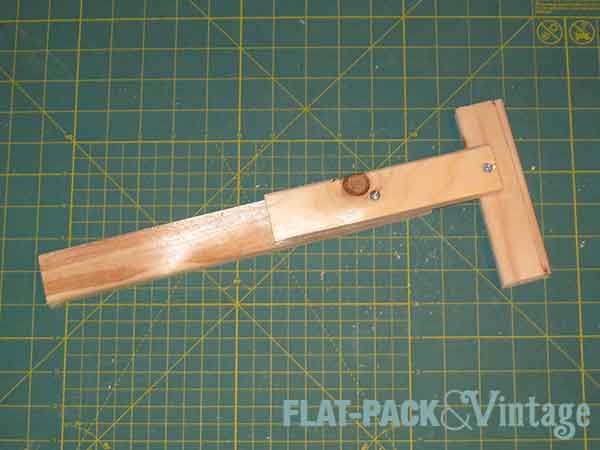
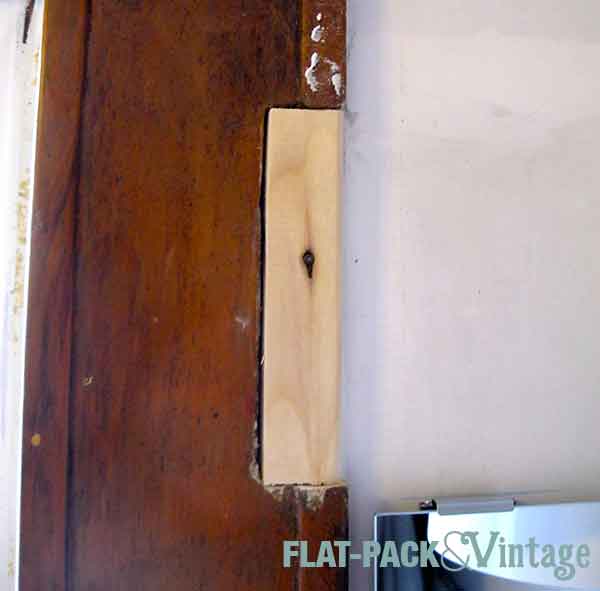
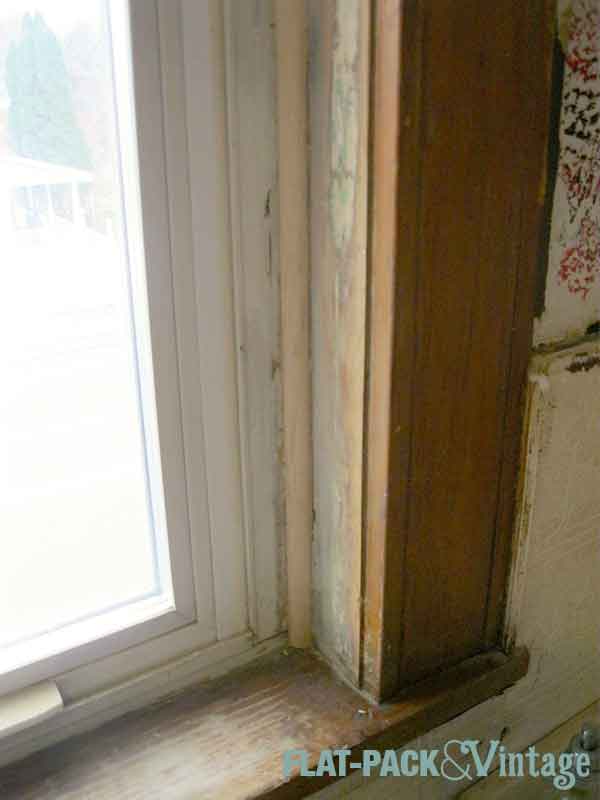
Besides patching the giant fracking hole in the wall there were a few other areas that needed some TLC before we could paint. The most noticeable of these was chunk of window trim that someone cut out to fit in that nasty old light fixture.
We’ve acquired a number of random wood scraps from other projects and luckily the 1×2’s were the perfect depth for the trim. Unfortunately they were just a hair too wide… and the only power saw we have is a miter saw. No sane person is going to put their fingers that close to the blade to shave a 1/4″ off of a 1×2. I could have picked up a hand saw, but it would still be difficult to safely hold a piece of wood that narrow while cutting. Instead I screwed a few pieces of wood together to lengthen the piece I needed to cut and keep my fingers well away from the blade.
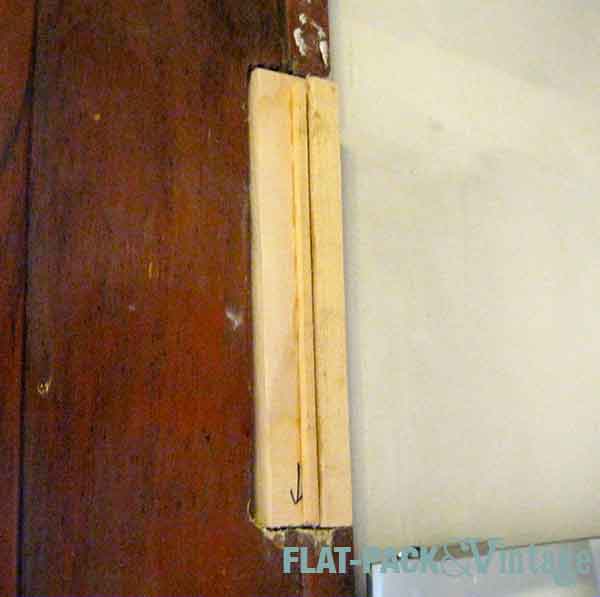
The wood got cut and I still have all my fingers. Win. It’s a little too small, but I can hide a gap a lot more easily than I can hide a too-wide piece of wood.
Then I picked up a couple little strips of craft wood to mimic the raised edge detail on the out edge of the trim. It was a little too high so I used my palm sander to knock it down a bit.
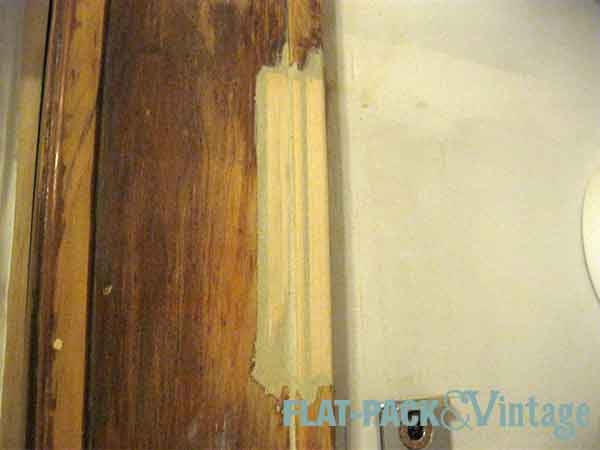
After that it was a just a matter of evening everything out with wood filler.
The only thing left to do now is paint it since there’s no way you can stain over this patch job and have it look good. Luckily I wanted white trim anyway.
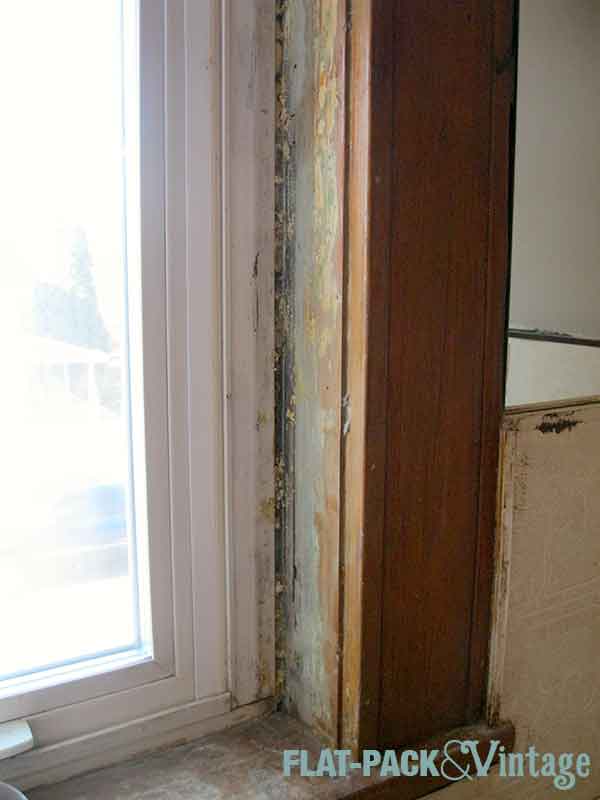
There was more work still to be done on the window frame though. When we moved it we ripped out some glass shelves that were built in across the window. This left some glue residue behind and exposed some foam insulation along the window frame. Not so great to paint over.
I started by sanding off the glue residue. Next I cut down some quarter round to hide the exposed insulation. Based on the other windows in the house there should be a larger piece of trim here (that would actually cover all the damaged wood) but I didn’t think I could find something that would work without a lot of custom cuts and routing and I just don’t currently have the equipment for that.
We pulled off the closet door earlier too, opting for a curtain instead (the cat box is in the closet so it needs to be very easily accessible). Unfortunately the hinges were glued in place so we had more glue residue to contend with. I scraped and sanded the glue off, but left the holes. The curtain should hide them well enough and if we (or future owners) decide to swap the door back in it will be way easier.
I also ripped out the old shelves in the closet since they’re rather haphazard. The closet’s getting painted too and I’ll be putting up new shelving so it looks more organized. I’ve also added the person who installed these shelves and painted over the screws eleventy-billion time to the People I Want to Punch list. There’s a fair amount of peeling paint I’ll need to scrap off the walls too. Urgh.
Everything else was just a matter of patching the normal holes, cracks, and gaps that you encounter when painting.
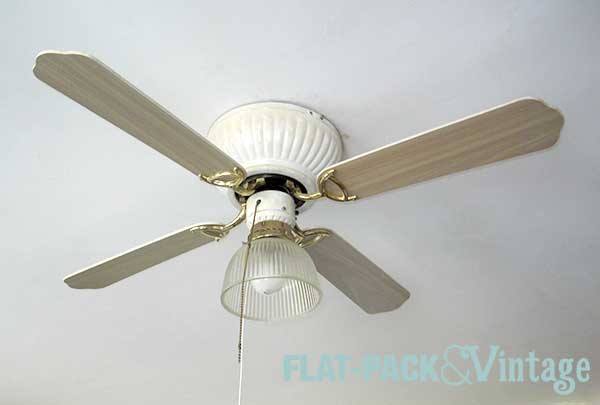
A couple weeks ago we started tackling some of the upstairs light fixtures. The vanity fixture I ordered for the bathroom finally arrived and the bedroom ceiling fan was making some unpleasant grinding noises (and wobbled when you pulled on the cords) so we decided those 2 were up next.
We started in the bedroom and dismantled our sad old fan.
No one will miss it.
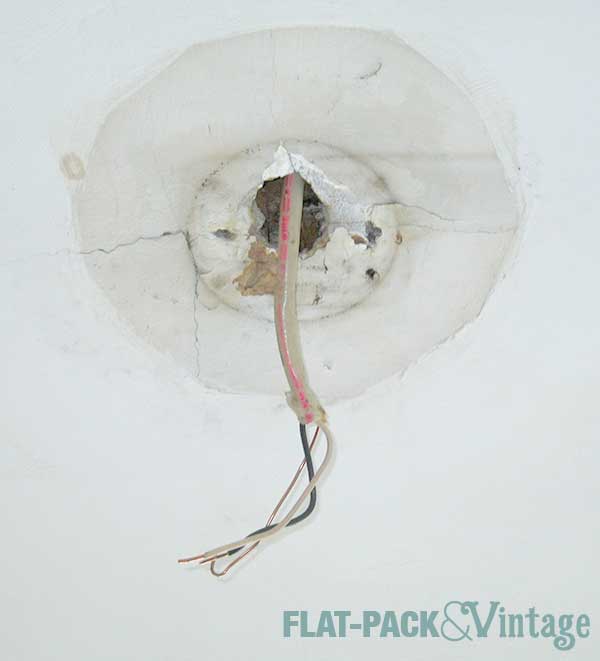
I got a little excited at first because there was modern wiring! Modern wiring! There would be an electrical box! This would be as easy as it should be! Right?
Wrong.
There was modern wiring, but no electrical box and the new fan was significantly heavier than the wussy little old fan. Shit. We’d have to do this right.
The good news was that since we were on the second floor we had ceiling access through our unfinished attic. The bad news was that the way the joists and other supports were configured left no space to mount an electric box over the existing hole. So we had to cut a new hole in our ceiling. Joy.
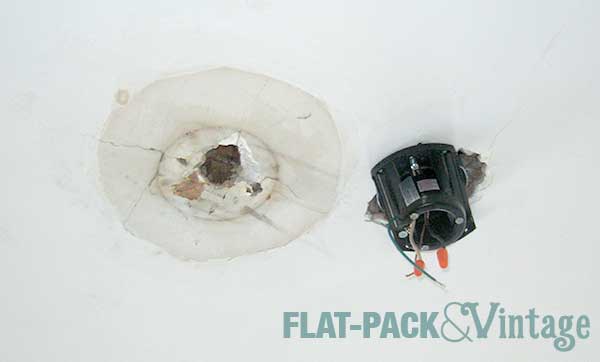
Cutting a hole in old lath and plaster (with a crappy saw no less) is mildly terrifying. At least it was for me as I stood underneath and started yelling at Matt to stop what he was doing because some hairline cracks started to form. The take-away here? Just buy a good saw already.
We did successfully cut a hole in the ceiling AND securely mount an electrical box. After that installing the fan was pretty easy.
Much better! I agonized over a ceiling fan for he bedroom for a while (like I agonize over nearly all lighting choices). The ceiling fan was a must since we don’t have A/C and I don’t sleep well if I’m too warm. I eventually settled on the Hampton Bay Havana ceiling fan from Home Depot. I usually think the fake palm blades are a little kitschy, but something about this one just seemed nicely textural without totally screaming tacky Palm Beach hotel.
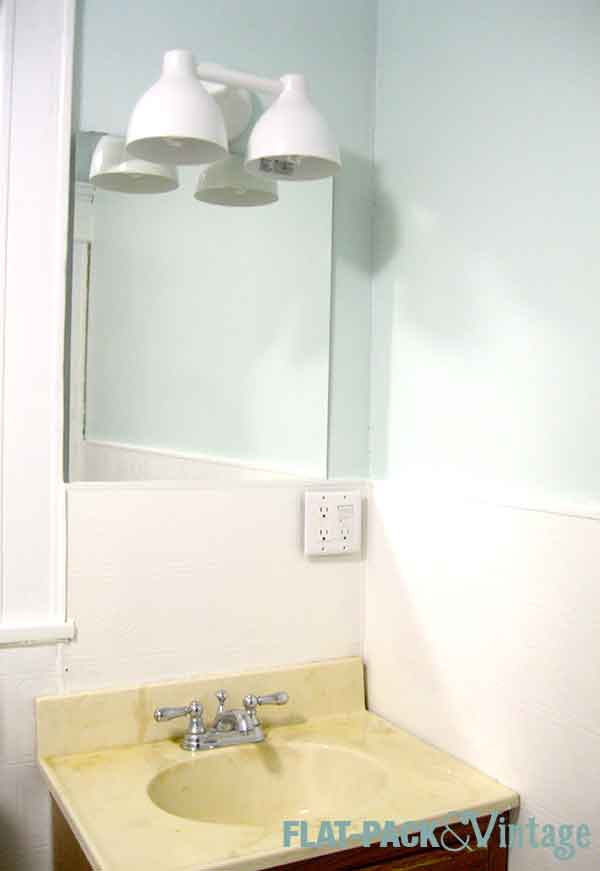
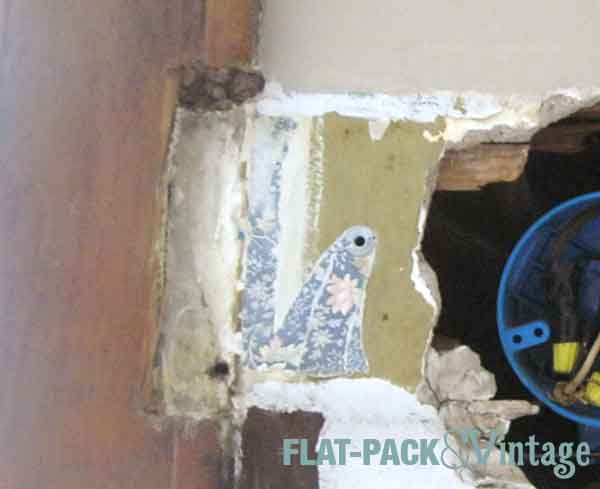
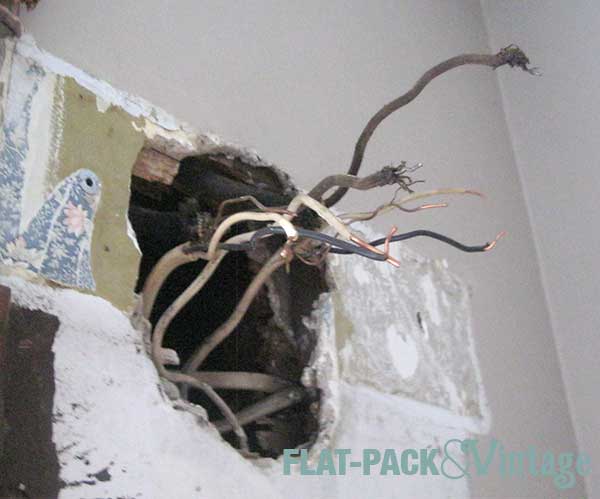
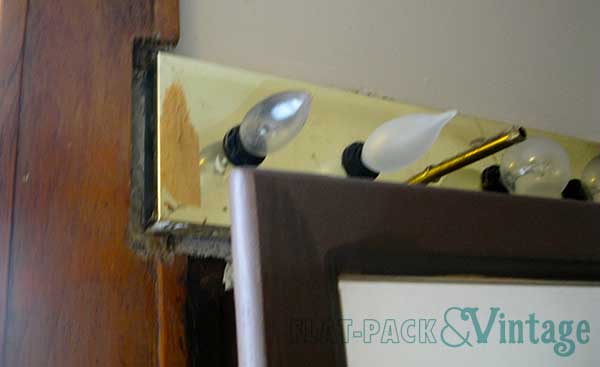
Up next was the bathroom. That fugly vanity light HAD to go. During our demo process we discovered the medicine cabinet was hiding a hole in the wall and the light fixture was hiding even more of a hole in the wall.
And an absolute cluster fuck of wires. You can’t really see what’s going on here, but there are 3 hot wires, 4 neutral wires, and 2 grounds for a single light fixture. There was some crazy splicing happening to get everything hooked up to power and to the light switch above the sink.
We also had to enlarge the hole in the wall so we could center the new fixture the best we could and, you guessed it, install an electrical box. It was a giant headache and we were left with a big honking hole in the wall that needed patching (more on that later) but once again we had a HUGE improvement over the the existing light (even if it’s a little crooked at the moment).
We went with the Contour Double Sconce from West Elm and I may order another on the these for the downstairs bathroom cuz I kind of adore it.
You know how I was all gung-ho about the bathroom makeover a few weeks ago? You might be wondering what all I’ve accomplished.
Absolutely nothing.
Well, ok, I painted the radiator and we replaced the vanity light (with a new crooked vanity light that will need to be re-positioned ), but other than that, absolutely nothing… and given how long ago I started this it does really feel like nothing.
Yup, that’s right. I caught the plague or mono or malaria or something* and it lingered forever. Even after I thought I was better it came back with a vengeance and I had to take another sick day from work. I was utterly exhausted constantly and one of my co-workers tried to convince me I might be pregnant (spoiler alert: I’m not). So yeah, I was barely getting off the couch much less tackling the bathroom. Then the first weekend I was back to normal we skipped town to visit family (and attend a friend’s baby shower. A comic book themed baby shower with no stupid games. This is why we’re friends).
Once I finally felt alive again we started working on reinforcing our windows (they’re triple paned so super heavy and awesomely sound-proof, but the upper sash is only supported by some plastic pieces which have started to give way) and getting the porch painted before it’s too cold
Now we have a giant hole we need to patch around the new light (thanks for nothing previous homeowners) and THEN we’ll probably actually started painting.
*I actually still have no clue what I had except that it wasn’t strep. After over a week of a killer sore throat and general malaise I was really hoping it would be so antibiotics would actually make it all better. No such luck, I just had some sort of wait-it-out viral awfulness.
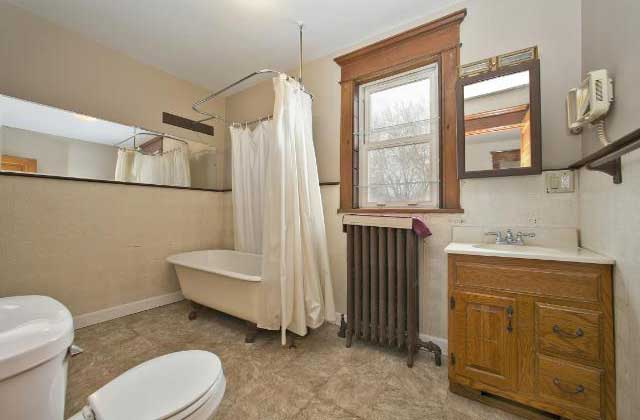
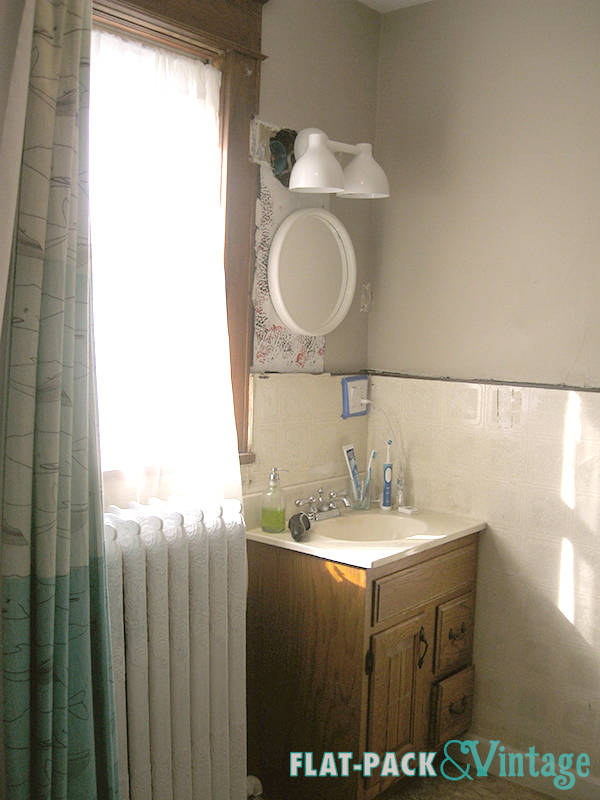
Now that the bulk of the kitchen work has finished up and I can move on to the Brown Bathroom of Despair. Seriously, this room is pretty bad.
I’m pretty sure it looks even more dismal in person.
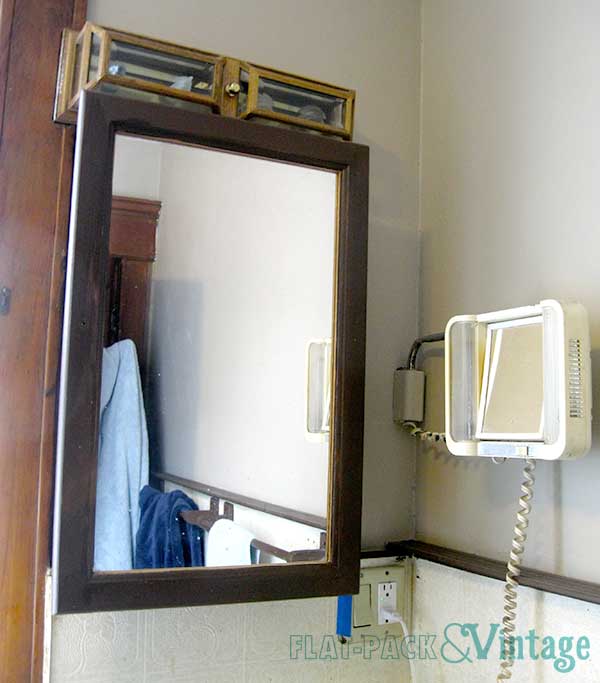
First there’s the scary make-up mirror which looks like it was added in the 80’s and really only gets in the way. There’s also trim molding running along the perimeter of the room about half way up the wall, only it’s not attached vertically like molding, but rather horizontally like a little shelf. A crappy, narrow, and slightly angled shelf.
Then there’s the fact that the medicine cabinet is not recessed into the wall and someone apparently cut a chunk out of the window trim so that absolutely fugly light would fit.
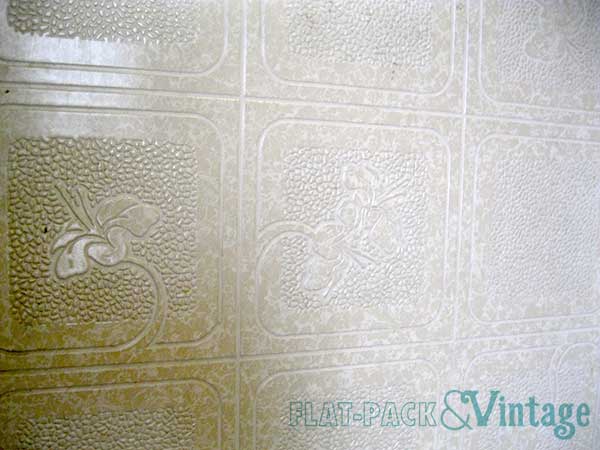
And then of course there are the walls themselves. They’re covered with this rather nasty tile board stuff that looks like a bad vinyl floor but on the walls.
Plus everything is just brown… except the inside of the closet which is dark dark green.
Brown is not really my favorite color for interiors, but it can be done very well. This however is not one of those times. I want a bright and airy, spa-light bathroom. I want it to feel clean. The beige and brown and general dated-ness of the fixtures just make this room feel old and dirty.
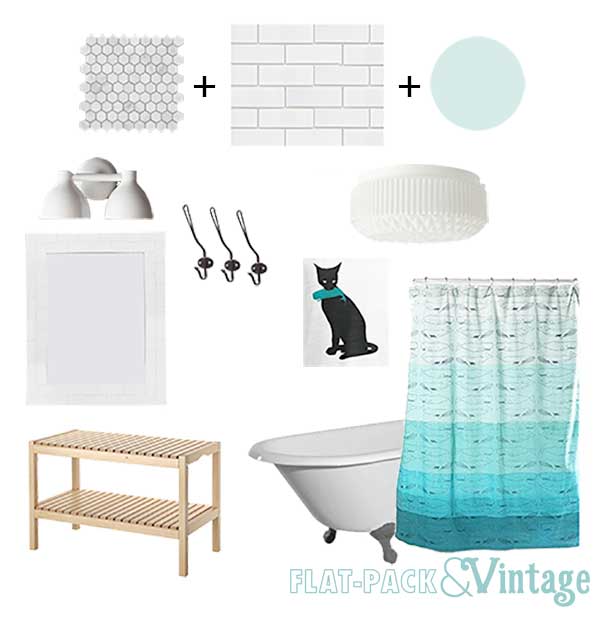
So here’s the plan:
I want the permanent surfaces and fixtures to feel like they belong in the house so the hex tile is an absolute must for me. I know subway tile is ridiculously trendy at the moment and trendy rarely overlaps with classic, but I think it will work really well with the hex tile for the vintage bathroom vibe. I’m going to try and talk Matt into keeping the clawfoot too.
The medicine cabinet will get replaced with just a mirror since we have plenty of storage between the bathroom closet and hall linen closet. The fugly wall light will also get upgraded to this beauty from West Elm and the towel bars near the sink will get switched to wall hooks by the tub.
I’m going to remove the closet door and replace it with a curtain so the cats will still have easy litter box access without the litter box being all up in yo’ face. The incredibly haphazard shelves are going to get switched out as well.
We have the shower curtain and cat print already and I happen to really like them. They’re fun and quirky without being too juvenile feeling. I also happen to like the white and aqua color combo for the bathroom since I think it works for the light and spa-like feel I’m going for.
The bathroom makeover is also going to be done in stages since ultimately we’re just going to gut the thing. In the meantime though I’m going to demo all the gross non-permanent fixtures (medicine cabinet, light, towel bars, trim) and paint ALL THE THINGS. Sometime (probably well into the future) we’ll rip out the tile board and floor, even out the walls, tile the floor and walls, and replace the vanity.
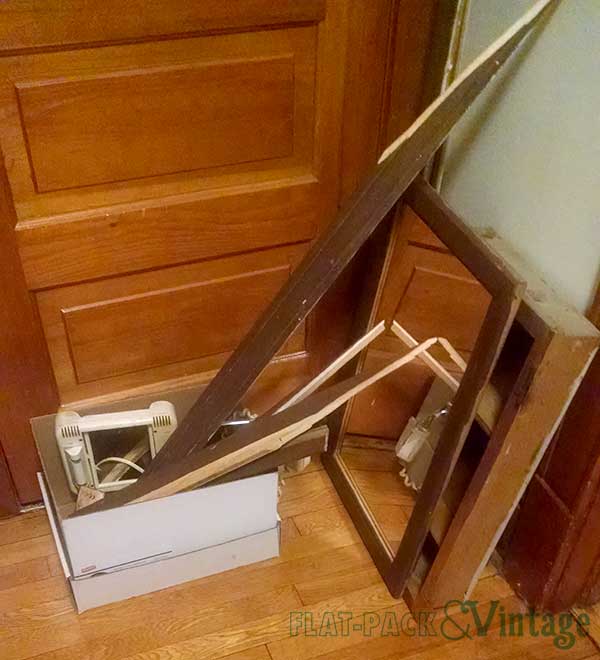
This weekend we tackled the demo work and after many stripped screws, and much swearing* we had a pile of this:
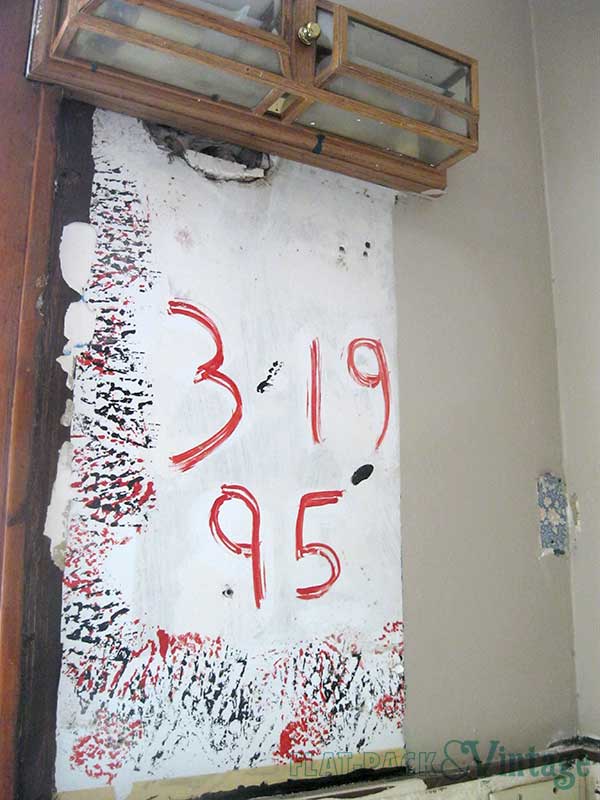
And were left with this:
Gee… I wonder when the last decor update was? The light is staying (temporarily) since the West Elm one is back ordered and I don’t want bare wires sticking out of the wall.
Stay tuned for paint!
*Those stupid trim crappy-not-really-a-shelf pieces were nailed in with 3″ nails. Overkill much? The whole bathroom demo process was a great stress/anger management tool. Stress at work? BEAT THE SHIT OUT OF SOME FUGLY TRIM WITH A HAMMER. Annoyed because your husband ruined one of your favorite paint brushes? SMASH THE CHEAP WOOD TOWEL RACKS TO BITS BECAUSE YOU CAN’T UNSCREW THEM.
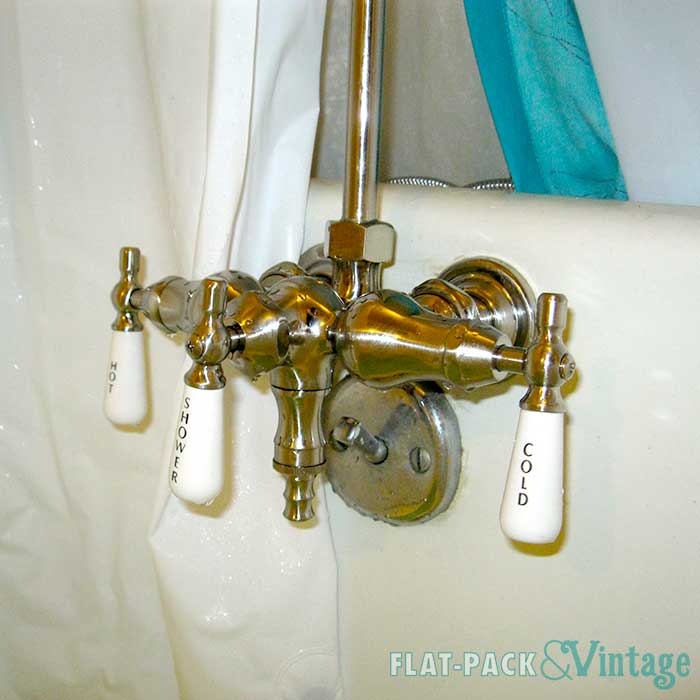
You may have noticed I’ve mentioned our tub faucet a couple times without any actual closure. Our existing faucet is leaky as hell so we decided to replace it. Also the shower curtain rod was was too small for the tub (a little narrow and about a foot too short). We even got all fancy and splurgey and found this complete set (faucet/shower/curtain surround) at Vintage Tub and Bath because I figured if we were going to do it, let’s do it right.
The new faucet arrived the day before we left for Europe. We somehow got it into our crazy heads to try and install it that night so the faucet wouldn’t be dripping the whole time we were gone. Two hardware store runs later we discovered we couldn’t actually turn the water off. There’s no shut of at the tub and the main house shutoff wouldn’t budge and we were afraid of breaking it. So we called a plumber to replace the shutoff valves.
All right! Let’s do this thing!
We tackled the kitchen faucet last weekend and were going to do the bathroom at the same time… only when we went to start disconnecting everything we discovered that there are no actually hex nuts connecting the pipes to the faucet so our wrench was rather useless. We had to give in at this point since it seems like the only way to disconnect everything was to cut the pipes and redo the connections. We’re at least smart enough to know that is probably beyond our skill level at the moment so we had to call a plumber again, this time to replace a faucet. Argh…. this should have been a pretty simple DIY job but our quirky house has conspired against us.
This morning the plumber came and nearly didn’t do the work. Our old faucet was not up to code (faucet below the spill the line) and our new faucet didn’t fix this issue (since this is hard to on a clawfoot where the faucet is mounted to the tub wall). Plus, St Paul is trying to change their codes to get rid of 2 handled shower faucets because apparently there’s a risk of scalding (????). We’re not worried about either of these issues since A) the spill line issue is only an issue if you have sewage backing up into the faucet (and contaminating your drinking water) which we’re not terribly concerned about on the second floor (and we haven’t found a record of this ever actually happening) and B) scalding could only be a possible issue if your water heater is set hot enough which ours is most certainly not. Ultimately we had to sign a waiver but we now have a non-leaky (and gorgeous!) faucet and shower head! … and a stupid-expensive plumber bill. Nrghhh.
Expensive, but oh-so pretty! And much more authentic to the house! Granted, nothing else in the bathroom besides the tub are terribly authentic to the house (more like authentic to the 70’s-80’s), but I’m working on it!
The new shower head sits significantly higher than the old one and can definitely comfortably fit even the tallest people I know (and I know some crazy tall people).
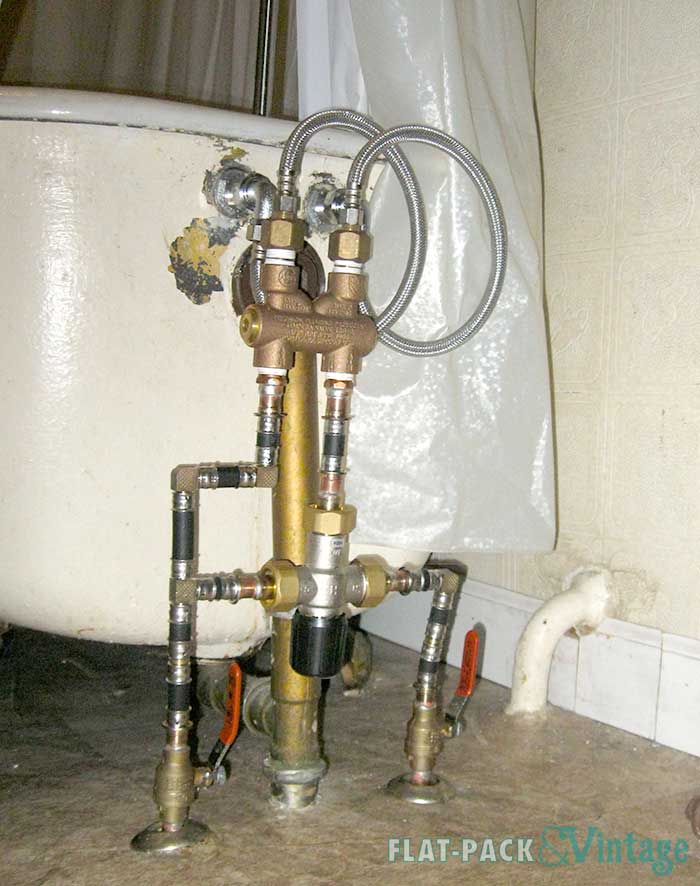
We also ended up with this….er… beauty. If we had anticipated this we could have ordered nice looking connections. But then, if we had anticipated all of this we might have just asked the plumber to repair the existing faucet. The good thing here is that the shower curtain hides it pretty well.
Unrelated: I’ve been home sick all day, pumping myself full of pain killers/fever reducers and vitamin C and really just trying to sleep it off. Apparently I get some trippy dreams while sick. This time my house was invaded by a squirrel that both my stupid boy cat and my cousin’s six year old son tried to befriend. The Bloggess was my neighbor and was giving me gardening advice, like growing carrots in bathroom vanity drawers and trying to keep renegade kale from taking over the yard. Then my Dad and step-mom came over and we went to the Gay 90’s (not exactly NSFW, but possibly mildly questionable for work) to watch the drag show but ended up playing a bizarre Clue-like game (involving the Waco, TX siege) instead. The really sad thing is I can see exactly how my sub-conscious arrived at about 99% of this.