Sorry I psyched you out last time, but some things just happen on their own time. I have a real nursery reveal for you now, although there are still some minor tweaks that still need doing.
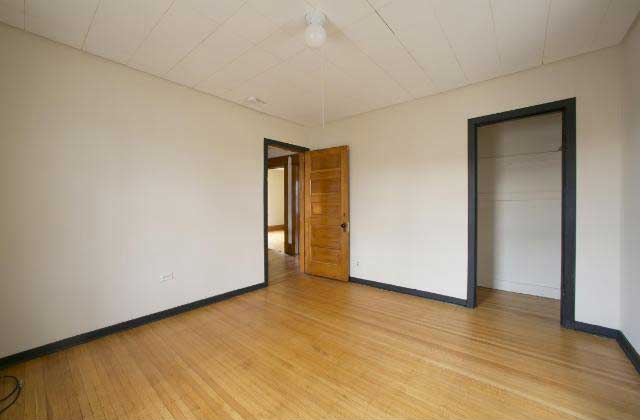
Let’s start with a quick reminder of what we started with, shall we?
Ugh.
Acoustical ceiling tiles, paneled walls (you can’t tell they’re paneling in the picture, but trust me), and trim belonging to basic modern construction instead of a Victorian beauty. So we demoed All The Things, put up new drywall, routed some custom casings, got me sent to the ER, and cobbled together the rest of the trim pieces from stock moldings.
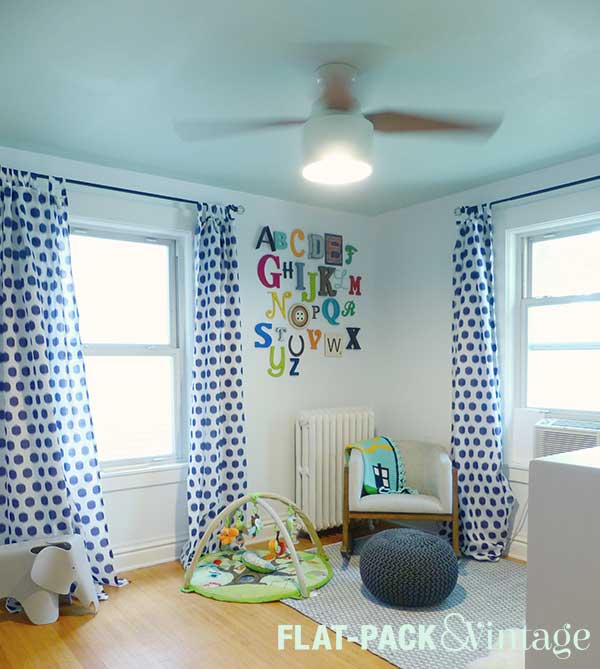
I opted for a colorful ceiling and muted walls partly because of the ceiling fan, and partly because I figured there would be more busy-ness happening on the walls and floor and didn’t want too much color competition.
Oh, and if you’re wondering if that is a TARDIS blanket on the chair, yes, yes it is!
I also wanted something fun and whimsical, without being overly baby-ish. The animal portraits are by Yago Partel and actually from a calendar I picked up a few years ago. I fell in love with the mobile from Haba because it was bright and stimulating for baby, but still pretty artsy.
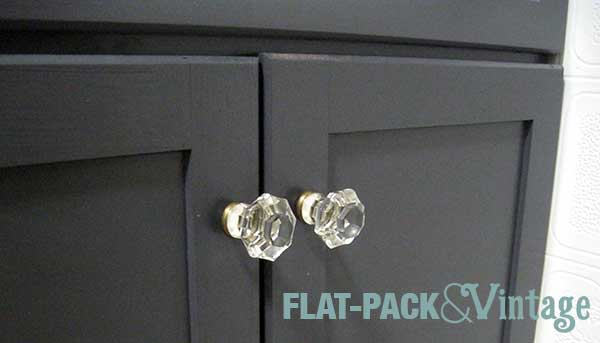
The chifferobe was apparently built by my great-grandfather and has actually managed to stay in use over the years. I re-painted it, but still feel like it’s missing a little something.
I didn’t want a specific changing table in the room, but I did want a changing station. We picked up the cubby organizer from Target and added a bit more structure by screwing on an MDF backing. I absolutely love the animal bins and they’re great for stashing towels, blankets, and small loose toys. All the diapering supplies are on a rolling cart, perfect when mom’s a righty and dad’s a lefty.
Things that still need doing:
Install a real closet door
Refinish the main bedroom door
Hem the curtains
I’d really like to move the alphabet wall down a smidge (it’s a little too high and driving me bonkers) but that would be a significant undertaking (and Matt will probably kill me for even thinking about it)
There’s actually not too much left given that we unexpectedly lost about 3 weeks of work time thanks to this kiddo arriving early. Now that we have a newborn around, it may be some time before the room is 100% done, but it’s mostly there and fully functional so it seemed like a good time to show it off!
I wasn’t prolonging the suspense on purpose, I swear! I was all on track to have this finished up last Sunday, but I work up feeling crappy (sore throat, muscle aches, no energy At All) so I managed to get 2 things (out of 7) hung in the dining room and then just sort of passed out. Ugh. By Tuesday I hauled myself off to the doctor and got a positive Strep Throat test (wheee) and wasn’t back to 100% until the end of the week…it was rough.
But FINALLY I have the full reveal for you!
First let’s step back and look at what the dining room looked like when we bought the house.
There are worse rooms out there for sure, but this one was seriously lacking in style. The light fixture was kind of dated, the ceiling was pretty awful (and saggy in spots–thankfully this was only from the tiles pulling free of their staples, and not actually structural), and the bookcases served no useful purpose whatsoever in here.
In fact, the bookcases just sort of turned into catch-alls once we moved in.
So we ripped out the bookcases, repaired the wall behind one and the floors under both, replaced the baseboards, painted everything, ripped out the old ceiling, added a tin ceiling, extended the crown molding, and added a new light fixtures.
Oof, that made me tired just typing all of it… but the end result is so completely worth it!
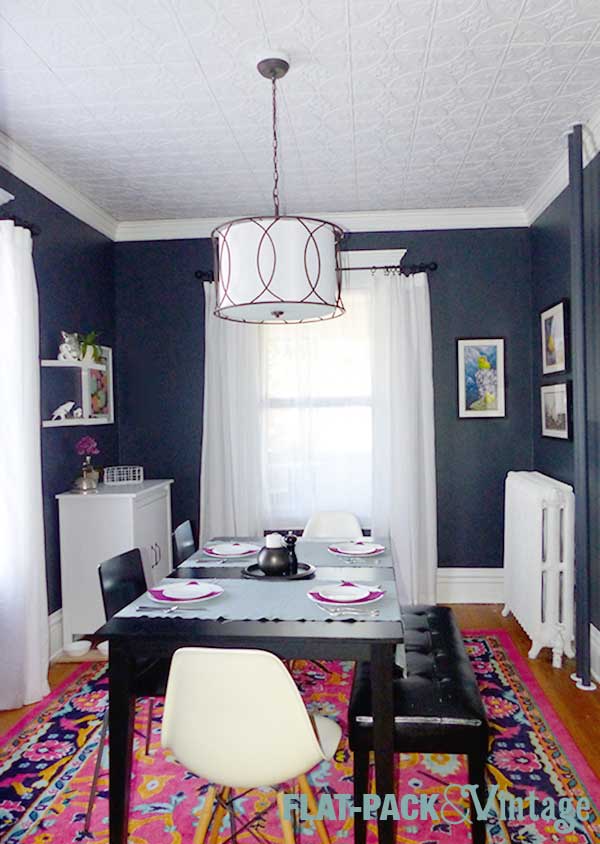
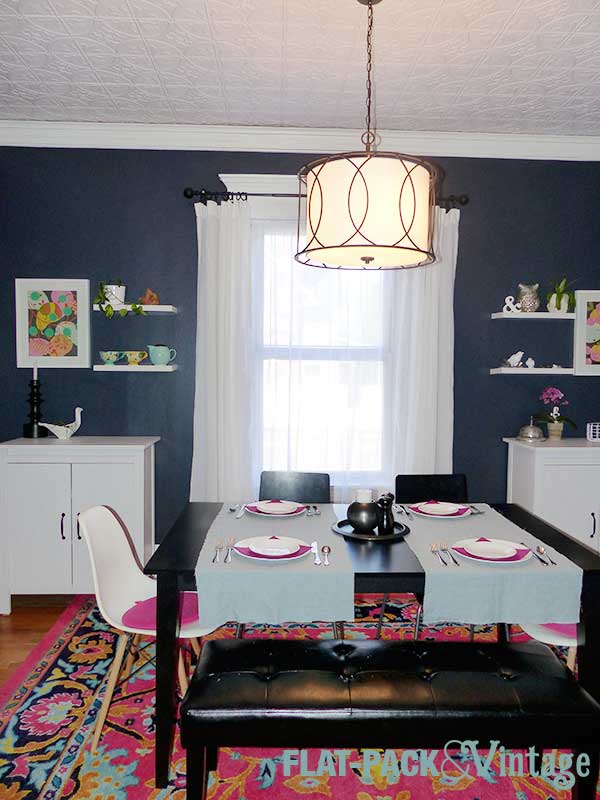
I LOVE how dramatic this turned out! We don’t have separate formal and casual dining spaces so this is it. I didn’t want to take it too formal since we’re not terribly formal people, but I still wanted the room to make a statement and I think I succeeded.
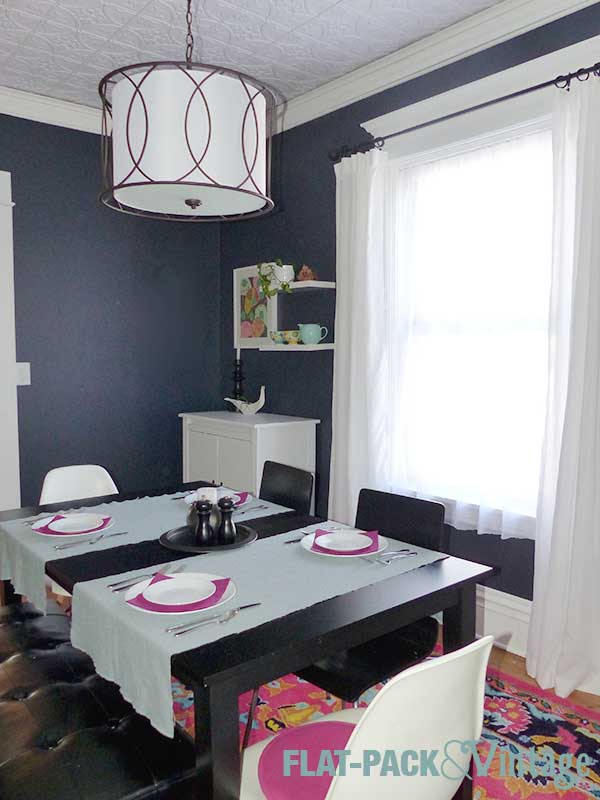
Pssst… don’t tell anyone, but those table runners totally aren’t hemmed yet. I only recently scored some blue-gray linen at Hancock Fabrics for like 70% off so they’re only cut down to size at the moment.
The ceiling and rug make me kind of stupid-happy. Matt was deeply suspicious of my desire for a hot pink rug, but after he saw it in person he admitted it really pulled the room together.
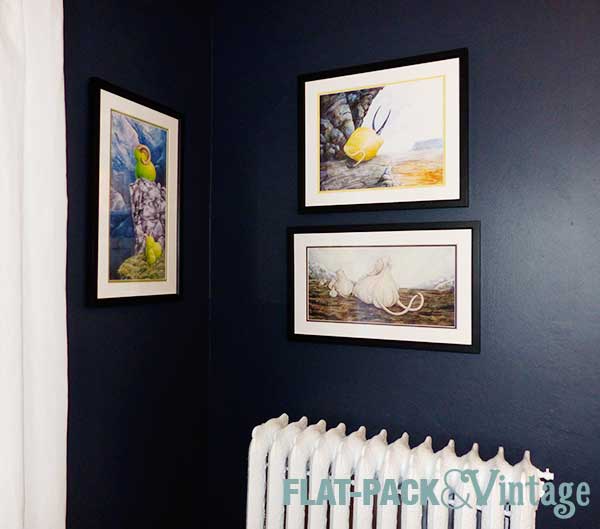
We also found a spot for my Weird Fruit prints by Ursula Vernon.
And my Queen Victoria made of garbage postcard that a friend sent me.
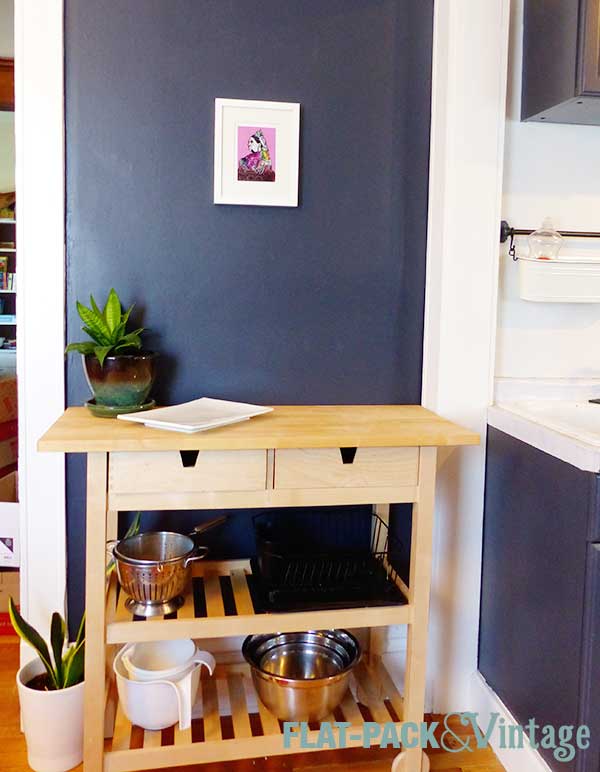
This sideboard is pretty much our dishwashing station since we have very limited counter space in the kitchen. It’s ok, but I hope to upgrade it at some point. I hope to upgrade the IKEA buffets on the other side of the room too, but sometimes you just have to accept some temporary solutions while you’re on the hunt for perfection. Plus, nothing ever is really done when you’re a creative–there will always be something you decide to tweak at some point. It’s done enough though (actually looking a like a finished room!) and we can finally have people over again!
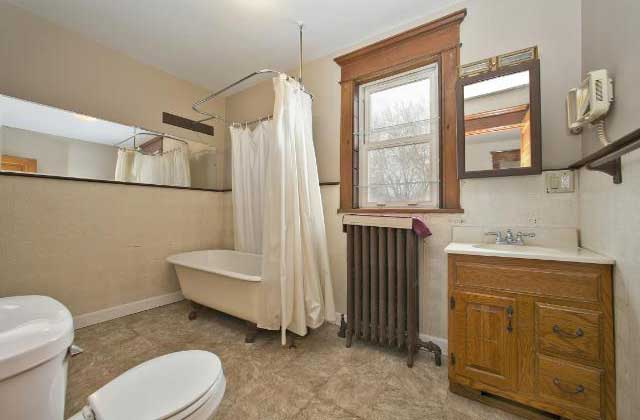
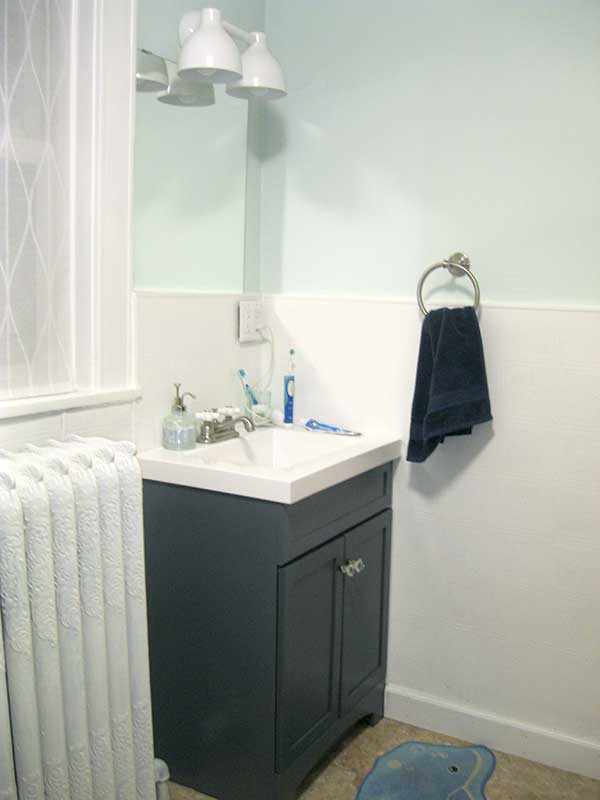
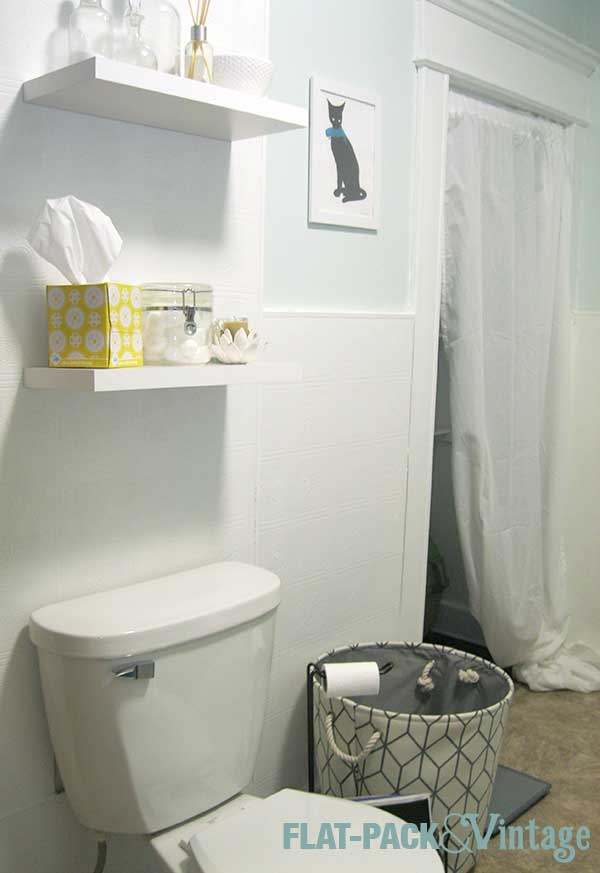
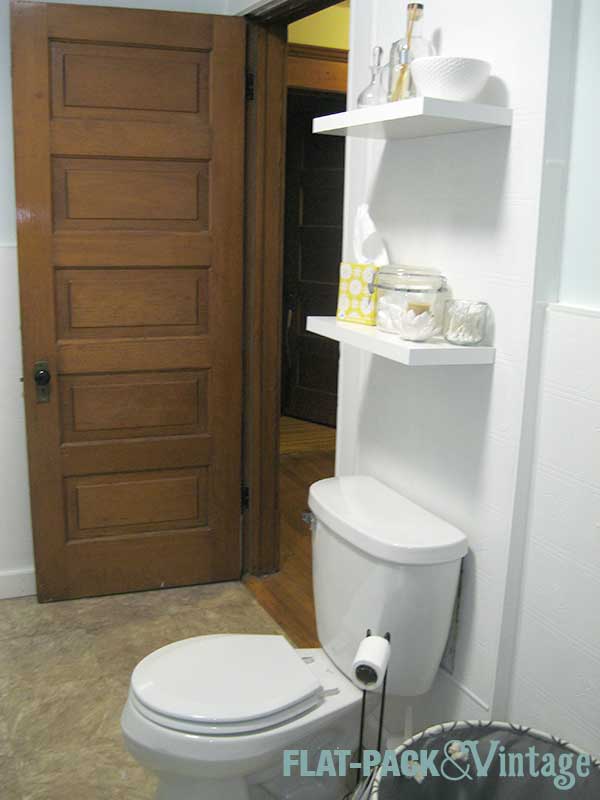
If you remember the picture I posted a while back of the tub base you’ll see I changed my mind. Originally I had freshened it up with a coat of white paint and some gunmetal feet, but after bringing in the vanity I wanted something to balance the dark gray. The tub base is now the same color as the vanity and I repainted the feet silver for contrast. We also had to bite the bullet and hire a plumber to switch out our old leaky tub faucet.
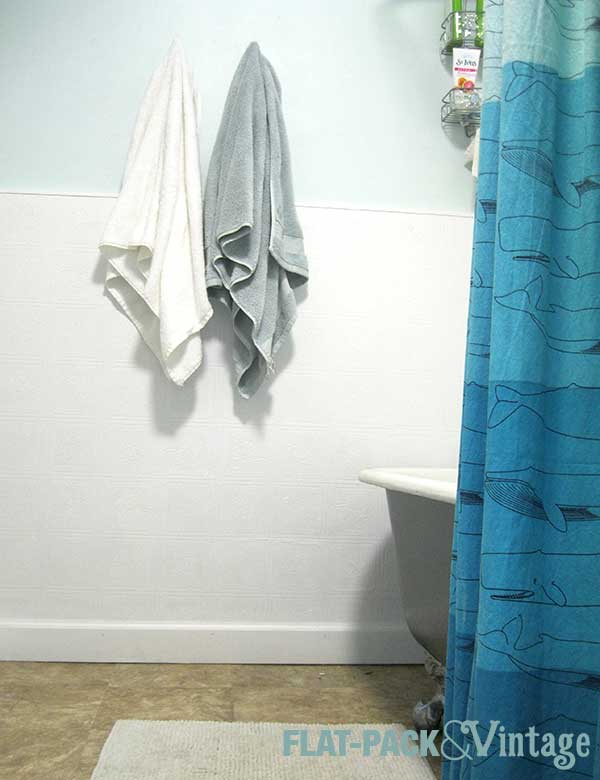
We now have a bright, practical closet and convenient towel hooks (before the only hooks were on the back of the door–nowhere near the tub).
I brought in some more shelving above the toilet and added a hamper since laundry always seems to pile up in the bathroom.
*Long term plan is to gut most of the room, tile the floor and partially tile the walls, but it will be quite a while before that happens because moving our cast iron tub and radiator is definitely not a DIY.
My dad and step-mom came into town over the weekend to see our place to help us out with some projects. My dad is kind of awesome (HI DAD!) and super handy and good with the problem solving necessary for old goofy houses. Our project for the weekend was light fixtures. Pretty much every light fixture in our house I want to replace, but I’ve never changed a hard-wired fixture before since I’ve only ever had apartments. I figured I could learn how to do it through the power of You Tube, but it would be way easier to have someone here walking me through.
Sometimes I do actually make smart life choices.
The first light fixture we tackled was the family room ceiling fan which by far the most depressing of the 3. We had also been unable to use the fan feature since the fixture was hanging out of the ceiling a good inch so we were not terribly confident in how well it was attached. We also figured it would be the most difficult to deal with.
We were right.
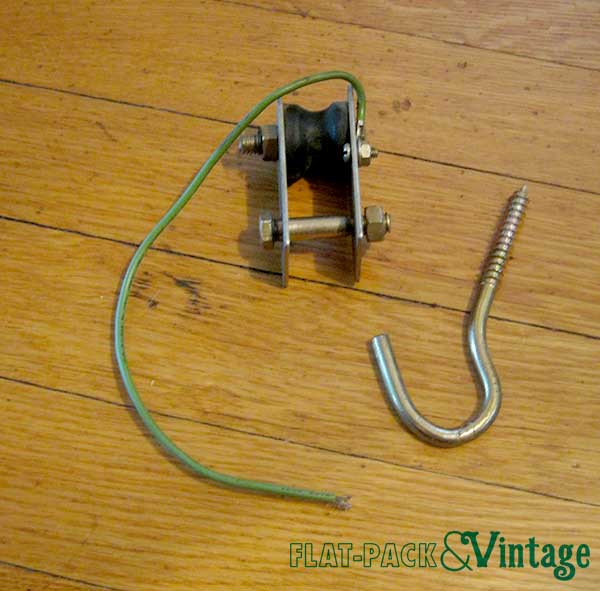
The concern was that the electrical box in the ceiling would not actually be rated for ceiling fans. The problem ended up being there was not actually an electric box in place. Nope. Instead there big ol’ screw in a ceiling joist that the fixture was hanging from. Awesome. I don’t actually have pictures of this step since I guess I was mildly in shock, but these are the pieces we pulled out:
WTF house?
The good news was that with the joist right there we had a really solid mounting surface. I’m not really going to go into detail about what we did because it’s one of those things is not technically up to code (although still an improvement over what was there) so I don’t really want to encourage people. But let’s be honest here, in an old home sometime you gotta do what you gotta do.
There was also a decent amount of ceiling damage that the previous medallion was covering. I hadn’t planned on putting a ceiling medallion in the family room, but at this point it seemed like the easiest solution and I was ok with it.
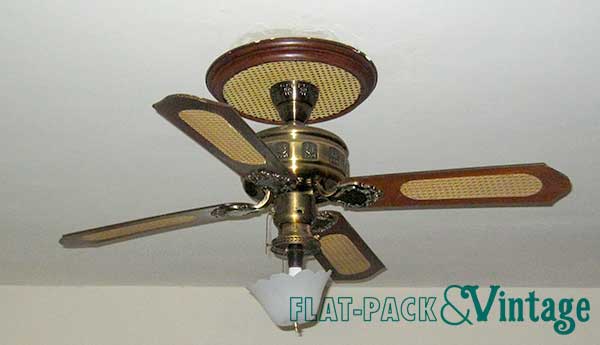
Better already. At this point we could actually install the damn fan. Word of advice for old home owners, the hot and neutral wires may not be color-coded so you want to make sure which is which (our existing fan had the hot and neutral reversed… joy). Everything else was following the instruction manual that came with the fan. Putzy and annoying, but not ungodly difficult.
Ta-da! Much much better. The light patterns from the water glass are a little crazy and it kind of turns into a disco in here when the fan is on so we’re going to try and find some more diffuse bulbs. This fan was also the last of its kind within 100+ miles of us. I was scouring websites trying to find a ceiling with a some-what vintagey feel (nearly impossible) and finally found this one at Menards and had to drive out to Apple Valley to snag their last one on clearance.* It’s a Turn of the Century Cosmos 52″ fan in satin nickel. The blades were faux birch on one side and silver on the other, so I just painted them white. It looks a little stark in the room at the moment so it may get another mini-facelift down the road.
The two other ceiling fixtures we tackled also had two more radically different mounting situations.
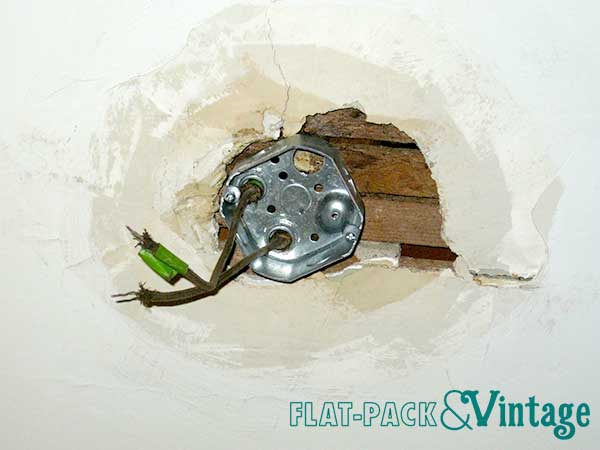
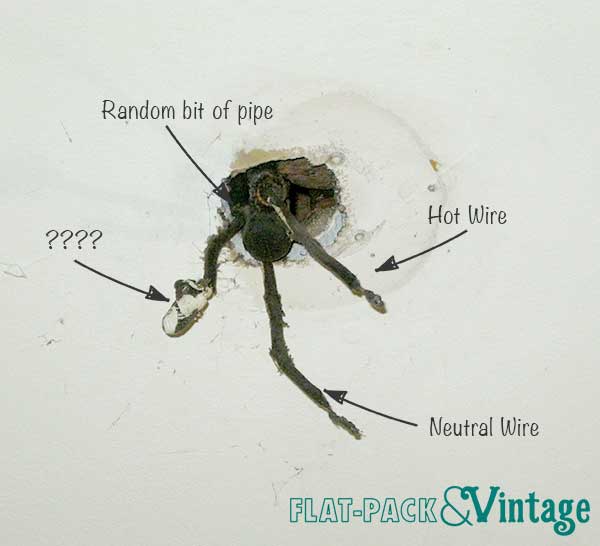
The living room was also lacking an electrical box AND there was what appeared to be a gas pipe (from when the house probably had gas lighting) jutting out of the hole. There was also a third random wire which in any sort of normal situation would have been the ground wire, but I think I’ve already established that we’re pretty far removed from normal in this house. (The picture make the wires look a frayed and scary, but they were actually in surprising good shape, just dusty)
Even though we were pretty sure the gas pipe was no longer connected to anything we didn’t want to mess with it so we went back to the hardware store (again) to get a different electrical box (technically an extender since it had an open back). We also had to saw a chunk out of the ceiling medallion to have it fit around the new electrical box that would be sticking out of the ceiling a bit.
Then we had to run to a hardware store (yet again) to get a 100 watt equivalent candelabra bulb** since the single bulb in the living room is kind of wussy and we wanted the bulb in before we finished assembling the fixture.
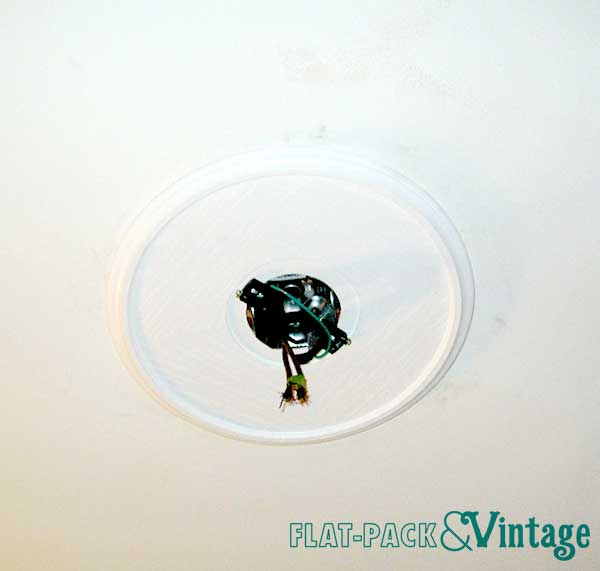
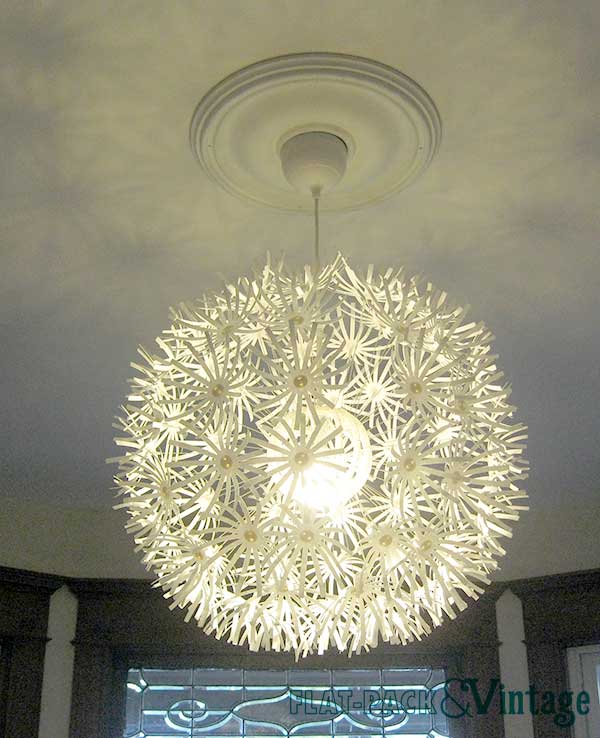
Voila! Matt was skeptical about the crazy mod MASKROS light in our fairly traditional (architecturally) home, but I think everyone was pretty impressed with the end result.
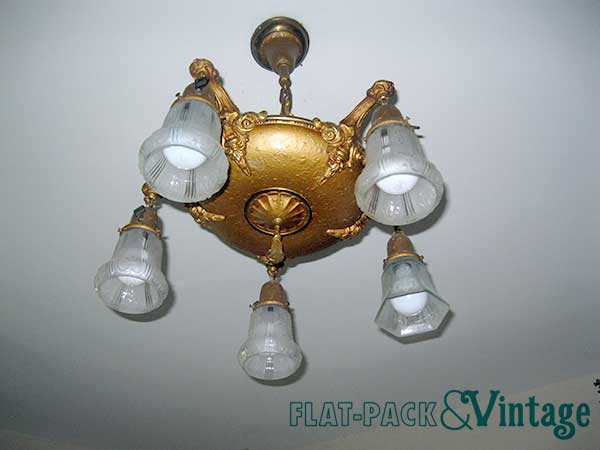
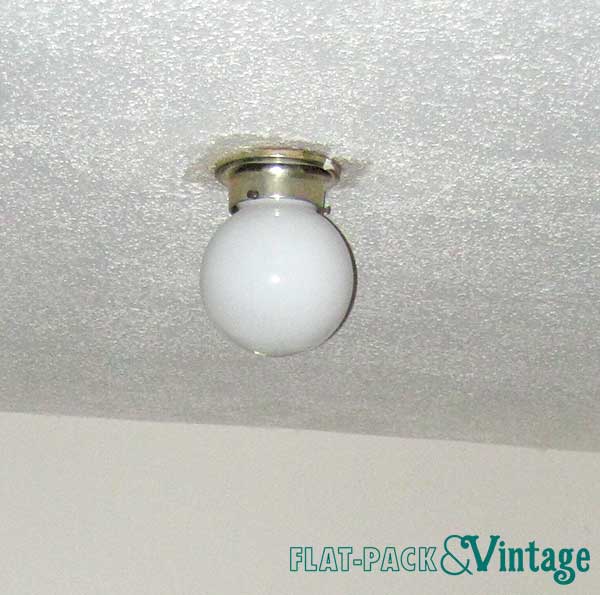
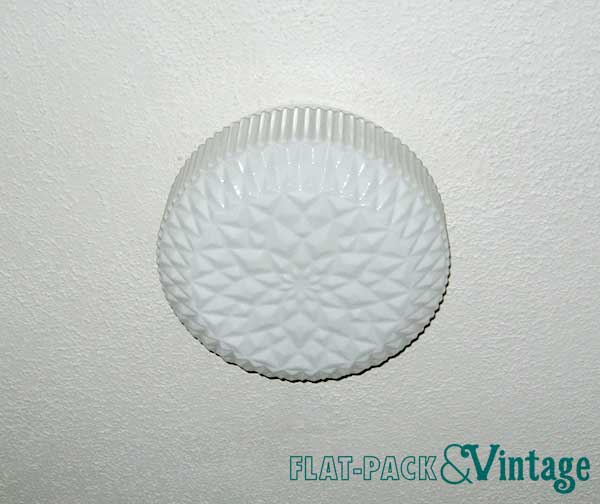
Fixture #3 was the entry light. The existing light was this boring old (tiny) globe.
Not awful, but not so nice either. Enter IKEA once again. I loooove their VANADIN ceiling light. Pretty simple, still interesting, cheap, and most definitely not a boob light. It also has a vintagey vibe. Win.
When we took this light down there was actually an electrical box in place. WOOT! And color-coded hot/neutral wires! There was even a ground wire! Craziness! ….Only the electrical box wasn’t exactly attached to anything. Luckily there were screw holes in the base of the VANADIN so we were still able to solidly attach that to the ceiling with drywall screws.
This one was hands down the easiest out of the three fixtures we tackled, but nothing was 100% as straightforward as it should have been so it took the whole weekend to change out three lights. We also answered the slightly lesser asked question of “How many people does it take to change a light fixture.” Answer: 4 people, 2 days, and 5 trips to the hardware store.
* The lighting department guy is possibly my hero and also quite probably thinks I’m just slightly unhinged. I called to make sure the store still had it and how much it was since the website didn’t list the price. $80. “I’LL BE THERE IN 20 MINUTES!” *click*
** The only 100 watt equivalent candelabra bulb we found was at Lowes and the closest one to us was in West St Paul. Nearly every frickin’ road our GPS tried to direct us down was closed. And then we went the wrong way on the expressway on our way home. It was an adventure… or something.
First house decorating success–the kitchen is DONE! Mostly at least, I’m still looking for a new ceiling light and we plan to add some custom shelves into a corner, but all the major work is done!
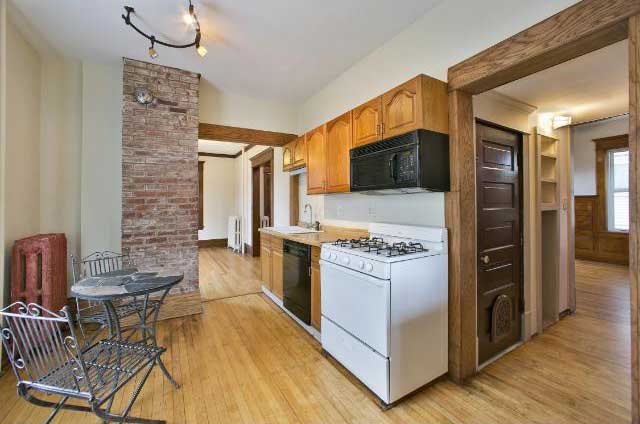
Remember the kitchen before we moved in?
Yeah… a little blah, a little drab, and then there’s that funky red radiator.
Also crappy faucet, ugly florescent bulb, and some pretty nasty counter tops. Oh, and like next to no storage and work space.
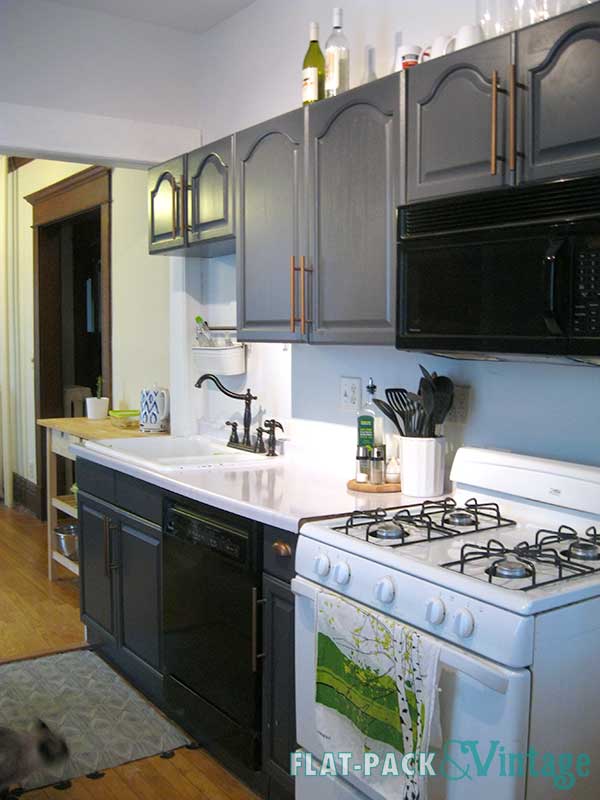
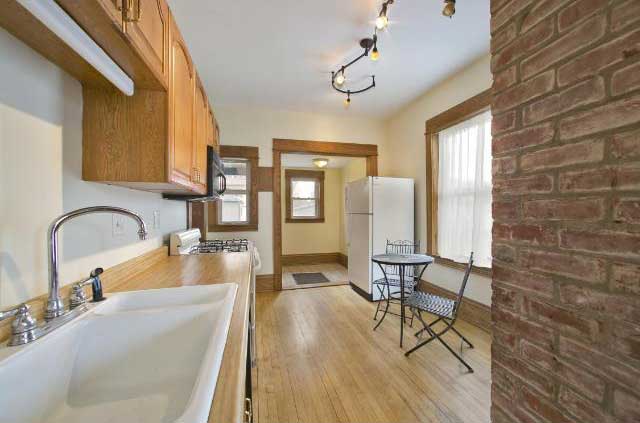
Not anymore! Now we have contrast, brightness, and a photo-bombing cat.
Also storage, extra work space and a functioned mud room/shoe dumping ground.
There’s still finishing work to be done–artwork and window treatments along with the lighting and shelves I mentioned before–but the paint and counter revamp have made a HUGE difference. The eagle-eyed among you may also have caught that we flipped the hinge side on the fridge. This is, in theory, a pretty easy job but was made slightly annoying since our fridge is rather old so things did not unscrew well and the plastic caps that cover the unused holes just sort of crumbled when we tried to pull them out. Having your fridge door swing so it opens into your work area instead of cutting off your work area is extremely useful though.
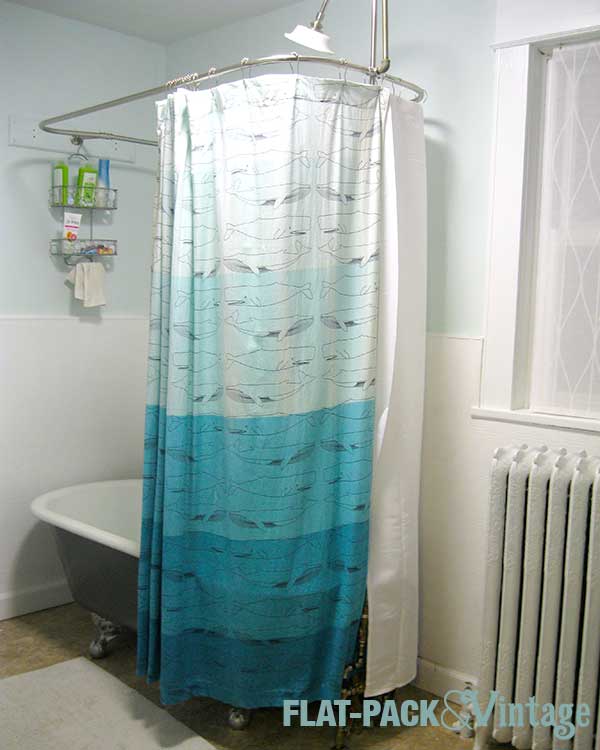
You may have noticed I’ve mentioned our tub faucet a couple times without any actual closure. Our existing faucet is leaky as hell so we decided to replace it. Also the shower curtain rod was was too small for the tub (a little narrow and about a foot too short). We even got all fancy and splurgey and found this complete set (faucet/shower/curtain surround) at Vintage Tub and Bath because I figured if we were going to do it, let’s do it right.
The new faucet arrived the day before we left for Europe. We somehow got it into our crazy heads to try and install it that night so the faucet wouldn’t be dripping the whole time we were gone. Two hardware store runs later we discovered we couldn’t actually turn the water off. There’s no shut of at the tub and the main house shutoff wouldn’t budge and we were afraid of breaking it. So we called a plumber to replace the shutoff valves.
All right! Let’s do this thing!
We tackled the kitchen faucet last weekend and were going to do the bathroom at the same time… only when we went to start disconnecting everything we discovered that there are no actually hex nuts connecting the pipes to the faucet so our wrench was rather useless. We had to give in at this point since it seems like the only way to disconnect everything was to cut the pipes and redo the connections. We’re at least smart enough to know that is probably beyond our skill level at the moment so we had to call a plumber again, this time to replace a faucet. Argh…. this should have been a pretty simple DIY job but our quirky house has conspired against us.
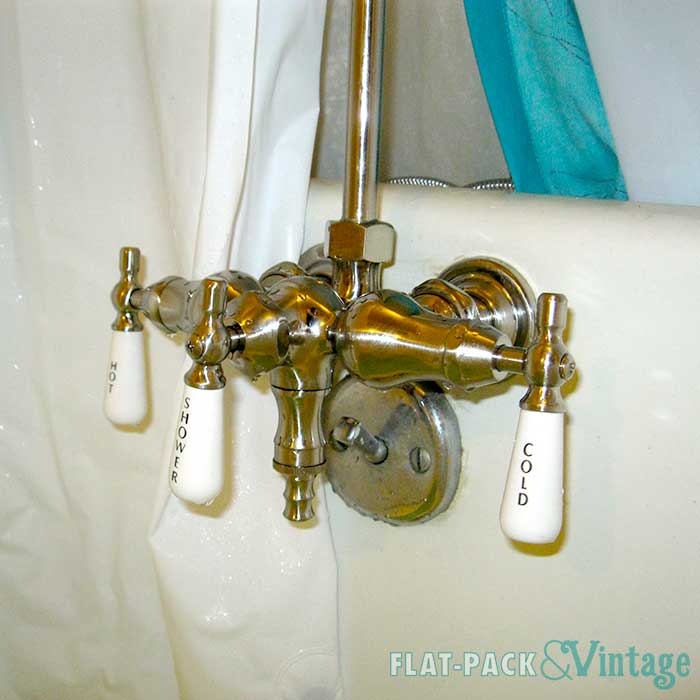
This morning the plumber came and nearly didn’t do the work. Our old faucet was not up to code (faucet below the spill the line) and our new faucet didn’t fix this issue (since this is hard to on a clawfoot where the faucet is mounted to the tub wall). Plus, St Paul is trying to change their codes to get rid of 2 handled shower faucets because apparently there’s a risk of scalding (????). We’re not worried about either of these issues since A) the spill line issue is only an issue if you have sewage backing up into the faucet (and contaminating your drinking water) which we’re not terribly concerned about on the second floor (and we haven’t found a record of this ever actually happening) and B) scalding could only be a possible issue if your water heater is set hot enough which ours is most certainly not. Ultimately we had to sign a waiver but we now have a non-leaky (and gorgeous!) faucet and shower head! … and a stupid-expensive plumber bill. Nrghhh.
Expensive, but oh-so pretty! And much more authentic to the house! Granted, nothing else in the bathroom besides the tub are terribly authentic to the house (more like authentic to the 70’s-80’s), but I’m working on it!
The new shower head sits significantly higher than the old one and can definitely comfortably fit even the tallest people I know (and I know some crazy tall people).
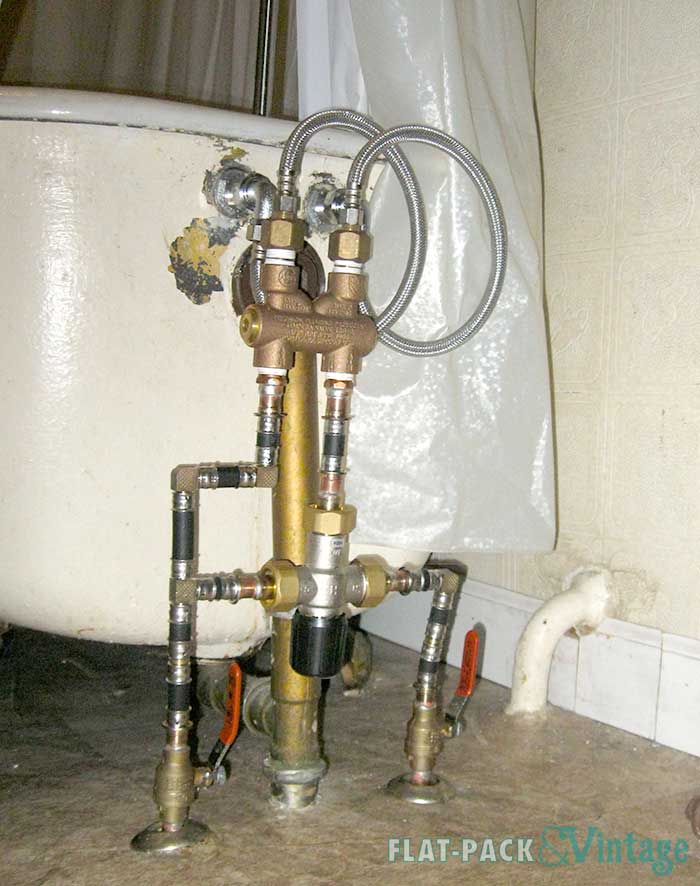
We also ended up with this….er… beauty. If we had anticipated this we could have ordered nice looking connections. But then, if we had anticipated all of this we might have just asked the plumber to repair the existing faucet. The good thing here is that the shower curtain hides it pretty well.
Unrelated: I’ve been home sick all day, pumping myself full of pain killers/fever reducers and vitamin C and really just trying to sleep it off. Apparently I get some trippy dreams while sick. This time my house was invaded by a squirrel that both my stupid boy cat and my cousin’s six year old son tried to befriend. The Bloggess was my neighbor and was giving me gardening advice, like growing carrots in bathroom vanity drawers and trying to keep renegade kale from taking over the yard. Then my Dad and step-mom came over and we went to the Gay 90’s (not exactly NSFW, but possibly mildly questionable for work) to watch the drag show but ended up playing a bizarre Clue-like game (involving the Waco, TX siege) instead. The really sad thing is I can see exactly how my sub-conscious arrived at about 99% of this.
Last week we attempted a temporary counter top fix because the butcher block patterned laminate is just a little gross. We’ll get new counter tops at some point, but not until we replace the sink and possibly the cabinets as well. In the meantime I ordered a roll of Instant Granite (in a marble pattern) for $60. It’s basically a heavy vinyl sticker you can put over your counters. It actually seems pretty awesome for a temporary solution and it’s renter friendly since it peels off without damaging the existing counters… we’ll see how it holds up over time.
As a refresher, here’s what we started with:
We actually flubbed the first installation attempt and had some issues with the sink corners and gaps that needed patching… it wasn’t pretty. Then I watched a shit ton more videos on people installing this and then tried again. It worked WAY better the second time. Here’s the quick rundown:
Step 1: Clean the counters. I used a general surface cleaner and then wiped everything down with rubbing alcohol and remove any trace nastiness. (Vodka works too if you say, lose the cap to the rubbing alcohol and then your husband dumps it out so no one accidentally spills it).
Step 2: Cut the vinyl roughly to size. Since we screwed up the first time we didn’t have *quite* enough the second time so I actually had to do a little piecing. In a perfect world I would have done the back splash as a single piece and then the entire flat surface as a single piece (we ended up using 4 pieces and one very tiny patch stuck in the sink corner). Maker sure you give yourself generous borders since you can always cut it down later, but adding on patches looks weird.
Step 3: Mist the counter top with water and start adhering the vinyl working in about 10″ sections at a time. Peel off the backing and have your buddy hold the non-working section of vinyl up while you smooth out bubbles with you hands and a make-do squeegee (like a credit card… we had a hard plastic kitchen scraper that worked great). Smooth everything out the best you can then expose a little more adhesive and slowly press that onto the counter.
Step 4: To fit the vinyl around corners (like if you have a over mount sink) a heat gun or hair dryer helps soften the the vinyl to make it a little more pliable. Corners are tricky though so my absolute best advice is to take some vinyl you know will be extra and experiment a little bit. Like wall decals, this stuff just peels right off. It can take a little muscle, but doesn’t seem to leave an residue or gunk behind.
We put on the back splash first (the above pictures are from attempt #1) and trimmed it so there was about a 1/4″ overlap on the horizontal counter surface since it can be a little difficult to line up a giant sticker perfectly. If you’re feeling bold you can try and do everything in one piece, but be warned, it is a little unwieldy. We also caulked around our sink after putting on the vinyl since any caulk had long since disappeared. Any remaining bubbles in the vinyl you can poke a pin hole in and then re-smooth.
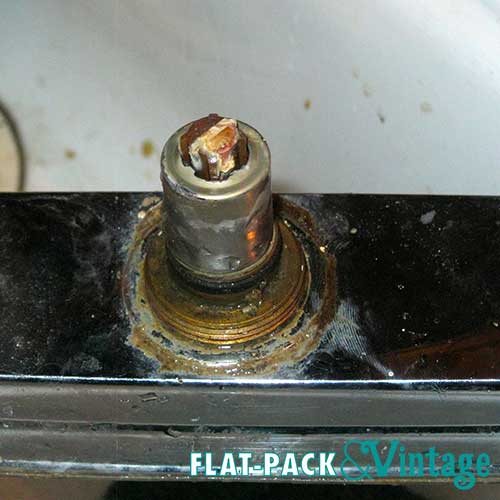
We also made things easier by taking out our faucet. Our existing one was nasty and had the wussiest water flow ever. We had a plumber look at it before and he thought the problem was in the faucet and not the pipes. As we removed the old faucet this started to look increasingly probable.
The hardest part of replacing the faucet was getting the old one out. There are lock nuts that hold the fixture in place, but are not any sort of watertight barrier whatsoever. Whoever put this faucet in though had puttied these into place. We finally had to break one to get it off (thankfully they were plastic). Everything else went about as smoothly as you would expect.
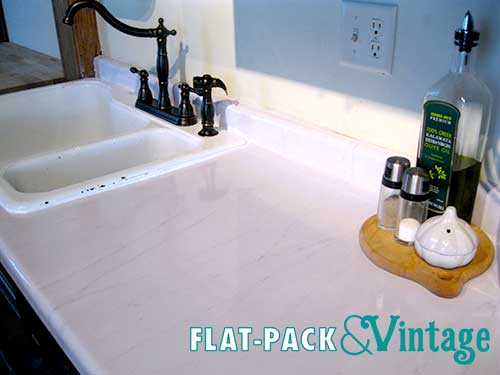
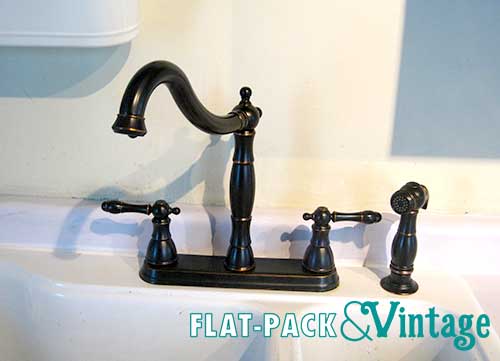
Now we have some much better looking counters and a beautiful and fully functioning faucet (We chose Premier’s Charlestown faucet)! Replacing that thing actually completely solved our water flow problem!
And now doesn’t our sink just look especially awful?