We have walls, we have a light fixture, and we now have mouldings!
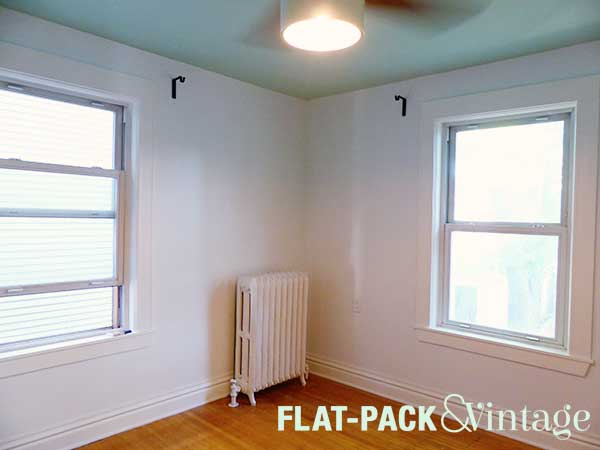
Oh my god it’s finally like a real room.
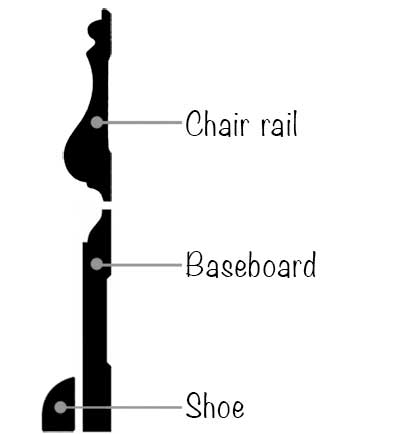
We started with the baseboards. Once again I spent a while agonizing over trim pieces (since trying to duplicate 100 year old moulding with contemporary, mass-produced pieces is a bit of a pain). We had a little more leeway in this room since the upstairs was already a bit mis-matched so I decided to simplify things from when I did the dining room baseboards.
This time I settled on a 3 part baseboard instead of the 4 part plan I used before. We picked up a 4″ baseboard, chair rail, and shoe molding.
We really should have started with the plinths, but I was still painting them. You can buy fancier plinths at the hardware store, but the ones in the rest of our house are super-simple so I made them myself. I measured the width of the door casings, added about a 1/4″ (seriously, I just eyeballed it) and ripped some down. We had a scrap board of 10″ select pine so I used that since it would be plenty tall. Then I took my palm sander and rounded down all the edges and corners, primed and painted… and waited for them to dry.
While the plinths were being finished, we put up the 2 main parts of the base. We started with the bottom layer, went around the entire room, then added the top layer rather than fully finishing a wall at a time. My best advice for installing baseboards (or pretty much any trim) is to just tack it in place until you’re sure all the edges/corners line up well. If there’s an oopsie down the road it’s way easier to pull off and fix. Oh, and also start with your longest pieces first so if you cut them too short you can still re-use them elsewhere. We were able to leave the right amount of space for the plinths because I had extra one that was originally intended for backup but had a pretty nasty split in the wood.
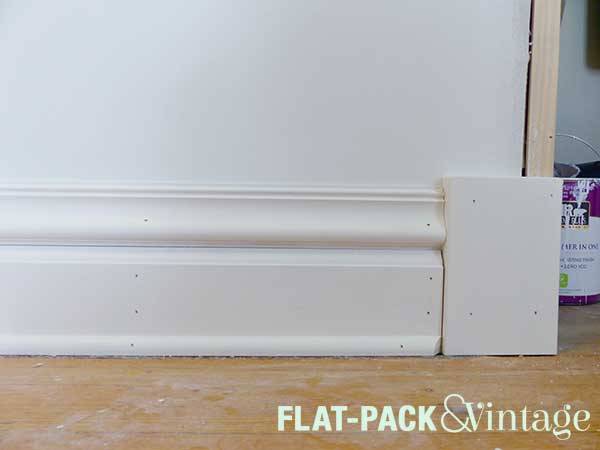
Once the baseboards were up we were able to add in the plinths, followed by the vertical door casings. I was a little paranoid about installing them because my dad and I custom routed them and didn’t have any extra. Matt totally rocked it though! We went with a simple header cut from a 1×6 since that’s what’s in the 3rd bedroom.
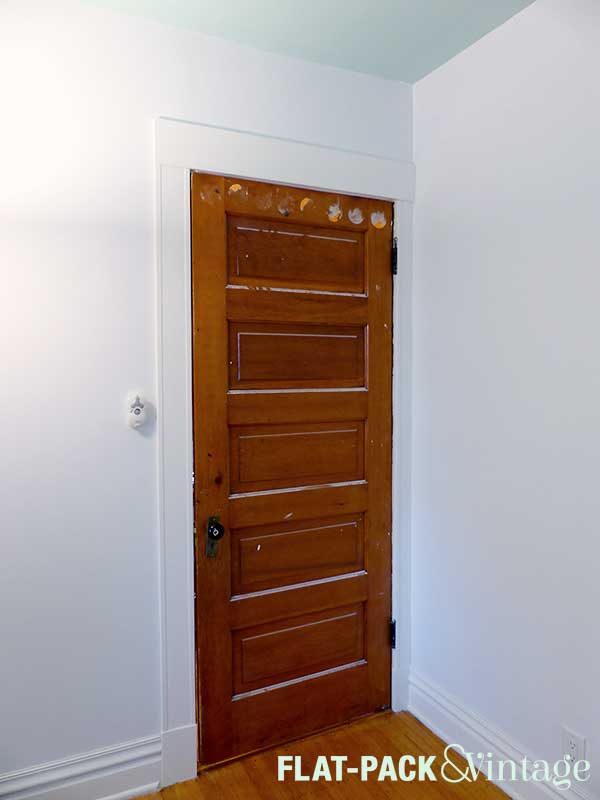
SHAZAAM! We have door mouldings! (and a door that needs to be refinished, but that’s a project for another day)
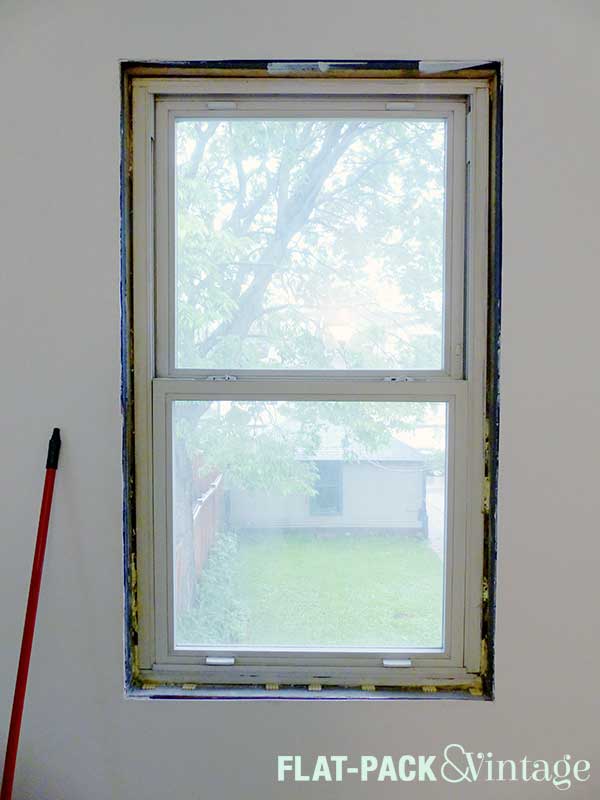
After the doors, we moved onto the poor, naked windows.
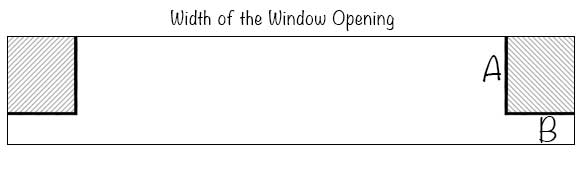
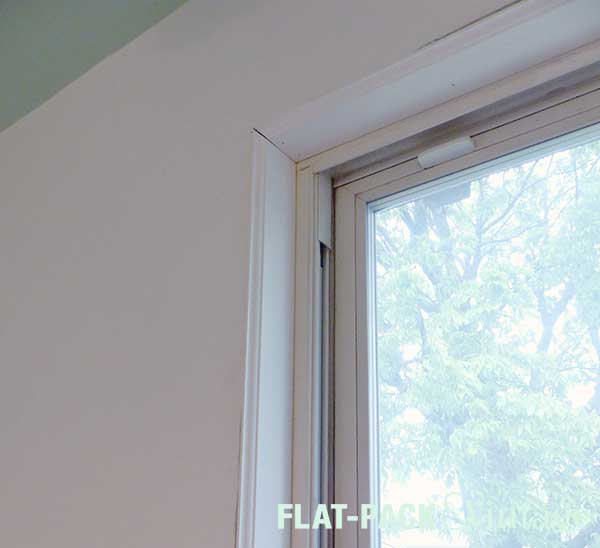
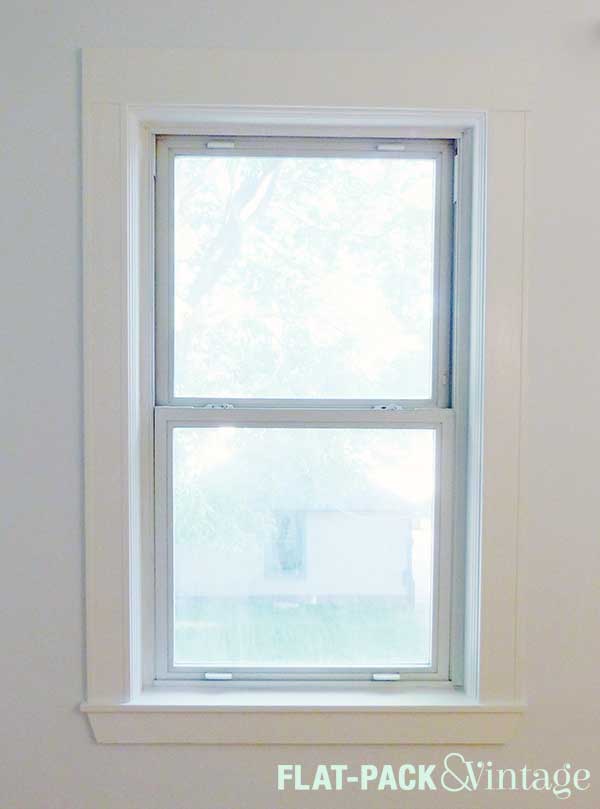
Here we started with the sills, which sound intimidating, but they were really easy. First we figured out the depth of the other sills in our house and ripped a couple boards down to that measurement. Then we measured the depth of the window opening + the depth of the casing (A) and the width of the casing + 1/2″ (B). This gave up the dimensions of the cutouts we needed to make. The length of your board will be the window width + (B x 2).
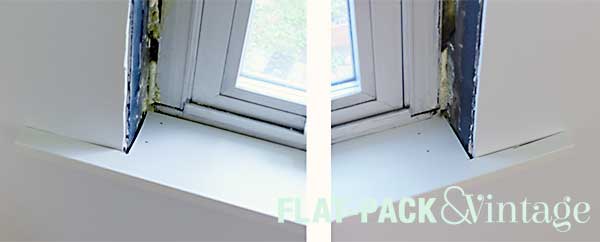
 I actually added a little more than a 1/2″ to the ends and cut it down after we dry-fit the sill. We used a jig saw to cut out the corners. It’s a pretty crappy jigsaw and we probably didn’t have the right blade for this this so my cuts were a little wonky. I also used my palm sander to slightly round off all the edges and corners.

All of this will get covered by the window trim pieces though so we’re ok!
After the sills were nailed down, we added the inside trim. We found a 3 1/4″ baseboard which was shockingly perfect. Yes, ok, there’s a bit of a gap in the middle, but our house isn’t square/level/standard in anyway so we’re used to these things.
I think it’s easiest to start from the top when you’re dealing with mitered cuts like these. You’ll know the top piece fits snugly and then you only have 1 mitered edge on the side pieces and shave off extra length with just a straight cut until those fit snugly too.
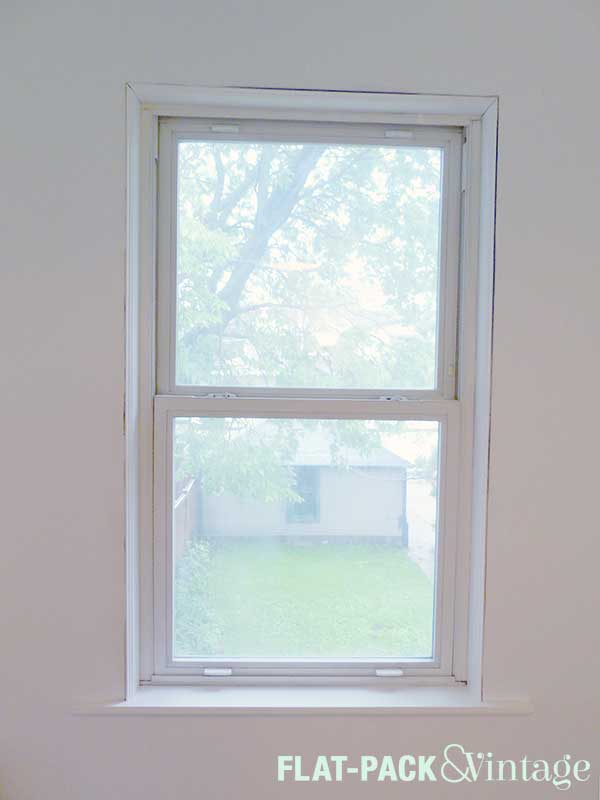
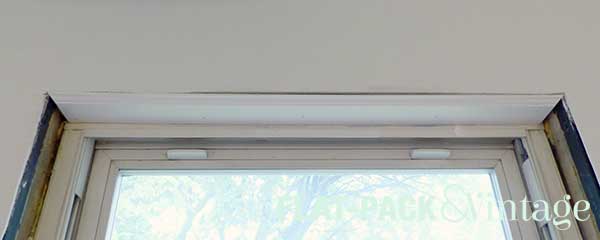
Next we added the vertical casings and the header. Thanks to our old house and wonky walls, there’s quite a bit of gap between the header. We’re going to add some wood filler and no one will ever be the wiser.
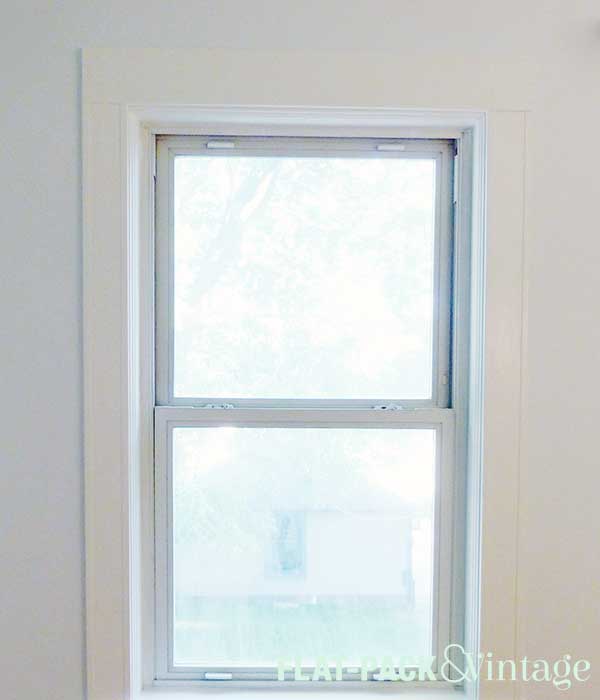
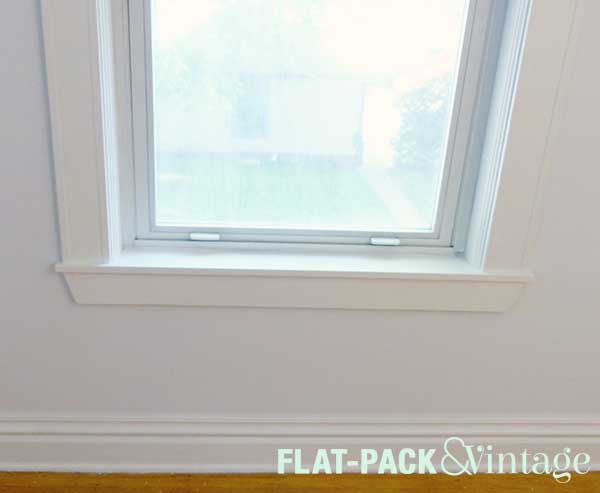
Finally we added sill base (there may be a technical term here, but I don’t know it….). Again, we just copied what was happening in the 3rd bedroom which was simpler than the trim in the rest of the house. Here we used a 1×4 cut to an 18 degree angle on the ends… I don’t know how they came up with 18 degrees, but it’s consistent with the other small bedroom.
And that’s the window! Lots of parts, but mostly easy cuts.
After all the trim was nailed up Matt went around and caulked everything.

I have to give a HUGE shout out to Matt for pretty much everything in this room. I may write the blog, but he’s been working so hard on and picking up my slack when I need a nap break. He’s really been the moulding (and painting, and ceiling fan) champ here and installed everything with pretty minimal help from me.