I was watching Wild Kratts with Wesley and they were doing an episode on Giant Pandas. For those who don’t watch PBS Kids, it’s an animated series by the Kratt brothers* and they have power suits so they can use the attributes of different animals (creature powers).
Kratt Brothers: What if we had panda powers?
Me: WTF are panda powers? Sitting around, eating, and refusing to have sex?
Spoiler alert: basically yes, although since it’s a kid’s show, it skips over pandas’ mating habits (or in this case, lack thereof)
*Who have been around frickin forever. I remember watching one of their shows on Saturday mornings when i was a kid.
When I started my closet makeover, I thought it was going to a weekend…maybe a week (factoring in a full-time job and toddler). Well, two and half weeks later, I’m finally able to put my clothes away (although there’s still a little bit of work I’d like to do)
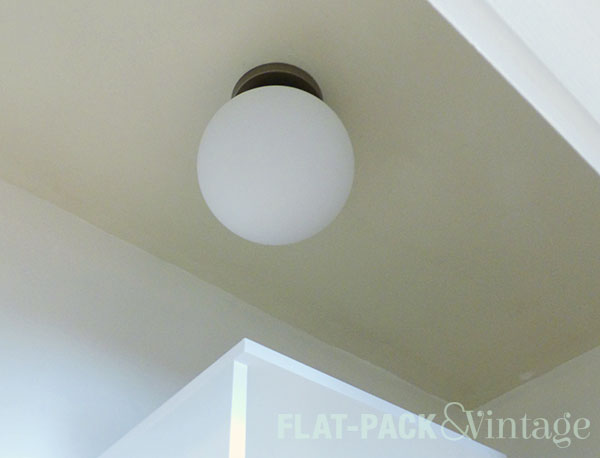
When we last left my closet, I had destroyed everything and finished repairing the walls. After that, I got everything painted and mostly-assembled the shelving unit of the organizer I bought (I’d need it for spacing and such). Then Matt installed a new ceiling light.
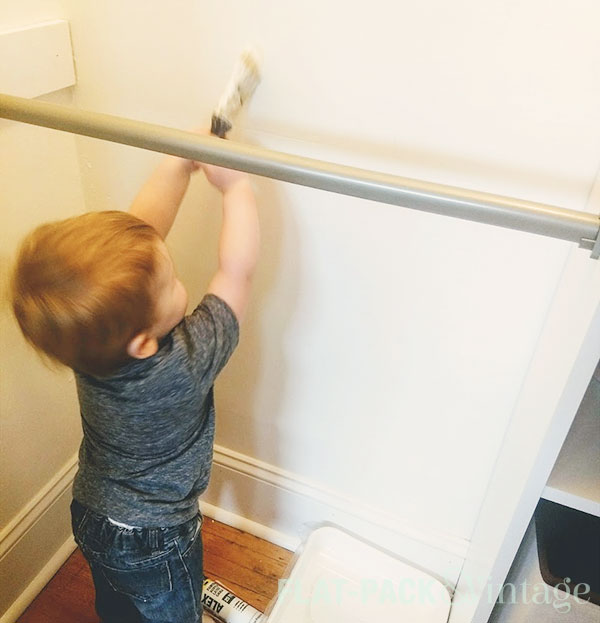
And I got some help with touch-up paint.
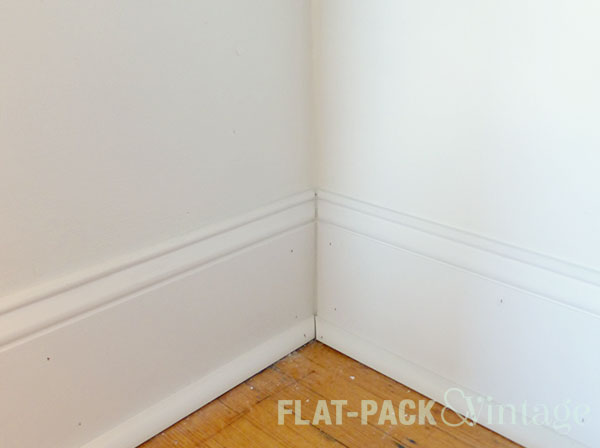
Next up was re-doing the baseboards. I had originally planned on just getting 1×8 pine boards…unfortunately the pre-primed 1×8’s at Menards looked suspiciously moldy. Ew. Pre-primed baseboard was only slightly more expensive so I decided to go that route rather than spend the time is priming.
You know Newton’s Third Law: for every action, there is an equal and opposite reaction? Well, it’s not just for physics anymore… While I saved time by not priming the baseboards, I lost time having to miter all the corners (yes, I had originally planned to take the lazy way out and use butt joints).
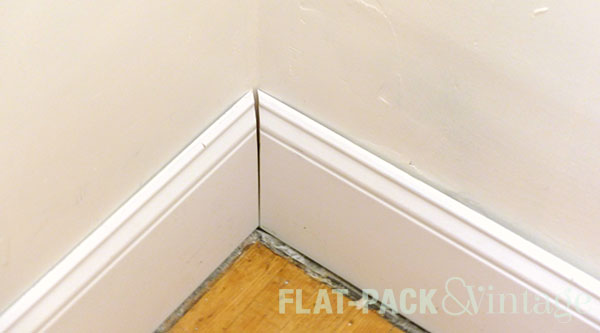
I also had to deal with the joy of old houses:
No matter how careful you may be with your cuts, if your walls aren’t square you’ll still end up with a mess (it’s harder to see, but the boards don’t sit completely flush against the wall either). If this was somewhere more visible than inside a closet, the options would be recalculating the angle, or using a coping saw. However, since this was inside a closet, I chose the super-unprofessional method of just filling the gap with caulk.
I also further half-assed things by using quarter round instead of shoe molding…but we had a bunch of (already painted!) quarter round from when I accidentally bought for our dining room so I figured the closet was decent place to use some of it up.*
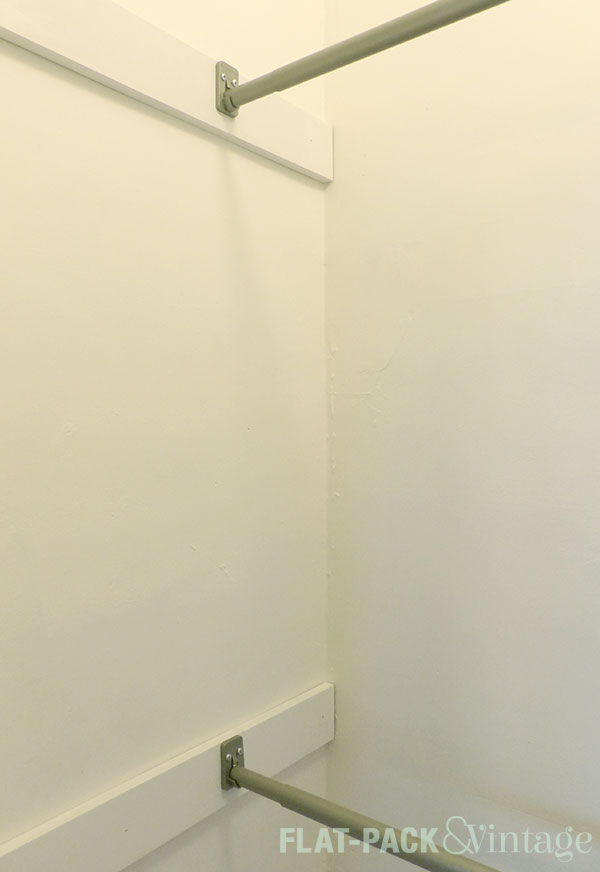
Along with re-installing baseboards, I also put up 1×4’s to support the curtain rod brackets. The previous closet system had the brackets attached to boards as well and I decided that was probably a good idea. In newer construction this probably unnecessary, but plaster doesn’t play especially nicely with anchors so I want to make sure I had the stability of studs to support the weight of my clothing.
Securing the shelving unit was one of the last things I did. I saved this for the end because I wanted to be able to move it out of the way while I crammed myself into an already tight corner to nail and caulk baseboards (sometime I make good decisions). Because the shelves were reasonably stable on their own and there wasn’t going to be anything pulling away from the wall, I was fine securing it with the anchors that came with the kit.
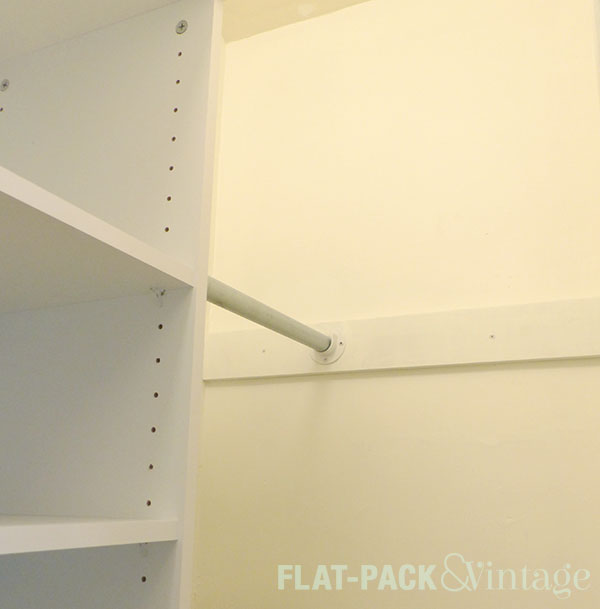
Once the tower was completely stable, I added the support brackets for the clothing rods. On the left side I used the rods and brackets that came with the kit. With careful measuring and a level…I still managed to eff up the first one. Matt, being the awesomely supportive husband that he is, walked in after I finished up, grabbed a level, and immediately pointed out that it wasn’t straight. Thanks dear…
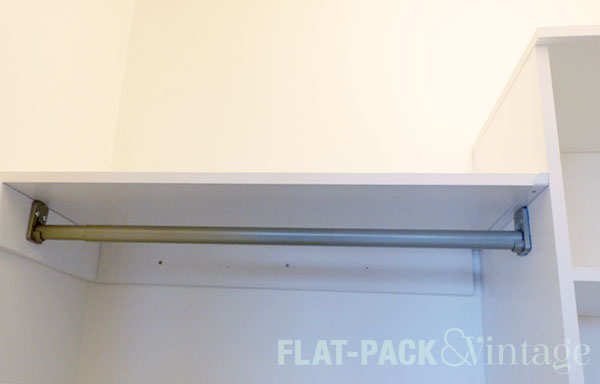
The area to the right of the shelves was too small to use the rod that came with the kit. I could have cut it down with a hacksaw, but the rod is two pieces, each of which have a notch at one end to lock into the bracket…basically it would have been very annoying to cut everything. Instead I cut my old closet rod down to size** with a pipe cutter and re-used the old brackets.
Once the main components were in place, I decided to add even more shelving over the rods. I bought the upper shelf support brackets designed to work with this system, a couple laminate shelves, and another 1×4. I only needed one package of the brackets since 1×4 the rods connected to on the walls would already be serving as some shelf support. I attached another 1×4 to the back wall to support the back of the shelf.
The laminate shelves only came in 48″ lengths so I had to cut them down to the right sizes (this left me a couple bonus shelves for the tower too!). Cutting laminate is a little intimidating since it’s prone to chipping so I did a a bit of a research first. The common method seems to be scoring the laminate with a utility knife first, then running it through a table saw with the blade height set to only cut through about half of the board, then flip the board over and cut the other side.
Well, I tried this and my board kept getting stuck so I decided to throw caution the wind and just run in through like a normal board…and this actually worked! If your board is going to be pretty visible I don’t know if I’d recommend this (I think I just got lucky), but if your cut edges aren’t really going to show, it might be worth the risk if you’re struggling with the “safe” way.
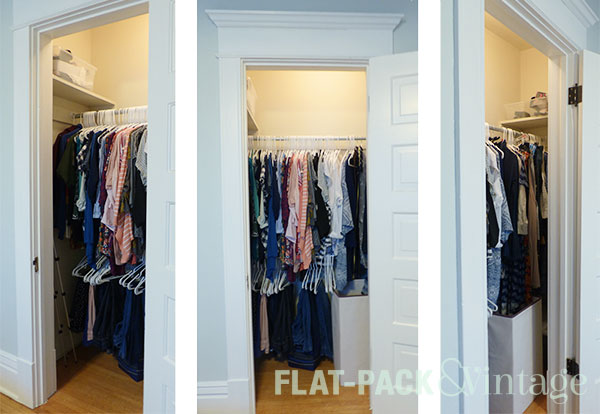
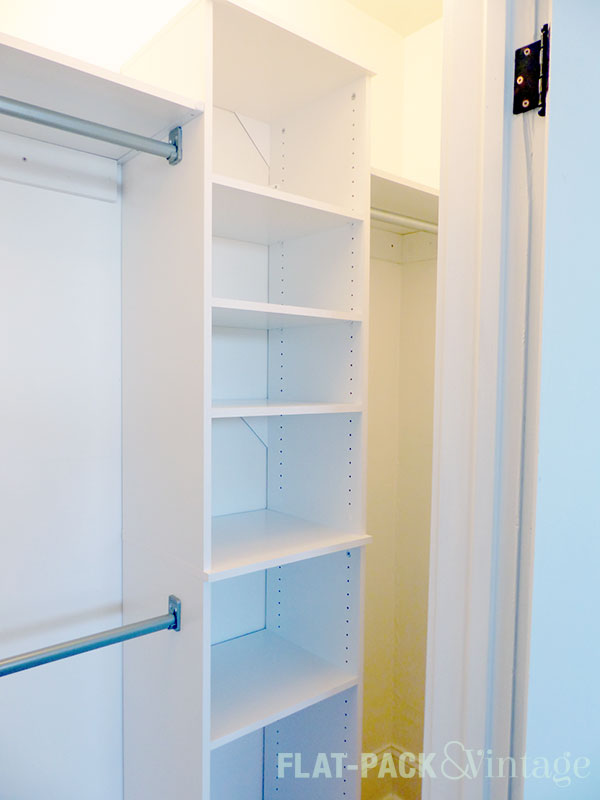
Now the light is up! The shelves are all up! The rods are up!
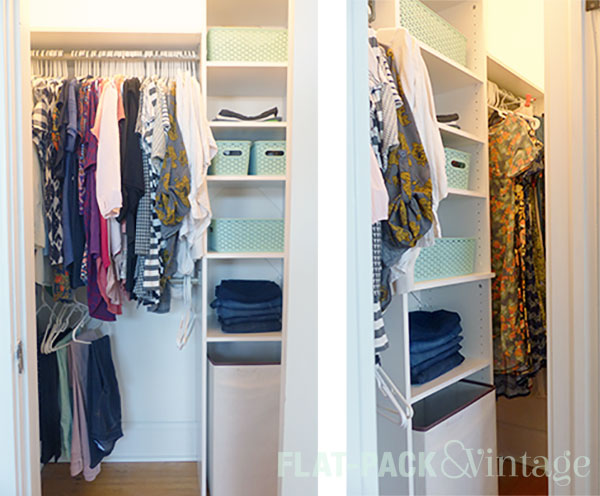
And I can put my clothes away at last!!!
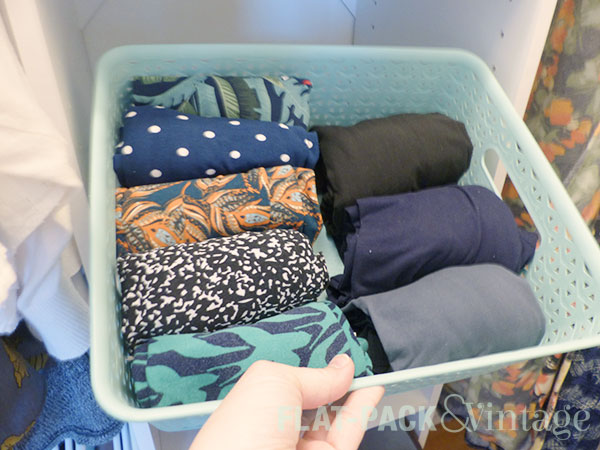
I have some t-shirts and jeans folded on shelves and a handful of inexpensive baskets from Target for things like swimwear, belts, tights, and leggings. (I KonMari’ed my leggings BTW and it feels sooo good!)So a weekend project ended up taking around 3 weeks to complete, but I am incredibly happy with the result.
*More so than I had planned because I could not for the life of me get one of the cuts right and effed it at least three times.
**Technically Matt started this part, only first he cut the rod to exactly length between the shelf and the wall and didn’t account for the width of the brackets. Then he tried to re-cut a slightly smaller piece, but the pipe rebelled and he gave up after getting some blisters. I jumped in at this point and finished cutting it in about a minute…because he loosened it for me, right? To his credit, he cut the first piece without issue so it wasn’t like he didn’t know how to use a pipe cutter.
The closet in our master bedroom is a shockingly good size for a 100+ year old house…which pretty much means it’s on OK size for one person.
The current configuration is decidedly meh–a single rod and some small shelves on each end. I added another hanging rod for a nice tiered effect, but the height isn’t ideal and it’s wobbly.
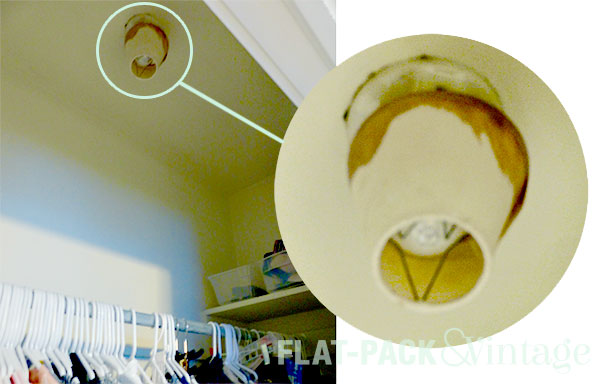
There is a light in the closet, which is a nice feature…except the light is simply a bulb with a really gross-looking clip on shade.
Meanwhile I’m sitting around waiting for the wallpaper for the micro-bath,* so it seemed like a good time for a closet makeover.
I found a stock closet organizer that had everything I was looking for–double rods on one side (for shirts and pants), single rod on the other (for dresses and longer skirts), and usable shelving in the center. Plus, the 16″ option was wide enough to slide my hamper into the shelf area with some minor adjustments. All we had to do was rip out the existing rod, shelving, and baseboards (so the organizer would fit flush against the wall). Sounds pretty simple, right?
Hahaha!
Last Wednesday night I decided to start on some demo. I knew some repair would be needed, so I was hoping to get the demo done and joint compound any dings in the wall during the week so I’d be able to throw on a coat of paint over the weekend and hopefully even get the organizer up and functioning.
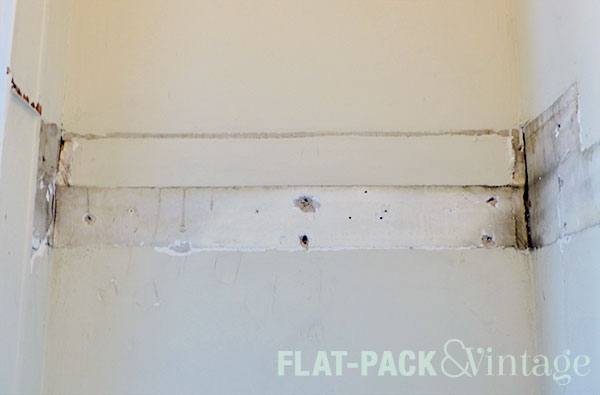
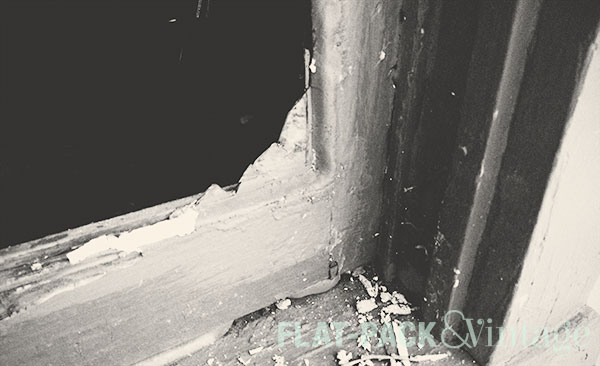
Although it sounded like a good plan, this is what happened once I started to pry the baseboards off:
*twitch*
It turns out that part of the problem was that the corners where not actually mitered and the butt joints that were used were pushing the back section of baseboard into place. Unlike me, Matt figured this out and by the end of the evening he had almost finished removing the boards…which went much more smoothly when you weren’t fighting against the butt joints.
Matt could have made more progress, but I made him stop because I actually wanted Wesley to go to bed at his normal time.
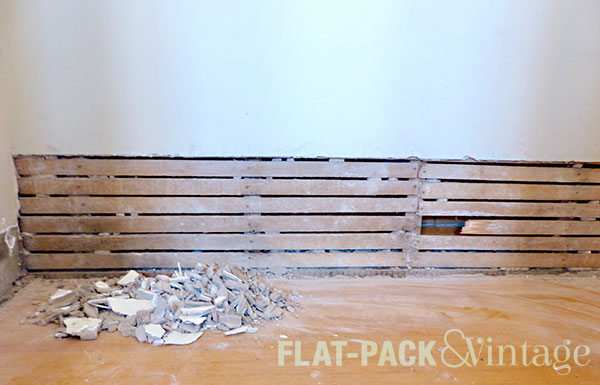
Thursday saw the removal of the upper shelves:
I just love the smell of demo in the morning… only not because 1) this was all happening in the evenings after work and 2) it really just smells like dust and sweat.
And on Friday, she rested. With a glass of wine.
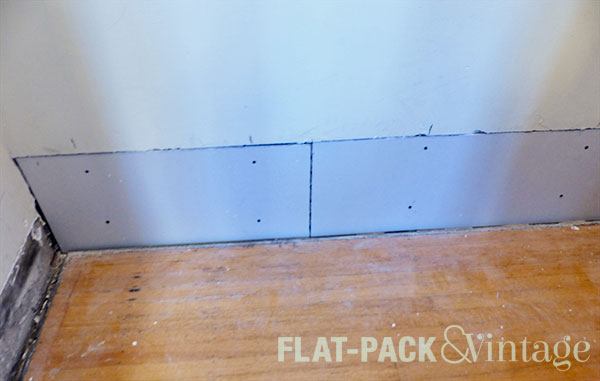
My plans of joint-compounding any “dings” were looking incredible optimistic. This was going to a full-on patch job on the back wall. So on Saturday, I squared off the holes in the plaster (and knocked off any remaining plaster where my patches needed to fit) and filled in the large damaged areas with drywall. Then I taped and finally joint compounded. Sunday brought on a couple more rounds of sanding and joint compounding. Because this was in a closet, I didn’t go full-on perfectionist in my patch job. That being said, I was probably more neurotic than most people would be while working on a closet.
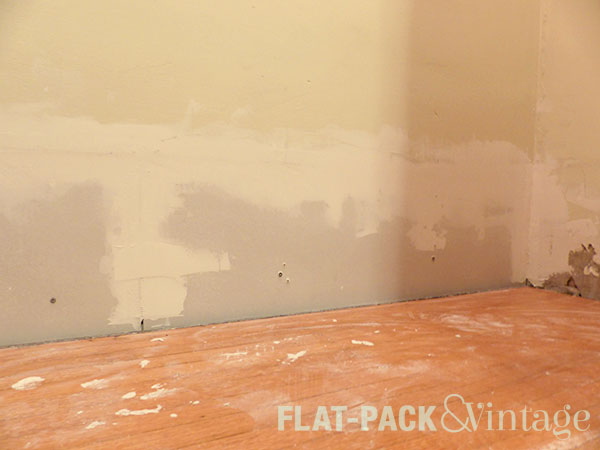
The upper part of the walls also got a layer of joint compound to fill in nail holes and dings, repair corners, and even up the paint build up that accumulated around the edges of the shelves.
I feel like I could make millions on this as a abstract painting–White on Dirty White.
We’ll see how this week goes and if I’m feeling ridiculously productive I may be able to get the walls painted some evening…more likely I won’t do much else until next weekend.
While I’m working out the final details for the living room and TV room, it seems like a good time to knock out the downstairs micro-bath.
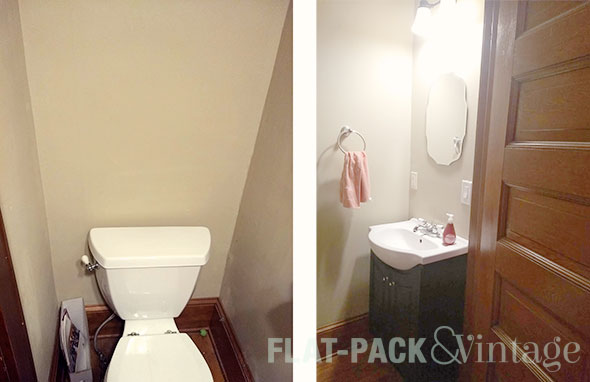
I don’t think I’ve ever posted a good picture of the micro-bath…possibly because it’s nearly impossible to photograph…so apologies for crappy angles and awful lighting. The truly depressing shade of brown on the walls does not help matters.
When I say “micro-bath” I’m not really exaggerating–this is the smallest bathroom I’ve seen outside of Europe. You can wash your hands while still sitting on the toilet. This was actually immensely helpful while I was pregnant because I could use the sink to hoist my ginormous self off of the toilet.
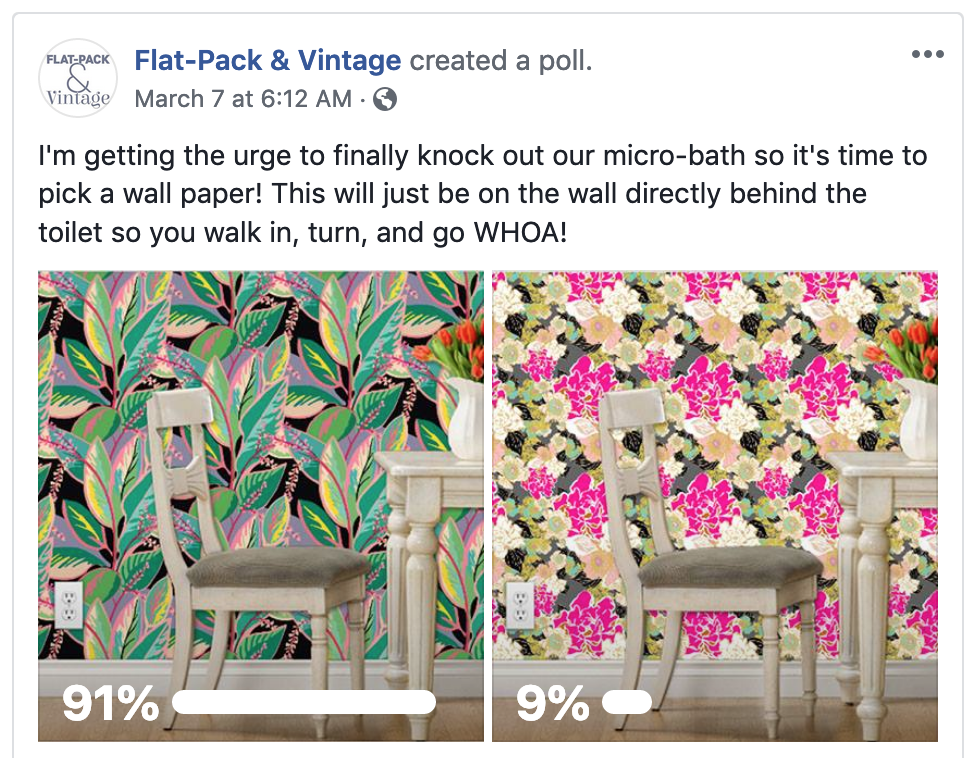
I’ve actually had a plan for our minuscule bathroom for years, I’ve just never gotten around to it. The other week Spoonflower was having a free-shipping event so I decided it was finally time to buy the wallpaper I’ve been eyeing for practically forever…but when I went to the site I immediately saw a different wallpaper that really jumped out at me. What to do?
FACEBOOK POLL!
I asked, you answered, and the overwhelming response was that the new print I found caught your eye too!
I have a sample of the wallpaper on the way, because it’s always a good idea to get a sample of things like this, especially when they’re on the spendier side.
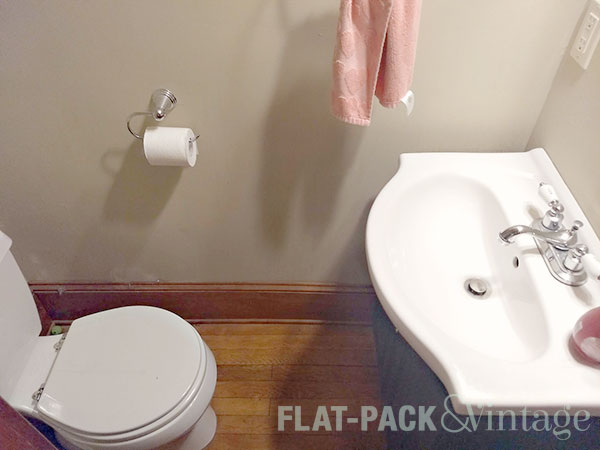
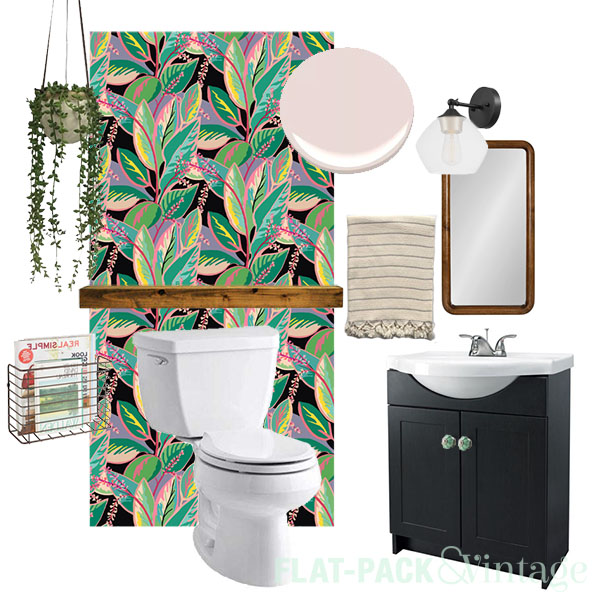
The wallpaper will just be on the wall behind the toilet. I actually think that a crazy wallpaper could look cool on every wall in a small space…but I think that might frighten Matt a little bit, so accent wall it is. The paint color will probably change once I get the actual wallpaper sample, but I’m currently thinking a light, blushy, pink.
One of the best tips for a space is to always make sure you bring a but of warmth into a room. An easy way to do this is use some natural elements, like wood, plants, or even woven baskets. Here I’m planning a wood shelf behind the toilet and a wood-framed mirror. Since this room gets zero natural light it will need a fake plant for any greenery.. I’m hoping to find a good-looking, fake string-of-pearls succulent, but any dangley plant would work here.
Damn…Netflix makes some really good series. The main reason I’ve been keeping it around after getting Amazon Prime is for Stranger Things. But I’m also a sucker for the 72 Dangerous Animals series. Now I’m also keeping it around for The Umbrella Academy.
To be fair, The Umbrella Academy isn’t 100% original Netflix–it’s based off a comic book. A comic book I really want to read now.
Me: I’m watching The Umbrella Academy and really getting sucked in. I want to read the comic it’s based off of now too.
Matt: Is it sort of like X-Men?
Me: Sort of… it’s like a jacked-up, highly dysfunctional X-Men
It’s fairly predictable if you’ve seen/read a lot of this sort of thing, but it’s still very good. The soundtrack is also awesome, in a bizarre sort of way. Like a fight scene to They Might be Giants: Istanbul (Not Constantinople). I think it has a similar musical feel to Kill Bill (which was the first movie I saw where I was really wowed by the soundtrack).
The actors are awesome, especially the guy who plays Five. I assumed he was an older (and by “older” I still mean fairly young, like 20’s) actor who just looked very young. Nope, dude’s 15 and just wildly talented.
So basically, if you like shows/movies based off of comic books, or generally like Sci-Fi/Fantasy, I definitely recommend it.
Now that we’ve wrapped up the master bedroom, it’s time to move onto the living room/TV room. This is more-or-less how I approach a room design, but remember that there are no set rules when it comes to your own space. The ultimate goal is that YOU are happy (your home = your rules).
Fix on a Focal Point
This could be a piece of artwork, a rug, a piece of furniture, an architecture detail….pretty much anything. Hell, it could be your TV, I won’t judge. What’s going to be the “star” of the room? Where do you want the eye to be drawn?
You may also have an inspiration piece for you room that’s not going to be your focal point. Heck, it could be a magazine clipping that’s not exactly about to framed and hung in the room at all. Some sort of inspirational image is incredibly useful at this point.
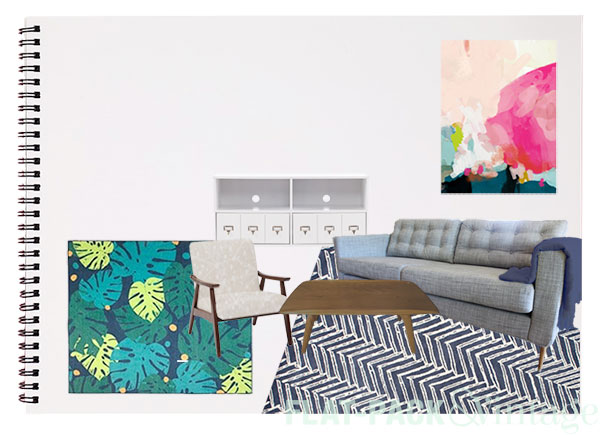
Technically this print is planned for the living room and I’m going to be only focusing on the TV room here. Because my 2 rooms flow into each other, they really need to relate to each other so this piece serves as a great inspiration for both spaces.
Pick Your Palette
Using your focal point or inspiration piece, determine your color scheme. If you’re feeling minimal, you could opt for a monochromatic (different values of the same color) color scheme. This can end up a little flat so I’m always a fan a making sure there’s some good contrast going on. You can always use the internet for inspiration and search for “blue rooms” and see how other people have handled it.
Personally, I like a variety of color. The absolute easiest way to accomplish this is to start with a focal piece that already has multiple colors in it. Not to worry if the star of your room is your solid pink chair though! Internet to the rescue again! If you search google or Pinterest for “pink color schemes” you’ll get a ton of results and you can pick one that resonates with you.
See what I mean by finding something with multiple colors? This print provides a variety of options! Navy and blush make for a more formal base (along with some gray and creamy neutrals) and accents of aqua, bright coral-pink, and bright green funk it up a bit.
Now, don’t go buying your wall paint just yet. This is just a rough color idea at these point. The exact shades may change, plus, you’ll want to have your main pieces already in your home so you can match paint swatches in the most accurate lighting. Pro Tip: never bank on accurate color representation from an online image–monitors and color settings are way too varied.
Bring in the Big Stuff
So you have a focal point, you have a rough idea of a color scheme, now you want to look for the main items that will fill in the room. This is going to be pretty much furniture, rugs, and dominant light fixtures. They may not all be physically large items either, but they’ll probably be your spendier items. They may also be pieces you already have an definitely want to keep in the room.
Why the two rugs you may be asking? A corner of the TV is going to be a play space for Wesley and the rug helps define the space.
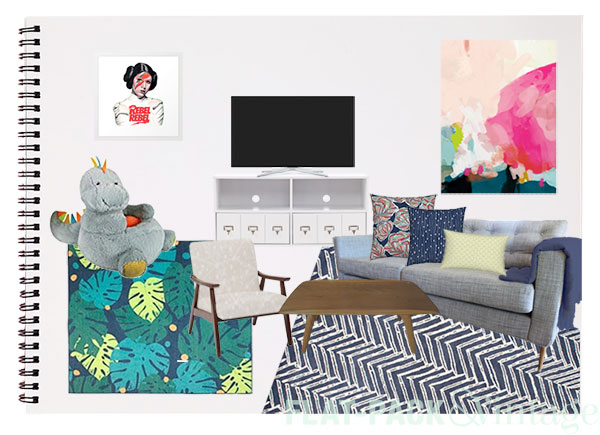
Add in Accessories
To really make a space feel like you, and not a staged show-house, shop your house for accessories. Things you’ve naturally acquired overtime will have more personality than something you’ve bought just because it looked good in the room. This isn’t to say you can’t by new things, just see what you already have first and pick items that truly resonate with you even if they’re not “magazine perfect.” You’ll be happier and that’s the most important thing for you to feel about your home.
Accessories don’t necessarily mean knickknacks. Plants, accent lighting, throw pillows, wall art…all of these are options for accessories. I don’t bother adding every little thing in when I’m creating a mood board either–I usually stick to pillows and wall art.
Wake up your Walls
You may already have an idea of what color you want your walls to be. Now’s the time to pick your exact paint color. Why wait until the very end of the design process? There are practically unlimited paint color choices so it’s much easier to find a paint that will complement your rug/upholstery/throw pillows/art than vice versa.
Now, for the record, it’s not as easy as pick this, pick that, bam you’re done. There will be changes and frustrations, and maybe your entire plan will morph into something completely unexpected. Just go with your gut and don’t try and force things. Maybe the rug you picked as your focal point isn’t meshing with the other items that caught your eye. It’s ok to completely rethink your rug choice. That’s why it’s a good idea put together a mood board before you start shopping.
Don’t feel like you have to make decisions on every single thing in the room either. Your mood board isn’t set in stone, but it’s a good idea to get the overall feel for your room before you start spending money.
Not even including windchill (see: feels like -47). I’m pretty sure even the polar bears at the zoo are miserable.
We got hit with snow on Monday, not a ton of snow, but enough so that the roads were pretty crappy in the morning (my car got stuck twice on the way into work**). Since then the temperature has been steadily plummeting and schools are closing because it literally too dangerous for kids to wait outside for the bus. I had to get gas on my way home from work today and my fingers were painfully cold because I had to take my glove off for a minute to run my credit card and use the touch-screen.
Wesley’s daycare is closed tomorrow (and probably Thursday too) because they have huge windows everywhere and don’t think they can keep everything at the required minimum temperature. We were already planning on keeping him home tomorrow because it is so viciously cold just going to and from the car. Unfortunately my job is considered “essential services” so I am expected to go into work (Matt’s staying home tomorrow and thankfully my boss is very understanding of issues that come up for parents)
The St Paul Winter Carnival is also going on right now… unfortunately it’s too cold for any sane person to leave their house. Good news: it’s supposed to warm up this weekend. Bad news: it’s supposed to get above freezing so we may have another year of very deconstructivist ice sculptures.
Aaand since I’m just rambling at the moment….we went out to a local brewery on Sunday. At 1:00 in the afternoon. For Tot Time. Seriously. I also witnessed a 1st Birthday party and Baby Shower being hosted there. It was a little surreal, but kind of a cool idea. They have a bunch of toys for the kids and a kid-friendly band.*** It gives the adults a way to get out of the house and still feel reasonably adult (because it gives hard to feel adult when you’re constantly reading books that consist entirely of 1-syllable words and trying to figure out if your child is poopy or just farty).
*Actually, all of the upper Midwest.
**Both times in intersections where the plow had created a pile of snow at the cross street.
***This week was a friend of mine college and her husband. So that was cool.
Ooof, it’s been a while! The master bedroom is finally done though!
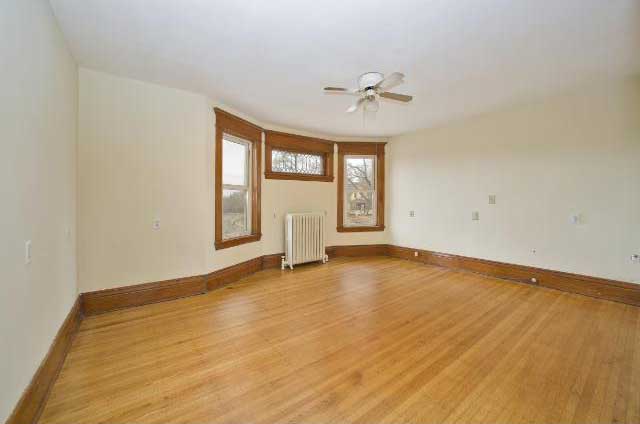
Let’s take a look back at what we started with:
One of the major pros of this house was the room sizes; you rarely find 100+ year old homes with generous room sizes and the master bedroom was especially generous.
It was also very generous with the outlets–12 pairs (and all of them about 3′ off the ground)!
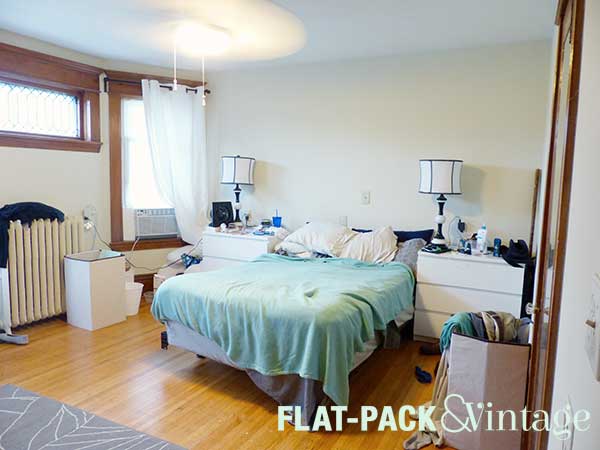
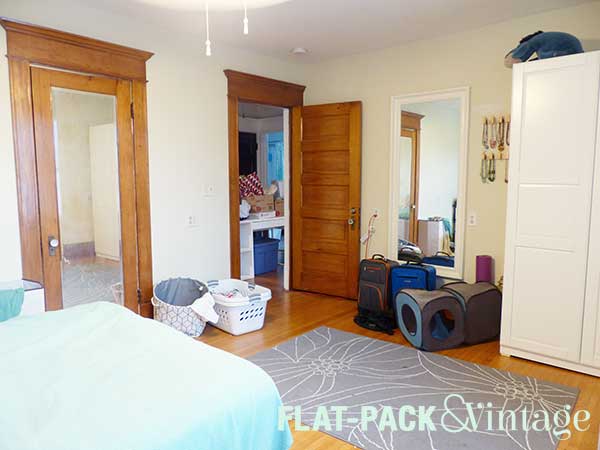
After moving in, it pretty much morphed into this:
And then stayed that way for a while as we focused on other projects. Whomp whomp
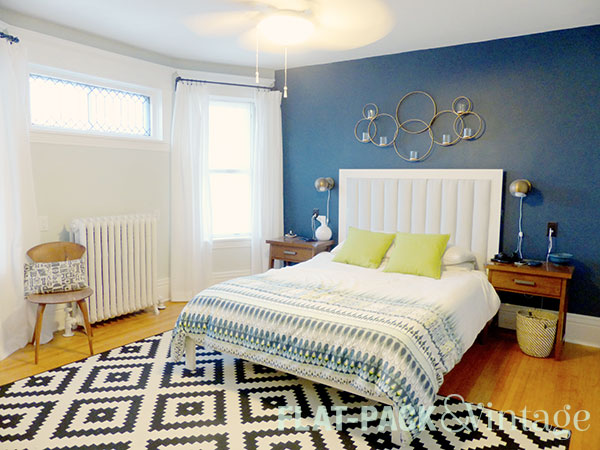
A little paint, some new furniture, and let’s see where we’re at today.
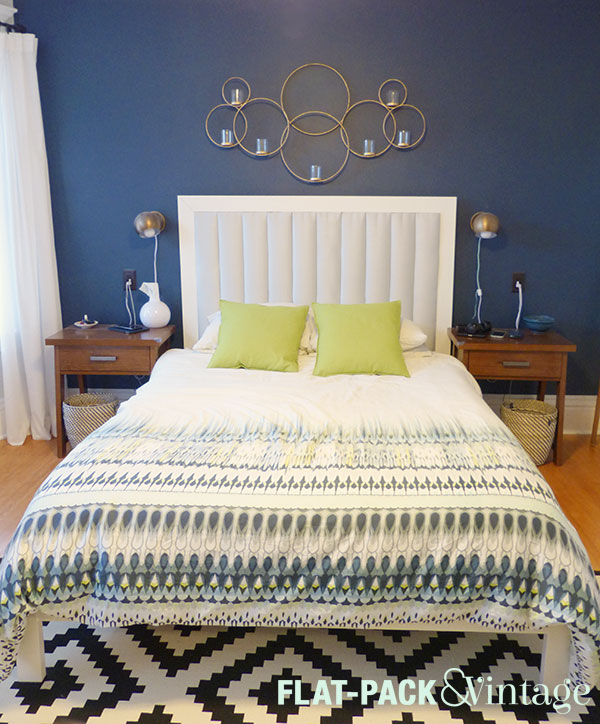
SO much better. It looks like adults actually live here now!
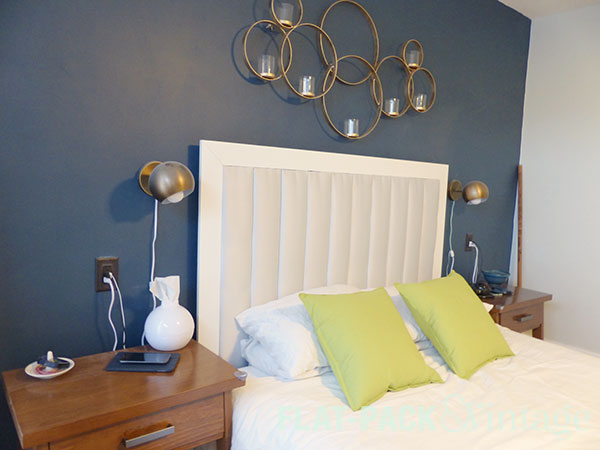
The headboard, nightstands, sconces, and rug are all at a much better scale. The proper bed frame and drawers on the bedside tables add some much needed polish (it’s really nice to be able to stash things like deodorant, hairbrush, chapstick, etc out of view but still easily accessible). We also upgraded the outlets next to the bed to the fancy ones with the USB ports because we’re always charging phones and tablets on our nightstands.
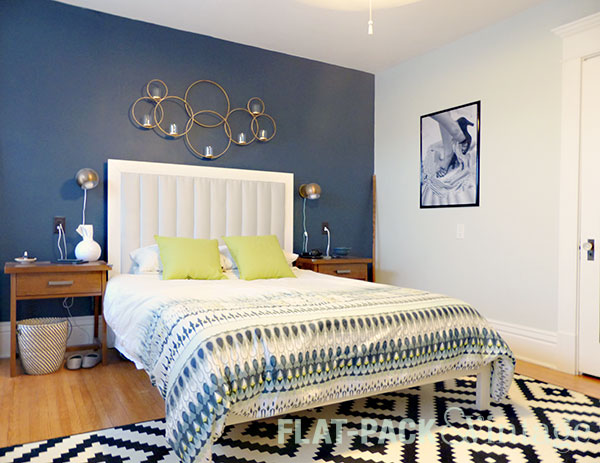
I love the drama of the accent wall and it really helps highlight the bed (which is the pretty standard focal point in a bedroom). The pale green-blue-gray walls are wonderfully soothing.
I found the candle holder at World Market and had a beast of time getting it into my tiny little car, but here it is! The circle pattern compliments the sconces and the round mirror on the opposite side the room, and the bronze really pops against the teal wall.
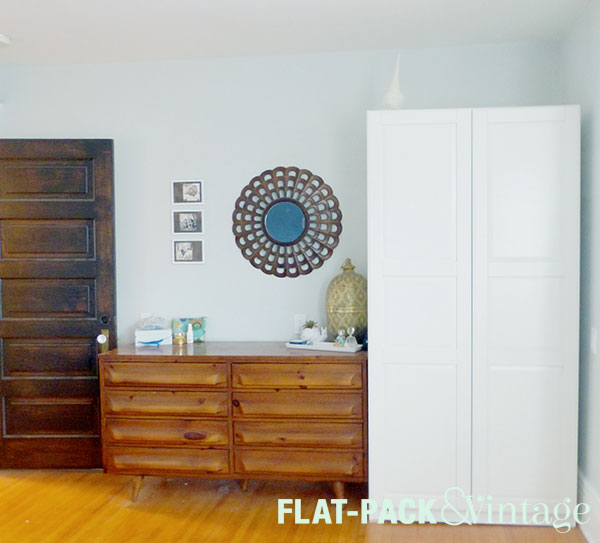
Especially when working with cool colors (blues, greens, purples) adding a touch of warmth really helps balance out the space. I scored an amazing vintage dresser and then found some side tables in a similar tone at Target. The pops of natural wood add so much more than sticking with all white furniture like we had previously.
Added bonus: the mid-century dresser paired beautifully with my Cherner chair. I literally pulled it out of a dumpster years ago! It works well in the bedroom because it gives me a place to stash a robe or PJs, but it’s not big enough to let a giant pile of laundry accumulate.
The rug seems a bit crazy, right? I absolutely love it though! A different color and pattern would have completely changed the entire feel of the room. This one just seems to add a bit of playfulness and quirkiness that appeals to me. Matt may try and argue that we’re fairly formal people, but I will always enjoy of pop of the unexpected.*
There are still some tweaks needed–the solid green pillows are a bit too intense and the print needs a new frame. I’m eyeing this print from Spoonflower for the pillows since the citron color pulls from the duvet and breaks up the mostly blue color scheme. My closet is also in need of a complete overhaul, but that will be a project for another time.
I am so glad we finally have a respectable bedroom! Especially since now that we’re done I can go back to working on the downstairs. Next up are going to be the living room and TV room. I’m looking forward to getting those done. I always have a little self-guilt whenever we have people over because half of our main entertaining space is decidedly meh which makes me look like a shitty designer…but you can’t do everything at once.
*I still can’t convince him to buy one of the reindeer heads from the vintage store down the street. The fossilized rhino skull was also shot down, despite the fact that it could never be broken by cats or kids…some complaint about not paying $7k for a rock or something…
This past weekend we finally cleared all my refinishing projects out of the garage. The desk still needs a couple coats of poly, so it’s living on the front porch at the moment, but we’ve started getting snow so I want my covered parking back!
Monday was a bank holiday so I had the day off of work. I meant to do productive things like hemming curtains and putting the finishing touches on master bedroom. Instead I couldn’t find a ruler, lost my hem gauge as soon as I set it down, then gave up and went to IKEA. Running errands, in and out, perfectly normal day, right?
Well then comes Tuesday. I leave for work around 6:30am so it’s still quite dark out. Off I go to the garage, enter the code in the keypad, and….nothing. It’s not even like the door is frozen shut–I can’t even hear it trying to open.
Shit.
After re-keying the code a dozen times, I finally give up and go in to wake up Matt for backup.
I convince him it’s not a power issue–the keypad still lights up when you press buttons, and Wesley’s room (on the same breaker) still has power. So he comes out and tries the code in the keypad a few more times.
No go.
Just for kicks, he goes back in and flips the breaker off and on again (hey, power cycling works for computers).
Nothing.
Around this point I ask if the keypad is hardwired (vs using a battery). Matt says it is, plus the buttons are lighting up so it’s clearly getting power from somewhere.
We are now officially out of ideas and I have to get to work. The only option that seems to be left to us is to break a window, climb in, and manually open the door from the inside.
Ah, but why doesn’t our garage have a human-sized door you may be asking. Well, it does, but a couple years ago some jerkward broke into our garage, stole a broken snowblower, and seriously damaged the door so it’s been screw shut ever since. Quite honestly it was never high on our to-do list…until that morning.
Yeah…so it’s nearly 7am and we now have to break into our own garage and hope no one calls the police on us. Matt just repaired the glass in this window too.
Is Matt still in his pajamas? Yes he is. Is he also the one who crawled through the window? Yes he was. It was all terribly heroic.*
Once he’s in the garage, I suggest that he tries the button on the wall first, instead of the manual release. Seems a little silly, but he tries the button and…the door opens.
WTF???
So the inside button works, The remotes in our cars work. But the keypad doesn’t work.
Matt pokes around a little bit and then I hear it:
“Oh look, a battery!”
Yes, that’s right. The keypad I was told was hardwired, actually ran off a battery. A battery that was apparently providing just enough power to illuminate the keys, but not enough power to send the signal to open the door.
Now, in Matt’s defense, there were wires running along the wall near the keypad. It turns out these belonged to the sensors at the bottom of the door (the ones that exist so you don’t squash small children when you close your garage door). I also didn’t press the issue when I mentioned the idea of a battery and have learned a valuable lesson in standing my ground.
Thankfully we had a spare 9V battery so the keypad is now fully functioning. Replacing the side door on the garage has also gotten bumped to the top of our warm weather to-do list. We should be getting the floor of the garage re-poured this spring so we’re planning on waiting until after that to deal with the door, just in case it changes the sizing at all. In the meantime, we’ll make sure to always have an extra 9V battery on hand.
*He asked me to work in the word “heroic” somewhere. You’re welcome.
I’m all about the Halloween group costume. Last year we did Peanuts and this year I nerded it up big time! Let’s just say when you’re a nerd and your son is named Wesley, this costume is practically mandatory.
And for the non-nerds out there, no, we’re not the family from the Incredibles. We’re not anyone from Star Wars.* Nope, this costume is straight-up Star Trek: The Next Generation.
Matt makes a pretty awesome Picard, Wesley’s the cutest little Crusher on the planet (#momBias), and I’m supposed to be Beverly Crusher, I just don’t have the hair for it.
Let’s take a closer look at Wesley’s iconic ugly sweater, shall we?
If you really want to be technical, the bottom stripe is supposed to be more tealy-blue, but I DIYed this puppy on the cheap so my options were limited.
I think my son only smiles when he has a stick (then bawls when I don’t let him bring sticks into the house).
Our daycare’s Halloween Party was today, and apparently once his teacher said “Wesley Crusher from Star Trek” there was even some recognition (so I think they would have gotten it if they had seen us all together). We went to Halloween/Birthday party over the weekend and only 1 person there got it. #nerdProblems
*These were all actual guesses. I also had a co-worker ask what we were doing for Halloween. When I responded that I had a Star Trek family costume planned, she asked if Wesley was going to be the “bear thing.” My new tagline may be “May the force be so Number One.”

 So a weekend project ended up taking around 3 weeks to complete, but I am incredibly happy with the result.