Master Bedroom Reveal!

Ooof, it’s been a while!  The master bedroom is finally done though!

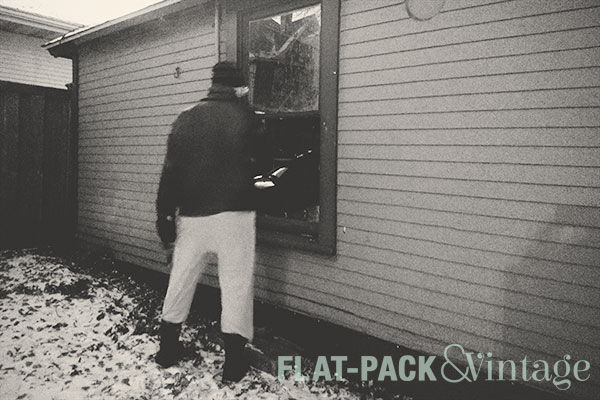
Let’s take a look back at what we started with:

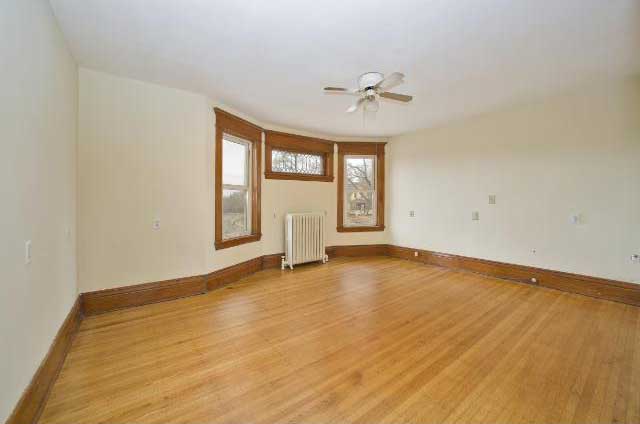
One of the major pros of this house was the room sizes; you rarely find 100+ year old homes with generous room sizes and the master bedroom was especially generous.

It was also very generous with the outlets–12 pairs (and all of them about 3′ off the ground)!

After moving in, it pretty much morphed into this:

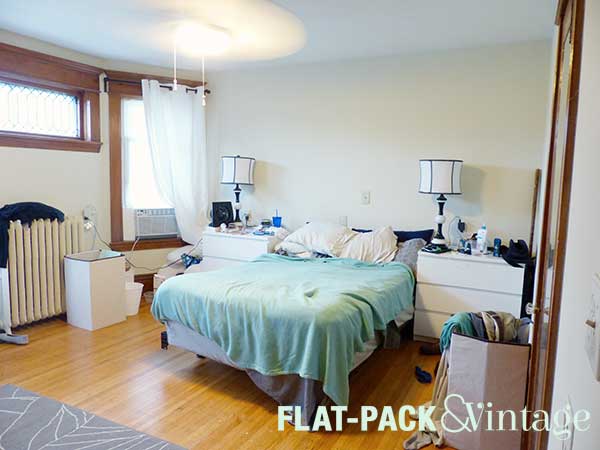
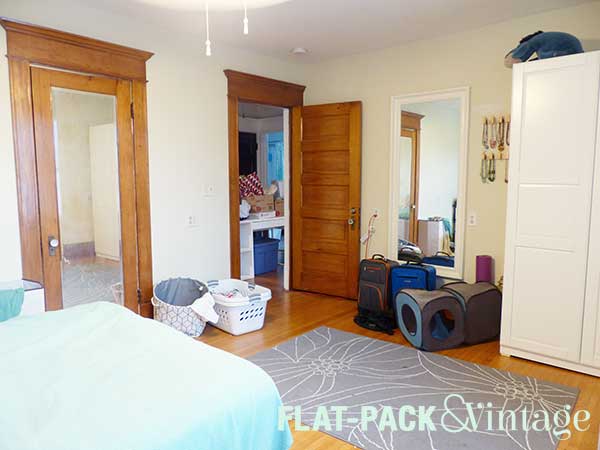
And then stayed that way for a while as we focused on other projects. Whomp whomp

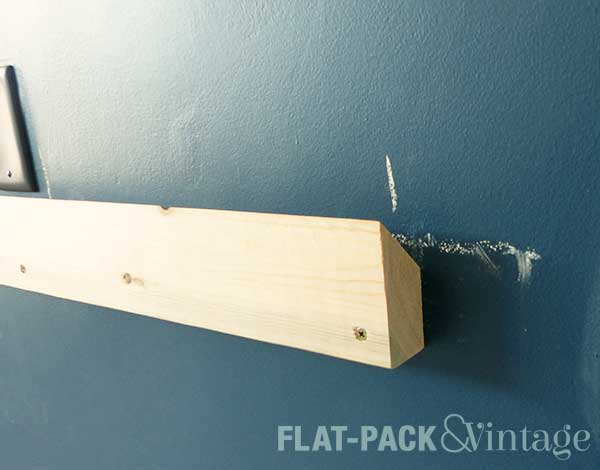
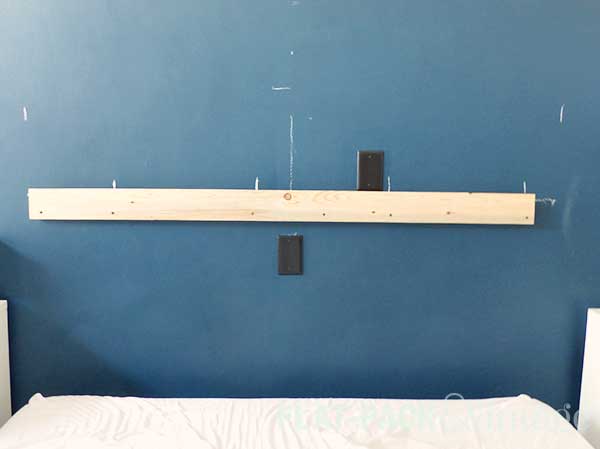
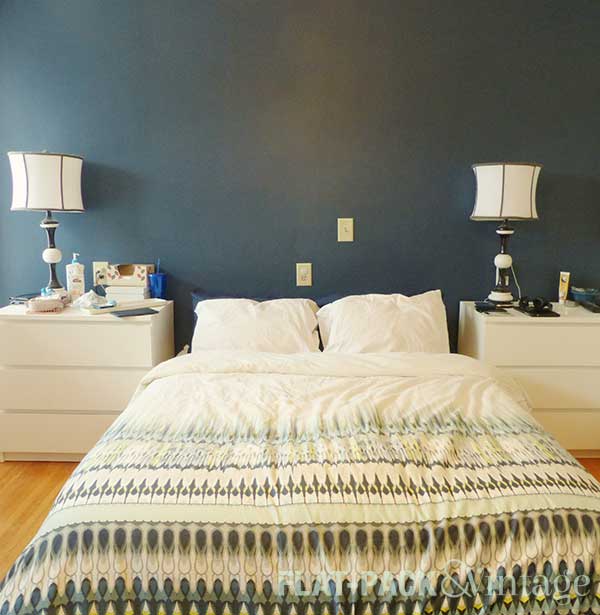
A little paint, some new furniture, and let’s see where we’re at today.

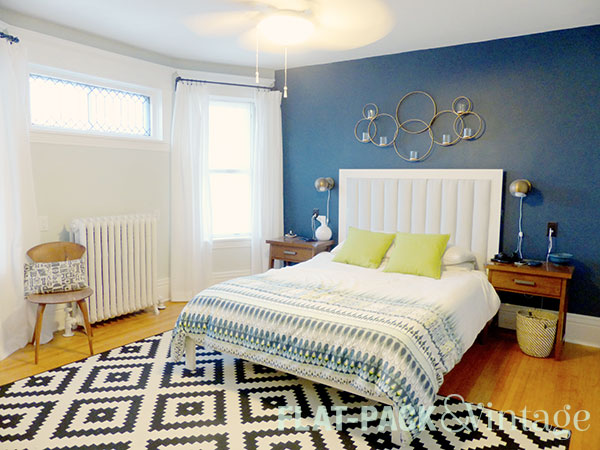
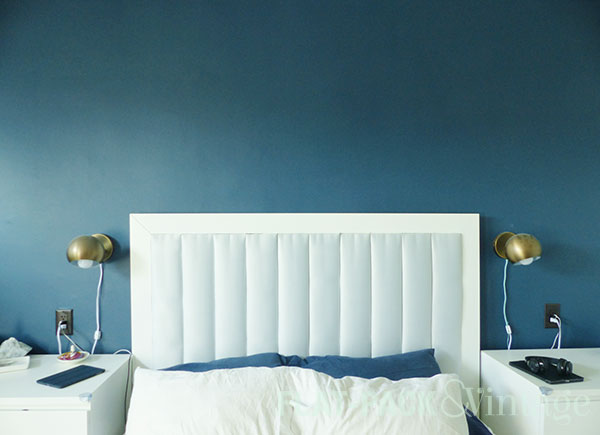
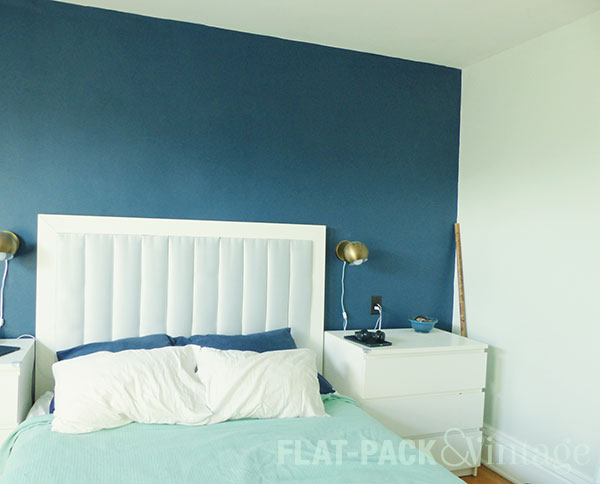
SO much better. It looks like adults actually live here now!

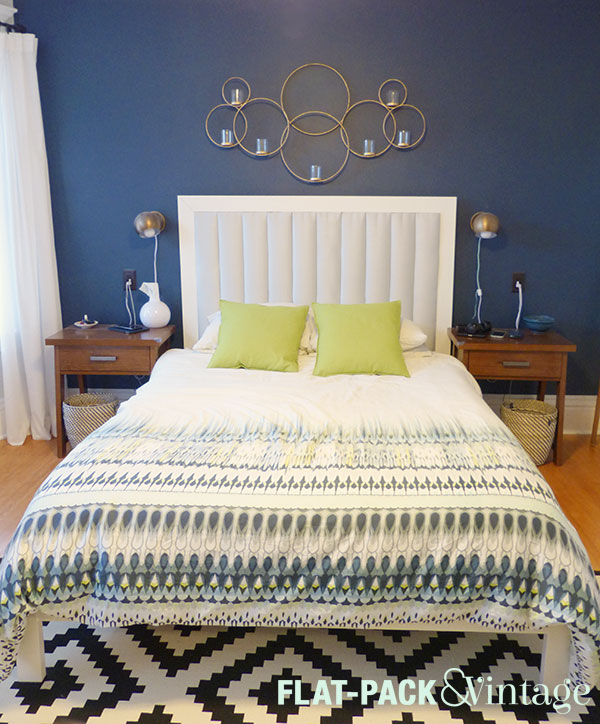
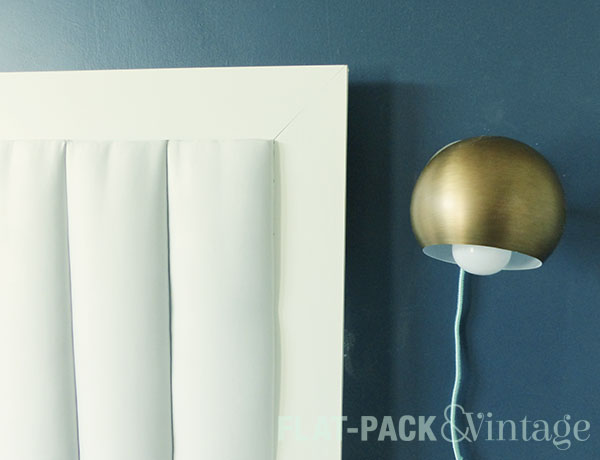
The headboard, nightstands, sconces, and rug are all at a much better scale.  The proper bed frame and drawers on the bedside tables add some much needed polish (it’s really nice to be able to stash things like deodorant, hairbrush, chapstick, etc out of view but still easily accessible). We also upgraded the outlets next to the bed to the fancy ones with the USB ports because we’re always charging phones and tablets on our nightstands.

I love the drama of the accent wall and it really helps highlight the bed (which is the pretty standard focal point in a bedroom). The pale green-blue-gray walls are wonderfully soothing.

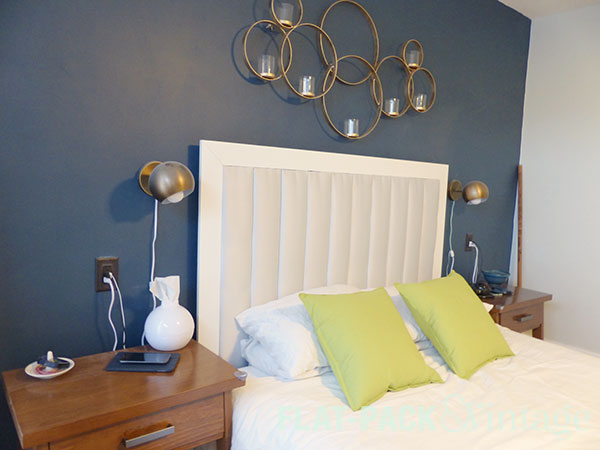
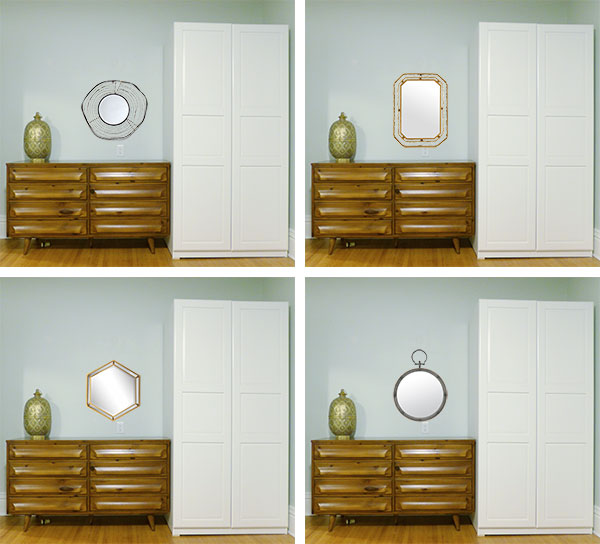
I found the candle holder at World Market and had a beast of time getting it into my tiny little car, but here it is! The circle pattern compliments the sconces and the round mirror on the opposite side the room, and the bronze really pops against the teal wall.

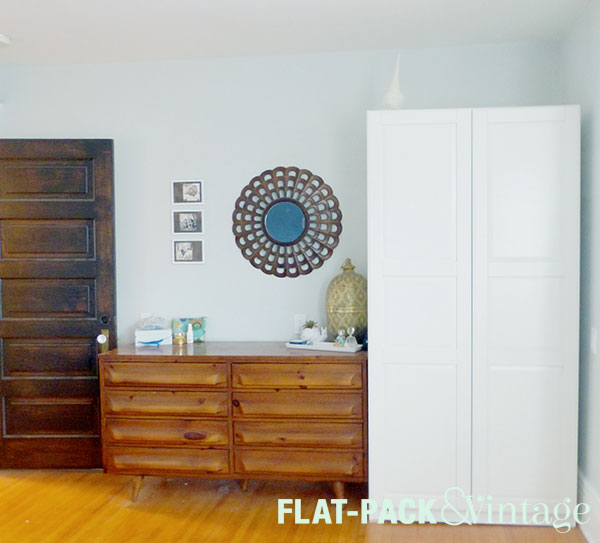
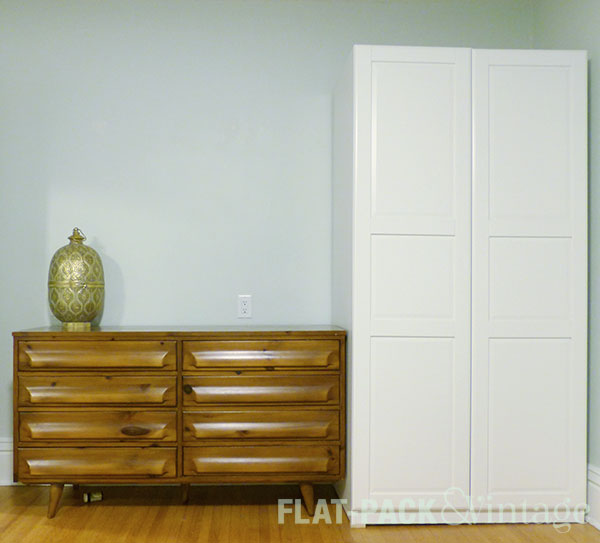
Especially when working with cool colors (blues, greens, purples) adding a touch of warmth really helps balance out the space. I scored an amazing vintage dresser and then found some side tables in a similar tone at Target.  The pops of natural wood add so much more than sticking with all white furniture like we had previously.

Added bonus: the mid-century dresser paired beautifully with my Cherner chair. I literally pulled it out of a dumpster years ago! It works well in the bedroom because it gives me a place to stash a robe or PJs, but it’s not big enough to let a giant pile of laundry accumulate.

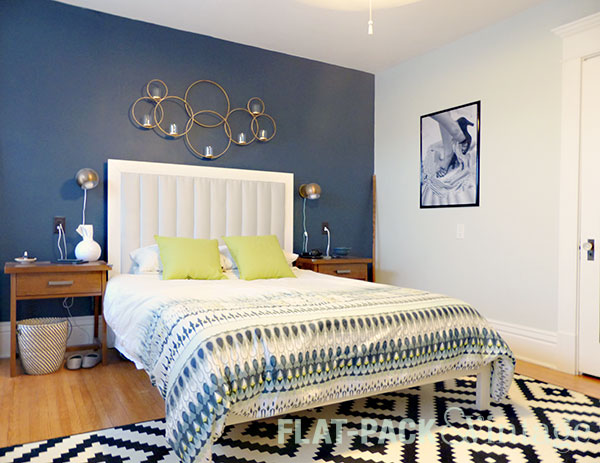
The rug seems a bit crazy, right? I absolutely love it though! A different color and pattern would have completely changed the entire feel of the room.  This one just seems to add a bit of playfulness and quirkiness that appeals to me.  Matt may try and argue that we’re fairly formal people, but I will always enjoy of pop of the unexpected.*

There are still some tweaks needed–the solid green pillows are a bit too intense and the print needs a new frame. I’m eyeing this print from Spoonflower for the pillows since the citron color pulls from the duvet and breaks up the mostly blue color scheme. My closet is also in need of a complete overhaul, but that will be a project for another time.

I am so glad we finally have a respectable bedroom! Especially since now that we’re done I can go back to working on the downstairs. Next up are going to be the living room and TV room. I’m looking forward to getting those done. I always have a little self-guilt whenever we have people over because half of our main entertaining space is decidedly meh which makes me look like a shitty designer…but you can’t do everything at once.


*I still can’t convince him to buy one of the reindeer heads from the vintage store down the street.  The fossilized rhino skull was also shot down, despite the fact that it could never be broken by cats or kids…some complaint about not paying $7k for a rock or something…


Then Suddenly We’re Breaking Into Our Own Garage

This past weekend we finally cleared all my refinishing projects out of the garage. The desk still needs a couple coats of poly, so it’s living on the front porch at the moment, but we’ve started getting snow so I want my covered parking back!

Monday was a bank holiday so I had the day off of work. I meant to do productive things like hemming curtains and putting the finishing touches on master bedroom.  Instead I couldn’t find a ruler, lost my hem gauge as soon as I set it down, then gave up and went to IKEA. Running errands, in and out, perfectly normal day, right?

Well then comes Tuesday. I leave for work around 6:30am so it’s still quite dark out. Off I go to the garage, enter the code in the keypad, and….nothing. It’s not even like the door is frozen shut–I can’t even hear it trying to open.

Shit.

After re-keying the code a dozen times, I finally give up and go in to wake up Matt for backup.

I convince him it’s not a power issue–the keypad still lights up when you press buttons, and Wesley’s room (on the same breaker) still has power. So he comes out and tries the code in the keypad a few more times.

No go.

Just for kicks, he goes back in and flips the breaker off and on again (hey, power cycling works for computers).

Nothing.

Around this point I ask if the keypad is hardwired (vs using a battery). Matt says it is, plus the buttons are lighting up so it’s clearly getting power from somewhere.

We are now officially out of ideas and I have to get to work. The only option that seems to be left to us is to break a window, climb in, and manually open the door from the inside.

Ah, but why doesn’t our garage have a human-sized door you may be asking.  Well, it does, but a couple years ago some jerkward broke into our garage, stole a broken snowblower, and seriously damaged the door so it’s been screw shut ever since. Quite honestly it was never high on our to-do list…until that morning.

Yeah…so it’s nearly 7am and we now have to break into our own garage and hope no one calls the police on us. Matt just repaired the glass in this window too.

Is Matt still in his pajamas? Yes he is.  Is he also the one who crawled through the window? Yes he was. It was all terribly heroic.*

Once he’s in the garage, I suggest that he tries the button on the wall first, instead of the manual release. Seems a little silly, but he tries the button and…the door opens.

WTF???

So the inside button works,  The remotes in our cars work. But the keypad doesn’t work.

Matt pokes around a little bit and then I hear it:

“Oh look, a battery!”

Yes, that’s right. The keypad I was told was hardwired, actually ran off a battery. A battery that was apparently providing just enough power to illuminate the keys, but not enough power to send the signal to open the door.

Now, in Matt’s defense, there were wires running along the wall near the keypad. It turns out these belonged to the sensors at the bottom of the door (the ones that exist so you don’t squash small children when you close your garage door). I also didn’t press the issue when I mentioned the idea of a battery and have learned a valuable lesson in standing my ground.

Thankfully we had a spare 9V battery so the keypad is now fully functioning. Replacing the side door on the garage has also gotten bumped to the top of our warm weather to-do list. We should be getting the floor of the garage re-poured this spring so we’re planning on waiting until after that to deal with the door, just in case it changes the sizing at all. In the meantime, we’ll make sure to always have an extra 9V battery on hand.


*He asked me to work in the word “heroic” somewhere. You’re welcome.

Let’s Style a Dresser

Ladies and gentlemen, we have a dresser!

My original plan was to take the two IKEA dressers we currently had on each side of the bed and move them between the wardrobe and the door. Unfortunately, the dressers were a few inches too big to fit there.

Whomp whomp. Time for plan B and it ended up being gorgeous.

I originally though plan B was going to involve more IKEA.  Not fancy, but affordable. I wasn’t ready to give in to more flat-pack just yet,* so I would periodically browse Craigslist and  Facebook Marketplace. One day I stumbled across this beauty.  It had been up for over a week so I figured it was long gone, but I messaged the seller anyway and it was still available. The seller was even willing to hold it for me until the weekend so I could recruit a friend with an SUV. I have never felt so damn lucky.

We used to have a full-length mirror on this wall which obviously wasn’t going to work with the dresser. No biggie, I could turn the mirror and hang in horizontally above the dresser.  Or at least I thought I could…only I failed to actually measure the mirror ahead of time. It was longer than the dresser so it would have stuck out past the end and that would have just looked awkward.

So now the mirror’s scrapped and I need something to fill the space above the dresser and I’m thinking….another mirror. Matt thinks I’m nuts, but bows to my superior design skills.**

Here’s where you guys come in.  I’ve got a handful of mirror options, but I think I’m too close to the project at the moment so I need to get some outside opinions.

Watcha think? I’m sticking with brass accents in this room because there is so much blue/teal/cool gray happening that it really needs a pop of warmth.  I’m also trying to find a mirror that’s roughly 24″x30″ because then I can mount it to a stud*** and it will still look well positioned. Next to the mirror I have plans for some jewelry storage so whichever mirror I choose won’t be lonely for long.

Now that we have a new dresser (and some new nightstands!) we just have to bring in artwork and accessories and we’ll be ready for the full room reveal in no time!  Woot woot!


*Remember Matt’s challenge?

**Or just doesn’t care enough to argue.  Same dif really.

***Mirrors = heavy, plaster walls = wussy.


DIY Channeled Headboard

Hey hey hey!  We have a new headboard! Did you think you had lost me to baby posts? Yeah… hopefully those will be slowing down and I’ll be focusing more on the house again. If you are interested in some down-to-earth baby talk, I finally did something with my Twitter account. Yup, I’m officially a Twit.

And our new sconces? How cute are they???

We seriously haven’t had a headboard since we moved into this house, so it’s been really nice to finally get this project out of the way. And yes, this was all custom-made and not terribly difficult. If you can use a miter saw and staple gun without losing a hand, this is for you!

I based this on the ah-maze-ing looking headboard from Fabric Paper Glue, but made a couple modifications to make it work better in our space.  Most notably:

  • I switched out the 1×8’s for 1×6’s (personal preference, plus 8-1×6’s + a 1×4 frame fit our bed frame perfectly)
  • I opted for it not to run all the way to the floor (our chunky baseboards would get in the way)
  • I chose to mount it on the wall using a cleat, which is a great way to hang big, heavy things.

Here’s what you need (measurements/amounts based on a Queen-sized bed)

Supplies

  • 5-1″x6″x8′ boards (they just need to be straight, they don’t need to be pretty)
  • 2-1″x4″x8′ boards (paintable/stainable quality)
  • 2-2″x6″x6′ boards
  • 1 or 2-1″x2″x6′ boards
  • 2-L-shaped metal plates
  • 10-straight metal plates
  • Batting (1-90″x108″ roll of “classic loft” gave me 3 layers/board)
  • Fabric (about 3yds)
  • Spray adhesive (optional)

Tools

  • Scissors
  • Miter saw
  • Table saw
  • Staple gun (+ 1/4″ staples)–an electric staple gun is totally worth it!

Because we didn’t take our headboard all the way to the floor, we measured from the top of our bed frame (without the mattress) to our desired height. We cut 8 1x6s to this measurement.

I used spray adhesive to adhere 2 layers of batting to each board. The adhesive will help prevent your base layers from shifting, but isn’t necessary. I rough-cut the batting first, then trimmed it to size after gluing it down.

Cut your third layer of batting a few inches longer on each side–you’ll need enough to wrap around the board and staple down.  Cut your fabric about the same size.

Lay your fabric on the ground right-side down. Layer your batting, and then your board (fabric side down).

Oh hey, look! I finally remembered to take some pictures! I blame mom-brain (it’s a convenient excuse for everything).

I also cut out the corners of the batting to de-bulk when I got to wrapping the ends.

Starting from the center, staple the batting and fabric to the back of the board.  You’ll want to pull the fabric snug, but not super-tight. Work your way around the board, alternating sides.

Once all your board are wrapped you’ll need to attach them all together.  Cut a 1×2 a few inches shorter than the entire width of the boards. Use a convenient stretch of baseboard to keep the top of your boards lined up evenly (because of our shoe molding, I put an extra board in front of our baseboards).  Recruit a helper to pull the boards tightly together as you screw the 1×2 into them. Depending on how you choose to mount the headboard, you may opt to do more rows of 1x2s, but we were attaching some additional boards.

After the panels were secured together, we measured, cut, and attached the frame. First I dry-fit everything to check that everything was cut right. Then I attached the corners together with L-shaped plates. The frame then slipped around the panels and got attached to each board with straight plates.

We added a 2×6 along the bottom to give us an area to screw our bed frame directly into the head board. Our bed was constantly inching forward on our hardwood floors so we wanted to put a stop to that. Only about half of the 2×6 overlaps the headboard, the remaining overhang fills the gap between our bed frame and the wall. If you have less-chunky baseboards, you may not not need a 2″ board here.  Just measure the gap between your bed frame and the wall when your frame is pushed up as close as it will go.

At this point, some of you may be wondering why one of the boards of the frame appears to be painted on the back side.  This is because my husband–the math major–forgot how angles work.

Matt: I probably shouldn’t have bothered getting the pre-primed boards.  I still had to prime one of them again anyway.

Me: Why?

Matt: Because after cutting the first the side piece you need to flip it over to cut the angle for the opposite side.

Me: Or you could just reverse the saw.

Matt: No no, because see, this side needs to be angled this way so to get the opposite angle on the other side you need to flip the board over and…. oh… well I feel stupid now.

The picture above also show the cleat on the back of the baseboard.  Cleats are a great way to mount heavy objects on a wall–the length helps distribute weight while allowing you to hit multiple studs. If you have a table saw, they’re also super easy to make.

We chose to mount half of the cleat on the back of the headboard first and then measure for the correct height for the corresponding wall

I don’t have a lot of specific guidance for lining up each half of the cleat other than measure.  Measure lots.  And make chalk mark for guides.  It probably easier if your headboard rests on the ground, but ours rests on the top of our bed frame (because we just like to be difficult here).

FYI: That’s not a phone resting on the cleat, it’s just one of the 50 million awkwardly placed outlets in the room.  Matt removed the outlets, capped the wires, and put a solid plate over the electrical boxes.

So to recap: The headboard is attached to both the wall and the bed frame. It’s secured to the wall with a French Cleat, and bolted to the frame using a spacer.

.

Awesome diagram, no? One of these days I’d like to install Windows XP on my old (Windows 7) laptop so I can install my copy of AutoCAD again…but that’s a lot of work. #lazygirl

So yay! We have a headboard! And new sconces! Our bedroom is actually starting to come together! I have one wall left to paint (that I won’t be able to fully finish until we take out the window AC unit). I have an area rug ready to go (I just don’t want to put it down until I’m done painting). The biggest element I’m missing at the moment is a pair of nightstands.  The dressers aren’t really working there, especially with a lower bed frame…but hey, we’re getting close to done!


Spring Dreaming

Spring may have sprung in a lot of places by now, but not in Minnesota.

This is the current state of our yard and no, this isn’t a belated April Fool’s joke.

I am so sick of winter right now. I want sunshine! I want warm weather! I want to actually be able to spend some time outside!

We’ve definitely made progress in our backyard, but it’s still pretty sad. I realize gardening takes time and we’ve had a lot of demo to do, but with the current weather I’m positively itching for an outdoor space I can enjoy.

We should be getting a proper patio poured this summer (hopefully before Wesley’s birthday?). We have an lovely little park just a couple blocks away so we don’t need a to try and cram in a eyesore swing set. My goal for the backyard is to make it geared towards adults, but still child-friendly. I also want something reasonably low-maintenance.

We do have some annoying limitations with our backyard:

  • Walkway right smack down a middle. Sure we could technically move it, or make it more organic-looking, but unfortunately a straight line is much easier to shovel, so I think it has to stay put.
  • Lots of shade. This is both a perk and a drawback. On one hand, the shady yard keeps our house cool and keeps makes the Minnesota summers a little more pleasant outside too (because despite current appearances, summers can get pretty boiling here).
  • I’m kind of an incompetent gardener so I need things are are hard to kill. I’ve already managed to kill off the Bishop’s Weed that came with some plants from our friends’ yard, and that’s supposed to be practically impossible. I’m thinking lots of rocks.

Here are some things I’ve been eyeing for a little inspiration:

Check out this amazing landscaping idea for a backyard or front yard
via Yard Surfer

I love the mix of planters and in-ground plants. I think it adds some lovely textures (and fills in some space with non-killable things).

via Bea Ray Gardens

This mix of two sitting areas is pretty cute.  I’m thinking of having a defined dining section and lounge/fire pit section.

Rock Gardens
via The Art in Life

The back corner by our lilac kills off e.v.e.r.y.t.h.i.n.g. My hostas are sad, my ferns are sad, my transplanted creeping charlie and bishop’s weed remain a few sad little strands… I’m thinking to compensate for the lack of lush plants with rocks and do an alpine-ish style garden over there.

via Tales From the Coop Keeper

I want to try and cover the back our our garage with a trellis and vines. I also think it would be cool to frame it out with a mini pergola like this.

There’s a lot of work to be done, and it’s definitely not all happening this year. It is fun to daydream about though!

Now, for all the green-thumbs out there: What are your favorite resources for gardening (especially for beginners)? Do you have any Minnesota-hardy (USDA Zone 4b), low-maintenance, shade-tolerant, plant suggestions?


The Difference a Wall Makes

We’ve officially started work on our bedroom makeover!* It’s slow goings, because baby, but I got one whole wall painted the other weekend!  Whoohoo! A wall!

The bedroom plan was to have a dramatic, dark accent wall behind the bed, so I decided to start there.

Gorgeous, no? The color is Benjamin Moore Gentleman’s Gray… although don’t be fooled by the name because it is decidedly greenish-blue.

I painted the baseboard along that wall at the same time (yup, white trim EVERYWHERE) so we could shove our bed back into place. I’ll probably be tackling one wall at a time so it will look pretty hodge-podgey for a while.  I’m also going to wait until spring to paint the radiator because I really want to be able to open windows for that!

I had hoped to make some more progress by now, but cold and flu season took a pretty nasty toll on me, so it’s been sitting like this for a few weeks. We do have a headboard up now too, so those pictures (and tutorial) will be coming soon!


*Although, is it really a makeover if it wasn’t really “made” in the first place?

And Then Our House Rebelled

Image via Giphy

Around 3:30am on Saturday our smoke detector decided to lose its shit.  It started beeping and loudly announcing “low battery!” Around 4am Matt decided to go an rip out the batteries.  That was when he discovered that the smoke detector in the hallway is hardwired. Yup,  our smoke alarm woke us up at 3:30am because the backup battery was bad.

Luckily we had extra batteries, so Matt grabbed a replacement…only to find that the previous battery was also rather corroded and the gunk left on the battery connectors was now impeding its ability to sense the new battery.

Now, I’m still in bed at this point so all I hear is Matt shuffling around the house like he’s playing some twisted game of Marco Polo with the smoke alarm. Then the alarm suddenly starts shrieking “Fire! Warning carbon monoxide! Fire! Warning carbon monoxide!” I start laughing like an idiot because now I’m convinced our smoke detector is just straight-up broken and of course that would happen at 4am.

Turns out Matt hit the test button to see if that would act like a reset and get the alarm to recognize the new battery. It didn’t work. Obviously.  So now it’s 4:10am and I start googling how to remove a corroded battery because it’s either that or flee to a hotel.

In case you’re wondering, vinegar will clean off battery corrosion. You should really use gloves/eye protection, and of course be very careful around the electrical workings of anything–especially when it’s still connected to power.

You’re welcome.

After Matt and I properly woke up for the day, we went on a walk to get breakfast since we’re having a January heat-wave at the moment.* When we got back, I went to haul in the baby gear and the baby, and Matt stayed out to salt the walkways. I left Wesley snoozing in his stroller next to the door while I dropped the diaper bag and pastries inside, then turned to go back out and grab the baby.

Only the backdoor wouldn’t open.

I checked the locks. It was unlocked. I fiddled with the locks (both the deadbolt and the simple lock for the latch we never use). Nothing. Was it stuck on something? Nope.

W.T.F.?

I finally went out the front door, walked around the back and tried to shove it open vs pull it open. No dice. So I tried and force it open with my shoulder TV cop style. Ouch. Finally I gave it a good swift kick (just to show it who’s boss), collected Wesley and schlepped around to the front door.

When Matt was done salting, he repeated everything I had just tried and nothing worked for him either.  It turns out that the bottom doorknob (which controls the latch) had inexplicably broken, so the knob could no longer retract the latch. This is a vital part of being able to open a door.

Step 1 was to run to the hardware store and buy a new latch set.  I also picked up a matching deadbolt because I really didn’t like the existing brass one we had so hey, excuse to update! We thought Step 2 would be as simple as taking off the door knob and wiggling the inner workings around. Nope. The inner workings were well and truly busted.

Matt went through our tool stash to try and find something he could shove between the frame and the door to push the latch back in,** but it still wouldn’t budge.  He asks me if I have any brilliant ideas, to which I reply “sure” and then immediately get to googling.***

It turns out this sort of thing is not unheard of and found a fairly lengthy thread in a DIY forum dedicated to it. Long story short, if your latch is properly busted (like in our case) there isn’t an easy fix. The general consensus is 1) don’t bother taking the door off the hinges because that often doesn’t help and 2) either bust out your hack saw or call a locksmith.

We chose the hacksaw option and it took Matt around an hour to cut through.

(We set the knob back in place to block some of the draft)

Thankfully installing our new latch and deadbolt was a piece of cake. Matt was very confused because I decided to try Kwikset Smartkey locks that let you re-key them yourself.  They were more expensive that the standard locks, but cheaper than bringing in a locksmith (and we really didn’t want 3 different keys for our house). They are SUPER simple to use to, so we were able to get our 2 back locks on the same key as our front lock in about a minute.

Once the weather legitimately warms up we’ll also paint the the rest of the door frame and repaint the door, since it looks a little sad at the moment.

Matt looked up the security of these locks and it sounds like they’re no better or worse than a lock that would require a professional to re-key. Plus, as one person put it: your house is only as secure as its weakest point and we all have windows.

So that was our Saturday.  We woke up to a demon smoke alarm and later I got locked inside the house. I have a feeling I’ve offended the DIY spirits in some way or else our house has spontaneously acquired a poltergeist. Maybe I should turn on our gas stove and shake some sage from our spice cabinet over it… If that doesn’t work, we are surrounded by churches so I could probably round up an old priest and a young priest.


*In Minnesota a winter heat-wave means anything over 30 degrees. Over the last 2 days I have seen 2 people outside in short sleeves, one guy in shorts, and several without jackets.

**During all of this we’re working from inside the house, so you have access to that tiny gap.  The outside of the door frame has trim pieces covering up this space.

***This is how I solve problems at work too. People think I’m smart, but really I just figure out good search terms.

A-Door-able

Sorry, couldn’t resist. Matt’s propensity for punning is apparently rubbing off on me.

One of the (many) random “features” of this house was the lack of a closet door in Wesley’s nursery. We originally put up a tension rod and curtain, but that just didn’t look terribly finished and we’ve been meaning to get a proper door up there for ages.

By some crazy stroke of luck, the door frame was actually a standard size.* By some other crazy stroke of luck, I was able to find a 5-panel door that was a reasonable match.  Not perfect, but for $50 it was pretty damn good! I’m pretty sure the only way I could have found a better match would have been to order a custom door which would have been super pricey. I’ve already mentioned that our house work is much more renovation than restoration, so the investment in a custom door just wouldn’t have been worth it in this case.

So door. $50. Good deal. Part of the reason it was so cheap is because we ordered a door slab vs a pre-hung door. The difference is just what it sounds like. A door slab is just a slab of wood–no hinges, no pre-drilled anything. A pre-hung door is both the door and door frame already connected by hinges. One of these is a little easier to deal with, but we didn’t choose that one.

Because we had an existing frame, we first needed to check the fit. The frame may have been a standard size, but unfortunately it wasn’t square.** In order to get the door to fit properly, we had to plane off a good chunk from every side. This would have been super easy, except for the way hollow-core doors are constructed.

Planing is meant to happen with the with the grain, but at the top and bottom of the door you hit the vertical supports of the frame, and it’s REALLY hard to go against the grain.  Matt ultimately took a hand saw to the edges–he figured out how much we needed to take off from the corner, sawed that off, and planed the rest down to that point.

After planing (lots and lots of planing), I took a palm sander to all the edges to smooth them out nicely. And yes, we were totally working on our upstairs landing since we had to keep checking the fit of the door and didn’t want to be constantly hauling it up and down the stairs.

To add the door knob, we bought a simple kit that came with a guide and hole saw bits for a drill. The guide clamps onto the door and then you just drill on through.  We managed to position our door knob right over one of the cross supports on the door so it was a little more difficult to drill through, but not a huge problem.


Mort likes to supervise things.

The hinges were a bit more problematic. The frame already had places for the hinges, and we even had some extra hinges that were original to the house… we just had to mount said hinges to the door itself. You can get hinge kits like the door knob kit, but they usually require a router, which we don’t have, so we decided to half-ass it. Typically you would route out only the exact size of the hinge, so you’d leave a little strip of wood along the edge.  Instead, Matt just planned out the entire depth of the frame to accommodate the depth of the hinge.*** It’s only noticeable from inside the closet though (and only if you know what to look for), so not a big deal.

Whoa! It’s a door! That opens and closes! Craziness!

Don’t mind the random futon.  We did some furniture shifting and need to figure out a permanent home for it.

My only real disappointment with this door is the knob. I assumed I’d be able to switch out the actual knob on a new latch set. Wrong. Current latch sets are designed to interlock and screw together in a way that makes switching out any one part of them impossible. House of Antique Hardware has vintage-looking knobs/latches designed to fit modern construction, but I can’t quite justify spending $140 on a closet door knob… although I am scoring an extra bonus this year at work…


* “Standard,” “square,” and “level,” are terms that don’t tend to exist when dealing with 100+ year old houses.

** See what I mean?

*** And only planed off a small amount of his thumbnail in the process.

2018 House Goals

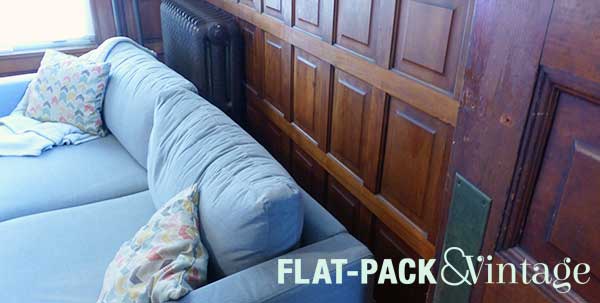
Did everyone have a good New Year’s Eve?  I fell asleep on the couch.  With guests hanging out in the same room.* I have no guilt though because Welsey went to sleep around9:30 so I expected him to wake up around 5:30/6, regardless of what time I ultimately went to bed.

I never bother making New Year’s Resolutions since it’s a rare person who can actually stay that focused.  Now, I am a rare person, but focus is not my strong suit. That being said, I thought I’d try and outline our house goals for the year.  These are all things we’re hoping to tackle in 2018, but if we don’t check them all off the list we won’t be beating ourselves up.

Contractor Work

  • Get a back patio poured/back walkway evened out
  • Unfuck the upstairs electrical**
  • Add gutters***

DIY & Design Work

  • Overhaul the butler pantry
  • Paint and decorate Master Bedroom
  • Re-organize the study to fit a guest bed
  • Make a dent on the landscaping
  • Childproof All The Things because this kid will be moving before we know it.
  • Paint and decorate the downstairs Micro Bath (if I’m feeling ambitious)

It sounds pretty doable to me, but we’ve never really worked with a kid underfoot before so we’ll see how it goes. We might not finish it all and we might switch gears somewhere along the way, but I really like starting out with some sense of a plan.

Anyone else making goals for the New Year?


*It’s some kind of miracle we had anyone show up.  It was negative-my-car-won’t-start degrees, people were sick, and Matt may have accidentally told someone to not bother coming. We had a good time though.

**This is most concise way to put it.  We need to get our upstairs hall light on a 3-way switch, get an open neutral outlet fixed, add an ceiling electrical box in the study, and get our upstairs wiring split up so it’s not all on 2 breakers.

***Yes, currently our house does not have gutters.  It’s not hugely problematic, so we’re just adding partial gutters to the couple problem areas.  We’ve currently already given our down payment to a gutter company but haven’t heard anything from them regarding a start date.  We knew there was a decent chance it wasn’t going to get done this fall, but we’re a little pissed about the lack of communication.

Sofa Table DIY

The room we use as our TV room is slightly awkward for furniture placement since it would have originally been used as the dining room. We happen to like it as the TV room since the built-in buffet acts as a killer bar and we really like the openness between this room and living room for entertaining purposes.

The layout in the TV room has the couch in front of the radiator, which means…

…the couch has a tendency to angle back  since there’s nothing to stop the other side from shifting.

Luckily, there was super easy fix. Full disclosure: As easy as it was, I totally half-assed this project.  I had no plan and had to redo it once. But it the end it all worked out. I also failed at taking progress shots since I was just trying to get this done in the evenings while Matt was on baby duty.

First I picked up a couple 1×10 pine boards, along with a couple 1×2’s. I cut the 1×10’s into 1 board the length of my finished table, and 2 boards the height of my finished table (if your goal is a really exact finished size, technically it’s the height minus 3/4″).

You could move on to construction at this point, but I wanted a little extra detail, so I cut the 1×2’s down to 4 pieces the height of the table, then glued and clamped them down onto edges of the table legs. (You can also glue, then cut everything down to size at the same time)

Once the legs were dry, I glued the tops of them onto the bottom of the table top, making sure to line up the edges as smoothly as possible.  After that dried, I reinforced the joint with a couple of small L brackets and assorted tiny screws we had left over from random projects.

The table was still a little wibbly-wobbly, so I cut down a scrap 2×2 with 45 degree angles at each end to use as a brace on each side. This also got simply wood-glued into place.

Once everything was nice and solid, the whole piece got a light sanding, a couple coats of stain (Minwax: dark walnut), and 2 coats of polyacrylic. I didn’t bother staining the inside faces of the table since it will be completely hidden behind the couch. #lazygirl

Et Voila! No more shifting couch + a great place to stash drinks and a basket of baby items since this couch is my go-to nursing spot (and a great spot to stash a cuppa).