Destroying Historical Fabric One Room at a Time

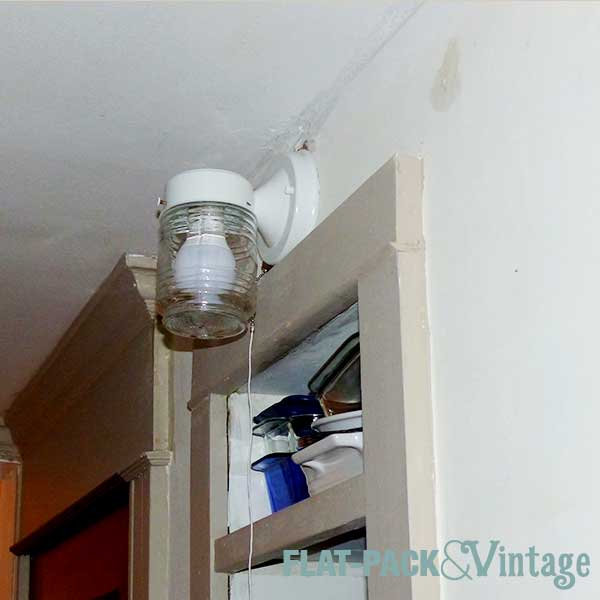
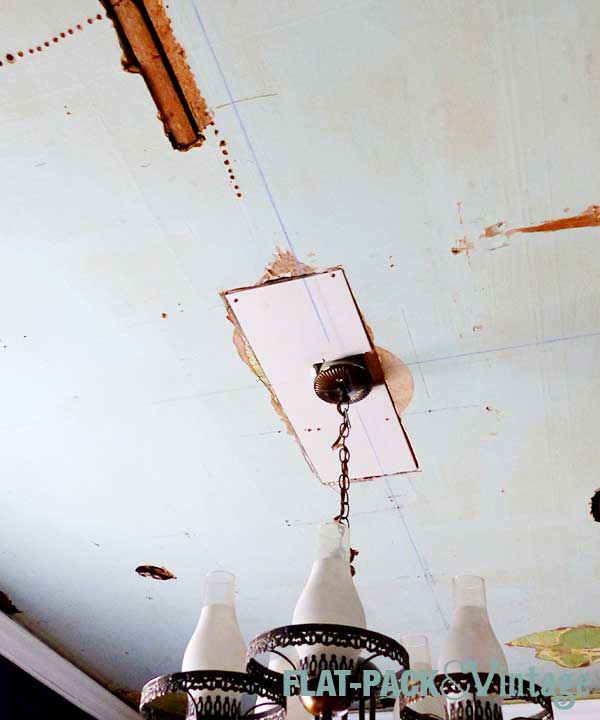
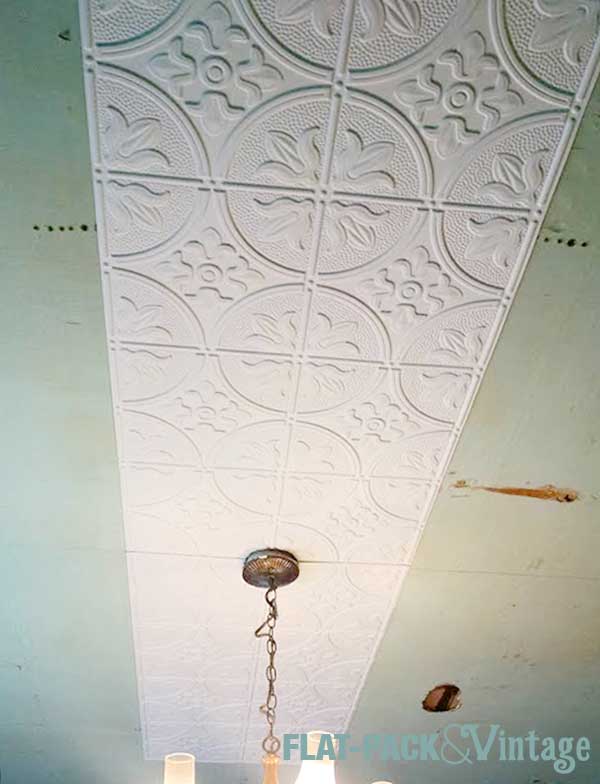
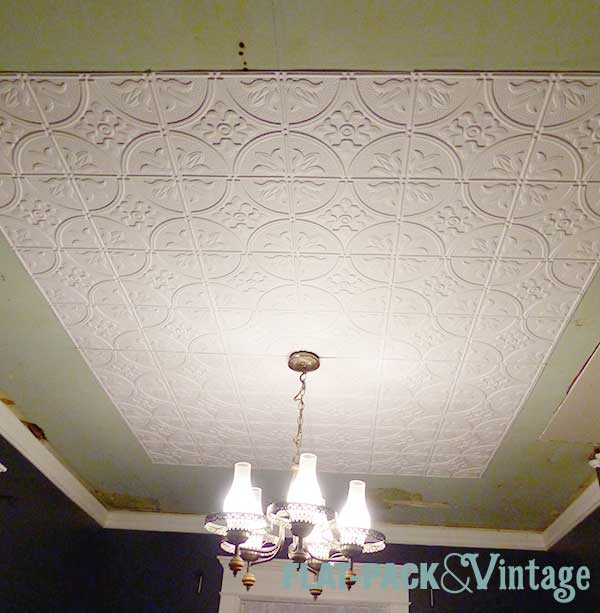
A while back Matt was reading an article on restoring old homes and it mentioned that you shouldn’t insulate because it would “destroy the historical fabric.”  It’s one of the reasons the Historical Preservation Society is often referred to as the Hysterical Preservation Society and has been a running joke with me and Matt ever sense.

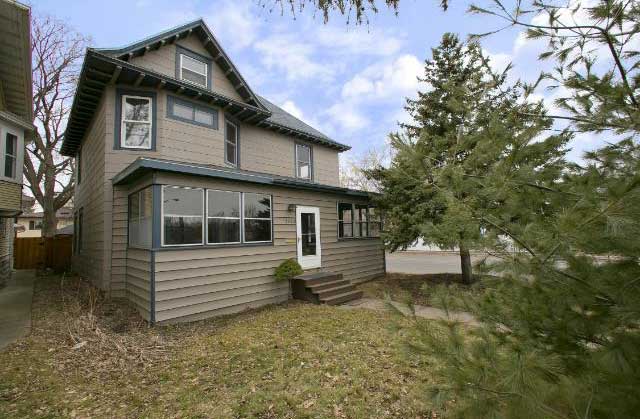
Don’t get me wrong, the HPS is important, and recognizing historically significant homes is important. Here’s the thing though, not every old home is historically significant.  Our house is an American Foursquare… sort of the cookie-cutter house the early 1900s.  Is it pretty awesome compared to more recent architectural styles?  Hells yes!  It this specific house historically significant? Our neighborhood is filled with the same style houses, are they all historically significant?  No and no.

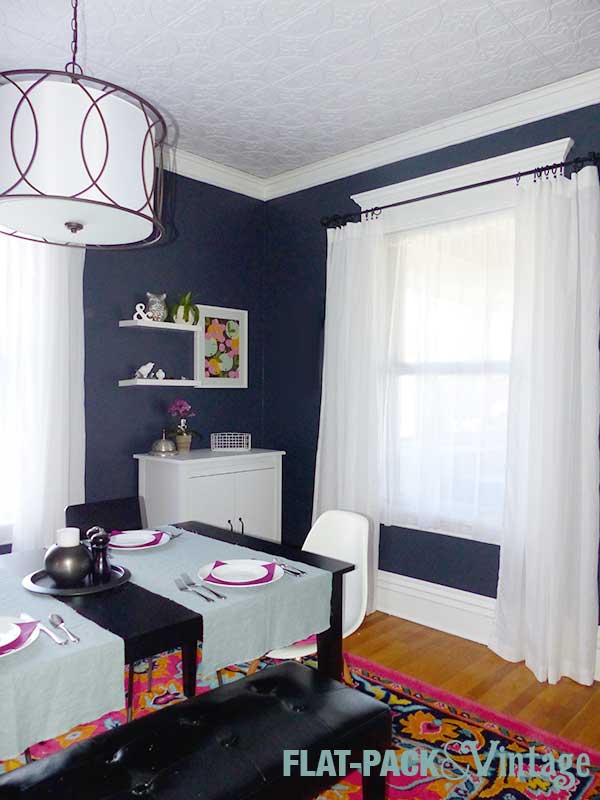
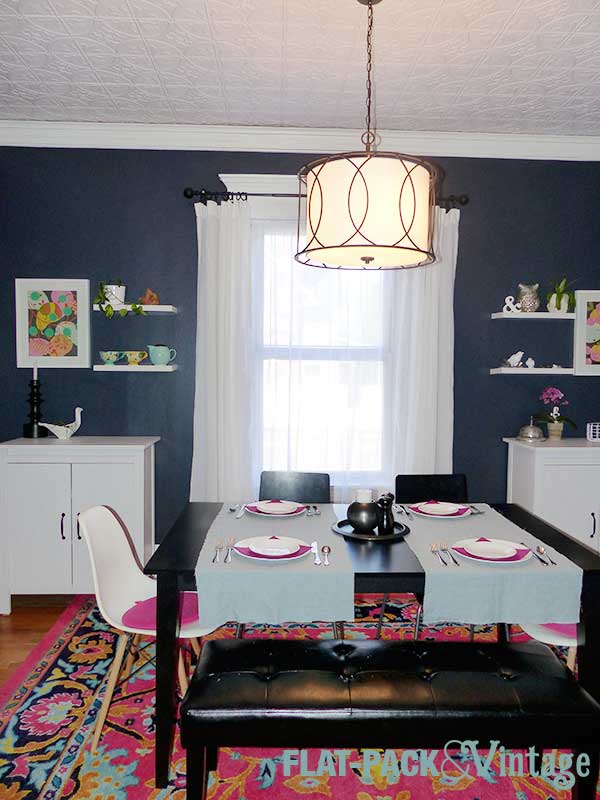
When I shared my dining room reveal on Apartment Therapy a while back, a handful of people decided to ream me out for painting the trim.  They claim I had “destroyed” the house and the final design was a “travesty” and merely “trendy” (*gasp*).  What do I have to say to that?  BAH!

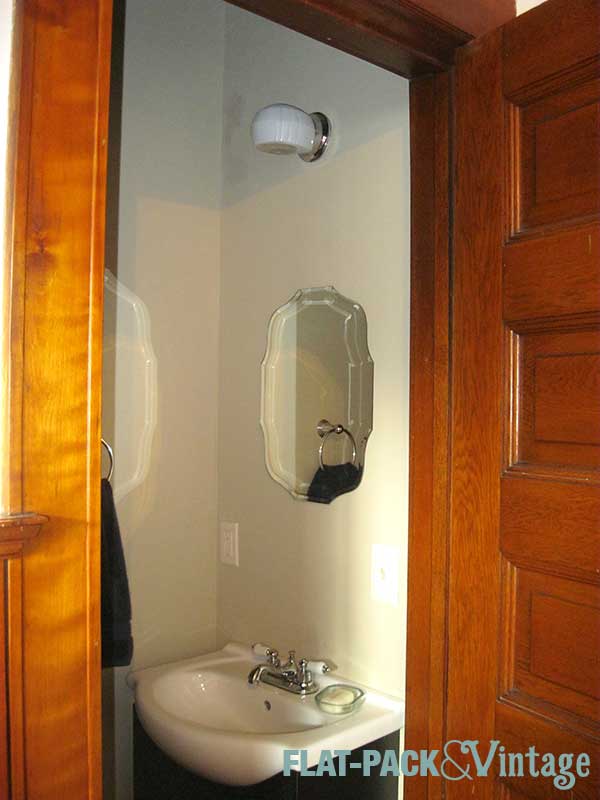
Your home is a reflection of YOU.  Unless you own a house that’s on the historical register you can do whatever you damn well please (and people often do*).  I have been trying to keep the bones of the house pretty traditional, but have some fun with the fixtures and furnishings which suits my more eclectic nature.  I also don’t feel like white trim is trendy and I’ve seen it in tons of similarly aged homes including million dollar properties and historically recognized homes (ok, only certain rooms in this one–but important, public rooms).  It also lets me brighten our home and cost-effectively replace damaged trim pieces.

Which is why we’re continuing to paint the trim.

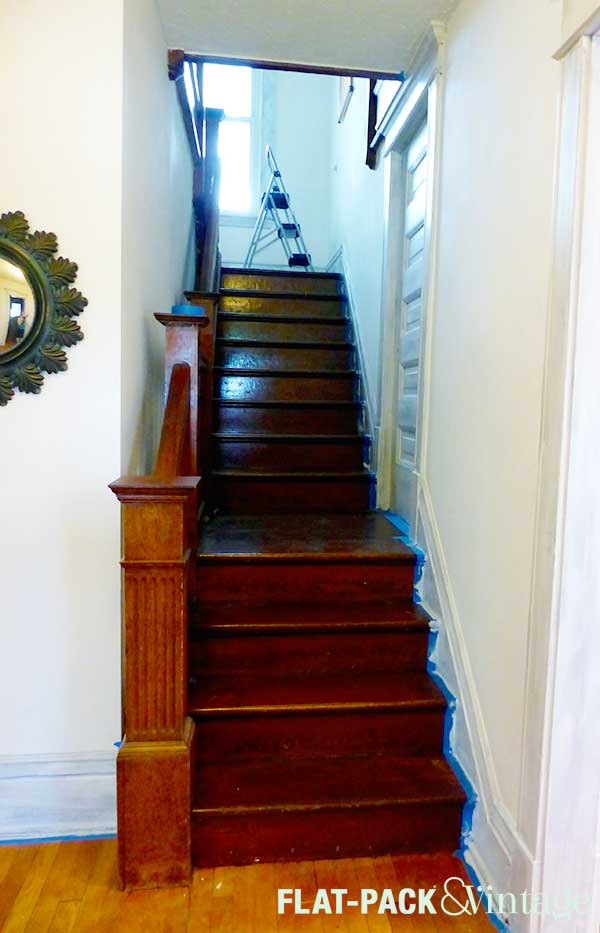
Yup.  The critics haven’t dissuaded me and we’re continuing the paint into our entry way/stairwell/hallway.

We also picked an awesome weekend to start painting.  Saturday was in the upper 90’s and Sunday was (only!) in the 80s. Keep in mind we do not have central air.  Yeah, it was boiling.

HallwayPrimed_1

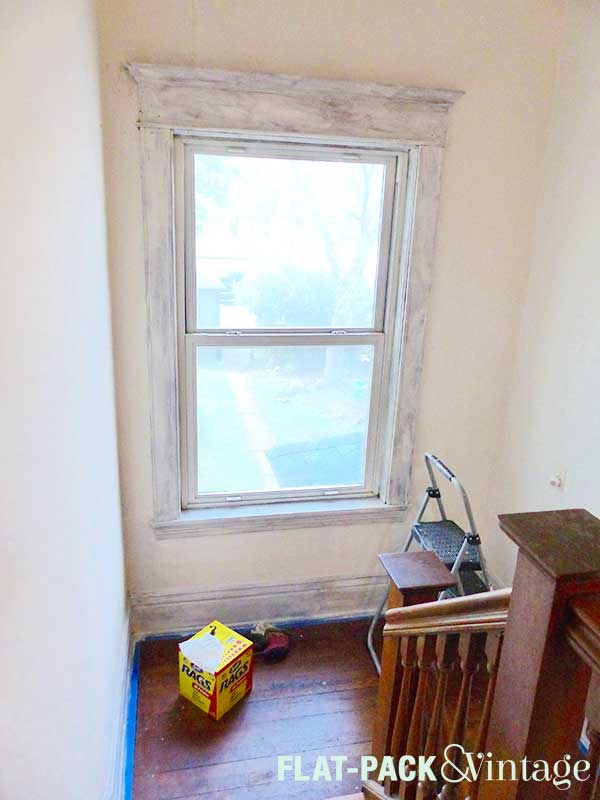
We got the first section primed on Saturday by working in the morning and then late at night when the temps were a little cooler.  We were still dripping buckets of sweat.  Lovely.

hallwayPrimed_2

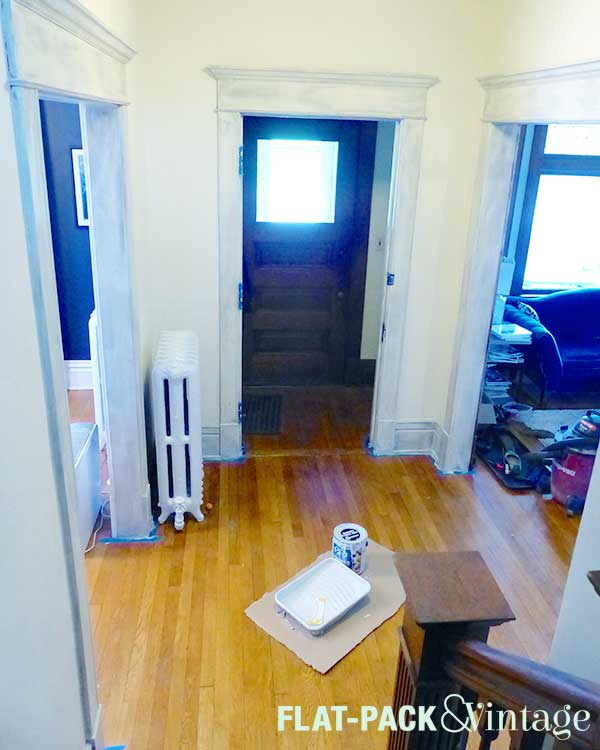
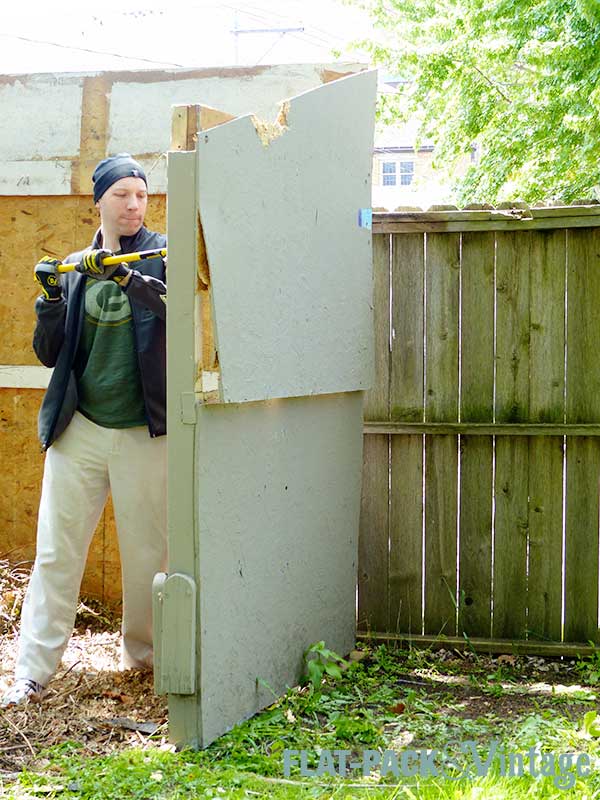
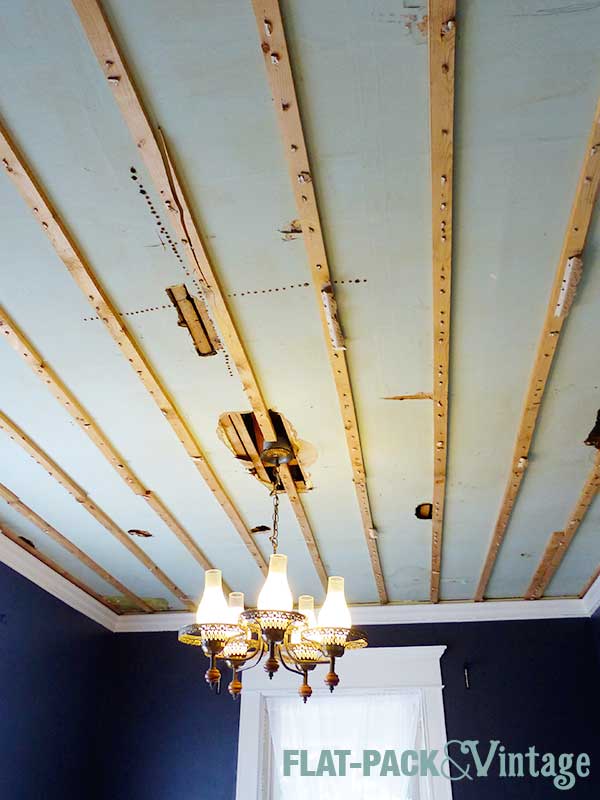
Notice our lack of a door?  It’s currently hanging out  (haha!) between our living room and TV room.  It’s not the locking door so I insisted we take it off so I could better paint the trim.  Matt rolled his eyes and said I was crazy, but humored me anyway because that’s what makes our marriage work.

hallwayPrimed_3

Big difference right?  This is just the primer, but it’s already made a huge difference on the stairs–that smaller landing was nearly invisible on the way down (leading to many missteps and trips), now you see the changes outlined against the white and it is SO much easier to see!

We continued to power through on Sunday so everything has its first coat of paint now too.  It’s been super cloudy and rainy all week so I don’t have any good pictures of that, but it won’t be impressive until the final coat of paint anyway.


* Sure people make crappy decisions all the time but the worse case scenario is that future homeowners will roll their eyes, mutter WTF? and change it all.  Big whoop. The less rehab inclined may just not buy the house in the first place, so it’s good to at least keep resale value in the back of your mind, just don’t let it paralyze your own dreams.

Save

Friday Favs: Happy-Hour All Weekend Long

Happy Memorial Day weekend!  While it’s really a time to honor our Nation’s deceased veterans, the focus tends to be a little more a little more on barbecues and booze (….and appliance sales…. go ‘merica*).    The good new is that with a long weekend you can do both!  Attend a Memorial service, spend some beautifying a loved one’s grave site…and celebrate with friends and family.

ff_happyHour_pin

And if you like your celebrations on the boozy side, here are some cocktail recipes for you to try out.

ff_happyHour_3
Rosemary Gin Sparkling Lemonade Via Creative Culinary

Matt and I are both mad for Gin + Tonics… although I’m a little more open to variation than he is.  Rosemary-gin-lemonade?  Sounds deliciously summery.


ff_happyHour_2
Fruit + Tonic Via A Beautiful Mess

If lemonade isn’t your jam, maybe try a different fruit with your g+t.  I think the blackberry sounds especially amazing!


ff_happyHour_5
Peach Sangria Via Tori Avey

Our go-to Sangria recipe is, oddly enough, more winter-friendly, using oranges, lemons, and limes.  Peaches just started appearing in stores here and I cannot wait to try this more seasonal recipe.


ff_happyHour_1
Classic Mojito Via Chef Savvy

Mojitos are one of my favorite summery drinks, and I just planted some mint this year (if you do grow your own mint make sure you keep it in a container otherwise it could take over).  You can also easily make mojitos by the pitcher.


ff_happyHour_4
Caipirinha Via All Recipes

Ever heard of a caipirinha?  Most people I know haven’t, but they’re all missing out.  It’s basically a Brazilian margarita–delicious, simple to make, and massively boozy (so be careful about how fast you go through them!)

Looking for more?  I’m a little biased towards gin and rum so if you’re looking for something else Total Wine’s website has a recipe index by type of liquor.

And of course, please be responsible people.


*I feel like there really needs to be a be a proper sarcasm tag in HTML…

Adventures in Gardening

As Matt worked on the shed, I worked on digging up the stones on half of our patio.  I like the stones, but the patio as-is just isn’t working so I’m going to reporpose the stones for paths and edging elsewhere.

garden_2

I’m currently about 1/3 of the way through the patio.  Looks gorgeous, huh?  We’ve got a fine crop of weeds this year. (you can also see my make-shift herb/veggie garden in the pots–tomato, basil, and mint.  It will be a good summer for caprese and mojitos…. if I can keep basil alive more than a week…)

garden_1

This isn’t going to be the final layout (there will be a fair amount of tetris-ing, I’m sure) but I wanted to get an idea of how many of the stones I would need before I start digging them into place.  I’m also planning on having some sort of ground-cover between the stones so those un-mowable patches of weeds won’t be staying.

I also have a PSA for newbie-gardeners:  know thy evil plants.

I grabbed a pretty innocuous looking weed to rip it up and immediately knew something was amiss by the stabbing pain.  Ok thorns, no biggie, right? WRONG!  The stabbing/burning continued after I let go.  Ohshit.  I ran my hand under cold water and washed it with soap to try and wash away whatever toxin was causing the burning, but no luck. I even tried hot water which is a treatment for marine stingers… doesn’t work with mid-western flora apparently. On a whim I googled “Stinging nettles” and sure enough, it looked exactly like what I had grabbed bare-handed.  Joy.  The next morning–12 hours later–my hand was still burning.  I tried hydro-cortisone and antihistamines but it still didn’t really start to subside until around 18 hours later.  For the next couple of days it still felt like I had a mostly-healed burn on my palm.

garden_3

It doesn’t look all that terrifying does it?  The barbs on the stems really just look like fuzz… until you grab them.  I was feeling kind of like a dumbass for not knowing what stinging nettles look like (#citygirl) but apparently none of my co-workers did either.  One found out about them the same way I did, but another just knew she had these killer plants in her yard (seriously, one just brushed against her arm once and started the whole burning awfulness).  My sister suggested this link for weed identification… but she also suggested having Matt do all the weed pulling and I kind of like that idea.

It doesn’t help matters that we have another plant that looks pretty similar to the nettles.

plant_id_4

This one?  Not a nettle.  The leaves are still jagged, but a little broader and they get bluebell-like flowers on them later in the summer.  Anyone know what they really are?  The leaves seem to wrong for bluebells…


plant_id_1

Fuzzy stem, still not a nettle.  These guys get brown-eyed susan like flowers on them, but they’re way taller (about 4+ feet at their peak) and spindly-er than the brown-eyed susans I’m used to.


plant_id_3

These guys just flowered.  The flowers are more purple than they look here and I think they’re adorable… I just have no clue what they are.


plant_id_2

And my final mystery plant… I don’t remember these flowering last summer (but we didn’t move in until July).  It’s currently about 2 feet tall and too well-placed for me to just write off as a weed.

For those of you playing along at home, any ideas on my mystery plants?  The first 2 have just about taken over our back yard so they clearly spread like mad.

Demo Day on the Shed

Goodbye sad little shed, we will not miss you. Especially since you were a beast to take down.

shedDemo_1

It may not have looked like much, but this thing was surprisingly solid.  We started by detaching it from our fence so that wouldn’t get pulled down with it.  Then Matt went it and unscrewed everything he could and then took a crowbar to the roof.

shedDemo2


shedDemo_4

An hour later he had the roof off, but it was ungodly heavy.

shedDemo_6

“Real men work in khakis.” –Matt  Also, this was just 2 weekends ago and we really did need jackets.  Yay for early May in Minnesota.  At least it wasn’t snowing….

Before we could do anything else we stripped off all the shingles–they weighed a ton!  Then we were able to wrestle the roof away from where it fell so Matt could work on breaking it down into manageable chunks.

shedDemo_7

shedDemo_8

After lunch we tackled the walls.  Some of the plywood panels pried off relatively easier than others….

shedDemo_9

shedDemo_10

After about 3 hours of work the whole thing was down.  The shed was really assembled in the most mind-boggling way–nails, screws, bolts, staples… they used every kind of fastener known to man.  Plus, every one of the 4×4’s supporting the corners was made up of multiple pieces sistered together.  3 were 2 separate pieces, and one was made up of 3 different pieces cobbled together.

shedDemo_13

WTF?

It still doesn’t look like much, but I think it looks better.  It’s one of the sunnier parts of our backyard so may be a possible spot for our future vegetable garden.

shedDemo_12

A Series of Small Projects

Some of these were more recent than other, but none really deserved their own post.  Every house has it’s small projects that make a difference though.

Pantry Light

Our butler pantry had a pretty hideous light fixture–really just a basic socket and pull chain (like you’d find in an unfinished basement) with an ugly little clip-on shade.  So sad.  The problem here though was that we were super limited in our choices.  There was no switch so we had to have a pull chain, and the trim around the weird built-in shells left us only about 6″ of space to work with.

pantryLight1

We ended up finding a super-cheap Jelly Jar light at Menards along with a pull-chain kit.  For about $10 total we figured it would be worth a try even if we royally effed it up.


pantryLight2

Still not amazing, but probably the best we can do with the limitations unless we haul in an electrician (which, honestly, I really would like to do).

The hardest part of converting a standard light to a pull-chain is drilling the hole for the pull-chain mechanism itself to go through.  I would suggest trying to make a pilot hole of sorts by pounding a nail through the area first, then you can probably drill through.  Matt tried using our Dremel and admitted it was not one of the smartest things he has ever done.

Micro-bath Mini Makeover

Our half-bath wasn’t in awful shape, but it still needed a little lovin’.  I don’t have a proper before picture, so here we’ve already swapped out the existing faucet for this adorable ceramic-handled one switched out the mirror for something with a little more style.

microBath1

We also replaced yet another sad little light fixture.


microBath2

I’m actually still on the hunt for a better fixture here, but at $25 I don’t feel too bad about swapping this one out again down the line.  The micro-bath is going to get a more significant makeover in the near-ish future so I’ll probably be deciding on a more permanent replacement then.

Front  Railing

Our house is in desperate need of some curb appeal, no question there, but a lot of that will be slowly worked in over the years.  A more pressing matter however, is that our front steps lacked a railing.  This can be a sore spot for insurance companies, but it was also a practical issue for us. Our parents are getting older, winters are icey, and I have a nasty habit of random injuries* so having a railing on our front steps seemed like a really good idea.

outside

We picked up a fairly inexpensive railing at Menards since we’re planning on completely replacing the front steps in the next couple years.  It took a few hours to align and assemble and then another day to paint (Rustoleum Hammered Old Bronze).  It actually looks better than I expected!

railing1

Please ignore our ghetto drainage solution–we get huge amounts of water pooling there when it rains and until recently it’s been too cold to start properly  re-grading that area.

Outlets

We’ve been steadily switching out all the switches and outlets in the house for the “decorator” style ones.  We needed to switch out all the beige for white anyway (at least by my personal definition of “need”) so I opted for the fancy ones.  Regardless of which style you go with though, replacing grody old switches/outlets can really make a big difference.


*Spraining your foot when you live on the 3rd floor with no elevator is not pleasant.

Save

Save

Save

Dining Room Sources

Wheeee the Dining Room is done!!!!  Thanks to everyone for their wonderful comments!  It gives me lots of warm fuzzies.

Now that I showed off the pretty, here’s the down-low on everything we used and a rough budget.

DR_after2

Paint

Walls: Behr Poppy Seed (eggshell) $30

Trim: Benjamin Moore Simply White (Advance, satin) Existing

Trim

1×6 Select Pine (8ft) $10 x6

Shoe Molding (8ft) $3 x6

Base Cap (8ft) $8 x6

Chair Rail (8ft) $13.50 x6

Cove Molding (8ft) $7 x6

DR_after5

Furniture

Table: Overstock.com Existing

Bench: Pier 1 Mason Bench Existing

Eames Chairs: Amazon Existing

Buffets: IKEA BRUSALI $79 x2

Accents

Ceiling Tiles: Amazon $284

Rug: Rugs USA $200*

Light: Amazon $120

Floating Shelves:  Home Depot $13 x4

Curtains: IKEA VIVAN Existing

DR_after6

Artwork

Fruit/Foliage Prints: IKEA $10

Weird Fruit: Ursula Vernon Existing

Queen Victoria: Gift

(white) Frames: IKEA RIBBA $10 x2

Total: $1,095…

…plus assorted miscellaneous things like stain and hardware and things that we didn’t fully track (like small accessories, if you’re wondering where we got something, just ask).  In realty it’s the final damage was probably closer to $1200, which I think is pretty damn good considering we replaced all the baseboards and ceiling, and also got a giant rug.


*Pssst you can also find it at Overstock and Wayfair… I just found the best deal through Rugs USA

Friday Favs: IKEA Hacks

One of my favorite things about living in St Paul is that we’re about 20 minutes away from IKEA.  The good news for anyone who doesn’t live close to an IKEA is that they’ve started offering a lot more of their furniture for purchase online.

FF_Ikea

IKEA has some great basic pieces, but sometimes they need a little extra oomf so your house doesn’t end up looking like an IKEA catalog.


FF_IKEA_7
Via Young House Love

Young House Love turned an Expedit (now Kallax) into a stylish changing station for their baby, but this same look would make a great credenza or TV stand too.


FF_IKEA_6
Via In My Own Style

Card Catalog style drawers + secretary desk?  I can hardly think of a better upgrade for a TARVA dresser.


FF_IKEA_5
Via House of Hawkes

If paint is more your skill level it can still make a huge difference and transform a simple shelf into something a little more glam.  A VITTSJO unit was used here, but you could also ramp up a $15 HYLLIS too!


FF_IKEA_4
Via Cleverly Simple

The RAST dresser is one of the most hacked IKEA pieces I’ve seen (I’ve hacked it myself too!).  I love how it’s been turned into a fabulous little nightstand here.


FF_IKEA_3
Via Money Saving Sisters

Another simple paint upgrade, this time with a SNILLE chair.


FF_IKEA_2
Via The Makerista

I think these built in BILLY bookcases are one of the most divine things ever!  And the addition of a  library ladder?  To DIE for!


FF_IKEA_1
Via Oliver & Rust

Need some extra storage for the kitchen?  This island looks fancy, but is really a pretty simple hack, needing just some paint and a new top.  This one used a BEKVAM kitchen cart, but if you want a little extra storage you could use a FORHOJA too.


Save

Dining Room: Faux Tin Install

We have a ceiling!!!! I have been positively pumped for this moment ever since I decided to add faux tin panels to our dining room ceiling!

Why faux tin?  Tin ceilings are fairly period-appropriate for the house but legit tin is super pricey and would need to be nailed up.  Plus, the fake stuff is super easy to cut and manipulate–scissors and glue is all you need.  I also wanted the ceiling to remain white, like someone had painted the tin (which is totally even a thing) and that seemed like a waste of good tin. If you’re feeling super hard core though, check your local salvage places for tin panels. If you’re local, The Mall of St Paul on has some and I would assume Architectural Antiques in Northeast Minneapolis has some too (I got distracted by doorknobs last time I was there…. omg that place is pure heaven).

If you’re going to jazz up a ceiling with faux tin, here’s what you need.

  • Tiles in your pattern of choice (there are loads of options!)
  • Locktite Power Grab (you need an adhesive that holds instantly because gravity)*
  • Caulk gun
  • Scissors and utility knife
  • Chalk line
  • Measuring tape
  • Straight edge
  • Another person

Yup, that’s about it.

We had ordered 160sqft of tile and had 150sqft of ceiling, so we didn’t have a ton of wiggle-room in how the pattern fell.  Thankfully the electrical box for the ceiling light was already nearly perfectly centered.

Then we chalk-lined the center lines on the ceiling….and then adjusted them ever-so-slightly to make sure the pattern was centered on the light.

DR_tin_ceiling_1

We followed the directions that came with the tiles and ran a bead of adhesive around the perimeter, and then in 3 cross-shaped sections in the middle. (White-on-white isn’t so visible in photos, so I traced the glue lines in blue)

DR_tin_ceiling_2

We started in the center, cutting out a semi-circle out of 2 panels to sandwich around the light fixture.  Ideally you should cut the power and take out the fixture,  but we’ll be replacing this one soon, we just don’t have the new one yet.  #poorplanning

If you’re working with 2×4′ panels it’s really a two person job.  Because the panels are very thin, they’re also very bendy so having an extra set of hands to both support the other end and help line up that end is incredibly useful.

Depending on the shape of your room and the placement of any fixtures, you could start in a corner.  I just wanted to get our ceiling fixture centered on the pattern.  You may want to sketch up a quick layout too so you can figure out where the panels will fall.  Because our room was a simple shape and our light fixture was nearly perfectly centered, I was able to just visualize the layout and go.

DR_tin_ceiling_3

From there we added all the panels that wouldn’t need to be trimmed down.  Because the panels are designed to interlock, as long as you get the first one well-placed, the rest should follow suit.

DR_tin_ceiling_4

And then filled everything else in.


(sorry for the ucky pictures… we were working on this mainly after work so natural light wasn’t on our side)

These panels are super easy to cut–scissors will work just fine.  If you’re not putting up crown molding (although I would suggest it) you may want to use a utility knife and straight-edge for your cuts.   It did take us several nights of work to get them all up, mainly because the caulk gun started to give me blisters, so we’d max out at around 5 panels per night.

We saved the panel that would go over the radiator pipes for (second to) last because we figured it would be really annoying to get the cutouts just right.  We cut out one of the squares from the pattern so we had a big gap around the pipes.  Then I tested the cuts on some poster board and used that as a template.  Using some of our scrap pieces, I used a straight edge to cut out a single square (I cut just to the outside of the pattern sections that overlap so it would fit into place) and traced my template onto there.  Now it was much easier to manipulate a single square around the pipes.  We wedged it into place and pulled down the edges to add the adhesive (it would have gotten everywhere if we had put the adhesive on first).  Sorry I don’t have more pictures of this… I got sucked into the process and neglected my camera.

DR_tin_ceiling_5

Because the previous tiles were stapled onto 1×2’s we were left with a small gap between the crown molding and the ceiling.  No bueno.

DR_tin_ceiling_6

We could have just moved the existing crown up, but I decided to add on to what was already there.  I found some approximately 1.5″ cove molding at Menards (I can’t find it on their site, otherwise I would link) which was exactly what I was looking for!  Now the crown molding sort of curves into the ceiling.

DR_tin_ceiling_7

Crown molding is an absolute beast to put up by the way.  It’s an exercise in geometry and I’m pretty sure luck plays into it as well.  Uneven, not square walls make it especially beastly.  Basically I’m saying I’m not even remotely qualified to give you a tutorial on installing crown molding because we’re not even entirely sure how we managed it at this point.  There are tons of tutorials out there on youtube though.  Good luck.

And now we have an actually nice looking ceiling!  Pretty amazing right?  I think it’s amazing a least, so please just humor me here….

DR_tin_ceiling_8

The electrical box for the light sticks out a little bit because of the drop in the previous ceiling, but we should be able to find either a canopy or medallion that will hide that.  Our new light fixture has been ordered and is on its way so the end of this makeover is in sight!


*You’ll need LOTS.  I originally picked up 3 tubes, then went back for another 12… we ended up using 11 total for our 150sqft ceiling


Friday Favs: Paper Flowers

I have a weakness for paper flowers.  They’re beautiful in their own way without looking just like a fake flower.  With Easter right around the corner they seemed like a good Friday inspiration.  If you’ve got some time on Saturday you could even whip some up for centerpieces or get crafty with your kiddos.


FF_Flowers_5
Via Project Nursery

Tissue paper dahlias are probably the most basic option, but they look pretty spectacular as a backdrop.


FF_Flowers_1
Via Design*Sponge

Daffodils are possibly the quintessential spring flower, but these you could keep year round.


FF_Flowers_2
Via Smile Mercantile

Go big or go home right? If you have an over-sized floor vase this would be the perfect spring addition.


FF_Flowers_3
Via DRI

The instructions are in Spanish, but the pictures are pretty easy to follow to make fun watercolor mums.


FF_Flowers_4
Via Martha Stewart Weddings

Mmm… Magnolias!  They’re one of my favs, but we’re nowhere near their natural range.  These might be my own weekend craft.


FF_Flowers_6
Via Oh Happy Day

This flower garland doesn’t have to accessorize a giant egg (although it is pretty cute).  You could also use it a runner for a centerpiece at Easter dinner (or your next springy brunch!).

Dining Room Day 41-48: Ceiling Demo

Our dining room ceiling was pretty sad when we moved in: fugly acoustical tiles and unfortunate saggy bits.  Something needed to be done.

DR_Ceiling_2

I pretty much assumed that there was some reason that there were acoustical tiles there instead of plaster, so I wasn’t terribly hopeful for the condition of the ceiling underneath.  I figured the safest course of action would be to plan on covering the ceiling.  Added bonus, a faux tin ceiling would be a pretty snazzy, and fairly period-accurate detail for the house and it would bump up the formality of our dining room a bit.

After doing some research and crowd-sourcing ideas from Facebook,  I decided on this pattern:

DR_ceiling_tile

It was one of the more affordable options (yay!) and after looking at a few companies who still used the same patterns they did back when they made actual tin ceilings, this one popped up a lot.  You can find it in several different scales, but I opted for the 2-by-4 so each square on the panel would be roughly 1sqft.  This was the same size as the existing titles so I already had a good reference for how it would look.

Immediately after moving into the house we had several things tested for asbestos, including the ceiling tiles.  I knew we were planning on ripping them out and I wanted to be sure it was going to be safe to DIY.  Thankfully the test results came back negative so we were good to go!

My back has been killing me for the past couple weeks so Matt removed the ceiling while I curled up with a heating pad and researched massage therapists.  And yup, it was more-or-less what I expected to find underneath (except there was modern wiring!!!!)

DR_Ceiling_1

We originally thought we were going to keep the 1x2s so we wouldn’t have to mess with the height of the crown molding.  This did mean we had to pull out all the staples, which Matt did over the course of a couple evenings.

Then the tiles arrived and we re-assessed matters.  After going back and forth a bit we decided that prying out the boards and semi-patching the holes would make putting up the tiles way easier in the long run…. so Matt went to work prying off the 1×2’s.  It probably wouldn’t have been so bad except a former owner of this house was clearly a strong believer in overkill so a number of nails holding up the boards were HUGE.

DR_Ceiling_4

Matt pulled out most of the boards without incident, but there were two runs that were clearly put up before the crown molding was so there wasn’t enough space to pry the nails entirely out.  We tried a metal hand saw, but it while it might have worked on a sheet of aluminum, it wasn’t going to get through a chunky steel nail.  So we went shopping.

There are some good options out there, like reciprocating saws and the Dremel Multi Max, but we didn’t want to spend a lot.  We eventually settled on a pair of 14″ bolt cutters which were just small enough to fit in the little gap we made after prying the boards as far away from the ceiling as we could.

DR_Ceiling_6

After prying off all the boards, we had to deal with the two biggest holes (we decided the smaller ones shouldn’t be a serious issue).  Matt removed some extra plaster to make the holes squarer and then we cut and screwed up 3/8″ drywall.  We didn’t bother taping and mudding because it’s not going to be visible, we just needed a solid surface to glue the tiles too.

DR_Ceiling_7

As with any project, prep-work is half (or possibly even three quarters) of the battle, but all the extra work should make the tile install go much smoother.